I was standing in line at the post office, clutching a package of vintage Halloween cookie cutters I’d found online, when the woman behind me—a tiny, silver-haired lady named Ethel—started talking about cookies. I wasn’t expecting baking advice from a stranger in line at the post office, but there I was, listening to her describe exactly how to make the darkest, most velvety crinkle cookies she’d ever baked. She called them her “Black Velvets,” and she made them every year for her grandson, who loved all things spooky. I had my package of cookie cutters, sure, but what I really walked away with was a scribbled recipe on the back of a deposit slip. Honestly, I almost lost it twice before I got home. But that first batch? Let me tell you, they were everything. They’re not just cookies—they’re a little bit of Halloween magic, baked into something you can hold in your hand. And I’ve been making them every October since.
Why You’ll Love This Recipe
These Cozy Black Velvet Halloween Crinkle Cookies aren’t just another cookie recipe. They’re the kind of cookie that makes you feel like you’re wrapped in a warm blanket on a crisp autumn night. I’ve tested this recipe more times than I can count, and I can tell you—it works every single time. Here’s why you’re going to fall head over heels for them:
- Quick & Easy: From start to finish, you’re looking at about 30 minutes of active time. Perfect for a last-minute Halloween party or a cozy night in.
- Simple Ingredients: No weird, hard-to-find stuff. You probably have most of these in your pantry right now.
- Perfect for Halloween: The deep black color and snowy powdered sugar coating make them the spookiest (and cutest) treat on the dessert table.
- Crowd-Pleaser: I’ve brought these to potlucks and watch parties, and they disappear faster than a ghost in the night. Kids and adults go nuts for them.
- Unbelievably Delicious: The texture is this perfect balance—crispy on the outside, but so soft and fudgy on the inside. It’s comfort food at its finest.
What makes these different from every other black cookie out there? It’s the velvet factor. We’re using a special combination of cocoa powder and a tiny bit of vinegar (trust me on this) to create that ultra-tender, almost cake-like crumb. It’s not just a colored cookie—it’s a cookie with soul. And honestly, it’s the kind of treat that makes you close your eyes after the first bite. It’s Halloween, but make it cozy.
What Ingredients You Will Need
This recipe uses simple, everyday ingredients to create something truly magical. No fancy trips to a specialty store—just good, honest baking staples that come together to make the perfect cozy Halloween cookie.
- All-purpose flour, 2 cups (250g) – The base of our cookie. I use Gold Medal, but any standard brand works great.
- Unsweetened cocoa powder, ½ cup (50g) – This gives the cookies their deep chocolate flavor. I recommend Hershey’s Special Dark for an even richer taste, but regular is fine.
- Granulated sugar, 1 cup (200g) – For sweetness and that perfect crinkly top.
- Vegetable oil, ½ cup (120ml) – This keeps the cookies incredibly moist. Canola or sunflower oil works too.
- Large eggs, 2, room temperature – They help bind everything together. Make sure they’re not cold straight from the fridge.
- Vanilla extract, 2 teaspoons – Pure vanilla is best, but imitation works in a pinch.
- White vinegar, 1 teaspoon – This is the secret ingredient! It reacts with the cocoa to create that velvety texture. Don’t skip it—you won’t taste it, I promise.
- Black gel food coloring, 1 to 2 tablespoons – This is what gives them that dramatic Halloween look. I use AmeriColor Super Black for the best results. Liquid food coloring won’t work as well, so stick with gel.
- Powdered sugar, ½ cup (60g), for rolling – This creates the iconic crinkled, snowy top.
- Salt, ½ teaspoon – Balances the sweetness and enhances the chocolate flavor.
- Baking powder, 1 teaspoon – Helps the cookies puff up slightly in the oven.
Ingredient Tips & Substitutions: If you want a gluten-free version, swap the all-purpose flour for a 1:1 gluten-free baking blend. For a dairy-free option, this recipe is already dairy-free since we use oil instead of butter! Just double-check your cocoa powder and food coloring to make sure they’re dairy-free too. And if you’re out of vinegar, you can use lemon juice—it does the same thing.
Equipment Needed
You don’t need a professional bakery setup to make these cookies. Here’s what you’ll need to get started:
- Large mixing bowl – Any bowl will do, but a glass or stainless steel one is best.
- Whisk – For mixing the dry ingredients together.
- Electric hand mixer or stand mixer – You can mix by hand, but a mixer makes it much easier to get that smooth, glossy dough.
- Rubber spatula – For scraping down the sides of the bowl.
- Baking sheets – Two standard half-sheet pans work perfectly.
- Parchment paper or silicone baking mats – Non-stick is key here. I’ve had cookies stick to bare pans, and it’s a mess.
- Small bowl – For the powdered sugar.
- Cookie scoop or tablespoon – For uniform cookies. I use a #40 scoop (about 1.5 tablespoons).
- Cooling rack – Letting them cool properly gives them that perfect texture.
If you don’t have a cookie scoop, just use two spoons—one to scoop and one to scrape. And parchment paper is your best friend here; it makes cleanup so much easier. I learned that the hard way after scrubbing a burned-on cookie pan for twenty minutes!
Preparation Method
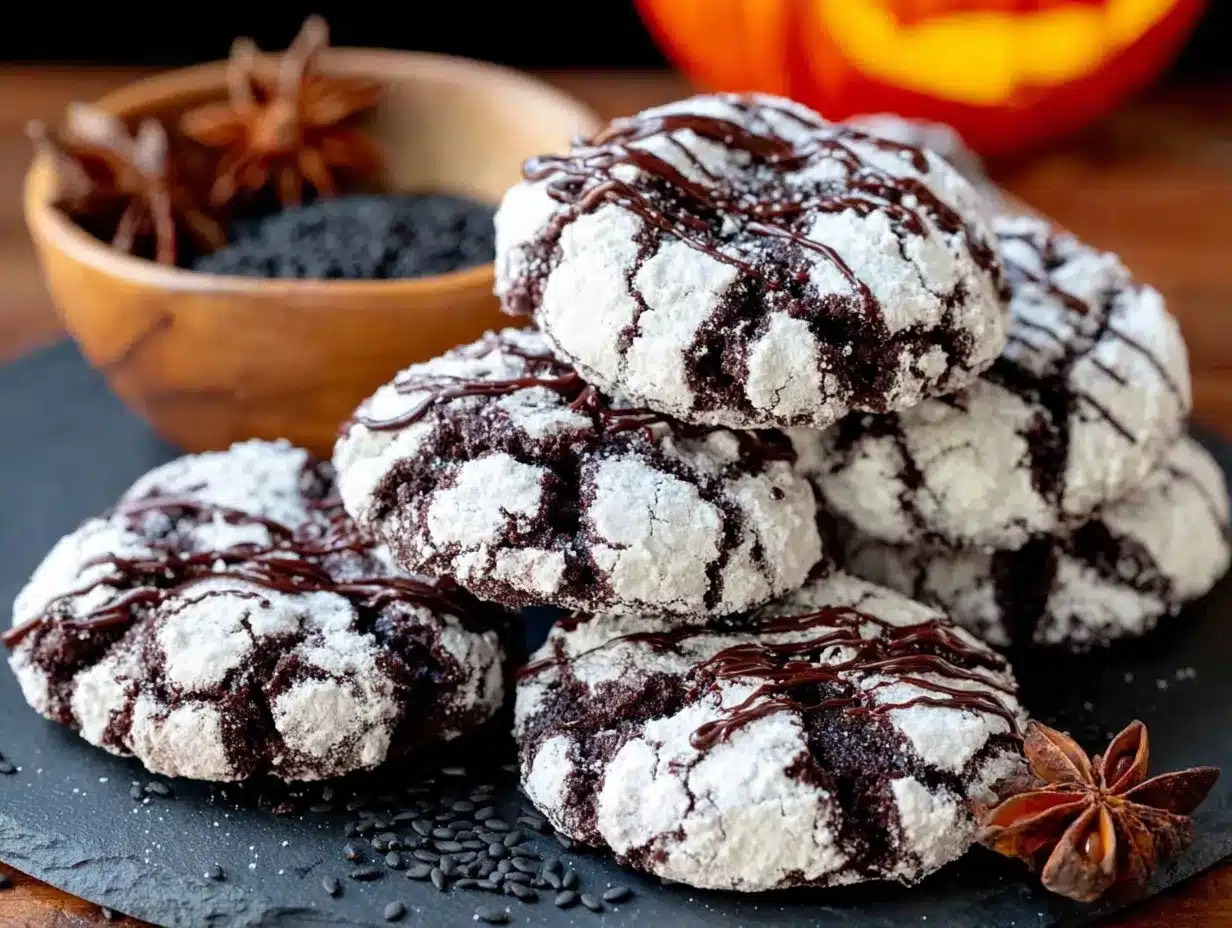
Ready to make some magic? Follow these steps carefully, and you’ll have a batch of the most beautiful, delicious Halloween cookies you’ve ever made.
- Preheat your oven to 350°F (175°C). Line two baking sheets with parchment paper or silicone mats. This ensures the cookies won’t stick and makes cleanup a breeze.
- Mix the dry ingredients. In a medium bowl, whisk together the flour, cocoa powder, baking powder, and salt. Set this aside for now.
- Combine the wet ingredients. In a large mixing bowl, beat the granulated sugar and vegetable oil together until well combined. It should look like a thick, grainy paste. Add the eggs one at a time, beating well after each addition. Then mix in the vanilla extract and white vinegar.
- Add the food coloring. This is the fun part. Add 1 tablespoon of black gel food coloring to the wet mixture and beat until the color is fully incorporated. The dough should be a deep, dark gray. If it’s not black enough, add another tablespoon and mix again. Don’t be shy—you want them to be as dark as a Halloween night sky. The dough will darken slightly as it bakes.
- Combine wet and dry. Gradually add the dry ingredients to the wet mixture, mixing on low speed until just combined. Be careful not to overmix—stop as soon as you don’t see any more flour streaks. The dough will be soft and slightly sticky, which is exactly what you want.
- Chill the dough (optional but recommended). For the best crinkly texture, cover the bowl and refrigerate the dough for 30 minutes. This makes it easier to handle and helps the cookies spread less. If you’re in a hurry, you can skip this step, but the cookies will be a bit flatter.
- Shape the cookies. Place the powdered sugar in a small bowl. Using a cookie scoop or tablespoon, scoop out about 1.5 tablespoons of dough. Roll it into a ball with your hands (the dough will be a bit sticky, so lightly oil your hands if needed). Drop the dough ball into the powdered sugar and roll it around until it’s completely coated. Place the coated dough balls on the prepared baking sheets, spacing them about 2 inches apart.
- Bake. Bake for 10 to 12 minutes. The cookies should look puffed and cracked on top, but still soft in the center. Don’t overbake—they will continue to set as they cool. The edges should be set, but the centers will look slightly underdone. That’s the secret to a fudgy cookie.
- Cool. Let the cookies cool on the baking sheet for 5 minutes. This is crucial—they’re very delicate when they come out of the oven. After 5 minutes, transfer them to a wire rack to cool completely. The crinkles will become more pronounced as they cool.
Pro Tip: If your cookies aren’t spreading enough, gently press down on the tops with the back of a spoon right when they come out of the oven. This helps create those beautiful cracks. I forgot to do this once, and my cookies looked like little black hockey pucks—still delicious, but not as pretty!
Cooking Tips & Techniques
After making these cookies more times than I can count (and ruining a few batches along the way), here are my best tips for perfect results every time.
- Don’t skip the vinegar. I know it sounds weird, but the vinegar reacts with the cocoa powder to create a tender, velvety crumb. Without it, the cookies are a bit tough. I learned this the hard way when I ran out of vinegar and thought, “Eh, it can’t matter that much.” It does. It really does.
- Use gel food coloring, not liquid. Liquid food coloring will make the dough too wet and throw off the consistency. Gel coloring is concentrated, so you get a deep black color without adding extra liquid. A little goes a long way.
- Chill the dough for easier handling. If you skip the chilling step, the dough will be very sticky and harder to roll into balls. A 30-minute chill in the fridge makes it much more manageable. Plus, it helps the cookies keep their shape better in the oven.
- Coat generously in powdered sugar. Don’t be shy with the powdered sugar. Roll the dough balls until they’re completely covered. The sugar creates that iconic crinkled look as the cookies spread and crack in the oven. If you skimp, you’ll just get a few faint cracks.
- Watch the oven time closely. These cookies go from perfectly soft to overbaked in about 60 seconds. I set a timer for 10 minutes and check them. The tops should be cracked and the edges set, but the centers will still look a little soft. They’ll firm up as they cool.
- Bake one sheet at a time. If you bake two sheets at once, the heat distribution gets uneven, and your cookies might not bake evenly. I know it takes longer, but it’s worth it for consistent results.
Variations & Adaptations
One of the best things about this recipe is how easy it is to make it your own. Here are some of my favorite variations I’ve tried over the years.
- Spooky Orange Creamsicle Twist: Add 1 teaspoon of orange zest to the wet ingredients. The citrus flavor pairs beautifully with the dark chocolate, and it gives the cookies a subtle Halloween orange vibe. I made these for a fall festival, and they were gone in minutes.
- Gluten-Free Version: Substitute the all-purpose flour with a 1:1 gluten-free baking blend (I like Bob’s Red Mill). The texture will be slightly more delicate, but they’re still delicious. Just be extra gentle when handling the dough.
- Vegan Adaptation: Replace the eggs with two flax eggs (2 tablespoons ground flaxseed mixed with 6 tablespoons water, let sit for 5 minutes). Use a vegan-friendly powdered sugar. The cookies will be a bit less fudgy, but they still have that great crinkly top.
- Peppermint Bark Version: After the cookies have cooled, drizzle them with melted white chocolate and sprinkle with crushed candy canes. It’s a Christmas-meets-Halloween mashup that’s surprisingly amazing. I made these for a “Halloween in July” party, and everyone asked for the recipe.
- Spiced Velvet Cookies: Add ½ teaspoon of cinnamon and ¼ teaspoon of cayenne pepper to the dry ingredients. The heat from the cayenne sneaks up on you, and the cinnamon adds a cozy warmth that’s perfect for a chilly autumn evening.
Serving & Storage Suggestions
These cookies are best served slightly warm, when the centers are still soft and gooey. I love to serve them with a tall glass of cold milk or a warm mug of spiced apple cider. For a more decadent treat, sandwich two cookies with a scoop of vanilla ice cream for the ultimate Halloween ice cream sandwich.
For a Halloween party, arrange them on a platter with some candy corn and mini pumpkins for a festive display. They look stunning against a dark tablecloth or a wooden cutting board.
Storage: Store the cookies in an airtight container at room temperature for up to 5 days. Place a piece of bread in the container to keep them extra soft—the cookies will absorb the moisture from the bread. Just replace the bread every couple of days.
Freezing: These cookies freeze beautifully. You can freeze the baked cookies in a freezer-safe bag for up to 3 months. Thaw at room temperature for about 30 minutes before serving. You can also freeze the unbaked dough balls (before rolling in powdered sugar). Just roll them into balls, place them on a baking sheet, and freeze until solid. Then transfer to a freezer bag. When you’re ready to bake, roll the frozen dough balls in powdered sugar and bake for an extra 2 to 3 minutes.
The flavors actually get better after a day or two—the cookies become even more fudgy and the chocolate flavor deepens. So don’t be afraid to make them a day ahead!
Nutritional Information & Benefits
Let’s be real—these are a treat, not a health food. But here’s the estimated nutritional info per cookie (based on 24 cookies):
| Nutrient | Amount per Cookie |
|---|---|
| Calories | 145 |
| Total Fat | 7g |
| Saturated Fat | 1g |
| Carbohydrates | 20g |
| Sugar | 14g |
| Protein | 2g |
| Sodium | 55mg |
Health Benefits of Key Ingredients: Cocoa powder is rich in antioxidants called flavonoids, which can help reduce inflammation and support heart health. The vegetable oil provides healthy unsaturated fats. And hey, a little indulgence is good for the soul—especially on a cozy Halloween night.
Dietary Considerations: This recipe is naturally dairy-free and nut-free. For gluten-free or vegan options, see the variations above. The main allergens are eggs and wheat (gluten).
Conclusion
These Cozy Black Velvet Halloween Crinkle Cookies are more than just a recipe—they’re a little tradition in the making. They’re the cookie you bake on a chilly October evening, the one you share with friends at a costume party, the one that makes your kitchen smell like chocolate and magic. I love how simple they are to make, yet how impressive they look when they come out of the oven, all cracked and snowy and perfect.
Don’t be afraid to make them your own—add some orange zest, throw in some cinnamon, or just enjoy them exactly as they are. The beauty of baking is that you can always tweak things to suit your taste. And honestly, that’s what makes this recipe so special. It’s forgiving, it’s delicious, and it’s guaranteed to put a smile on your face.
I’d love to hear how yours turn out! Leave a comment below and let me know if you tried any fun variations. Share a photo of your cookies on Pinterest and tag me—I can’t wait to see your spooky creations. Happy Halloween, and happy baking!
Frequently Asked Questions
Can I use regular food coloring instead of gel?
I really don’t recommend it. Liquid food coloring will add too much extra liquid to the dough, making it too sticky and affecting the texture. Gel food coloring is concentrated, so you get a deep black color without changing the consistency of the dough. It’s worth picking up a bottle—it lasts forever!
Why didn’t my cookies crack?
There are a few reasons this can happen. First, make sure you’re coating the dough balls generously in powdered sugar—if there’s not enough sugar, the cracks won’t form. Second, the dough might be too warm. Chilling it for 30 minutes helps the cookies spread and crack properly. Finally, check your oven temperature—if it’s too low, the cookies will spread too slowly and won’t crack.
Can I make these cookies ahead of time?
Absolutely! You can make the dough up to 3 days in advance and keep it in the fridge. Just let it sit at room temperature for about 10 minutes before shaping and baking. Or you can freeze the baked cookies for up to 3 months. They actually taste even better the next day—the flavors meld together beautifully.
How do I get my cookies to be perfectly round?
The trick is to roll the dough balls as smooth and round as possible before coating them in powdered sugar. If the balls are lumpy, the cookies will be lumpy too. I use a cookie scoop to get uniform portions, then roll each one between my palms until it’s perfectly smooth. A little practice goes a long way!
Can I add chocolate chips or other mix-ins?
Sure! White chocolate chips look amazing against the black cookie dough—very spooky! Just fold in about ½ cup of chips after mixing the dough. You can also try adding chopped nuts, toffee bits, or even a pinch of espresso powder to deepen the chocolate flavor. Just be careful not to overmix the dough when adding extras.
Pin This Recipe!
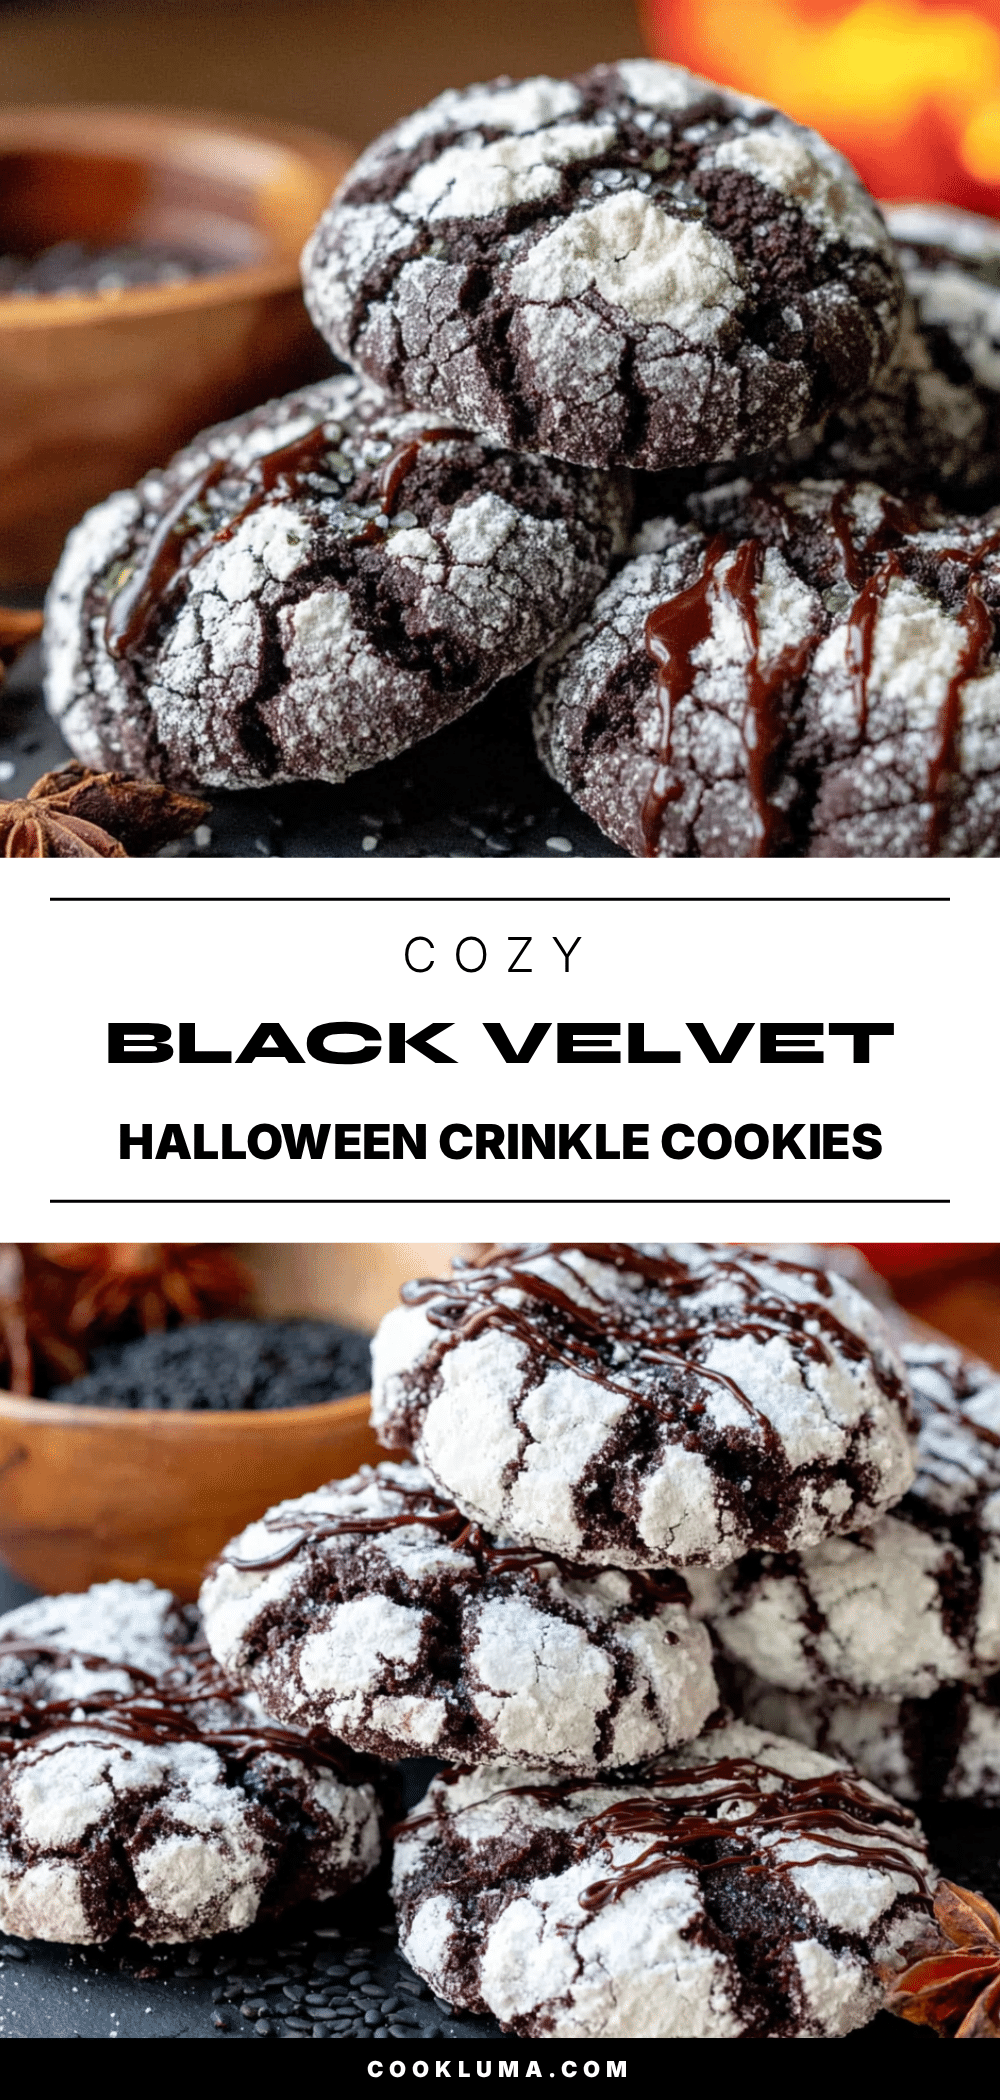
Cozy Black Velvet Halloween Crinkle Cookies
These Cozy Black Velvet Halloween Crinkle Cookies are the perfect spooky treat—deep black, velvety soft, and coated in snowy powdered sugar. Quick and easy to make with simple ingredients, they’re a crowd-pleasing Halloween classic.
- Prep Time: 15 minutes
- Cook Time: 12 minutes
- Total Time: 57 minutes
- Yield: 24 cookies 1x
- Category: Dessert
- Cuisine: American
Ingredients
- 2 cups (250g) all-purpose flour
- ½ cup (50g) unsweetened cocoa powder
- 1 cup (200g) granulated sugar
- ½ cup (120ml) vegetable oil
- 2 large eggs, room temperature
- 2 teaspoons vanilla extract
- 1 teaspoon white vinegar
- 1 to 2 tablespoons black gel food coloring
- ½ cup (60g) powdered sugar, for rolling
- ½ teaspoon salt
- 1 teaspoon baking powder
Instructions
- Preheat your oven to 350°F (175°C). Line two baking sheets with parchment paper or silicone mats.
- In a medium bowl, whisk together the flour, cocoa powder, baking powder, and salt. Set aside.
- In a large mixing bowl, beat the granulated sugar and vegetable oil together until well combined. Add the eggs one at a time, beating well after each addition. Mix in the vanilla extract and white vinegar.
- Add 1 tablespoon of black gel food coloring to the wet mixture and beat until fully incorporated. Add more if needed to achieve a deep black color.
- Gradually add the dry ingredients to the wet mixture, mixing on low speed until just combined. Do not overmix.
- Cover the bowl and refrigerate the dough for 30 minutes (optional but recommended for best texture).
- Place the powdered sugar in a small bowl. Using a cookie scoop or tablespoon, scoop out about 1.5 tablespoons of dough. Roll into a ball, then coat generously in powdered sugar.
- Place the coated dough balls on the prepared baking sheets, spacing them about 2 inches apart.
- Bake for 10 to 12 minutes, until puffed and cracked on top but still soft in the center.
- Let the cookies cool on the baking sheet for 5 minutes, then transfer to a wire rack to cool completely.
Notes
For best results, use gel food coloring (not liquid) and don’t skip the vinegar—it creates the velvety texture. Chill the dough for easier handling. Coat generously in powdered sugar for iconic crinkles. Bake one sheet at a time for even results. Store in an airtight container at room temperature for up to 5 days; freeze for up to 3 months.
Nutrition
- Serving Size: 1 cookie
- Calories: 145
- Sugar: 14
- Sodium: 55
- Fat: 7
- Saturated Fat: 1
- Carbohydrates: 20
- Fiber: 1
- Protein: 2
Keywords: Halloween cookies, black velvet cookies, crinkle cookies, chocolate cookies, spooky cookies, easy Halloween dessert


