It was 11:47 PM on a random Tuesday, and I had this ridiculous, undeniable craving for strawberry shortcake. Not the kind you buy in those sad little supermarket sponge cakes, but the real deal—fluffy, buttery biscuits with macerated berries and clouds of whipped cream. The problem? I didn’t have a round biscuit cutter, I was out of heavy cream for the biscuits, and honestly, I was too tired to deal with rolling out dough. But I had strawberries sitting in the fridge, a stick of butter, and this weird idea that popped into my head—what if I just baked the whole thing in my cast iron skillet like a giant, shareable biscuit? I mean, let’s be honest, when you’re craving something at almost midnight, you get creative. So I tossed the dough together, pressed it into the skillet, and threw it in the oven. Thirty minutes later, I was sitting on my kitchen floor (because that’s where the best late-night meals happen), pulling apart warm, buttery biscuit layers with my fingers and piling on juicy strawberries. It was messy, it was impulsive, and honestly? It was the best strawberry shortcake I’d ever made. There’s something about the odd hours that loosens the usual rules, you know? That night, the skillet method stuck, and now I can’t imagine making it any other way.
Why You’ll Love This Recipe
Let me tell you why this strawberry shortcake skillet biscuit is about to become your new favorite way to impress a crowd—or just treat yourself on a random Tuesday.
- One Skillet Wonder : Everything bakes in one cast iron skillet, which means less cleanup and a stunning presentation that looks like you spent hours on it.
- No Rolling or Cutting : Forget about biscuit cutters and chilled dough—you just pat the dough into the skillet and bake. It’s that simple.
- Perfect for Hosting : This is the kind of dessert that makes people stop mid-conversation and say, “Wait, you made this?” It steals the table every single time.
- Crowd-Sized Portions : One giant biscuit means everyone pulls off their own piece—it’s interactive, fun, and way easier than assembling individual shortcakes.
- Next-Level Texture : The edges get golden and crisp while the center stays soft and flaky. You get the best of both worlds in every single bite.
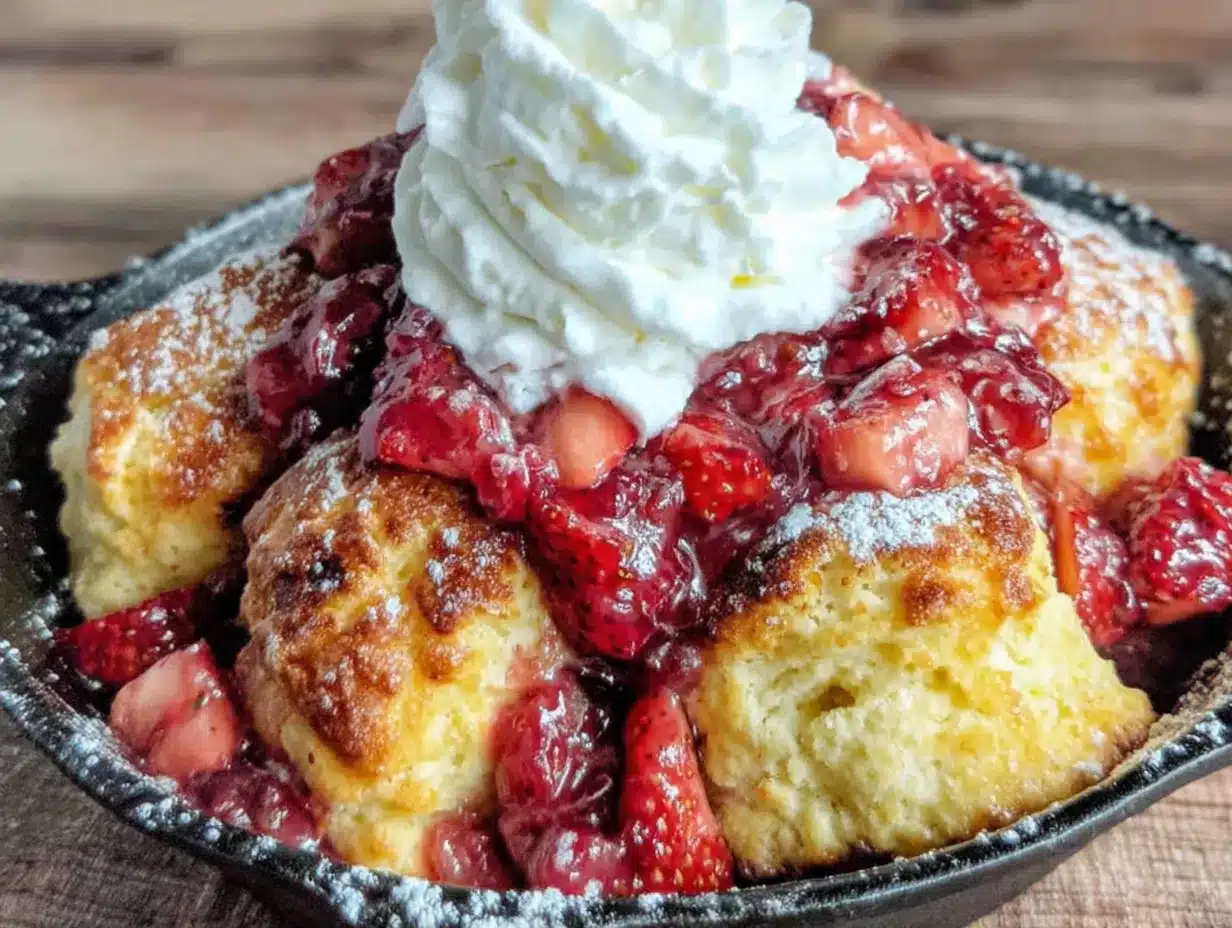
What makes this recipe different from every other strawberry shortcake out there? It’s the skillet method, honestly. The cast iron creates this incredible heat distribution that gives you a perfectly browned crust while keeping the inside tender and buttery. I’ve tested this with regular baking sheets and cake pans, and nothing compares to the skillet. Plus, you get to serve it right in the pan—rustic, warm, and absolutely gorgeous. This isn’t just another version of strawberry shortcake; it’s the version that makes you close your eyes after the first bite and forget you’re at a dinner party. It’s comfort food at its finest, but fancy enough to impress your guests without making you stress in the kitchen.
What Ingredients You Will Need
This recipe uses simple, honest ingredients that come together to create something truly special. Most of these are pantry staples, which is exactly what you want when you’re hosting and need a dessert that delivers without a fancy grocery run.
For the Skillet Biscuits
- 2 ½ cups all-purpose flour (315g) – I prefer King Arthur Flour for consistent results, but any good all-purpose works
- ¼ cup granulated sugar (50g) – Just enough sweetness to complement the berries without making the biscuit taste like cake
- 1 tablespoon baking powder – Make sure it’s fresh—this is what gives you those tall, fluffy layers
- ½ teaspoon baking soda – Helps with browning and tenderness
- ½ teaspoon salt – Don’t skip this; it balances the sweetness
- ½ cup cold unsalted butter (113g), cut into small cubes – The colder, the better. I sometimes pop my cubed butter in the freezer for 10 minutes before starting
- 1 cup cold buttermilk (240ml) – Shake it well before measuring. If you don’t have buttermilk, add 1 tablespoon lemon juice to regular milk and let it sit for 5 minutes
- 1 teaspoon vanilla extract – Pure vanilla, not imitation, if you can swing it
- 2 tablespoons turbinado sugar – For sprinkling on top; it creates that gorgeous crunchy crust
For the Macerated Strawberries
- 2 lbs fresh strawberries (about 900g), hulled and sliced – Look for berries that are deep red and fragrant; that’s how you know they’re at their peak
- ¼ cup granulated sugar (50g) – Adjust based on how sweet your berries are
- 1 tablespoon fresh lemon juice – Brightens everything up and helps the berries release their juices
- Pinch of salt – Trust me on this one—it makes the fruit taste more like itself
For the Whipped Cream
- 1 ½ cups heavy cream (360ml) – Cold, straight from the fridge
- 3 tablespoons powdered sugar (20g) – Dissolves easier than granulated
- 1 teaspoon vanilla extract – Again, go for pure vanilla if you have it
A quick note on substitutions: If you’re dairy-free, you can use cold coconut cream in place of the butter (though the texture will be slightly different), and oat milk with a splash of lemon juice can stand in for buttermilk. For a gluten-free version, I’ve had good results with Bob’s Red Mill 1-to-1 Baking Flour—just don’t overwork the dough. And if strawberries aren’t in season, frozen berries work beautifully; just let them thaw and drain off the excess liquid before macerating.
Equipment Needed
Here’s what you’ll need to pull this off—nothing too fancy, I promise.
- 10-inch cast iron skillet – This is non-negotiable for the best results. The heat retention and even baking are what make the biscuit so good. If you don’t have one, a 9-inch cake pan or oven-safe skillet will work, but the edges won’t get quite as crispy
- Large mixing bowl – For the dry ingredients
- Pastry cutter or two forks – To cut the butter into the flour. I’ve used my fingers in a pinch, but a pastry cutter gives you more control
- Measuring cups and spoons – For accuracy, especially with the baking powder
- Sharp knife or bench scraper – For cutting the butter into cubes
- Whisk – For the whipped cream. An electric mixer works too, but I like the arm workout
- Small bowl – For macerating the strawberries
- Parchment paper – Optional, but it makes cleanup even easier
I’ve made these biscuits in a well-seasoned cast iron that I’ve had for years, and honestly, the seasoning adds a subtle flavor that you just can’t replicate. If your skillet is new, make sure it’s properly seasoned before using—otherwise, the biscuit might stick. And don’t worry if you don’t have a pastry cutter; two forks crossed in an X motion work just as well, though it takes a bit longer.
Preparation Method
Alright, let’s make some magic happen. Here’s how to get the best strawberry shortcake skillet biscuits on your table.
- Preheat your oven to 425°F (220°C) and place your cast iron skillet inside while it heats. This is a game-changer—the hot skillet creates that immediate sizzle when the dough hits it, giving you an incredible crispy bottom.
- Start the strawberries while the oven preheats. In a medium bowl, combine the sliced strawberries, ¼ cup sugar, lemon juice, and a pinch of salt. Stir gently, then set aside. Let them sit for at least 20 minutes—they’ll release their juices and become beautifully syrupy. Give them a stir every now and then.
- Mix the dry ingredients for the biscuits. In a large bowl, whisk together the flour, ¼ cup sugar, baking powder, baking soda, and salt. Make sure everything is evenly distributed—you don’t want a pocket of baking powder in one bite.
- Cut in the cold butter. Drop the cold butter cubes into the flour mixture. Using a pastry cutter or two forks, work the butter into the flour until it looks like coarse meal with some pea-sized butter pieces remaining. Those little butter chunks are what create flaky layers, so don’t overdo it. I usually stop when I can see visible butter bits throughout.
- Add the wet ingredients. Pour the cold buttermilk and vanilla extract into the flour-butter mixture. Stir with a wooden spoon or spatula just until the dough comes together. It will be shaggy and a little sticky—that’s exactly what you want. Overmixing will make the biscuits tough, so stop as soon as you don’t see dry flour anymore.
- Shape the dough. Turn the dough out onto a lightly floured surface. Gently bring it together with your hands, patting it into a rough circle about ¾-inch thick. Don’t knead it—just pat it gently. If it’s too sticky, sprinkle a little more flour on top, but go easy.
- Carefully remove the hot skillet from the oven using oven mitts. Place the dough circle into the skillet—it should sizzle slightly. Don’t worry if it doesn’t fill the entire pan; it will spread as it bakes. Brush the top with a little melted butter or cream, then sprinkle generously with turbinado sugar.
- Bake for 18-22 minutes, until the biscuit is golden brown on top and a toothpick inserted in the center comes out clean. The edges should be deep golden and slightly crispy. Let it cool in the skillet for 5 minutes—this is crucial because the biscuit continues to cook slightly from the residual heat.
- Make the whipped cream while the biscuit cools. In a chilled bowl, whip the heavy cream, powdered sugar, and vanilla extract until soft peaks form. You want it billowy and light—not stiff. If you go too far, you’ll end up with butter, so watch closely.
- Assemble and serve. Spoon the macerated strawberries and their juices over the warm biscuit. Add dollops of whipped cream on top. Serve directly from the skillet, letting everyone pull off their own piece. The combination of warm biscuit, juicy berries, and cold cream is absolutely irresistible.
A few notes from my kitchen to yours: If the biscuit is browning too quickly on top but isn’t done in the center, tent it loosely with foil for the last 5 minutes. And don’t skip the turbinado sugar—it creates this wonderful crunchy crust that contrasts perfectly with the soft interior. I learned that the hard way after making a batch that looked beautiful but lacked that satisfying crackle.
Cooking Tips & Techniques
After making these skillet biscuits more times than I can count (and definitely messing up a few batches along the way), I’ve gathered some tips that will save you from my mistakes.
Keep everything cold. This is the number one rule for flaky biscuits. The butter should be straight from the fridge, and the buttermilk should be cold too. If your kitchen is warm, pop the flour mixture in the freezer for 10 minutes before adding the butter. I once made the mistake of using room-temperature butter, and the biscuits came out flat and greasy—not the light, flaky texture you’re after.
Don’t twist the biscuit cutter. Wait—you’re not using a cutter here, but the same principle applies when you’re patting the dough. Press straight down and lift straight up. Twisting seals the edges, which prevents the biscuit from rising properly. When you’re patting the dough into the skillet, handle it as little as possible. The less you work it, the more tender it will be.
Let the strawberries do their thing. The maceration process isn’t just about sweetening the berries—it’s about creating that gorgeous syrup that soaks into the warm biscuit. Give them at least 20 minutes, but 30-40 is even better. If you’re short on time, you can gently mash a few of the berries to speed things up.
Timing is everything when hosting. Here’s my strategy for dinner parties: macerate the strawberries and make the whipped cream ahead of time (store the cream in the fridge, covered). About 30 minutes before you want to serve dessert, mix and bake the biscuit. It comes out of the oven just as you’re clearing the dinner plates. The warm biscuit, cold cream, and juicy berries create that perfect temperature contrast that makes everyone at the table go quiet.
One mistake I’ll never make again is forgetting to heat the skillet before adding the dough. The first time I tried this recipe, I skipped that step because I was in a hurry. The bottom of the biscuit was pale and doughy while the top was perfectly golden. That hot skillet sizzle is non-negotiable for that crispy, buttery crust.
Variations & Adaptations
One of the best things about this recipe is how easily it adapts to different tastes, diets, and seasons. Here are some variations I’ve tried and loved.
Mixed Berry Skillet Biscuit : Swap half the strawberries for blueberries, raspberries, or sliced peaches. The combination of berries creates a beautiful color contrast and a more complex flavor. I made this for a Fourth of July party, and it was gone in ten minutes.
Chocolate-Drizzled Version : After assembling, drizzle melted dark chocolate over the top. The bitterness of the chocolate cuts through the sweetness of the berries and cream beautifully. This is my go-to when I’m feeling extra indulgent.
Vegan Adaptation : Use cold coconut oil or vegan butter in place of the regular butter, and substitute the buttermilk with almond milk mixed with 1 tablespoon of apple cider vinegar. For the whipped cream, chill a can of full-fat coconut milk overnight and whip the solid part with a little powdered sugar. It’s not exactly the same, but it’s surprisingly good.
Gluten-Free Option : I’ve tested this with Cup4Cup gluten-free flour blend, and it works beautifully. The texture is slightly more delicate, so handle the dough even more gently. Add an extra tablespoon of buttermilk if the dough seems too dry.
Savory-Sweet Twist : Add ½ teaspoon of black pepper to the biscuit dough and a few sprigs of fresh thyme to the macerating strawberries. The pepper adds warmth, and the thyme gives it an herby freshness that’s unexpected but incredible. I served this at a brunch, and people couldn’t stop talking about it.
Individual Skillet Biscuits : If you’re not feeding a crowd, divide the dough into 6-8 smaller rounds and bake them in a muffin tin or on a baking sheet. Reduce the baking time to 12-15 minutes. Perfect for when you want a single serving without committing to the whole skillet.
Serving & Storage Suggestions
This strawberry shortcake skillet biscuit is best served warm, straight from the oven, with the berries and cream piled high. The contrast between the warm biscuit and cold cream is what makes it so special. Set the skillet on a trivet in the center of the table with a stack of small plates and forks, and let everyone dig in. It’s a communal dessert that brings people together.
What to serve alongside : A scoop of vanilla ice cream on the side never hurts. Or, if you’re feeling fancy, a drizzle of balsamic reduction over the strawberries adds a sophisticated touch. For beverages, a cold glass of rosé or a sparkling lemonade pairs beautifully with the sweet, fruity flavors.
Storage : If you have leftovers (unlikely, but possible), store the biscuit, strawberries, and whipped cream separately. The biscuit can be kept at room temperature in an airtight container for up to 2 days. The macerated strawberries will keep in the fridge for 3-4 days, and the whipped cream is best used within 24 hours.
Reheating : To bring the biscuit back to life, warm it in a 350°F (175°C) oven for 5-7 minutes. Don’t use the microwave—it will turn the biscuit rubbery. If you’re reheating the whole skillet, cover it with foil to prevent the top from burning. The strawberries should be served at room temperature or slightly chilled, so just take them out of the fridge 15 minutes before serving.
How flavors develop : The biscuit is best the day it’s made, but the strawberries actually get better as they sit. The sugar continues to draw out the juices, creating an even richer syrup. If you’re planning ahead, macerate the berries a day in advance and make the whipped cream just before serving.
Nutritional Information & Benefits
Here’s the honest truth: this is a dessert, and it’s meant to be enjoyed. But that doesn’t mean it can’t have some redeeming qualities. Strawberries are packed with vitamin C, antioxidants, and fiber—one serving provides more than 100% of your daily vitamin C needs. They’re also low in calories and naturally sweet, which means you can use less added sugar.
The buttermilk in the biscuits adds calcium and probiotics, which are great for gut health. And while butter and cream aren’t exactly health foods, they do provide fat-soluble vitamins like A and D. The key is moderation—this is a treat, not an everyday breakfast.
Estimated nutritional values per serving (based on 8 servings):
- Calories: 385
- Fat: 22g
- Carbohydrates: 44g
- Fiber: 3g
- Sugar: 22g
- Protein: 6g
Dietary considerations: This recipe contains gluten, dairy, and eggs (in the buttermilk). For a dairy-free version, see the variations section. It’s naturally vegetarian and can be made vegan with the substitutions listed above.
My personal take? I believe in balance. I make this when I’m hosting friends or celebrating something special, and I don’t stress about the calories. Food is about joy, connection, and creating memories—and this skillet biscuit delivers on all three.
Conclusion
This strawberry shortcake skillet biscuit has become my go-to dessert for everything from casual Sunday dinners to holiday gatherings. It’s the kind of recipe that makes you look like a rockstar in the kitchen without actually requiring rockstar effort. The warm, buttery biscuit, the juicy macerated strawberries, and the billowy whipped cream come together in a way that’s simple, beautiful, and absolutely delicious.
I love that this recipe leaves room for your own creativity—swap in different fruits, add a splash of liqueur to the berries, or experiment with different toppings. The base is forgiving, and the results are always impressive. Whether you’re serving it to a crowd or just treating yourself on a quiet night, this skillet biscuit delivers every single time.
So go ahead—give it a try. Pull out your cast iron skillet, grab some strawberries, and make something that’ll have everyone asking for the recipe. And when you do, come back and let me know how it turned out. Did you add your own twist? Did the whole skillet disappear in five minutes? I’d love to hear about it in the comments below. Happy baking!
Frequently Asked Questions
Can I use frozen strawberries instead of fresh?
Yes, absolutely. Just thaw them first and drain off the excess liquid before macerating. Frozen berries tend to be softer, so they’ll break down more easily—which actually creates a saucier texture. Just don’t skip the draining step, or your biscuit might get soggy.
Why did my biscuit turn out dense and flat?
This usually happens for one of two reasons: the butter was too warm, or the dough was overmixed. Make sure your butter and buttermilk are cold, and stop mixing as soon as the dough comes together. Also, check that your baking powder is fresh—expired baking powder won’t give you the rise you need.
Can I make the biscuit dough ahead of time?
You can, but I recommend baking it fresh for the best texture. If you need to prep ahead, mix the dry ingredients and cut in the butter, then store that mixture in the fridge for up to 2 days. Add the buttermilk and bake just before serving. The biscuit is best warm from the oven.
How do I prevent the biscuit from sticking to the skillet?
Make sure your cast iron skillet is well-seasoned. If it’s not, you can line the bottom with a circle of parchment paper before adding the dough. Also, don’t skip preheating the skillet—the hot surface helps create a barrier that prevents sticking.
Can I use a different type of pan if I don’t have a cast iron skillet?
Yes, a 9-inch round cake pan or an oven-safe nonstick skillet will work. The biscuit won’t get quite as crispy on the bottom and edges, but it’ll still be delicious. Just make sure to grease the pan well and preheat it before adding the dough.
Pin This Recipe!
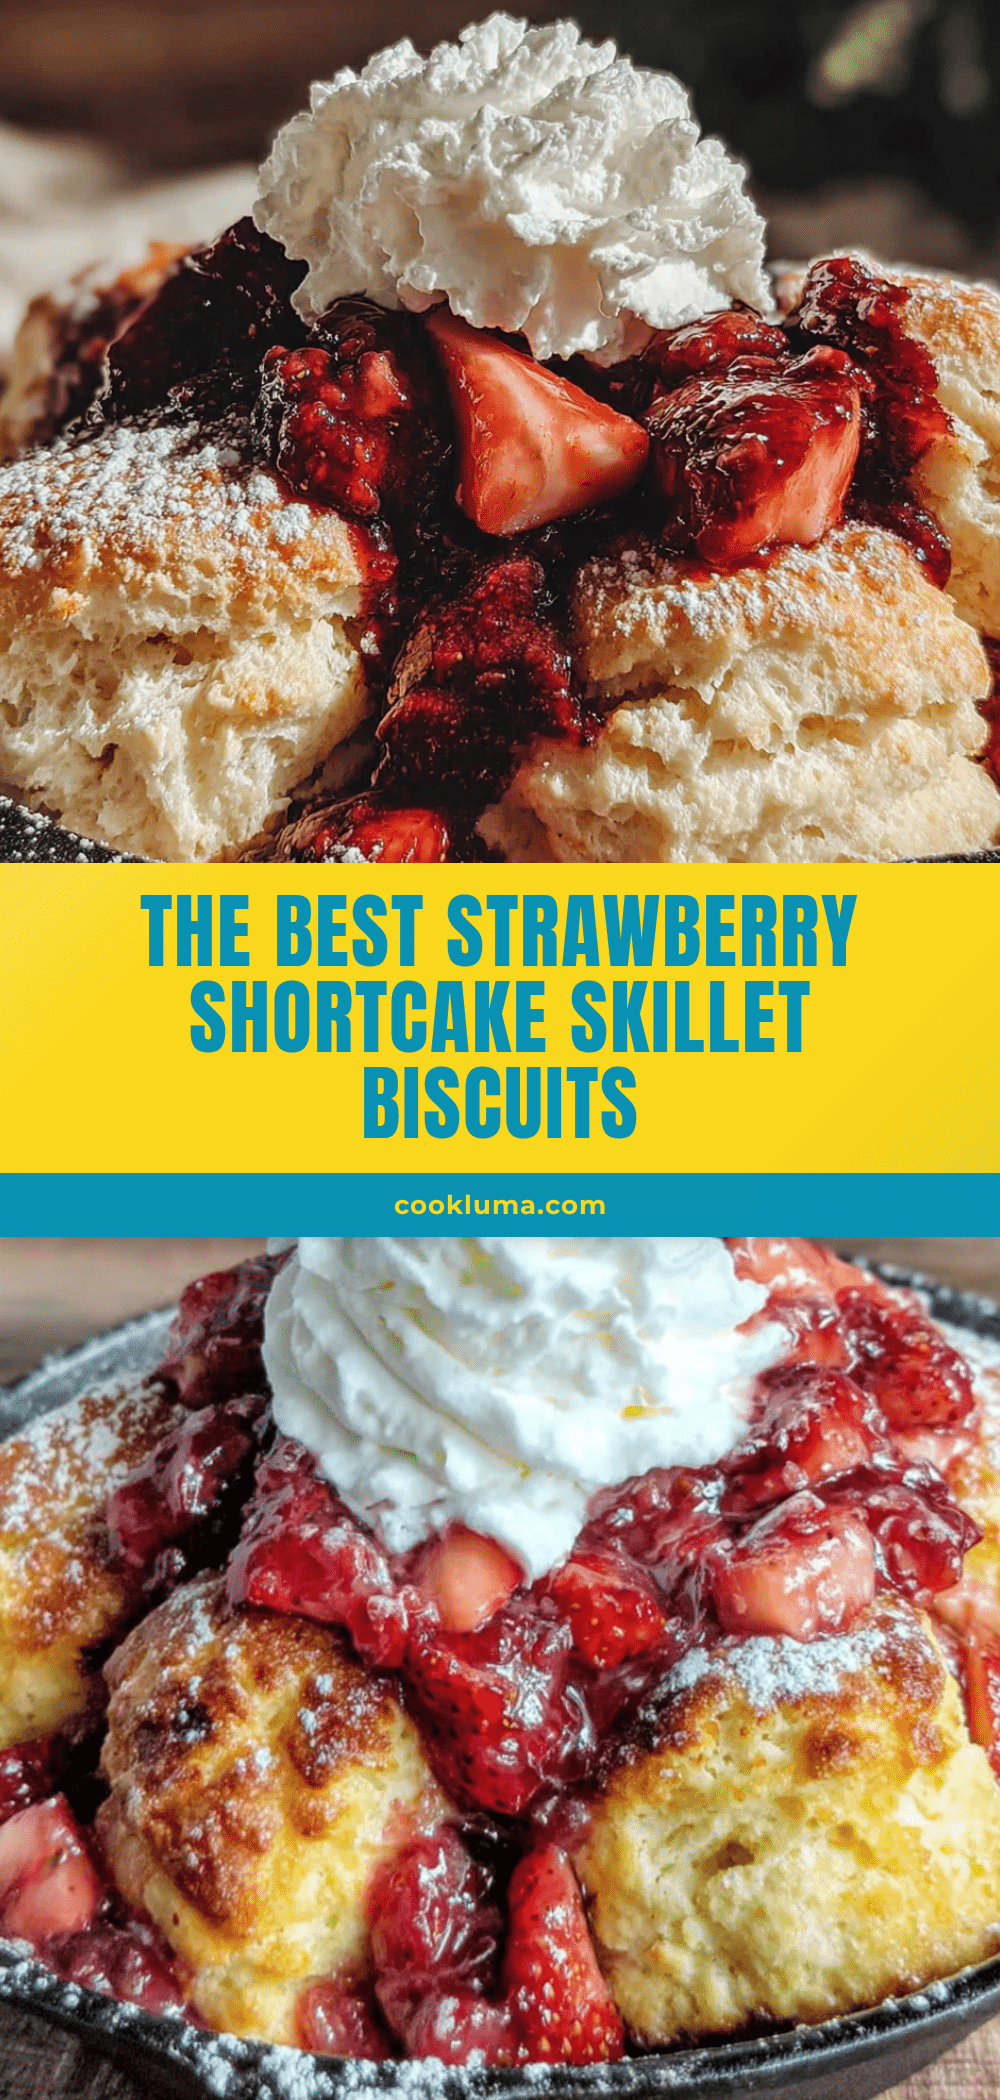
The Best Strawberry Shortcake Skillet Biscuits (Easy Homemade Recipe)
Fluffy, buttery biscuits baked in a cast iron skillet, topped with macerated strawberries and billowy whipped cream. This one-skillet wonder is perfect for hosting and delivers incredible texture with a golden crisp edge and soft, flaky center.
- Prep Time: 20 minutes
- Cook Time: 20 minutes
- Total Time: 40 minutes
- Yield: 8 servings 1x
- Category: Dessert
- Cuisine: American
Ingredients
- 2 ½ cups all-purpose flour (315g)
- ¼ cup granulated sugar (50g)
- 1 tablespoon baking powder
- ½ teaspoon baking soda
- ½ teaspoon salt
- ½ cup cold unsalted butter (113g), cut into small cubes
- 1 cup cold buttermilk (240ml)
- 1 teaspoon vanilla extract
- 2 tablespoons turbinado sugar
- 2 lbs fresh strawberries (about 900g), hulled and sliced
- ¼ cup granulated sugar (50g)
- 1 tablespoon fresh lemon juice
- Pinch of salt
- 1 ½ cups heavy cream (360ml)
- 3 tablespoons powdered sugar (20g)
- 1 teaspoon vanilla extract
Instructions
- Preheat your oven to 425°F (220°C) and place your cast iron skillet inside while it heats.
- In a medium bowl, combine the sliced strawberries, ¼ cup sugar, lemon juice, and a pinch of salt. Stir gently, then set aside for at least 20 minutes to macerate.
- In a large bowl, whisk together the flour, ¼ cup sugar, baking powder, baking soda, and salt.
- Drop the cold butter cubes into the flour mixture. Using a pastry cutter or two forks, work the butter into the flour until it looks like coarse meal with some pea-sized butter pieces remaining.
- Pour the cold buttermilk and vanilla extract into the flour-butter mixture. Stir with a wooden spoon or spatula just until the dough comes together. It will be shaggy and a little sticky.
- Turn the dough out onto a lightly floured surface. Gently bring it together with your hands, patting it into a rough circle about ¾-inch thick. Do not knead.
- Carefully remove the hot skillet from the oven using oven mitts. Place the dough circle into the skillet. Brush the top with a little melted butter or cream, then sprinkle generously with turbinado sugar.
- Bake for 18-22 minutes, until the biscuit is golden brown on top and a toothpick inserted in the center comes out clean. Let it cool in the skillet for 5 minutes.
- In a chilled bowl, whip the heavy cream, powdered sugar, and vanilla extract until soft peaks form.
- Spoon the macerated strawberries and their juices over the warm biscuit. Add dollops of whipped cream on top. Serve directly from the skillet.
Notes
Keep all ingredients cold for flaky biscuits. Do not overmix the dough. For best results, preheat the skillet before adding the dough. If biscuit browns too quickly, tent with foil. Turbinado sugar creates a crunchy crust.
Nutrition
- Serving Size: 1 serving
- Calories: 385
- Sugar: 22
- Sodium: 380
- Fat: 22
- Saturated Fat: 13
- Carbohydrates: 44
- Fiber: 3
- Protein: 6
Keywords: strawberry shortcake, skillet biscuit, cast iron dessert, easy strawberry dessert, homemade shortcake


