It was 11:47 PM on a Tuesday in early November, and I had an overwhelming urge to decorate something. Not the house, not the tree—that would be weird—but something small and edible and completely unnecessary. I didn’t have any cookie cutters shaped like leaves or turkeys, but I had a batch of sugar cookie dough chilling in the fridge and a bag of powdered sugar that was begging to be turned into something glossy. The idea just arrived, fully formed: Thanksgiving sugar cookies with royal icing. Not the fancy kind you see in bakeries—the kind you make at midnight in your pajamas because you’re already thinking about the holiday table and you need to do something with your hands.
Let me tell you, there’s something about late-night baking. The kitchen is quiet. The dog is asleep on the rug. You’re not rushing to get dinner on the table or pack lunches. It’s just you, the dough, and the soft hum of the refrigerator. I started rolling out the dough on a floured counter, and honestly, I didn’t even care that the cookies would be lopsided. I was using a drinking glass to cut circles because I couldn’t find my round cutter. That’s the kind of energy we’re working with here.
These cookies became my favorite Thanksgiving tradition, and I think you’ll understand why. They’re buttery, soft, and sturdy enough to hold a layer of royal icing without crumbling under pressure. Maybe you’ve been there—looking for a way to get into the holiday spirit without committing to a full turkey dinner. These cookies are that. They’re the warm-up act for the main event. And once you taste one, you’ll want to make them every year.
Why You’ll Love This Recipe
I’ve tested this recipe more times than I care to admit. The first batch was too flat. The second was too cakey. The third—well, the third was just right. I brought them to a Friendsgiving potluck, and someone actually asked if I’d bought them from a bakery. That moment, right there, told me I had something worth sharing.
Here’s what makes these Thanksgiving sugar cookies stand out from every other recipe you’ve tried:
- Quick & Easy: The dough comes together in under 15 minutes, and the chilling time is just 30 minutes. You can have decorated cookies on your counter in under two hours.
- Simple Ingredients: Butter, sugar, flour, eggs, vanilla—you probably have everything already. No trips to a specialty baking store required.
- Perfect for Thanksgiving: Whether you’re hosting the big meal or just bringing something to share, these cookies fit right in. They’re festive without being fussy.
- Crowd-Pleaser: Kids love decorating them. Adults love eating them. Everyone wins.
- Unbelievably Delicious: The texture is soft in the middle with slightly crisp edges. The royal icing dries to a perfect shine and stays put without cracking.
What makes this recipe different? It’s the ratio of butter to flour, honestly. I spent weeks tweaking it until the cookies held their shape during baking. No spreading, no puffing—just a clean, round cookie that looks like a canvas. The royal icing is my tested formula too: thick enough to pipe, thin enough to flood, and flavored with just a hint of vanilla and almond extract.
These aren’t just cookies. They’re the kind that make you close your eyes after the first bite. They’re comfort food reimagined for the holiday season—faster than a pie, but with the same soul-soothing satisfaction. Perfect for impressing guests without stress, or turning a quiet Tuesday night into something memorable.
What Ingredients You Will Need
This recipe uses simple, wholesome ingredients to deliver bold flavor and satisfying texture without the fuss. You’ll find most of these in your pantry already, which is exactly how I like to bake. Let’s break it down.
For the Sugar Cookies
- Unsalted butter, 1 cup (226g), softened to room temperature. I prefer Kerrygold for its rich flavor, but any good-quality butter works. Just make sure it’s unsalted so you control the salt level.
- Granulated sugar, 1 cup (200g). Regular white sugar gives these cookies their classic sweetness and slightly crisp edges.
- Large egg, 1, at room temperature. Cold eggs can make the dough stiff and hard to mix.
- Vanilla extract, 1 teaspoon. Pure vanilla extract makes a noticeable difference. Imitation works in a pinch, but the flavor won’t be as warm.
- All-purpose flour, 2 and ¾ cups (345g). Spoon and level your flour—don’t scoop directly from the bag, or you’ll end up with dry, crumbly dough.
- Baking powder, ½ teaspoon. This helps the cookies rise just slightly without puffing up.
- Salt, ½ teaspoon. Fine sea salt or table salt works best. It balances the sweetness.
For the Royal Icing

- Powdered sugar, 4 cups (480g), sifted. Sifting removes lumps and gives you a silky-smooth icing. I use C&H brand for consistent results.
- Meringue powder, 3 tablespoons. This is essential for royal icing. It gives the icing structure and helps it dry hard. You can find it at craft stores or online.
- Warm water, 6 tablespoons (90ml). Not hot, not cold—just warm. The temperature matters for dissolving the meringue powder.
- Vanilla extract, ½ teaspoon. For flavor.
- Almond extract, ¼ teaspoon. This is optional but adds a lovely, subtle nuttiness that pairs beautifully with the cookies.
- Gel food coloring, in fall colors. I like AmeriColor brand for vibrant shades without thinning the icing.
Substitution guidance: If you don’t have meringue powder, you can use 2 egg whites in place of the meringue powder and water. Just note that egg-white-based royal icing dries a bit more matte and is less shelf-stable. For a dairy-free version, swap the butter with a high-quality vegan butter stick like Earth Balance. The texture will be slightly different but still delicious.
Equipment Needed
You don’t need a professional bakery setup for these cookies. Here’s what I use and what you can substitute if needed.
- Stand mixer or hand mixer: A stand mixer makes creaming butter and sugar effortless, but a hand mixer works just fine. You can even do it by hand with a wooden spoon if you’re feeling strong.
- Rolling pin: I use a classic wooden rolling pin with thickness rings. If you don’t have one, a wine bottle works in a pinch—just make sure it’s clean and chilled.
- Cookie cutters: Round cutters are great for beginners. For Thanksgiving, look for leaf, acorn, or turkey-shaped cutters. I found a set at a craft store for $5.
- Baking sheets: Light-colored, rimmed baking sheets are best. Dark sheets can cause cookies to brown too quickly.
- Parchment paper or silicone baking mat: These prevent sticking and make cleanup a breeze.
- Piping bags or zip-top bags: For the royal icing. I prefer disposable piping bags with a #2 or #3 tip, but a zip-top bag with a tiny corner snipped off works perfectly.
- Cooling rack: Essential for letting cookies cool completely before icing. If you don’t have one, a clean kitchen towel works temporarily.
Budget-friendly tip: Don’t splurge on expensive cookie cutters. A simple round cutter gives you a blank canvas—you can decorate circles to look like pumpkins, sunflowers, or fall wreaths with just icing and sprinkles.
Preparation Method
Let’s make these cookies. I’ll walk you through every step so you feel confident, even if it’s your first time working with royal icing.
Step 1: Make the Cookie Dough
In the bowl of your stand mixer fitted with the paddle attachment, beat the softened butter and granulated sugar together on medium speed until light and fluffy, about 2 minutes. Scrape down the sides of the bowl. Add the egg and vanilla extract, then beat until combined. The mixture should look smooth and pale.
In a separate bowl, whisk together the flour, baking powder, and salt. Gradually add the dry ingredients to the wet ingredients, mixing on low speed until just combined. The dough will be soft but not sticky. If it feels too sticky to handle, add an extra tablespoon of flour.
Step 2: Chill the Dough
Divide the dough in half, flatten each half into a disc, and wrap tightly in plastic wrap. Refrigerate for at least 30 minutes, or up to 3 days. Chilling is non-negotiable—it prevents the cookies from spreading in the oven and makes the dough easier to roll.
Personal tip: I once skipped the chilling step because I was impatient. The cookies spread into sad, flat puddles. Don’t be me. Chill the dough.
Step 3: Roll and Cut
Preheat your oven to 350°F (175°C). Line two baking sheets with parchment paper. Lightly flour your work surface and rolling pin. Roll one disc of dough to about ¼-inch thickness. If the dough cracks at the edges, let it sit at room temperature for 5 minutes—it’s too cold.
Cut out your desired shapes and place them on the prepared baking sheets, spacing them about 2 inches apart. Gather the scraps, reroll, and cut again. Repeat with the second disc of dough.
Step 4: Bake
Bake the cookies for 8–10 minutes, or until the edges are just barely golden. The centers should look set but not browned. Let the cookies cool on the baking sheets for 5 minutes, then transfer them to a cooling rack to cool completely. Do not ice warm cookies—the icing will melt and slide off.
Sensory cue: Your kitchen will smell like butter and vanilla. The cookies should feel firm to the touch but still soft when you press the center gently.
Step 5: Make the Royal Icing
In the bowl of your stand mixer fitted with the whisk attachment, combine the powdered sugar and meringue powder. Add the warm water and mix on low speed until combined. Increase to medium-high speed and beat for 5–7 minutes, until the icing is thick, glossy, and forms stiff peaks. Add the vanilla and almond extracts, then mix for another 30 seconds.
Divide the icing into bowls and tint with gel food coloring. Cover each bowl with a damp paper towel to prevent the icing from drying out while you work.
Step 6: Decorate
Fit a piping bag with a #2 tip and fill it with your outline icing. Outline each cookie, then let the outline dry for 5 minutes. Thin the remaining icing with a few drops of water until it reaches a “flood” consistency—it should drizzle off a spoon in a smooth ribbon. Fill a separate piping bag with the flood icing and fill in the outlines. Use a toothpick to spread the icing into corners and pop any air bubbles.
Let the decorated cookies dry at room temperature for at least 4 hours, or overnight. The icing should be hard to the touch before you stack them.
Cooking Tips & Techniques
I’ve made plenty of mistakes with these cookies so you don’t have to. Here’s what I learned the hard way.
Don’t overmix the dough. Overworking the dough develops gluten, which makes cookies tough. Mix until the flour just disappears into the butter mixture. A few streaks of flour are fine—they’ll incorporate when you roll the dough.
Use a light touch with flour. Too much flour on your work surface will dry out the dough. Use just enough to prevent sticking, and brush off excess flour from the cut cookies before baking.
Chill the cutouts if your kitchen is warm. Pop the baking sheet with the cut cookies into the fridge for 10 minutes before baking. This extra chill time guarantees sharp edges and minimal spreading.
Royal icing consistency is everything. If your outline icing is too thin, it will run off the cookie. If your flood icing is too thick, it won’t spread smoothly. Test the consistency by lifting the piping bag—the icing should fall in a ribbon that disappears into the bowl within 10 seconds.
Work in batches. Don’t try to decorate all the cookies at once if you’re a beginner. Decorate 6–8 at a time, then take a break. Your hands will thank you, and your lines will be neater.
Keep the icing covered. Royal icing dries fast. Always keep a damp paper towel over the bowls you’re not using. If the icing starts to crust over, add a drop of water and stir.
Variations & Adaptations
One of the best things about this recipe is how flexible it is. Here are some ways to make it your own.
Gluten-Free Version
Substitute the all-purpose flour with a 1:1 gluten-free baking flour blend that contains xanthan gum. I’ve tested this with Bob’s Red Mill 1-to-1 Baking Flour, and the cookies turned out tender and almost identical to the original. Chill the dough for an extra 15 minutes—gluten-free dough can be stickier.
Vegan Version
Use vegan butter sticks (not tub margarine) and replace the egg with a flax egg (1 tablespoon ground flaxseed mixed with 3 tablespoons water, let sit for 5 minutes). For the royal icing, use aquafaba (chickpea brine) instead of meringue powder. Whip 3 tablespoons of aquafaba with the powdered sugar until stiff peaks form.
Spiced Autumn Variation
Add 1 teaspoon of ground cinnamon, ½ teaspoon of ground ginger, and ¼ teaspoon of ground nutmeg to the flour mixture. This creates a warm, spiced cookie that tastes like fall in every bite. I made these for a Halloween party, and they disappeared before the cupcakes.
Chocolate Dipped Version
Skip the royal icing and dip half of each cooled cookie into melted dark chocolate. Sprinkle with sea salt or crushed pecans before the chocolate sets. This is my lazy-day version, and honestly, it might be the best one.
Citrus Glaze Version
Replace the vanilla in the royal icing with 2 teaspoons of fresh lemon or orange zest and 1 tablespoon of fresh juice. The bright citrus flavor cuts through the buttery cookie beautifully. Perfect for a post-Thanksgiving brunch.
Serving & Storage Suggestions
These cookies are best served at room temperature. Arrange them on a platter or cake stand for a stunning Thanksgiving dessert table. I like to group them by color—orange leaves next to yellow acorns, with a few white snowflakes mixed in (yes, I start early with winter shapes).
Complementary pairings: Serve these cookies with a hot cup of spiced chai, apple cider, or a classic pumpkin latte. They also pair beautifully with a cheese board—the sweetness contrasts nicely with sharp cheddar or aged gouda.
Storage instructions: Store undecorated cookies in an airtight container at room temperature for up to 1 week. Decorated cookies should be stored in a single layer in an airtight container, with parchment paper between layers, for up to 2 weeks. Do not refrigerate decorated cookies—the moisture will make the icing sticky.
Freezer instructions: You can freeze the unbaked dough discs for up to 3 months. Thaw overnight in the fridge before rolling and cutting. Baked, undecorated cookies also freeze well for up to 3 months. Thaw at room temperature before decorating.
Reheating tip: If you prefer your cookies slightly warm, pop an undecorated cookie in a 300°F (150°C) oven for 3–4 minutes. Do not microwave—it will ruin the texture.
Nutritional Information & Benefits
Let’s be real: these are sugar cookies with royal icing. They’re a treat, not a health food. But here’s the estimated nutritional breakdown per cookie (based on a 2-inch round cookie with icing):
- Calories: 120
- Total Fat: 5g
- Saturated Fat: 3g
- Carbohydrates: 18g
- Sugar: 12g
- Protein: 1g
- Sodium: 45mg
Dietary considerations: This recipe contains gluten, dairy, and eggs. For gluten-free, vegan, or dairy-free options, see the variations section above. The royal icing contains meringue powder, which is made from dried egg whites—if you have a severe egg allergy, use the aquafaba version.
Health perspective: I believe in balance. These cookies are part of a joyful Thanksgiving celebration. One cookie won’t derail your wellness goals, but it might make your day a little sweeter. I always enjoy mine with a big glass of water and a walk afterwards. It’s all about moderation, right?
Conclusion
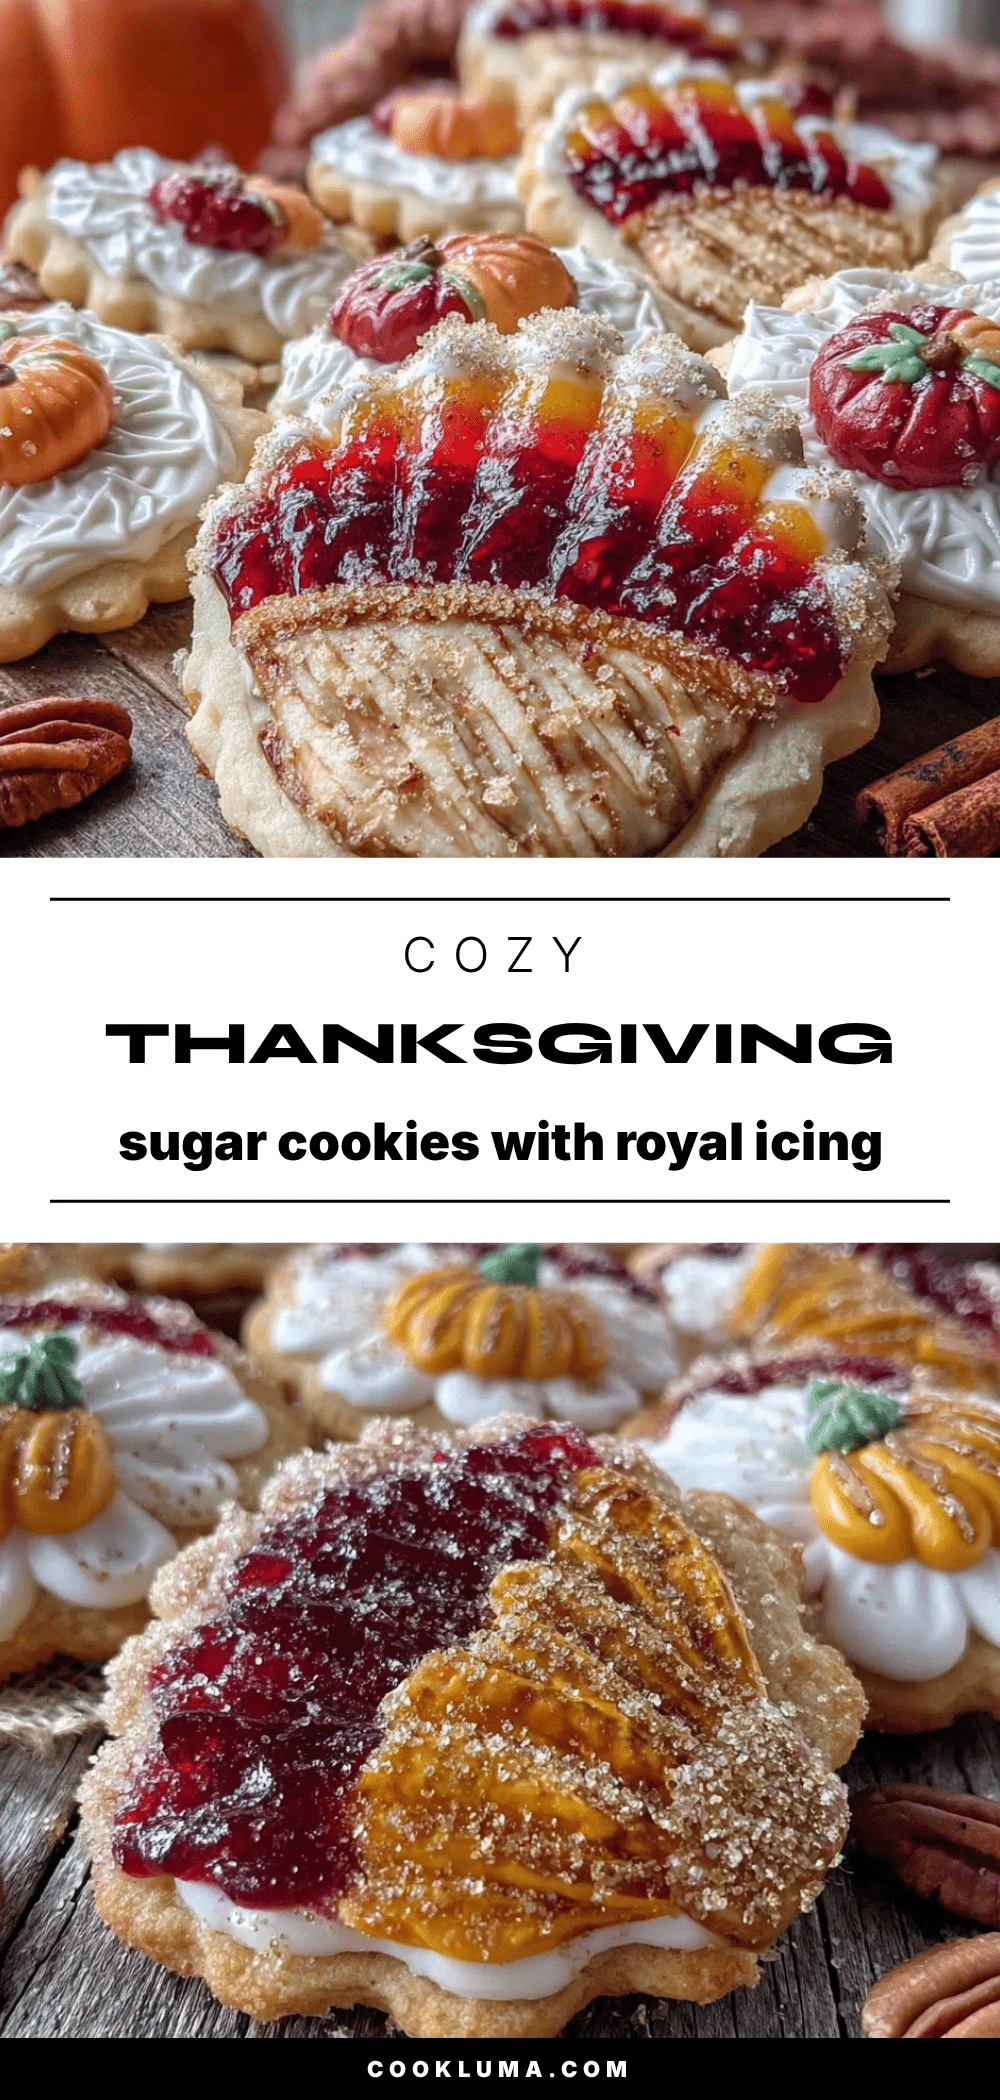
These cozy Thanksgiving sugar cookies with royal icing are worth every minute of effort. They’re the kind of recipe that brings people together—whether you’re decorating them with your kids, bringing them to a Friendsgiving, or just enjoying one with your coffee after the big meal. The buttery, soft texture paired with the glossy, sweet icing is a combination that never gets old.
I encourage you to make this recipe your own. Use your favorite fall cookie cutters. Experiment with colors and designs. Don’t stress about perfection—my first batch looked like a preschool art project, and they still tasted amazing. That’s the beauty of baking. It’s not about being perfect. It’s about creating something with your hands and sharing it with the people you love.
If you make these cookies, I’d love to hear about it. Drop a comment below and tell me how they turned out. Did you try a variation? Did your kids go wild decorating? Share a photo on Pinterest and tag me—I want to see your creations. Until then, happy baking, and happy Thanksgiving.
Frequently Asked Questions
Can I make the dough ahead of time?
Absolutely. The dough can be refrigerated for up to 3 days or frozen for up to 3 months. Just wrap it tightly in plastic wrap and then in foil. Thaw frozen dough overnight in the fridge before rolling.
Why did my cookies spread in the oven?
This usually happens for one of three reasons: the dough wasn’t chilled long enough, the butter was too soft, or your baking sheets were too warm. Always chill the dough for at least 30 minutes, and let your baking sheets cool completely between batches.
How do I get royal icing to dry faster?
Set up a fan on low speed pointing toward the cookies, but not directly at them. You can also place the cookies in a warm, dry room. Avoid the fridge or freezer—condensation will ruin the icing’s shine.
Can I use store-bought royal icing?
You can, but I don’t recommend it. Store-bought royal icing often has a weird aftertaste and doesn’t dry as hard. Homemade is easy to make and tastes so much better. Trust me on this one.
How far in advance can I decorate these cookies?
You can decorate them up to 2 weeks ahead of time as long as you store them properly. Keep them in an airtight container at room temperature, away from direct sunlight. They make great gifts for Thanksgiving hostesses.
Pin This Recipe!
Easy Cozy Thanksgiving Sugar Cookies with Royal Icing

Buttery, soft sugar cookies decorated with glossy royal icing, perfect for Thanksgiving celebrations. A quick and easy recipe that yields festive, crowd-pleasing treats.
- Prep Time: 15 minutes
- Cook Time: 10 minutes
- Total Time: 1 hour 55 minutes (including chilling and decorating time)
- Yield: 24 servings 1x
- Category: Dessert
- Cuisine: American
Ingredients
- 1 cup (226g) unsalted butter, softened
- 1 cup (200g) granulated sugar
- 1 large egg, room temperature
- 1 teaspoon vanilla extract
- 2 and ¾ cups (345g) all-purpose flour
- ½ teaspoon baking powder
- ½ teaspoon salt
- 4 cups (480g) powdered sugar, sifted
- 3 tablespoons meringue powder
- 6 tablespoons (90ml) warm water
- ½ teaspoon vanilla extract
- ¼ teaspoon almond extract
- Gel food coloring (fall colors)
Instructions
- In a stand mixer with paddle attachment, beat softened butter and granulated sugar on medium speed until light and fluffy, about 2 minutes. Scrape down sides. Add egg and vanilla extract; beat until combined.
- In a separate bowl, whisk together flour, baking powder, and salt. Gradually add dry ingredients to wet ingredients, mixing on low until just combined. Dough should be soft but not sticky.
- Divide dough in half, flatten into discs, wrap in plastic wrap, and refrigerate for at least 30 minutes (up to 3 days).
- Preheat oven to 350°F (175°C). Line baking sheets with parchment paper. Lightly flour work surface and rolling pin. Roll one disc to ¼-inch thickness. Cut into desired shapes and place 2 inches apart on prepared sheets.
- Bake for 8–10 minutes, until edges are just barely golden. Cool on baking sheets for 5 minutes, then transfer to a cooling rack to cool completely.
- For royal icing: In stand mixer with whisk attachment, combine powdered sugar and meringue powder. Add warm water and mix on low until combined. Increase to medium-high and beat for 5–7 minutes until thick, glossy, and stiff peaks form. Add vanilla and almond extracts; mix 30 seconds.
- Divide icing into bowls and tint with gel food coloring. Cover bowls with damp paper towels to prevent drying.
- Fit a piping bag with #2 tip and fill with outline icing. Outline each cookie, let dry 5 minutes. Thin remaining icing with water to flood consistency. Fill separate piping bag with flood icing and fill outlines. Use toothpick to spread and pop bubbles.
- Let decorated cookies dry at room temperature for at least 4 hours or overnight until icing is hard.
Notes
Chilling dough is essential to prevent spreading. For best results, chill cut cookies for 10 minutes before baking if kitchen is warm. Royal icing dries best at room temperature; avoid refrigerating decorated cookies.
Nutrition
- Serving Size: 1 cookie
- Calories: 120
- Sugar: 12
- Sodium: 45
- Fat: 5
- Saturated Fat: 3
- Carbohydrates: 18
- Protein: 1
Keywords: Thanksgiving cookies, sugar cookies, royal icing, fall cookies, holiday baking, easy cookie recipe


