Introduction
My sister had refused Biscoff cookies for years. “They’re just spiced cookies for airplane snacks,” she’d say with this little shrug, like the very idea was beneath her. For *years*. Birthday parties, holiday cookie trays, random Tuesday coffee breaks—she’d pass them by without a second glance. Then last fall, I made these cheesecake bars for a family dinner, “just for myself,” I told everyone, because I knew better than to expect converts. I set the pan on the counter, turned around to grab a spatula, and when I turned back, she was standing there with a fork in one hand and a bar in the other, caught red-handed. “These are… actually good,” she said, crumbs on her chin, trying to look casual. I just smiled. I didn’t say a word.
Honestly, that moment stuck with me. Not because I proved her wrong—though, let’s be real, that part was satisfying—but because it reminded me why I love recipes like this. They sneak up on you. You think you know what a cheesecake bar tastes like, and then this one hits you with that warm, caramelized, almost-but-not-quite-gingerbread flavor, and suddenly you’re the person eating it straight from the pan at 10 p.m. on a Tuesday. Maybe you’ve been there. I’m not judging.
So here’s the thing about these Biscoff cheesecake bars: they’re not trying to be fancy. They’re not layered with complicated ganache or topped with gold leaf. They’re just… cozy. The kind of dessert that makes you slow down, take a breath, and actually taste what you’re eating. The kind that makes a cold evening feel warm and a rough day feel a little softer. I keep making them because they work—every single time—and because watching someone take that first bite and pause, mid-chew, with that “wait, what is this?” look never gets old. It’s the recipe that stays.
Why You’ll Love This Recipe
Let me tell you why these bars have become my go-to for everything from lazy Sundays to holiday potlucks. I’ve tested this recipe more times than I care to admit (my neighbors have become very willing taste-testers), and it’s earned its spot in my permanent rotation.
- Quick & Easy: Comes together in about 20 minutes of active prep. The oven does most of the work, and the hardest part is waiting for them to chill. Perfect for when you need dessert *now* but don’t want to spend all evening in the kitchen.
- Simple Ingredients: You only need five main ingredients. No fancy grocery trips, no obscure extracts, nothing that requires a special trip to three different stores. I bet you already have most of these in your pantry right now.
- Perfect for Cozy Nights: These bars are basically edible comfort. They’re great for cold-weather gatherings, movie nights, or that moment when you just need something sweet and warm without the fuss.
- Crowd-Pleaser: I’ve served these to kids, adults, picky eaters, and people who “don’t really like cheesecake.” They disappear. Every. Single. Time. My sister is living proof that even skeptics can’t resist.
- Unbelievably Delicious: The texture is what gets me—that creamy, tangy cheesecake layer against the crunchy, caramelized Biscoff crust, with little pockets of melted cookie butter throughout. It’s next-level comfort food that somehow feels both indulgent and familiar.
What makes this recipe different from the dozens of other cheesecake bar recipes out there? It’s the Biscoff. That distinct, spiced, caramelized flavor transforms a standard cream cheese filling into something almost nostalgic. And the technique—layering crushed cookies with melted cookie butter—creates a crust that’s sturdy enough to hold the filling but tender enough to melt in your mouth. This isn’t just another version. It’s the best version. The one you’ll text your friends about.
Honestly, this recipe is the kind that makes you close your eyes after the first bite. It’s comfort food reimagined—faster, simpler, but with the same soul-soothing satisfaction. Perfect for impressing guests without stress, or turning a simple evening into something memorable.
What Ingredients You Will Need
This recipe uses simple, wholesome ingredients to deliver that rich, spiced flavor and creamy texture without any fuss. Most of these are pantry staples, and the ones that aren’t are worth the small investment because you’ll want to make these bars again and again.
For the Crust:
- Biscoff cookies (crushed): About 2 cups of finely crushed cookies. I use the original Lotus Biscoff cookies—they have that perfect balance of cinnamon, brown sugar, and caramelized flavor. You can crush them in a food processor or put them in a zip-top bag and go at them with a rolling pin (which is oddly satisfying, just saying).
- Unsalted butter (melted): 6 tablespoons, melted and slightly cooled. This binds the crust together and adds richness. I use salted butter in a pinch, but then I skip the salt in the crust.
- Granulated sugar: 2 tablespoons. Just a little extra sweetness to round out the crust. You could skip this if you’re watching sugar, but honestly, it makes a difference.
For the Cheesecake Filling:
- Cream cheese (full-fat, softened): 16 ounces (two standard blocks). This is non-negotiable for the best texture. Low-fat cream cheese contains more water and can make the filling runny. Let it sit on the counter for about an hour before you start—cold cream cheese leads to lumpy filling, and nobody wants that.
- Biscoff cookie butter (creamy): 1/2 cup. This is the secret weapon. It adds that signature Biscoff flavor to the filling itself, not just the crust. I recommend the Lotus Biscoff Spread (the smooth version), but any brand of speculoos cookie butter works. Don’t use the crunchy kind here—the smooth texture is what you want.
- Granulated sugar: 1/2 cup. Just enough to sweeten the filling without overpowering the Biscoff flavor.
- Large eggs (room temperature): 2. Room temperature eggs incorporate more evenly into the cream cheese, giving you a smoother, creamier filling. If you forgot to take them out ahead of time, place them in a bowl of warm water for 5 minutes.
- Vanilla extract: 1 teaspoon. Pure vanilla extract is best, but imitation works in a pinch. It rounds out the flavors and adds warmth.
- Biscoff cookies (for topping): A handful, roughly crushed. This is optional but highly recommended for that bakery-style look and extra crunch.
Ingredient Tips: I’ve tested this with different brands, and honestly, the Lotus brand Biscoff cookies and spread really do make a difference. The flavor is more pronounced and authentic. If you’re using a generic store brand, you might need to add a pinch more cinnamon to the crust to get that same warm spice note. Also, make sure your cream cheese is *really* softened—not just out of the fridge for 10 minutes. Give it a full hour on the counter, and you’ll thank me later.
Equipment Needed
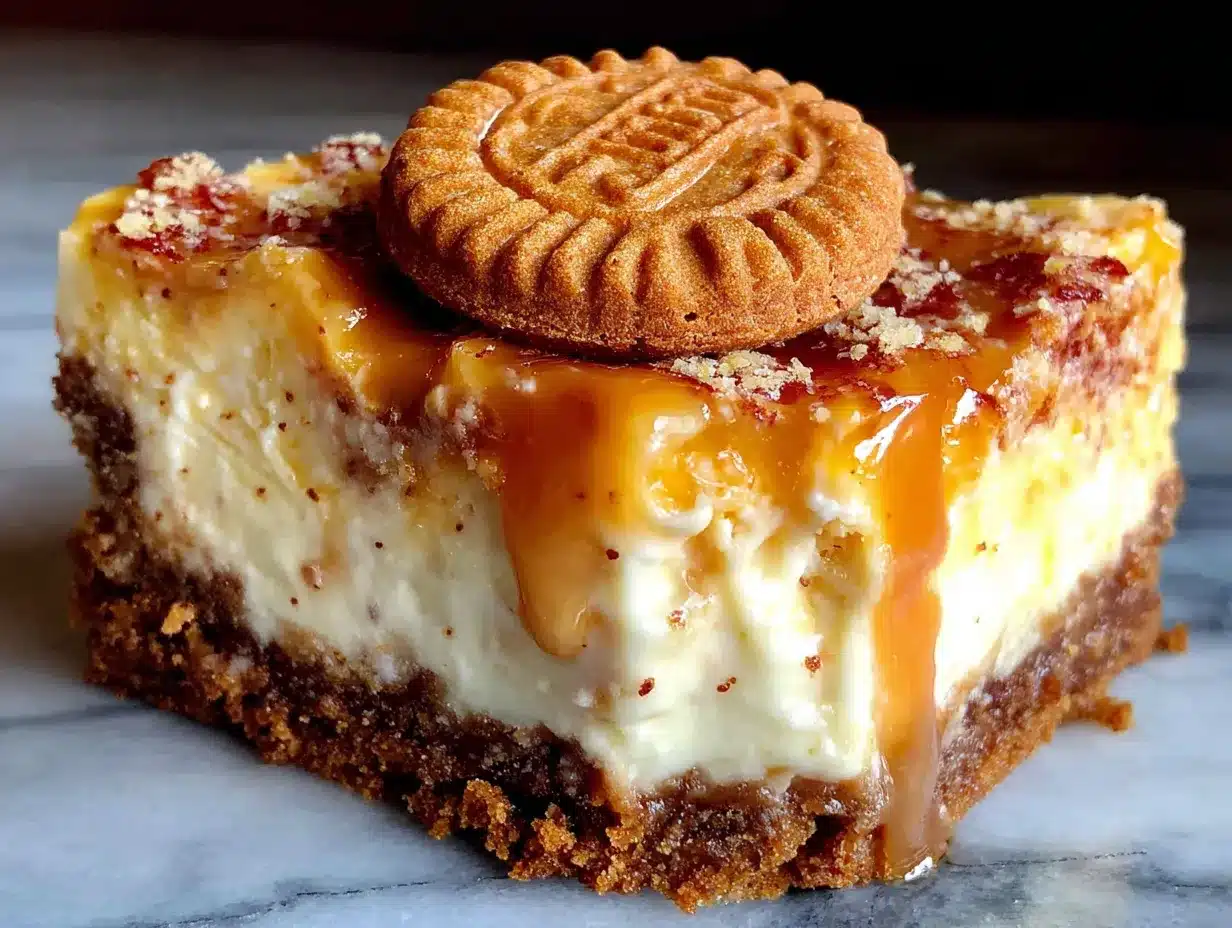
You don’t need a professional bakery setup for these bars. Here’s what I use in my own kitchen:
- 8×8-inch baking pan: This is the perfect size for these bars. A 9×9-inch pan works too, but your bars will be slightly thinner and may bake a few minutes faster. Glass, ceramic, or metal all work—just adjust baking time slightly if using glass (it retains heat longer).
- Parchment paper: Line your pan with parchment paper, leaving overhang on two opposite sides. This creates “handles” that make lifting the entire block of cheesecake bars out of the pan a breeze. Trust me on this—I learned the hard way after trying to cut bars straight out of the pan.
- Food processor or rolling pin: For crushing the cookies. A food processor gives you the most consistent texture, but a zip-top bag and rolling pin (or even a heavy-bottomed skillet) works perfectly. I’ve done both, and the rolling pin method is oddly therapeutic.
- Electric hand mixer or stand mixer: For beating the cream cheese until smooth. A hand mixer works great and is easier to clean. A stand mixer with the paddle attachment is also perfect. You can do it by hand with a whisk and some serious elbow grease, but it’s a workout.
- Mixing bowls: One medium bowl for the crust, one large bowl for the filling. Nothing fancy—whatever you have on hand.
- Measuring cups and spoons: Standard set for accuracy. I keep a separate set for dry and wet ingredients to avoid cross-contamination.
- Spatula: A rubber spatula for scraping down the bowl and spreading the filling evenly. The kind that’s heat-safe is nice but not necessary.
Budget-Friendly Options: If you don’t have a food processor, the bag-and-rolling-pin method costs nothing and works beautifully. No stand mixer? A hand mixer is under $20 and will serve you for years. And honestly, if you don’t have an 8×8 pan, a 9×9 or even a loaf pan can work—just adjust baking time and expect different thicknesses.
Preparation Method
Alright, let’s get to the good part. Here’s how to make these bars, step by step, with all the little details I’ve learned from making them probably two dozen times.
- Preheat and prep your pan. Preheat your oven to 325°F (163°C). While it’s heating up, line your 8×8-inch baking pan with parchment paper, leaving about 2 inches of overhang on two opposite sides. This is your lifeline later—those parchment handles make lifting the entire block of bars out so much easier. Lightly spray the parchment with non-stick spray just to be safe.
- Make the crust. In a food processor (or a zip-top bag with a rolling pin), crush 2 cups of Biscoff cookies until you have fine crumbs. You want them consistent—no big chunks, but not quite dust either. Transfer the crumbs to a medium bowl. Pour in 6 tablespoons of melted butter and 2 tablespoons of granulated sugar. Stir with a fork until all the crumbs are evenly moistened. It should look like wet sand and clump together when you squeeze it.
- Press the crust. Dump the crumb mixture into your prepared pan. Press it down firmly and evenly into the bottom. I use the bottom of a flat measuring cup or a glass to really pack it in—this prevents the crust from crumbling when you cut the bars later. Don’t press it up the sides; just keep it as an even bottom layer. Pop the pan in the fridge while you make the filling (this helps the crust set).
- Beat the cream cheese. In a large mixing bowl, beat 16 ounces of softened cream cheese with an electric mixer on medium speed until it’s completely smooth and fluffy—about 2 minutes. Scrape down the sides and bottom of the bowl with a spatula at least once. You don’t want any lumps at this stage because they’ll persist through baking.
- Add the sugar and cookie butter. Add 1/2 cup granulated sugar and 1/2 cup Biscoff cookie butter to the cream cheese. Beat on medium speed until everything is well combined and smooth, about 1 minute. Scrape the bowl again—I know I sound like a broken record, but scraping is what keeps your filling silky.
- Add the eggs and vanilla. Crack 2 room-temperature eggs into a small bowl first (this way, if you get any shell, you can fish it out without ruining your whole filling). Add them one at a time to the cream cheese mixture, beating on low speed after each addition just until incorporated. Then add 1 teaspoon of vanilla extract and mix until combined. Don’t overmix once the eggs are in—overbeating incorporates too much air, which can cause cracks during baking.
- Assemble and bake. Pour the cheesecake filling over the chilled crust. Use your spatula to spread it evenly to the edges. Give the pan a gentle tap on the counter to release any air bubbles. If you’re using the extra crushed cookies for topping, sprinkle them evenly over the surface now. Bake at 325°F for 35-40 minutes. The edges should look set and slightly puffed, but the center should still jiggle just a little when you gently shake the pan. That jiggle is your friend—it means the center will be creamy, not dry.
- Cool completely. Place the pan on a wire rack and let it cool to room temperature, about 1 hour. Don’t rush this—if you put warm cheesecake bars in the fridge, condensation will form on the surface and make them soggy. Once they’re at room temperature, transfer the pan to the refrigerator and chill for at least 4 hours, but overnight is truly best. This is where the magic happens—the flavors meld, the texture sets, and everything comes together.
- Slice and serve. Once fully chilled, use the parchment handles to lift the entire block of cheesecake bars out of the pan. Place it on a cutting board. Use a sharp knife (I run mine under hot water and wipe it dry between cuts for clean slices) to cut into 16 squares. Wipe the knife clean between cuts for those picture-perfect edges.
Cooking Tips & Techniques
I’ve made these bars enough times to have a few “oops” moments, which means I’ve also figured out how to avoid them. Here’s what I’ve learned:
Room temperature ingredients are not optional. I know, I know—you’re in a hurry, and the cream cheese is still cold. But cold cream cheese creates lumps that won’t smooth out, and cold eggs can cause the filling to curdle. I’ve made this mistake twice, and both times I ended up with a grainy texture that just wasn’t as good. Give your ingredients at least an hour on the counter. Set a timer if you have to.
Don’t overbake. The number one mistake people make with cheesecake bars is baking them until the center is completely set. By then, the edges are overbaked and the texture is dry. The center should still have a slight jiggle when you take it out of the oven. It will continue to set as it cools. Trust the jiggle—it’s your best indicator.
Patience with chilling is everything. I once cut into these bars after only 2 hours of chilling because I couldn’t wait. Big mistake. The bars were still soft, the slices were messy, and the texture wasn’t right. Four hours minimum, but overnight is when they really shine. The Biscoff flavor deepens, the crust firms up perfectly, and the filling becomes that ideal creamy-dense consistency.
Use a hot knife for clean cuts. Run your knife under hot water, dry it off, then make your cut. Wipe the blade clean and repeat for each cut. This gives you those beautiful, clean-edged bars that look like they came from a bakery. If you’re serving these for a special occasion, this little step makes a huge visual difference.
Watch your pan size. If you use a 9×9-inch pan instead of 8×8, your bars will be thinner and will bake faster—start checking at 25 minutes. If you use a glass pan, the baking time might be slightly longer because glass doesn’t conduct heat as efficiently as metal. Always go by the visual cues (edges set, center jiggly) rather than strict time.
Variations & Adaptations
One of the best things about this recipe is how adaptable it is. Here are some variations I’ve tried and loved:
Gluten-Free Version: Use gluten-free Biscoff-style cookies (or gluten-free graham crackers) for the crust. The cookie butter itself is naturally gluten-free, so the filling is safe. I’ve tested this with a few different gluten-free cookie brands, and they all work—just make sure your crumbs are finely ground for the best texture.
Chocolate-Biscoff Swirl: Melt 1/4 cup of dark chocolate chips and drizzle it over the filling before baking. Use a knife to swirl it gently into the cheesecake. The chocolate and Biscoff flavors are a match made in heaven—think of it as a grown-up version of a chocolate-and-caramel combo. I did this for a holiday party once, and people lost their minds.
Mini Mason Jar Version: Instead of using a baking pan, layer the crust and filling into small mason jars or ramekins. Bake for about 20-25 minutes (watch the jiggle). These make adorable individual servings for parties or gifts. I’ve done this for book club and neighbor gifts, and the presentation is just so charming.
Vegan Adaptation: Use vegan cream cheese (I like the brand Violife or Kite Hill), vegan butter, and a flax egg (1 tablespoon ground flaxseed + 3 tablespoons water, let sit for 5 minutes). The texture is slightly less dense but still delicious. I’ve only tested this once, and while it’s not identical to the original, it’s a solid alternative for plant-based eaters.
Spiced-Up Version: Add 1/2 teaspoon of cinnamon and a pinch of nutmeg to the crust mixture. This amplifies the warm, cozy notes of the Biscoff and makes the bars even more autumnal. I do this when I’m making them for fall gatherings or Thanksgiving dessert tables.
Serving & Storage Suggestions
These bars are incredibly versatile when it comes to serving. Here’s how I like to do it:
Serving Temperature: I prefer these bars straight from the fridge—cold, firm, and creamy. But if you like a softer texture, let them sit at room temperature for about 10-15 minutes before serving. They’re also fantastic slightly warmed (about 10 seconds in the microwave) with a scoop of vanilla ice cream on top. The warm-cold contrast is pure comfort.
Presentation Ideas: Dust the tops with a little powdered sugar or cocoa powder for a finished look. Add a dollop of whipped cream and a drizzle of melted Biscoff spread for extra indulgence. For a holiday touch, sprinkle crushed candy canes or toasted pecans on top. I once served these on a wooden board with fresh berries and edible flowers, and they looked like they belonged on a magazine cover.
Storage: Store leftover bars in an airtight container in the refrigerator for up to 5 days. Layer them with parchment paper between each layer to prevent sticking. The flavor actually improves after a day or two as the Biscoff and cheesecake flavors meld together.
Freezing: These bars freeze beautifully. Wrap individual bars tightly in plastic wrap, then place them in a freezer-safe bag or container. They’ll keep for up to 3 months. To thaw, transfer them to the refrigerator overnight or let them sit at room temperature for about 30 minutes. I always keep a stash in my freezer for unexpected cravings or last-minute guests.
Reheating: If you want that just-baked warmth, microwave an individual bar for about 10-15 seconds. If you’re reheating multiple bars, place them on a baking sheet and warm them in a 300°F oven for about 5-7 minutes. Just be careful not to overheat, or the cheesecake can become too soft.
Nutritional Information & Benefits
Let’s be real—these are an indulgence. But here’s a rough breakdown per bar (based on 16 servings):
- Calories: Approximately 280-320 per bar
- Fat: 18-22g (mostly from cream cheese and butter)
- Carbohydrates: 26-30g
- Protein: 4-5g
- Sugar: 18-22g
Health Highlights: The cream cheese provides a decent amount of calcium and protein (about 10% of your daily needs per serving). The Biscoff cookies contain a small amount of iron and fiber from the wheat flour. And honestly, there’s something to be said for the mental health benefits of a truly satisfying dessert—sometimes a little indulgence is exactly what you need to feel grounded and comforted.
Dietary Considerations: This recipe contains dairy (cream cheese, butter), gluten (cookies), and eggs. It can be adapted for gluten-free diets (see variations). It is not suitable for vegan diets without significant modifications. If you’re watching your sugar intake, you can reduce the sugar in the filling by 2 tablespoons without affecting the texture too much.
My Personal Take: I don’t believe in “guilt-free” desserts or pretending that cheesecake bars are health food. What I do believe is that a well-made, satisfying dessert can be part of a balanced life. These bars are rich, yes, but they’re also made with real ingredients, and one bar is genuinely enough to satisfy that sweet craving. I’d rather have one truly delicious bar than three mediocre ones. Quality over quantity, always.
Conclusion
So here’s the thing about these Biscoff cheesecake bars: they’re not complicated, they’re not fancy, and they don’t try to be anything other than what they are—a genuinely delicious, comforting dessert that makes people happy. Whether you’re making them for a holiday gathering, a cozy night in, or just because you need a little sweetness in your week, they deliver every single time.
I love this recipe because it’s forgiving. It doesn’t demand perfection. It lets you crush cookies by hand if you want, doesn’t care if your cream cheese isn’t perfectly softened, and rewards you with something that tastes like you spent hours in the kitchen when really, you didn’t. That’s my favorite kind of recipe—the one that makes you look good without making you work for it.
I’d love to hear how these turn out for you! Did you try any of the variations? Did your family fight over the last bar? (Mine did.) Drop a comment below and let me know—your feedback and adaptations are what make this community so special. And if you loved them, share this recipe with a friend who needs a little comfort food in their life. Happy baking!
Frequently Asked Questions
Can I use a different cookie for the crust?
Absolutely. Graham crackers, vanilla wafers, or even shortbread cookies work well. Just keep in mind that the Biscoff flavor is what makes these bars unique, so if you swap the cookies, you’ll lose that signature taste. If you’re using a less flavorful cookie, consider adding a pinch of cinnamon and brown sugar to the crust to compensate.
Why did my cheesecake filling crack?
Cracks usually happen from overbaking or overmixing. Make sure you don’t bake past the “slight jiggle in the center” stage, and avoid overbeating the eggs. Also, letting the bars cool gradually (room temperature first, then fridge) helps prevent sudden temperature changes that cause cracking. If they do crack, don’t worry—a little whipped cream or crushed cookies on top hides it perfectly.
Can I make these bars ahead of time?
Yes, and I actually recommend it. These bars taste even better after a day or two in the fridge because the flavors have time to meld. You can make them up to 3 days in advance and store them in the refrigerator. They’re perfect for holiday prep or party planning.
How do I know when the bars are done baking?
The edges should look set and slightly puffed, but the center should still have a gentle jiggle when you shake the pan. Think of it like Jell-O—it should wobble, not ripple. If the center looks completely firm, it’s overbaked. Trust the jiggle test over the timer.
Can I double this recipe for a larger pan?
Yes! To make a 9×13-inch pan, double all the ingredients. The baking time will be similar (start checking at 35 minutes), but the bars will be slightly thicker. You may need to add 5-10 minutes to the baking time. Just remember the jiggle test—it’s your most reliable guide.
Pin This Recipe!
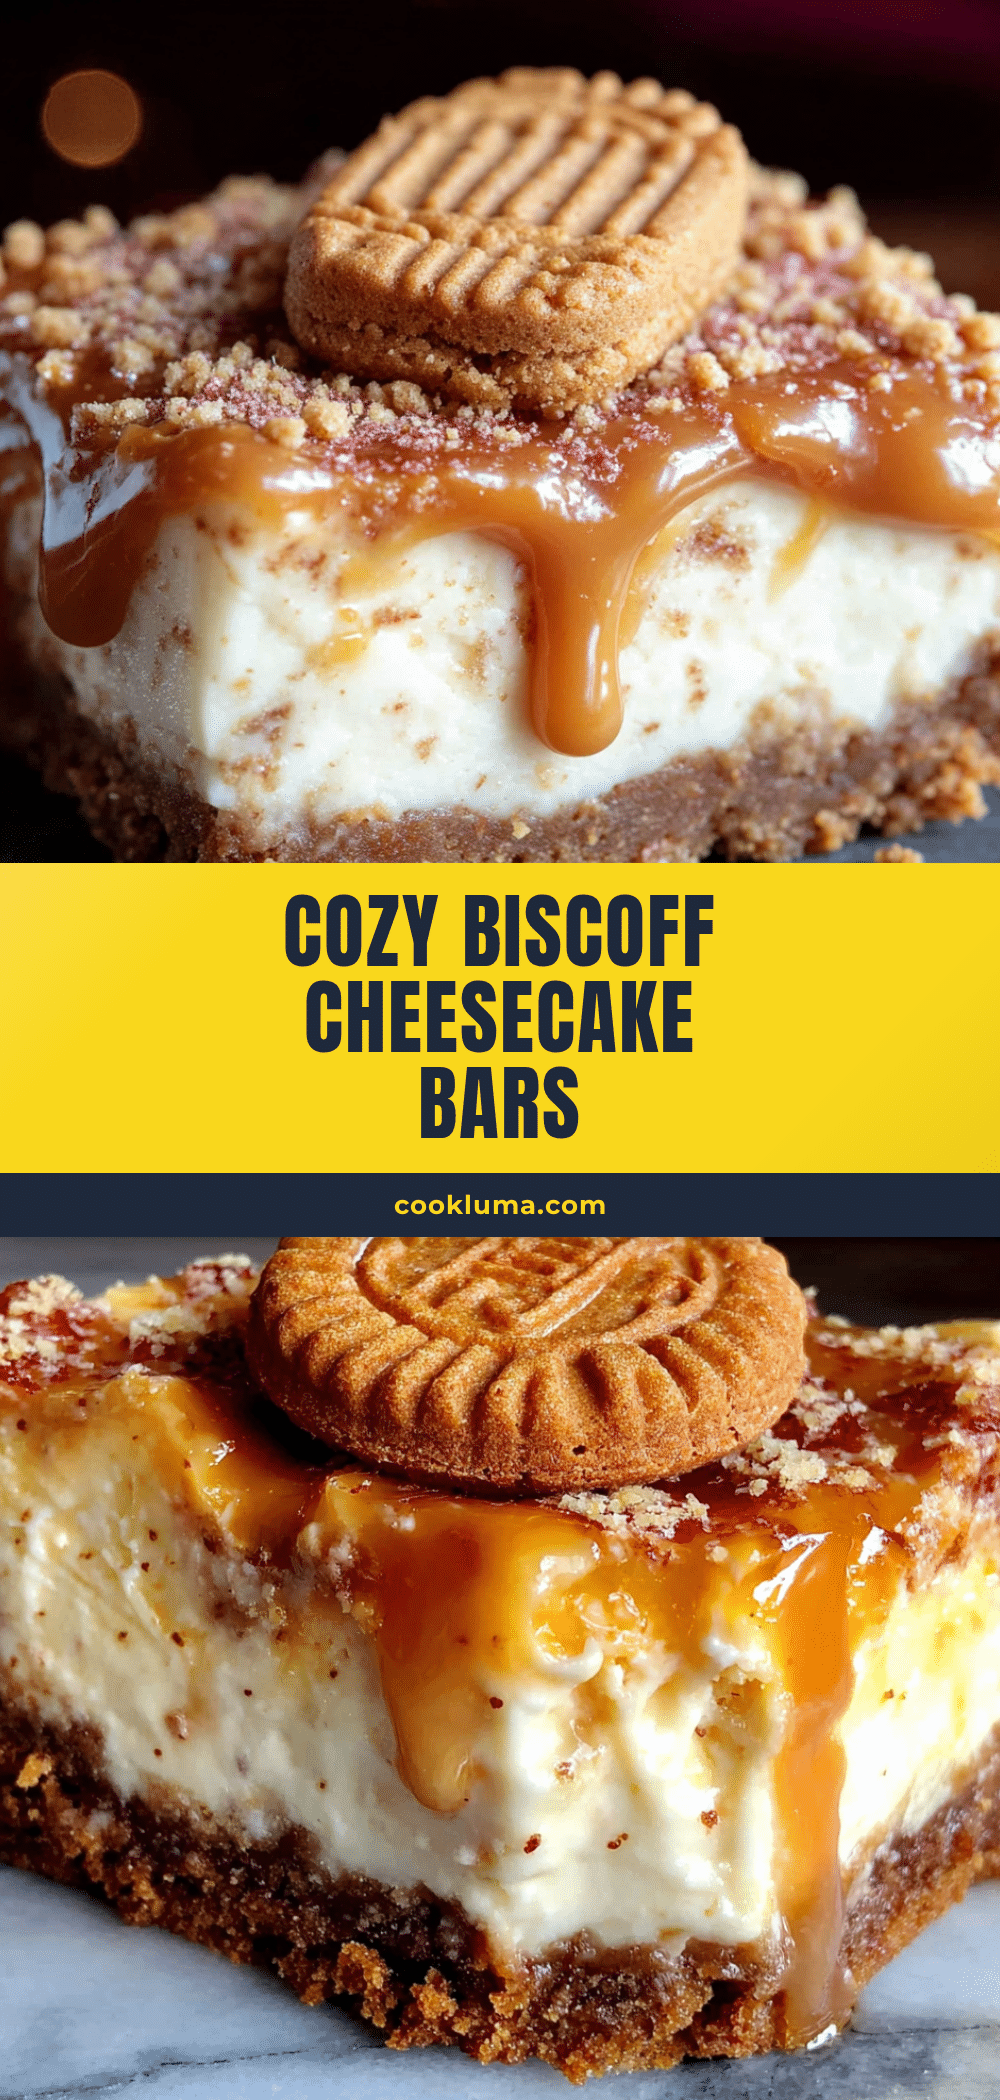
Cozy Biscoff Cheesecake Bars: Easy 5-Ingredient Recipe
These Biscoff cheesecake bars are a quick and easy dessert with a crunchy cookie crust and creamy, spiced filling. Made with just five main ingredients, they’re perfect for cozy nights and crowd-pleasing gatherings.
- Prep Time: 20 minutes
- Cook Time: 35-40 minutes
- Total Time: 4 hours 55 minutes (includes chilling)
- Yield: 16 servings 1x
- Category: Dessert
- Cuisine: American
Ingredients
- 2 cups Biscoff cookies, crushed
- 6 tablespoons unsalted butter, melted
- 2 tablespoons granulated sugar
- 16 ounces cream cheese, softened
- 1/2 cup Biscoff cookie butter (creamy)
- 1/2 cup granulated sugar
- 2 large eggs, room temperature
- 1 teaspoon vanilla extract
- A handful Biscoff cookies, roughly crushed (for topping, optional)
Instructions
- Preheat oven to 325°F (163°C). Line an 8×8-inch baking pan with parchment paper, leaving overhang on two opposite sides. Lightly spray with non-stick spray.
- In a food processor or zip-top bag, crush 2 cups of Biscoff cookies into fine crumbs. Transfer to a medium bowl. Add 6 tablespoons melted butter and 2 tablespoons granulated sugar. Stir until evenly moistened (like wet sand).
- Press the crumb mixture firmly and evenly into the bottom of the prepared pan. Refrigerate while making the filling.
- In a large bowl, beat 16 ounces softened cream cheese with an electric mixer on medium speed until smooth and fluffy, about 2 minutes. Scrape down the bowl.
- Add 1/2 cup granulated sugar and 1/2 cup Biscoff cookie butter. Beat on medium speed until well combined and smooth, about 1 minute. Scrape the bowl again.
- Add 2 room-temperature eggs one at a time, beating on low speed after each addition just until incorporated. Add 1 teaspoon vanilla extract and mix until combined. Do not overmix.
- Pour the cheesecake filling over the chilled crust. Spread evenly. Tap the pan gently on the counter to release air bubbles. Sprinkle extra crushed cookies on top if desired.
- Bake at 325°F for 35-40 minutes. Edges should be set and slightly puffed, but the center should still jiggle slightly when shaken.
- Cool the pan on a wire rack to room temperature, about 1 hour. Then refrigerate for at least 4 hours, preferably overnight.
- Use parchment handles to lift the block out of the pan. Place on a cutting board. Use a sharp knife (run under hot water and wiped dry between cuts) to cut into 16 squares.
Notes
Room temperature ingredients are crucial for a smooth texture. Do not overbake; the center should jiggle slightly. Chill for at least 4 hours, preferably overnight, for best results. Use a hot knife for clean cuts.
Nutrition
- Serving Size: 1 bar
- Calories: 300
- Sugar: 20
- Sodium: 220
- Fat: 20
- Saturated Fat: 11
- Carbohydrates: 28
- Fiber: 1
- Protein: 5
Keywords: Biscoff cheesecake bars, easy cheesecake bars, 5-ingredient dessert, Biscoff dessert, cookie butter cheesecake


