My neighbor Carol had claimed for years that she hated butternut squash. “Too sweet,” she’d say, waving her hand whenever I mentioned it. “Tastes like dessert pretending to be dinner.” I’d nod and move on, because honestly, who has the energy to argue about squash? But last Thanksgiving, I brought this mac and cheese to the potluck at the community center. I didn’t make a big deal about it — just set the dish down with the rest of the food and went to grab a drink. When I came back, Carol was standing at my dish, spoon in hand, scraping the last bit of cheese sauce from the edges of the baking dish. She caught me watching and froze, caught red-handed with a guilty look. “This is the one with the squash, isn’t it?” she asked. I just smiled.
That moment summed up everything I love about this recipe. It sneaks up on people. They take a bite expecting ordinary mac and cheese, and instead they get this creamy, velvety sauce that somehow tastes richer and more satisfying than the classic version. The squash doesn’t scream for attention — it just quietly makes everything better. Maybe you’ve been there, trying to get someone to eat more vegetables without turning dinner into a negotiation. This is the dish that ends those negotiations for good.
I keep making this recipe because it solves the problem I face every time I host: how do I serve something that feels indulgent and special but also makes me feel good about what I’m putting on the table? This mac and cheese does both. It’s the kind of dish that makes people close their eyes on the first bite, and then ask for the recipe before they’ve even finished their second helping. Carol asked for it three times before I finally wrote it down for her.
Why You’ll Love This Recipe
Let me tell you why this version of mac and cheese has earned a permanent spot in my hosting rotation. I’ve tested this recipe more times than I can count — through dinner parties, potlucks, and quiet weeknights when I needed something warm and comforting. Every time, it delivers.
- Quick & Easy : Comes together in about 45 minutes from start to finish, and most of that time is hands-off while the squash roasts. Perfect for when you’re juggling appetizers and drinks before guests arrive.
- Simple Ingredients : No fancy cheese counter required. Sharp cheddar and a bit of Parmesan do the heavy lifting, and the squash is the secret weapon you probably already have in your kitchen.
- Perfect for Hosting : This dish scales beautifully for a crowd, reheats like a dream, and looks stunning on a buffet table. Your guests will think you spent hours on it.
- Crowd-Pleaser : I’ve served this to kids who claim they don’t like vegetables and adults who consider themselves food snobs. Empty dish, every single time.
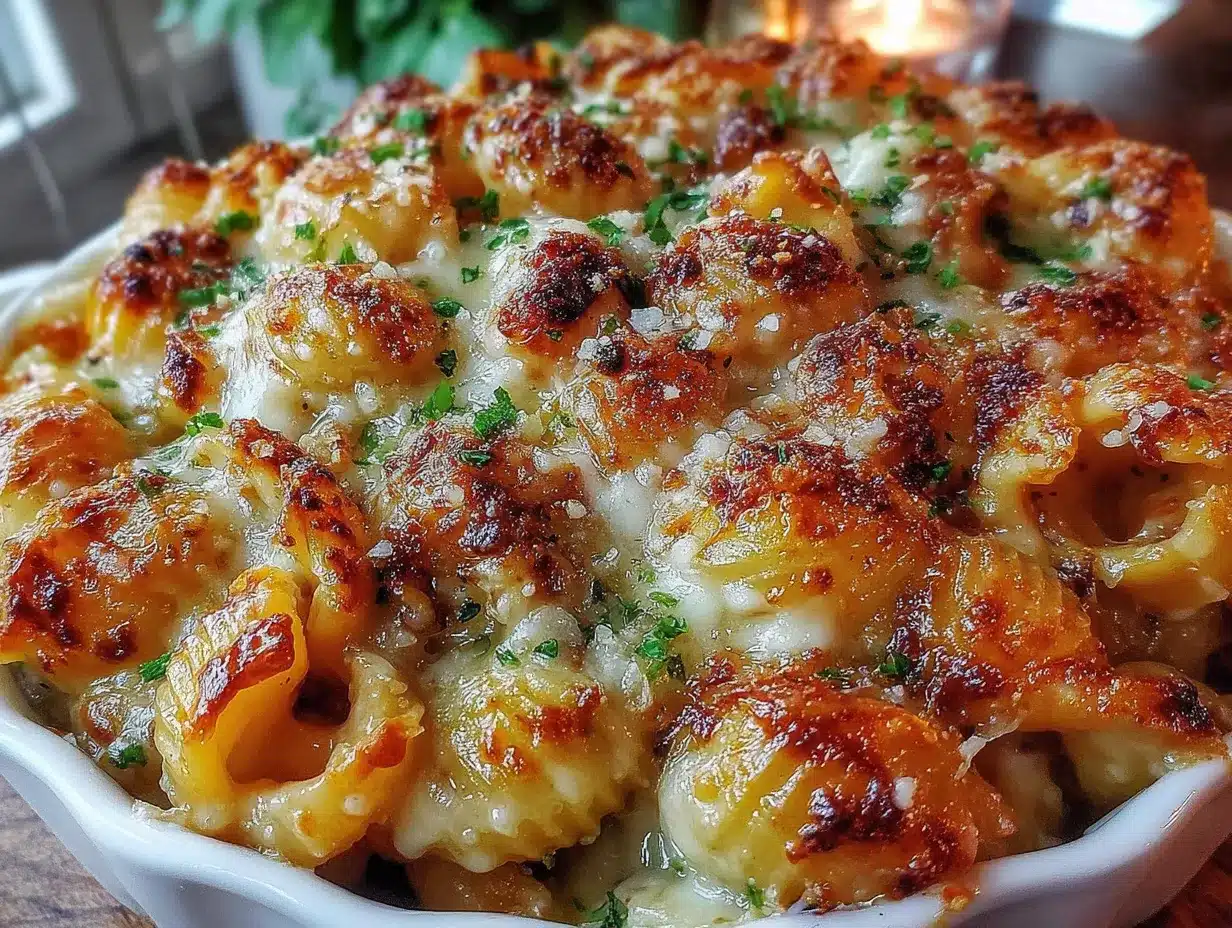
- Unbelievably Delicious : The texture is what gets people — silky, creamy, with that perfect cheese pull that makes mac and cheese so satisfying. The squash adds a subtle sweetness that balances the sharp cheddar beautifully.
What makes this recipe different from all the other butternut squash mac and cheese recipes out there? It’s the method. Instead of boiling the squash and mashing it into the sauce (which can make things watery), I roast the squash first. Roasting concentrates the flavor and gives you a much creamier texture. Then I blend it into the cheese sauce until it’s completely smooth. No one will ever guess there’s squash in there unless you tell them. And honestly, I usually don’t tell them until after they’ve cleaned their plate.
This isn’t just another mac and cheese recipe. It’s the one that makes you feel like a kitchen genius without actually having to work that hard. It’s comfort food that happens to have a vegetable hidden inside, and that’s a win-win in my book.
What Ingredients You Will Need
This recipe uses simple, wholesome ingredients to deliver bold flavor and satisfying texture without the fuss. Most of these are pantry staples, and the ones that aren’t are easy to find at any grocery store.
For the Butternut Squash Puree
- 1 medium butternut squash (about 2-3 pounds), peeled, seeded, and cut into 1-inch cubes
- 2 tablespoons olive oil
- 1/2 teaspoon salt
- 1/4 teaspoon black pepper
- 1/4 teaspoon garlic powder
For the Cheese Sauce
- 3 tablespoons unsalted butter
- 3 tablespoons all-purpose flour
- 2 cups whole milk, warmed (I use whole milk for the creamiest result, but 2% works too)
- 1 cup heavy cream (adds richness — you can substitute with half-and-half if needed)
- 2 cups sharp cheddar cheese, shredded (I recommend Cabot or Tillamook for best melting)
- 1/2 cup Parmesan cheese, grated (the real stuff, not the green can)
- 1 teaspoon Dijon mustard (trust me on this — it brightens the whole sauce)
- 1/2 teaspoon smoked paprika
- 1/4 teaspoon nutmeg, freshly grated if possible
- Salt and pepper to taste
For the Pasta
- 1 pound elbow macaroni (or any short pasta — cavatappi, shells, or rotini all work great)
- Salt for the pasta water (don’t skimp here — this is your only chance to season the pasta itself)
For the Topping (Optional but Recommended)
- 1/2 cup panko breadcrumbs
- 2 tablespoons butter, melted
- 1/4 cup Parmesan cheese, grated
- 2 tablespoons fresh parsley, chopped (for color)
A few notes on ingredients: For the sharp cheddar, buy a block and shred it yourself. Pre-shredded cheese has anti-caking agents that prevent smooth melting, and you’ll end up with a grainy sauce. I learned this the hard way when I was rushing before a dinner party and used bagged cheese. The sauce was clumpy and sad. Never again.
If you want to swap the heavy cream for something lighter, use evaporated milk instead of regular milk. It has a thicker consistency that mimics cream without the extra fat. For a dairy-free version, use unsweetened oat milk and dairy-free cheese shreds. The texture won’t be quite as creamy, but it still tastes wonderful.
Equipment Needed
Nothing too fancy here. Here’s what you’ll need:
- Large baking sheet (for roasting the squash)
- Large pot (for boiling pasta)
- Medium saucepan (for making the cheese sauce)
- Blender or food processor (for pureeing the roasted squash)
- Box grater (for shredding cheese — please don’t use pre-shredded)
- 9×13-inch baking dish (for the final bake)
- Whisk (for smoothing out the sauce)
- Wooden spoon or spatula
If you don’t have a blender, you can mash the roasted squash with a potato masher or fork. It won’t be as smooth, but it’ll still work. I’ve done this when my blender was in the dishwasher, and the sauce had a slightly more rustic texture that some people actually preferred. So don’t let a missing blender stop you.
For the baking dish, any 9×13-inch dish works. Glass, ceramic, or metal — they all do the job. If you’re using a metal pan, just keep an eye on the bake time since metal heats up faster. My grandmother’s old Pyrex dish is my go-to, and it’s never let me down.
One tip: if you’re making this for a party, use a disposable aluminum pan for easy cleanup. No one wants to scrub a baked-on cheese dish at midnight.
Preparation Method
- Preheat your oven to 400°F (200°C). Line a large baking sheet with parchment paper for easy cleanup.
- Prepare the squash. Peel the butternut squash with a vegetable peeler, cut it in half lengthwise, and scoop out the seeds. Cut the flesh into 1-inch cubes. Toss the cubes with olive oil, salt, pepper, and garlic powder on the baking sheet. Spread them in a single layer — don’t crowd them, or they’ll steam instead of roast.
- Roast the squash for 25-30 minutes. Flip the cubes halfway through. You’ll know they’re done when they’re tender enough to pierce easily with a fork and the edges are starting to caramelize. The smell at this point is incredible — sweet and nutty.
- While the squash roasts, start your pasta water. Fill your large pot with water, add a generous tablespoon of salt (the water should taste like the sea), and bring it to a boil. Cook the pasta according to package directions until al dente. For elbow macaroni, that’s usually about 8 minutes. Drain the pasta and set it aside. Don’t rinse it — you want the starch to help the sauce stick.
- Make the squash puree. Transfer the roasted squash to a blender or food processor. Add about 1/2 cup of the warm milk and blend until completely smooth. This should take about 30-60 seconds. Scrape down the sides as needed. Set the puree aside.
- Start the cheese sauce. In a medium saucepan over medium heat, melt the butter. Once it’s bubbling, whisk in the flour and cook for 1-2 minutes, stirring constantly. This is called a roux, and it’s the foundation of your sauce. You’re looking for a pale golden color — don’t let it brown.
- Add the milk and cream. Slowly pour in the warm milk and heavy cream while whisking continuously. Keep whisking until the mixture thickens, about 3-5 minutes. It should coat the back of a spoon. If you see lumps, don’t panic — just keep whisking and they’ll smooth out.
- Incorporate the squash puree. Add the butternut squash puree to the sauce and whisk until fully combined. The sauce will turn a beautiful golden-orange color. This is where the magic happens.
- Add the cheese and seasonings. Reduce the heat to low. Add the shredded cheddar, Parmesan, Dijon mustard, smoked paprika, and nutmeg. Stir until the cheese is fully melted and the sauce is smooth. Taste it and adjust salt and pepper as needed. Be careful with salt — the cheese already adds quite a bit.
- Combine the pasta and sauce. Pour the cheese sauce over the cooked pasta and stir until every piece is coated. At this point, you could stop and serve it immediately for a stovetop version. But for the full experience, let’s finish it in the oven.
- Assemble the dish. Transfer the mac and cheese to your greased 9×13-inch baking dish. Spread it evenly.
- Make the topping. In a small bowl, combine the panko breadcrumbs, melted butter, Parmesan, and parsley. Sprinkle this mixture evenly over the top of the mac and cheese.
- Bake at 375°F (190°C) for 20-25 minutes. You’re looking for a golden, crispy topping and bubbly edges. Let it rest for 5-10 minutes before serving. This resting time is crucial — it lets the sauce set up so you get clean, beautiful servings instead of a soupy mess.
One thing I always forget to mention: when you’re mixing the pasta and sauce, don’t be shy. Use a big spoon and really fold everything together. You want every piece of pasta to be completely coated. I’ve had friends tell me their mac and cheese was dry, and it’s almost always because they didn’t mix thoroughly enough.
Cooking Tips & Techniques
Let me share some things I’ve learned the hard way so you don’t have to make the same mistakes.
Don’t overcook the pasta. This is probably the most common mistake I see. Cook your pasta to al dente — it should still have a little bite to it. Why? Because it’s going to cook again in the oven. If you start with fully cooked pasta, you’ll end up with mushy mac and cheese. I learned this lesson when I made a batch for a potluck and ended up with something closer to baby food. Not my finest moment.
Warm your milk before adding it to the roux. Cold milk will seize up the roux and give you lumps. I microwave mine for about 60 seconds before adding it. This one small step makes a huge difference in the smoothness of your sauce.
Low and slow for the cheese. When you add the cheese, keep the heat on low. High heat can cause the cheese to separate and become greasy. I once rushed this step because I was hungry and impatient, and the sauce turned into this oily, stringy mess. Patience pays off here.
Toast your breadcrumbs. For extra crunch, toast the panko in a dry pan for 2-3 minutes before mixing them with the butter. This gives you that golden, crispy topping that makes everyone fight over the corner pieces.
Make it ahead of time. This is my favorite hosting hack. Assemble the entire dish up to the point of baking, cover it, and refrigerate for up to 24 hours. When you’re ready to serve, add 10-15 minutes to the bake time. Your future self will thank you.
Double the recipe for a crowd. This recipe scales perfectly. Just use a larger baking dish or two 9×13-inch pans. The bake time stays roughly the same since you’re just cooking more of it.
The secret ingredient is nutmeg. I know it sounds weird, but a pinch of nutmeg does something magical to cheese sauce. It doesn’t taste like nutmeg at all — it just makes the cheese taste cheesier. Try it once, and you’ll never skip it again.
Variations & Adaptations
One of the best things about this recipe is how flexible it is. Here are some variations I’ve tried and loved:
Add some protein. Cooked and crumbled bacon, shredded rotisserie chicken, or Italian sausage all work beautifully. I made this with bacon and caramelized onions for a game day party, and it disappeared in minutes.
Go gluten-free. Use gluten-free pasta and swap the all-purpose flour for a 1:1 gluten-free flour blend. The sauce comes out just as creamy. I’ve tested this with several brands, and Cup4Cup works the best for the roux.
Make it vegetarian-friendly. It already is, actually. But if you want to add more vegetables, try folding in steamed broccoli, roasted cauliflower, or sautéed mushrooms. The squash flavor pairs beautifully with roasted vegetables.
Spice it up. Add 1/4 teaspoon of cayenne pepper or a diced jalapeño to the cheese sauce for a kick. I did this for a friend who loves heat, and it turned into her go-to comfort food.
Try different cheeses. While sharp cheddar is my favorite, you can experiment with Gruyère, fontina, or smoked gouda. Each one gives the sauce a different personality. Smoked gouda with the roasted squash is absolutely divine.
Skip the baking step. If you’re short on time, just mix the pasta and sauce and serve it straight from the stovetop. It won’t have that crispy topping, but it’ll still be delicious. I do this on busy weeknights when I need comfort food fast.
Make it dairy-free. Use unsweetened oat milk, dairy-free butter, and shredded vegan cheese. The texture won’t be as creamy, but the flavor is still wonderful. My sister-in-law is dairy-free, and this is the version I make when she comes over.
Serving & Storage Suggestions
This mac and cheese is versatile enough for any occasion. Here’s how to serve and store it like a pro.
Serving temperature and presentation. Serve it hot, straight from the oven. Let it rest for 5-10 minutes so it sets up properly. Garnish with fresh parsley or chives for a pop of color. For dinner parties, I like to serve it in a beautiful ceramic baking dish right at the table. The golden topping and bubbly edges make for a stunning presentation.
What to serve alongside. This dish is hearty enough to be a main course, especially with a simple green salad dressed with lemon vinaigrette. The acidity cuts through the richness beautifully. For a holiday table, it pairs wonderfully with roasted turkey, ham, or a simple roast chicken. I also love serving it with roasted Brussels sprouts or a crisp coleslaw for contrast.
Storage instructions. Leftovers keep well in an airtight container in the refrigerator for 3-4 days. The flavor actually gets better as it sits — the squash and cheese meld together even more.
Freezing. This mac and cheese freezes beautifully. Assemble the dish completely but don’t bake it. Wrap it tightly in plastic wrap and then foil, and freeze for up to 3 months. When you’re ready to bake, thaw it in the refrigerator overnight and bake as directed, adding 10-15 minutes to the bake time.
Reheating. The best way to reheat is in the oven at 350°F (175°C) for 15-20 minutes. Add a splash of milk if it seems dry. The microwave works in a pinch, but the texture won’t be as good. I’ve found that reheating individual portions in a small skillet with a splash of milk gives you that creamy texture back.
How flavors develop over time. This is one of those dishes that tastes even better the next day. The flavors have time to meld and deepen. If you’re planning ahead, I actually recommend making it a day in advance. Your guests will never know, and you’ll have one less thing to worry about on the day of your party.
Nutritional Information & Benefits
I’m not a nutritionist, but I can tell you what’s in this dish and why I feel good about serving it to my family and friends.
Estimated nutritional values per serving (based on 8 servings):
- Calories: 520
- Protein: 22g
- Fat: 28g
- Carbohydrates: 48g
- Fiber: 4g
- Sugar: 8g
Health benefits of key ingredients. Butternut squash is packed with vitamin A, vitamin C, and fiber. It supports eye health, immune function, and digestion. The sharp cheddar adds calcium and protein. So while this isn’t exactly health food, it’s a more nutrient-dense version of the classic.
Dietary considerations. This recipe is vegetarian-friendly. For gluten-free, use gluten-free pasta and flour. For a lower-carb option, substitute the pasta with steamed cauliflower florets. I’ve tried this, and while it’s not the same as mac and cheese, it’s a satisfying alternative that scratches the same itch.
Potential allergens. This recipe contains dairy and gluten. It also contains nightshades (paprika). If you have sensitivities, check the substitution notes in the variations section.
My personal wellness perspective. I believe in balance. This mac and cheese isn’t something I eat every day, but it’s a dish I feel good about serving because it has real food in it — vegetables, good cheese, and whole ingredients. It’s comfort food that nourishes you, and that’s a beautiful thing.
Conclusion
This cheesy butternut squash mac and cheese has become my go-to for every gathering, from casual weeknight dinners to holiday feasts. It’s the dish that proves you don’t have to choose between healthy and delicious. The roasted squash adds creaminess, sweetness, and a whole lot of nutrition without sacrificing any of the comfort-food satisfaction you’re craving.
I love this recipe because it makes me look like a kitchen genius when really, it’s just smart cooking. The squash does the heavy lifting, the cheese brings the flavor, and you get all the credit. It’s the kind of recipe that becomes part of your permanent rotation — the one your friends and family request again and again.
So go ahead and make it for your next dinner party. Watch the faces of your guests as they take that first bite. And when they ask for the recipe, just smile and tell them it’s my little secret. Or better yet, share it with them. Good food is meant to be shared.
I’d love to hear how it turns out for you. Drop a comment below and let me know if you tried any variations, or if this became a hit at your table. And if you’re looking for more crowd-pleasing recipes, check out my creamy Tuscan chicken — it’s another one that disappears fast at parties.
Frequently Asked Questions
Can I use frozen butternut squash instead of fresh?
Absolutely. Frozen butternut squash cubes work perfectly. Roast them straight from frozen — just add 5-10 minutes to the roasting time and drain any excess liquid before blending. The flavor is slightly less concentrated than fresh, but it’s a great time-saver.
Why did my cheese sauce turn out grainy?
This usually happens for two reasons: either you used pre-shredded cheese (which has anti-caking agents) or you overheated the sauce. Always shred your own cheese from a block, and keep the heat on low when melting it into the sauce. If it does get grainy, you can try blending it with an immersion blender to smooth it out.
Can I make this recipe vegan?
Yes, with a few swaps. Use unsweetened oat milk or cashew milk for the base, dairy-free butter, and vegan cheese shreds. The texture won’t be as creamy as the dairy version, but the flavor is still wonderful. I recommend adding a tablespoon of nutritional yeast for extra cheesy flavor.
How do I prevent the mac and cheese from drying out when reheating?
Add a splash of milk or cream before reheating. The pasta absorbs liquid as it sits, so a little extra moisture brings it back to life. Reheat in the oven at 350°F for 15-20 minutes, or in a skillet on the stovetop with a lid on. The microwave works but can make it rubbery.
Can I use a different type of squash?
Definitely. Kabocha, acorn squash, or even pumpkin all work well. Each one brings a slightly different sweetness and texture. Kabocha is especially creamy and works beautifully. Just make sure to roast it the same way — that caramelization is key to the flavor.
Pin This Recipe!
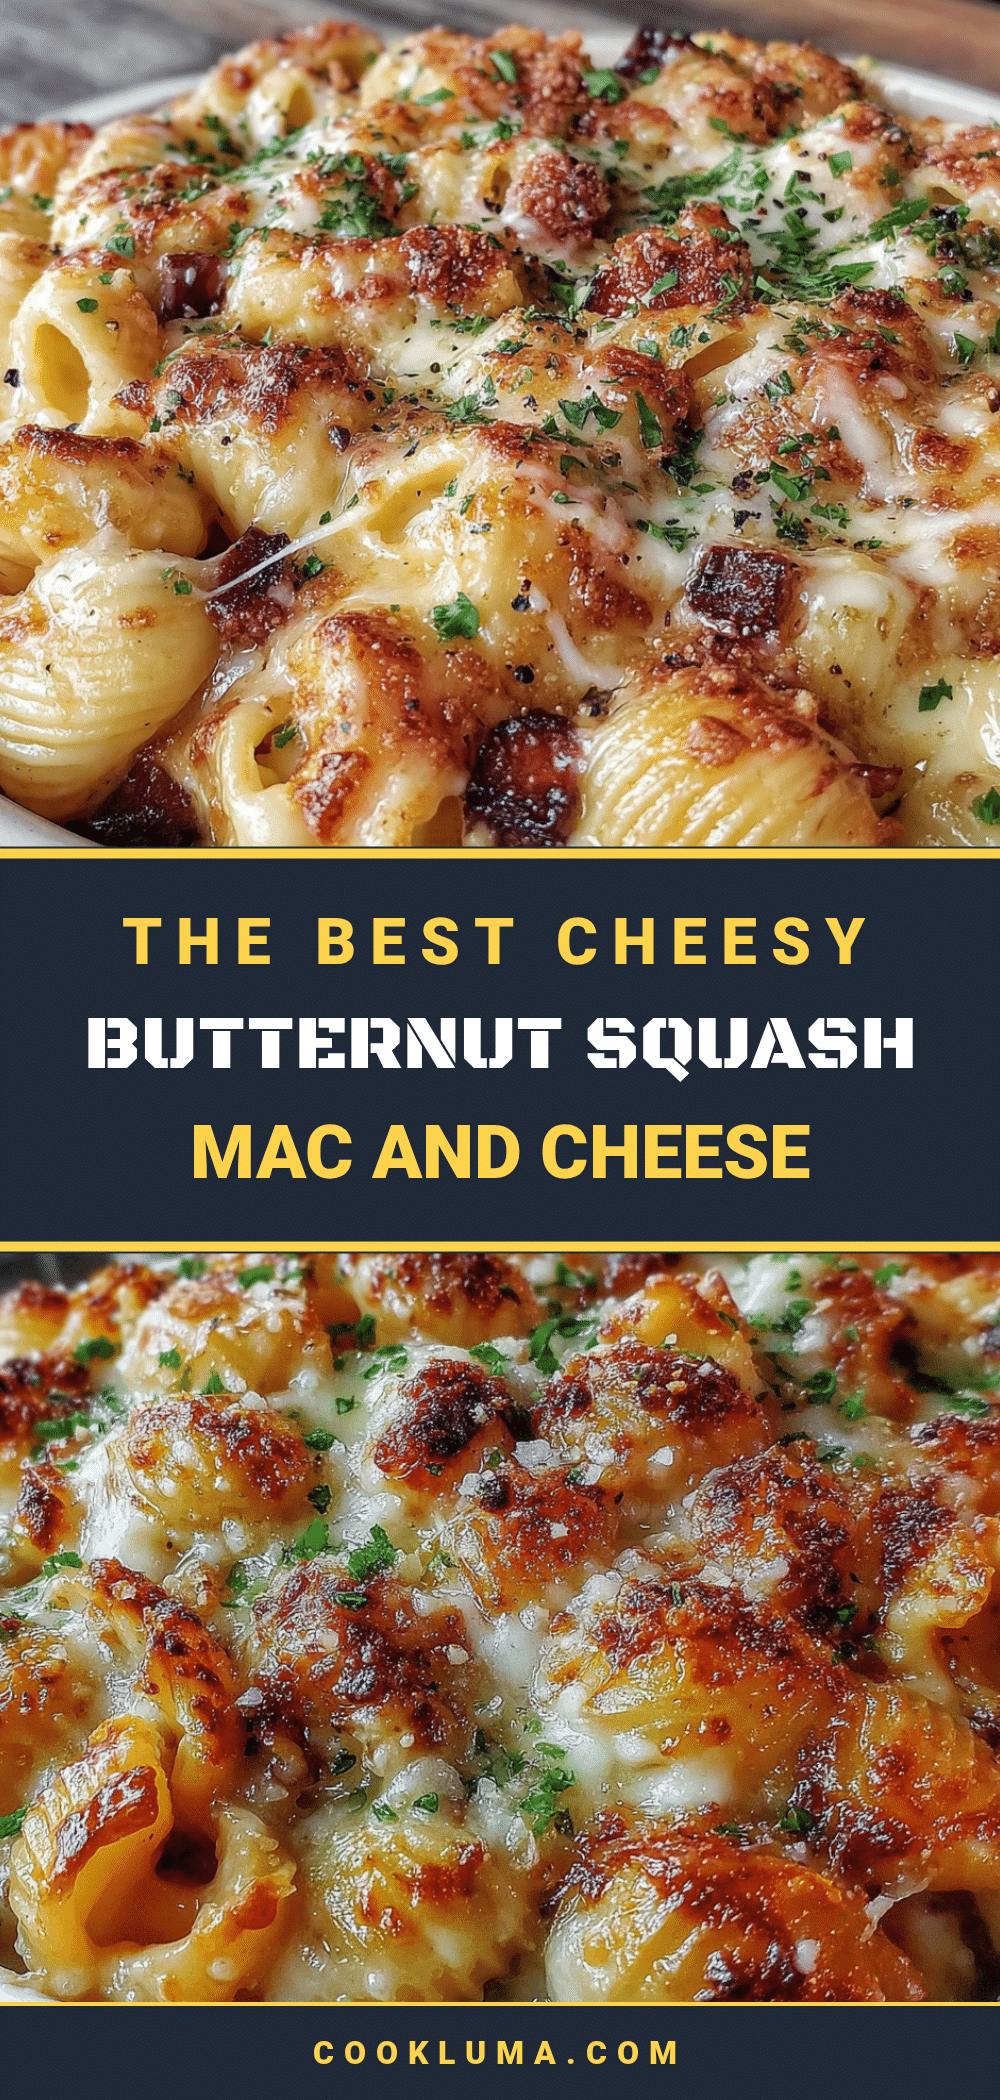
The Best Cheesy Butternut Squash Mac and Cheese
This creamy, velvety mac and cheese sneaks roasted butternut squash into a rich cheese sauce for a healthier twist on the classic. It’s a crowd-pleaser that even squash skeptics will love.
- Prep Time: 15 minutes
- Cook Time: 45 minutes
- Total Time: 1 hour
- Yield: 8 servings 1x
- Category: Main Course
- Cuisine: American
Ingredients
- 1 medium butternut squash (about 2–3 pounds), peeled, seeded, and cut into 1-inch cubes
- 2 tablespoons olive oil
- 1/2 teaspoon salt
- 1/4 teaspoon black pepper
- 1/4 teaspoon garlic powder
- 3 tablespoons unsalted butter
- 3 tablespoons all-purpose flour
- 2 cups whole milk, warmed
- 1 cup heavy cream
- 2 cups sharp cheddar cheese, shredded
- 1/2 cup Parmesan cheese, grated
- 1 teaspoon Dijon mustard
- 1/2 teaspoon smoked paprika
- 1/4 teaspoon nutmeg, freshly grated if possible
- Salt and pepper to taste
- 1 pound elbow macaroni
- Salt for the pasta water
- 1/2 cup panko breadcrumbs
- 2 tablespoons butter, melted
- 1/4 cup Parmesan cheese, grated
- 2 tablespoons fresh parsley, chopped
Instructions
- Preheat your oven to 400°F (200°C). Line a large baking sheet with parchment paper.
- Prepare the squash: Peel the butternut squash, cut in half lengthwise, scoop out seeds, and cut into 1-inch cubes. Toss with olive oil, salt, pepper, and garlic powder on the baking sheet. Spread in a single layer.
- Roast the squash for 25-30 minutes, flipping halfway through, until tender and edges are caramelized.
- While squash roasts, bring a large pot of salted water to a boil. Cook pasta according to package directions until al dente. Drain and set aside (do not rinse).
- Transfer roasted squash to a blender or food processor. Add 1/2 cup of the warm milk and blend until smooth, about 30-60 seconds. Set aside.
- In a medium saucepan over medium heat, melt the butter. Whisk in the flour and cook for 1-2 minutes, stirring constantly, until pale golden.
- Slowly pour in the warm milk and heavy cream while whisking continuously. Cook until thickened, about 3-5 minutes, until it coats the back of a spoon.
- Add the butternut squash puree and whisk until fully combined. The sauce will turn golden-orange.
- Reduce heat to low. Add shredded cheddar, Parmesan, Dijon mustard, smoked paprika, and nutmeg. Stir until cheese is melted and sauce is smooth. Season with salt and pepper to taste.
- Pour the cheese sauce over the cooked pasta and stir until every piece is coated.
- Transfer the mac and cheese to a greased 9×13-inch baking dish and spread evenly.
- In a small bowl, combine panko breadcrumbs, melted butter, Parmesan, and parsley. Sprinkle over the top.
- Bake at 375°F (190°C) for 20-25 minutes, until golden and bubbly. Let rest for 5-10 minutes before serving.
Notes
For best results, shred your own cheese from a block to avoid anti-caking agents. Warm the milk before adding to the roux to prevent lumps. Let the dish rest after baking for clean servings. Can be assembled up to 24 hours in advance and refrigerated before baking.
Nutrition
- Serving Size: 1 serving (about 1/8
- Calories: 520
- Sugar: 8
- Sodium: 680
- Fat: 28
- Saturated Fat: 16
- Carbohydrates: 48
- Fiber: 4
- Protein: 22
Keywords: butternut squash mac and cheese, healthy mac and cheese, vegetarian mac and cheese, comfort food, butternut squash recipe


