I was standing in the baking aisle of a grocery store last October, trying to decide between black gel food coloring and a tube of black frosting, when a kid ran past me trailing the scent of cheap vanilla extract and artificial butter. And suddenly I was ten years old, sitting on a cold linoleum floor in Mrs. Kowalski’s house two doors down, watching her pipe ghost shapes onto a sheet of wax paper. She had these hands that moved like they knew something mine didn’t—steady, patient, sure. The ghosts were plump, almost friendly, with crooked little mouths that looked like they were laughing. I remember thinking, I want to make something that makes people smile like that. I never saw her again after that Halloween. She moved away the following spring. But every year when October rolls around, I find myself chasing that exact feeling—the one where a cupcake isn’t just a cupcake, but a tiny edible ghost that makes a room full of people light up. And honestly? These ghost cupcakes are the closest I’ve ever gotten.
I’ve made these for six Halloweens now, and let me tell you—they have never, not once, failed to get a reaction. The first time I brought them to my friend Marco’s costume party, I was nervous. I mean, there were people there in full monster makeup and elaborate skeleton costumes, and here I was with a tray of cupcakes that looked like they belonged on a children’s cartoon. But the thing is, people love them. Grown adults in vampire fangs were elbowing each other to grab one. Maybe you’ve been there—you spend hours on a complicated dish for a party, and everyone politely nibbles. Then you bring out something simple and fun, and suddenly you’re the hero of the evening. That’s these cupcakes.
What makes them work isn’t complicated frosting techniques or expensive ingredients. It’s the contrast—the dark, rich chocolate cake underneath, the creamy white ghost on top, the little black eyes that give each ghost its own personality. I messed up the first batch pretty badly, I’m not gonna lie. The ghosts looked more like sad blobs than anything spooky. But that’s the beauty of this recipe: even the mistakes are cute. And once you get the hang of it, you can crank out two dozen of these in about half an hour. For a party host, that’s gold.
Why You’ll Love This Recipe
Let me be real with you—I’ve tested a lot of Halloween cupcake recipes over the years, and most of them are either too fiddly or too bland. These ghost cupcakes hit that sweet spot where they’re impressive enough to get compliments but simple enough that you’re not stuck in the kitchen while your guests are having fun. Here’s what makes them stand out:
- Quick & Easy : From start to finish, you’re looking at about 30 minutes of active time. The cake batter comes together in one bowl, and the ghost decoration takes maybe 10 minutes per batch. You can literally make these between answering the door for trick-or-treaters.
- Simple Ingredients : Nothing weird here. Butter, sugar, eggs, flour, cocoa powder—the usual suspects. The ghosts are made with store-bought marshmallows and white chocolate, so you don’t need any fancy piping equipment or specialty baking supplies.
- Perfect for Halloween Parties : These are designed for a crowd. The recipe scales beautifully, and the ghosts stay cute even after sitting out for a few hours. No melting, no drooping, no stress.
- Crowd-Pleaser : I’ve served these at parties with kids, adults, and everyone in between. The chocolate cake is rich enough to satisfy serious dessert lovers, and the ghost decoration is playful enough to make everyone smile. They disappear fast.
- Unbelievably Delicious : Here’s the thing—a lot of decorated cupcakes sacrifice flavor for looks. Not these. The cake is moist, deeply chocolatey, and has that perfect tender crumb. The white chocolate coating adds a creamy sweetness that complements the dark cake beautifully.
What makes this recipe different from every other ghost cupcake you’ll find online is the technique. I spent three Halloweens perfecting the marshmallow ghost method—using melted white chocolate as glue, angling the marshmallows just right, getting the eyes to stay put. It sounds simple, and it is, but the little details make all the difference between a ghost that looks like it’s haunting a graveyard and one that looks like it’s asking for a hug.
This is the kind of recipe that makes you close your eyes after the first bite. It’s Halloween comfort food—nostalgic, fun, and deeply satisfying. Perfect for impressing your party guests without spending all day in the kitchen, or for turning a simple October evening into something memorable.
What Ingredients You Will Need
This recipe uses straightforward ingredients that you probably already have in your pantry. The magic is in how they come together—simple components creating something that feels special. I’ve tested this with various brands and substitutions, so I’ll share what works best.
For the Chocolate Cupcakes
- 1 ½ cups all-purpose flour (spooned and leveled—don’t scoop directly from the bag or you’ll end up with dense cupcakes)
- 1 cup granulated sugar (I’ve tried this with coconut sugar and it works, but the texture is slightly less tender)
- ½ cup unsweetened cocoa powder (I prefer Ghirardelli or Hershey’s Special Dark for a deeper chocolate flavor)
- 1 teaspoon baking soda
- ½ teaspoon baking powder
- ½ teaspoon salt
- 1 cup buttermilk (room temperature—if you don’t have buttermilk, add 1 tablespoon of lemon juice to regular milk and let it sit for 5 minutes)
- ½ cup vegetable oil (or melted coconut oil; oil keeps the cupcakes moist longer than butter)
- 2 large eggs (room temperature)
- 2 teaspoons vanilla extract
- ½ cup hot coffee (this doesn’t make them taste like coffee—it enhances the chocolate flavor. Trust me on this one)
For the Ghost Decoration
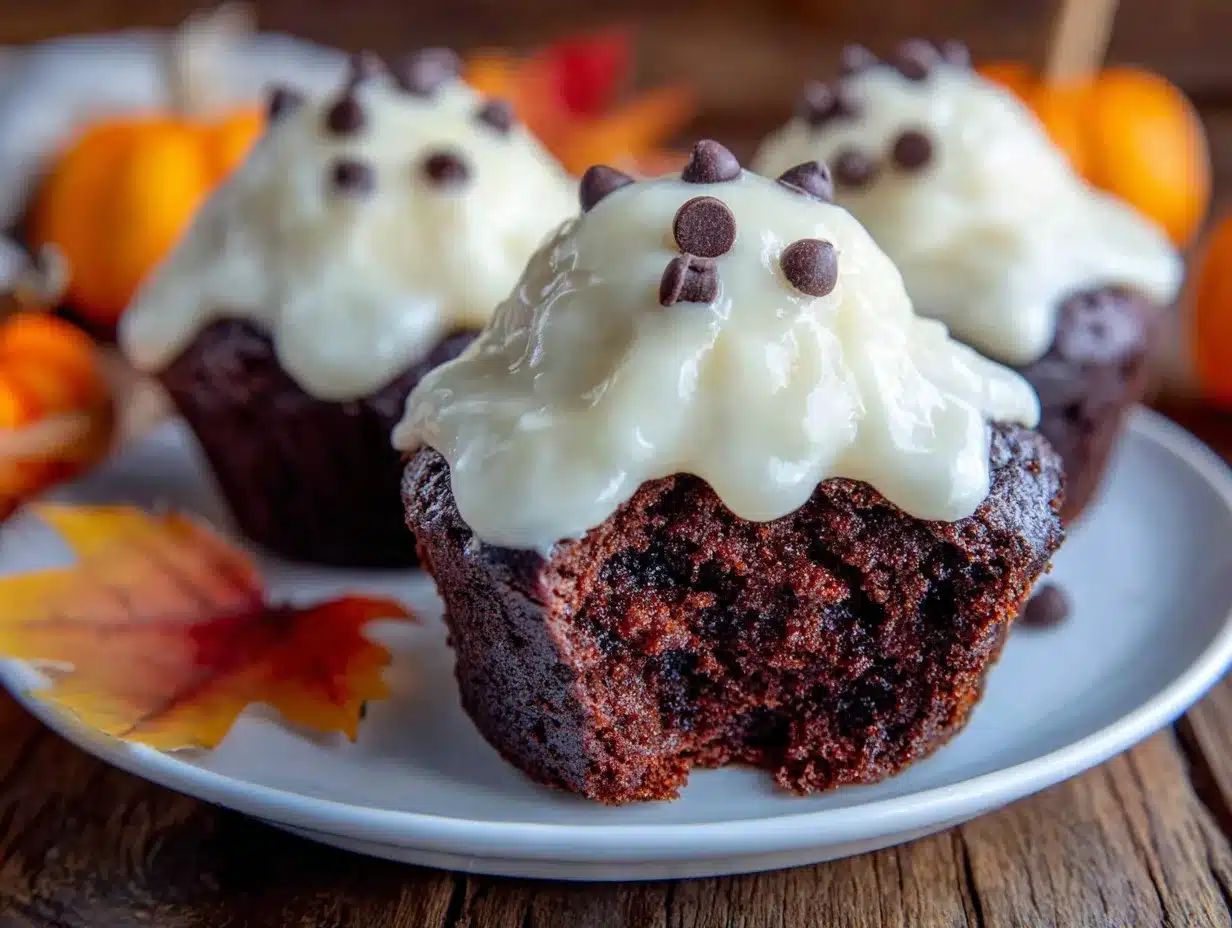
- 24 large marshmallows (standard size, not mini—look for fresh, soft marshmallows; stale ones are harder to shape)
- 1 cup white chocolate melting wafers (I use Ghirardelli white melting wafers—they melt smoothly and set firmly. White chocolate chips work but can be finicky)
- ½ teaspoon coconut oil or shortening (this helps thin the white chocolate for easier dipping)
- Black decorating gel or black candy melts (for the eyes—I prefer Wilton black decorating gel for ease, but candy melts give a cleaner look)
Optional Garnishes
- Orange or black sprinkles (for a festive touch around the base)
- Edible glitter (because Halloween deserves a little sparkle)
A quick note on ingredient selection: I’ve learned the hard way that cheap white chocolate can seize up and become grainy when melted. Spend the extra dollar on good melting wafers—it makes the ghost dipping process infinitely smoother. Also, make sure your eggs and buttermilk are at room temperature. Cold ingredients can make the batter lumpy and affect how the cupcakes rise. I usually pull everything out of the fridge about 30 minutes before I start baking.
Equipment Needed
You don’t need a fully stocked bakery to make these ghost cupcakes, but having the right tools makes the process much smoother. Here’s what I use:
- Standard 12-cup muffin tin (you’ll need two if you’re making a full batch of 24)
- Paper cupcake liners (white or black look best—the ghosts pop against darker liners)
- Mixing bowls (one large for the dry ingredients, one medium for the wet)
- Whisk and rubber spatula
- Cookie scoop or ice cream scoop (for even batter distribution—this is my secret to uniform cupcakes)
- Cooling rack (essential for getting the cupcakes completely cool before decorating)
- Microwave-safe bowl (for melting the white chocolate)
- Piping bag or zip-top bag (for the black eyes—a tiny snipped corner works perfectly)
- Toothpicks (for adjusting the ghost eyes and cleaning up edges)
If you don’t have a piping bag, don’t worry. I’ve used a sandwich bag with a tiny corner cut off for years and it works just fine. For the white chocolate dipping, I’ve found that a shallow bowl works better than a deep one—you want to be able to dip the marshmallow without submerging your fingers. And here’s a tip I learned after washing chocolate out of too many bowls: line your work surface with parchment paper. It makes cleanup a breeze and catches any drips.
Preparation Method
Let’s walk through this step by step. I’ll include the timing and the little sensory cues that tell you you’re on the right track.
Make the Cupcake Batter
- Preheat your oven to 350°F (175°C). Line your muffin tins with paper liners—this recipe makes 24 cupcakes. While the oven heats, take a moment to make sure your ingredients are at room temperature. Cold eggs can make the batter lumpy.
- In a large bowl, whisk together the flour, sugar, cocoa powder, baking soda, baking powder, and salt. The mixture should look uniform and smell deeply chocolatey. If your cocoa powder is clumpy, sift it in—trust me, nobody wants a bite of pure cocoa powder.
- In a separate bowl, whisk the buttermilk, oil, eggs, and vanilla extract until smooth. The mixture should be pale and slightly thick. I like to use a fork for this—it breaks up the eggs more efficiently than a whisk.
- Pour the wet ingredients into the dry ingredients and stir gently with a rubber spatula. Mix until just combined—a few streaks of flour are fine. Overmixing at this stage will make your cupcakes tough.
- Pour in the hot coffee and stir until the batter is smooth and thin. This is where the magic happens. The batter will look almost like chocolate milk—that’s normal. It should smell rich and slightly bitter from the coffee.
- Fill each liner about two-thirds full. I use a cookie scoop for this, which gives me exactly 24 perfectly even cupcakes. If you don’t have a scoop, use a ¼ cup measure and fill it about three-quarters full.
Bake the Cupcakes
- Bake for 15-18 minutes, or until a toothpick inserted into the center comes out with a few moist crumbs. The tops should spring back when lightly touched. Don’t overbake—dry cupcakes are sad cupcakes.
- Let the cupcakes cool in the pan for 5 minutes, then transfer them to a cooling rack. This is crucial. If you leave them in the pan too long, the bottoms will get soggy. If you try to move them too soon, they’ll fall apart.
- Cool completely before decorating. I usually let them sit for at least 30 minutes. Warm cupcakes will melt the white chocolate and make a mess of your ghosts.
Make the Ghosts
- While the cupcakes cool, prepare your marshmallow ghosts. Place the white chocolate melting wafers and coconut oil in a microwave-safe bowl. Microwave in 30-second intervals, stirring between each, until smooth. The chocolate should be completely melted and runny—like warm honey. If it’s too thick, add another tiny splash of coconut oil.
- Working one at a time, hold a marshmallow by the flat end and dip the rounded top into the melted white chocolate. Let the excess drip off—I tap the marshmallow gently against the side of the bowl to encourage the chocolate to flow down the sides. The goal is a thin, even coating that looks like a ghost’s flowing body.
- Place the dipped marshmallow on a parchment-lined baking sheet. The chocolate should form a little skirt around the base of the marshmallow. If it pools too much, you’ve dipped too deep—next time, dip only the top third.
- While the chocolate is still wet, use a toothpick or the tip of a knife to gently pull the chocolate downward at the bottom edge. This creates the ghost’s wavy hem. I do this on three or four sides of each marshmallow, creating an uneven, organic shape.
- Repeat with remaining marshmallows. You’ll get better with practice—the first few might look a little rough, but that’s part of their charm. Let the ghosts set completely, about 10-15 minutes at room temperature.
Assemble the Ghost Cupcakes
- Once the ghosts are set and the cupcakes are cool, it’s time to bring them together. Place one ghost on top of each cupcake, pressing gently so it sticks. The white chocolate bottom acts as glue.
- Using black decorating gel or melted black candy melts, pipe two small eyes onto each ghost. I use a piping bag with a tiny tip, but a toothpick dipped in gel works too. The eyes should be small and round—think about the size of a chocolate sprinkle. I make mine slightly uneven on purpose; it gives each ghost a unique expression.
- For extra personality, I sometimes pipe a tiny open mouth—just a small oval or a little “o” shape. Some ghosts get surprised faces, some look grumpy, some look like they’re laughing. It’s become a fun little ritual, giving each ghost its own mood.
- Let the decorations set for about 5 minutes before serving or storing. If you’re adding sprinkles or edible glitter around the base, do it now while the white chocolate is still slightly tacky.
Cooking Tips & Techniques
I’ve made enough mistakes with these ghost cupcakes to fill a small book. Let me save you some trouble with the lessons I learned the hard way.
The coffee trick is non-negotiable. I know it sounds weird, but hot coffee does something magical to chocolate cake. It deepens the flavor without making it taste like coffee at all. The first time I tried skipping it because I was out of coffee, the cupcakes were noticeably less rich. Use instant coffee dissolved in hot water if you don’t have brewed coffee—it works just as well.
Don’t rush the cooling process. I once tried to speed things up by putting the cupcakes in the fridge after they’d cooled for 10 minutes. The centers were still warm, and the white chocolate ghosts slid right off. Now I give them a full 30 minutes on the counter, and sometimes I even pop them in the freezer for 5 minutes at the end to make sure they’re completely cool.
The marshmallow shape matters more than you think. Fresh, soft marshmallows are easier to dip and shape. If your marshmallows are stale, they’ll be tough and the white chocolate won’t adhere as well. I test mine by squeezing one gently—it should be soft and springy. If it’s hard, buy a new bag.
Thin your white chocolate properly. White chocolate straight out of the bag is too thick for dipping. The coconut oil or shortening makes it flow like a dream. But don’t add too much—a half teaspoon per cup of wafers is perfect. Too much oil and the chocolate won’t set properly.
Work in batches. Don’t try to dip all 24 marshmallows at once. The white chocolate will start to thicken as it cools. I dip 6-8 at a time, let them set, then reheat the chocolate if needed. It keeps the consistency right and the ghosts looking uniform.
Speed is your friend when piping eyes. The decorating gel dries quickly, so work fast. I pipe all the eyes on one ghost before moving to the next. If the gel starts to get stringy, I wipe the tip clean and start fresh.
Variations & Adaptations
One of the best things about this recipe is how flexible it is. Here are some variations I’ve tried and loved:
Gluten-Free Ghost Cupcakes : Substitute the all-purpose flour with a 1:1 gluten-free baking blend. I use Bob’s Red Mill, and the texture is almost identical to the original. Add ¼ teaspoon of xanthan gum if your blend doesn’t already include it.
Dairy-Free Version : Use almond milk with a tablespoon of vinegar for the buttermilk, and swap the butter for coconut oil. For the ghosts, use dairy-free white chocolate—Enjoy Life makes a good one. The texture is slightly different, but the flavor is still fantastic.
Pumpkin Spice Ghost Cupcakes : Replace the cocoa powder with an equal amount of flour, and add 1 teaspoon of pumpkin pie spice and ½ cup of pumpkin puree. Reduce the buttermilk to ¾ cup. The ghosts look adorable on the orange-tinted cupcakes.
Mini Ghost Cupcakes : Use a mini muffin tin and bake for 8-10 minutes. Use mini marshmallows for the ghosts. These are perfect for kids’ parties or for when you want a smaller treat.
Different Ghost Expressions : Get creative with the faces. I’ve made ghosts that look surprised, sleepy, mischievous, and even one that looked like it was telling a secret. Use different colored gels for variety—orange eyes for a warmer look, or purple for a spookier vibe.
Serving & Storage Suggestions
These ghost cupcakes are best served at room temperature, which makes them perfect for parties. I usually set them out about 30 minutes before guests arrive so they’re not cold from the fridge.
Presentation Tips : Arrange the cupcakes on a black or orange platter for maximum Halloween impact. I like to scatter a few candy corn or candy pumpkins around the base for extra color. If you’re serving them at a party, consider placing them on a cake stand at different heights—it creates visual interest and makes the ghosts look like they’re floating.
What to Serve Alongside : These pair beautifully with warm apple cider or a pumpkin spice latte. For a full Halloween spread, serve them alongside caramel apples, pumpkin bars, or a bowl of candy corn. They also work great as a dessert after a hearty chili dinner or a pumpkin soup.
Storage Instructions : Store the cupcakes in an airtight container at room temperature for up to 3 days. The ghosts will stay firm, and the cake will remain moist. If you need to store them longer, refrigerate for up to 5 days, but bring them back to room temperature before serving—the cake tends to dry out in the fridge.
Freezing Tips : You can freeze the undecorated cupcakes for up to 3 months. Wrap them individually in plastic wrap and place them in a freezer bag. When you’re ready to serve, thaw at room temperature, then make the ghosts fresh. The ghosts themselves don’t freeze well—they get sticky and lose their shape.
Make-Ahead Strategy : For parties, I bake the cupcakes and make the ghosts the day before, then assemble everything the morning of the event. The white chocolate ghosts stay crisp in an airtight container at room temperature, and the cupcakes stay moist. Assembly takes about 10 minutes, which means you’re not scrambling on party day.
Nutritional Information & Benefits
Let’s be honest—these are a treat, not a health food. But here’s what you should know:
Estimated Per Cupcake : Approximately 220 calories, 9g fat, 33g carbohydrates, 3g protein, 18g sugar. These numbers will vary based on your specific ingredients and portion sizes.
Health Highlights : The dark cocoa powder contains antioxidants called flavonoids, which have been linked to heart health. The buttermilk adds calcium and probiotics. And the eggs provide high-quality protein. Every little bit counts, right?
Dietary Considerations : This recipe contains gluten, dairy, and eggs. For allergen-friendly versions, see the variations section above. The sugar content is moderate for a decorated cupcake, but if you’re watching your sugar intake, you can reduce it slightly in the cake batter—though it will affect the texture.
My Personal Take : I believe in balance. These ghost cupcakes are a celebration food, meant to be enjoyed without guilt. One cupcake with a glass of milk or a cup of tea is a lovely moment of joy. Three cupcakes in one sitting? Well, that’s a different story—but I’ve been there too, and I don’t judge.
Conclusion
These ghost cupcakes have become my Halloween signature, and I think they’ll become yours too. They’re the perfect blend of nostalgic fun and genuinely good baking—the kind of recipe that makes people say, “Wait, you made these?” with genuine surprise. And honestly, that never gets old.
What I love most about this recipe is how it brings people together. I’ve made these for costume parties, office potlucks, neighborhood gatherings, and quiet family Halloweens. Every single time, someone lights up when they see the ghosts. Kids giggle. Adults get that nostalgic look in their eyes. And for a few minutes, everyone is ten years old again, sitting on a cold linoleum floor, watching someone make magic with marshmallows and chocolate.
I hope you’ll try these for your next Halloween gathering. Don’t worry if your first few ghosts look a little wonky—that’s part of their charm. Each one has its own personality, just like the people who eat them. And if you come up with a fun variation or a new ghost expression, I’d love to hear about it. Drop a comment below or tag me in your photos. Let’s make this Halloween a little sweeter, one ghost cupcake at a time.
Frequently Asked Questions
Can I use a boxed cake mix for these ghost cupcakes?
Absolutely. If you’re short on time, a chocolate cake mix works perfectly. Just follow the box instructions and add a tablespoon of instant coffee dissolved in hot water to deepen the flavor. The ghost decoration stays the same regardless of what cake base you use.
Why did my white chocolate seize up when I melted it?
White chocolate is sensitive to heat and moisture. If even a drop of water gets into the bowl, the chocolate can seize and become grainy. Make sure your bowl and utensils are completely dry, and melt the chocolate in short bursts in the microwave, stirring between each. If it does seize, add a teaspoon of coconut oil and stir vigorously—sometimes it can be saved.
How far in advance can I make these cupcakes?
You can bake the cupcakes up to 3 days ahead and store them in an airtight container at room temperature. The marshmallow ghosts can be made 2 days ahead and stored in a single layer in an airtight container. Assemble the cupcakes the day you plan to serve them for the best presentation.
Can I use homemade marshmallows for the ghosts?
You can, but I don’t recommend it. Homemade marshmallows are softer and stickier, which makes them harder to dip in white chocolate without creating a mess. Store-bought marshmallows have a firmer structure that holds up better to the dipping process and gives you cleaner ghost shapes.
My ghosts keep sliding off the cupcakes. What am I doing wrong?
This usually happens when the cupcakes are still warm or when the white chocolate hasn’t set properly. Make sure your cupcakes are completely cool before adding the ghosts. Also, let the white chocolate on the marshmallows set fully—about 10-15 minutes at room temperature—before placing them on the cupcakes. If it’s a humid day, the chocolate might take longer to set, so be patient.
Pin This Recipe!
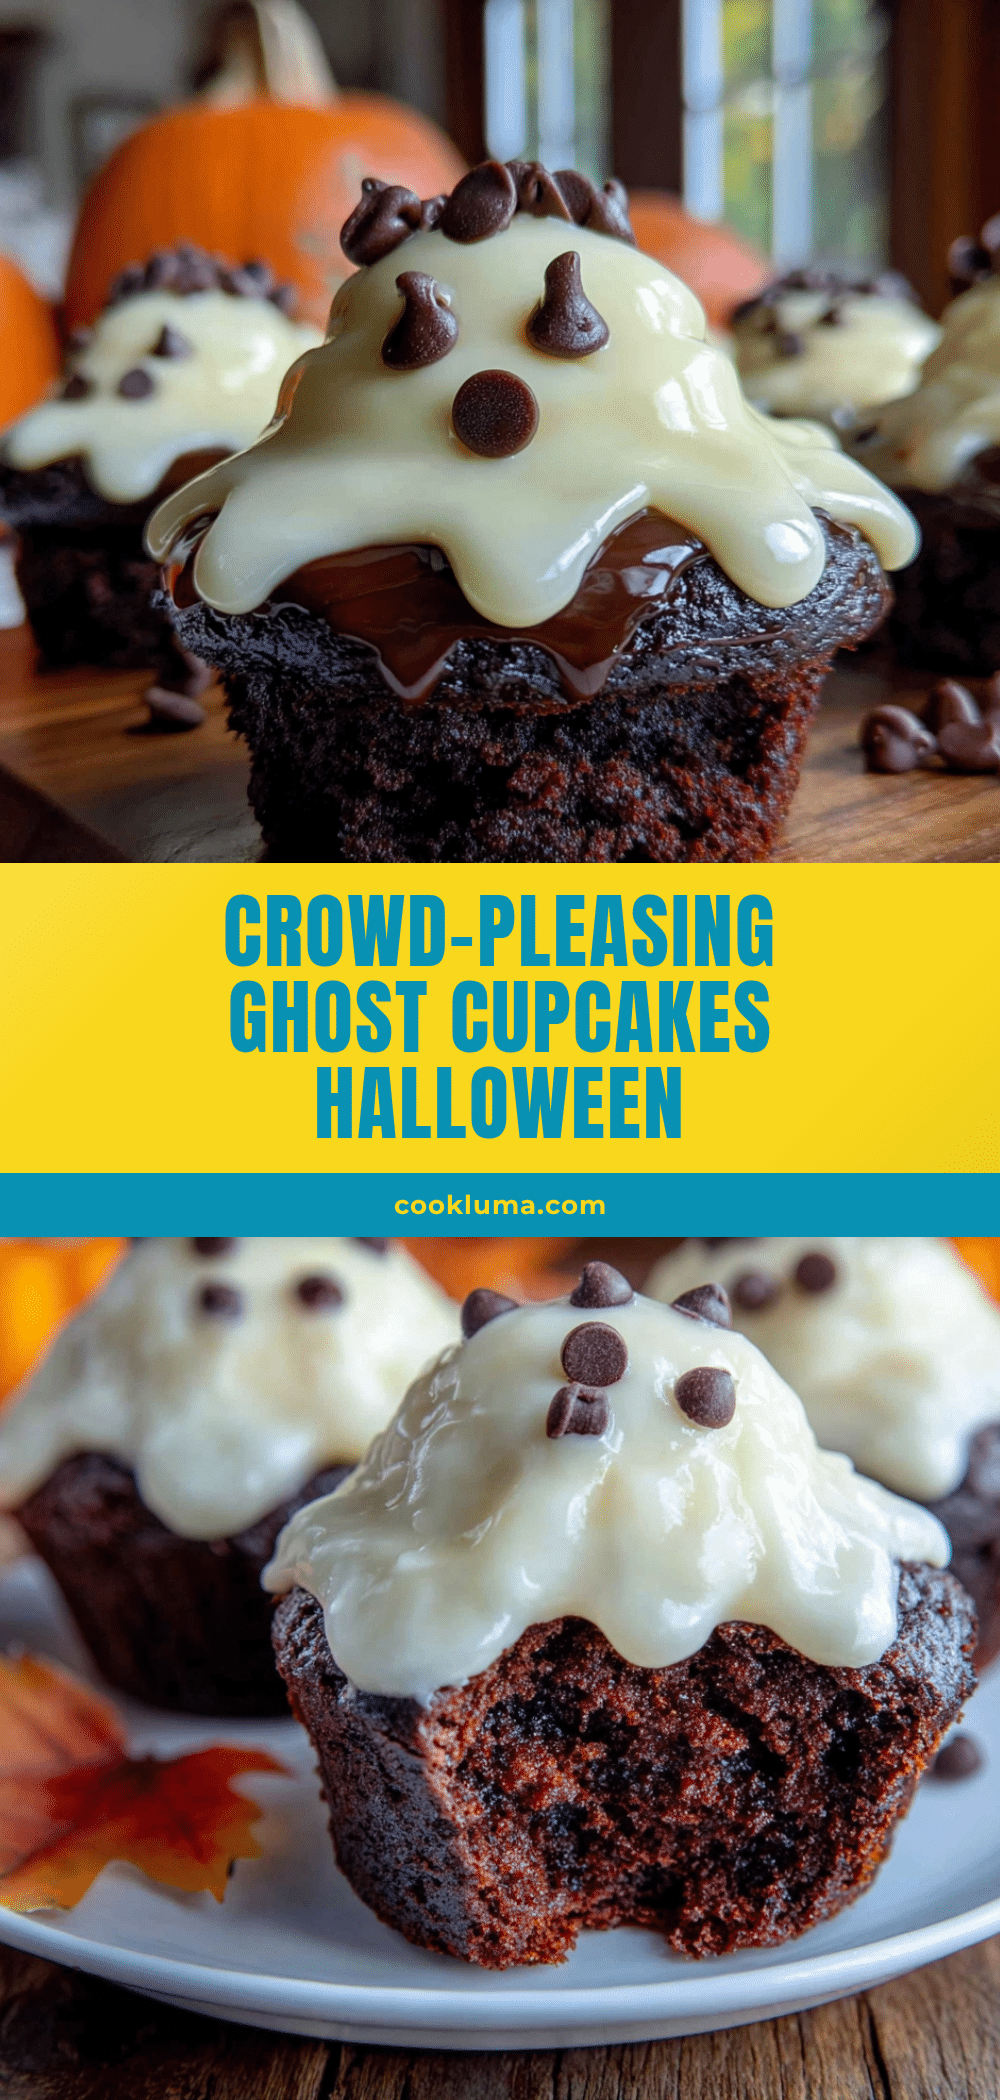
Best Ghost Cupcakes: Easy Halloween Recipe in 30 Minutes
These ghost cupcakes are the perfect blend of nostalgic fun and genuinely good baking—dark, rich chocolate cake underneath, creamy white ghost on top, with little black eyes that give each ghost its own personality. Quick and easy to make in about 30 minutes, they’re a crowd-pleaser for Halloween parties.
- Prep Time: 15 minutes
- Cook Time: 15-18 minutes
- Total Time: 30 minutes (active time)
- Yield: 24 cupcakes 1x
- Category: Dessert
- Cuisine: American
Ingredients
- 1 ½ cups all-purpose flour (spooned and leveled)
- 1 cup granulated sugar
- ½ cup unsweetened cocoa powder (preferably Ghirardelli or Hershey’s Special Dark)
- 1 teaspoon baking soda
- ½ teaspoon baking powder
- ½ teaspoon salt
- 1 cup buttermilk (room temperature)
- ½ cup vegetable oil (or melted coconut oil)
- 2 large eggs (room temperature)
- 2 teaspoons vanilla extract
- ½ cup hot coffee
- 24 large marshmallows (standard size, not mini)
- 1 cup white chocolate melting wafers (e.g., Ghirardelli)
- ½ teaspoon coconut oil or shortening
- Black decorating gel or black candy melts (for eyes)
- Orange or black sprinkles (optional, for garnish)
- Edible glitter (optional, for garnish)
Instructions
- Preheat oven to 350°F (175°C). Line muffin tins with paper liners (makes 24 cupcakes).
- In a large bowl, whisk together flour, sugar, cocoa powder, baking soda, baking powder, and salt until uniform.
- In a separate bowl, whisk buttermilk, oil, eggs, and vanilla extract until smooth and pale.
- Pour wet ingredients into dry ingredients and stir gently with a rubber spatula until just combined (a few streaks of flour are fine).
- Pour in hot coffee and stir until batter is smooth and thin (like chocolate milk).
- Fill each liner about two-thirds full using a cookie scoop or ¼ cup measure.
- Bake for 15-18 minutes, or until a toothpick inserted into the center comes out with a few moist crumbs. Tops should spring back when lightly touched.
- Let cupcakes cool in the pan for 5 minutes, then transfer to a cooling rack. Cool completely (at least 30 minutes) before decorating.
- While cupcakes cool, prepare ghosts: Place white chocolate melting wafers and coconut oil in a microwave-safe bowl. Microwave in 30-second intervals, stirring between each, until smooth and runny like warm honey.
- Working one at a time, hold a marshmallow by the flat end and dip the rounded top into melted white chocolate. Let excess drip off, tapping gently against the bowl.
- Place dipped marshmallow on a parchment-lined baking sheet. While chocolate is still wet, use a toothpick to gently pull chocolate downward at the bottom edge to create a wavy hem. Repeat with remaining marshmallows.
- Let ghosts set completely, about 10-15 minutes at room temperature.
- Once ghosts are set and cupcakes are cool, place one ghost on top of each cupcake, pressing gently to stick.
- Using black decorating gel or melted black candy melts, pipe two small eyes onto each ghost. Optionally pipe a tiny open mouth for personality.
- If using sprinkles or edible glitter, add around the base while white chocolate is still slightly tacky. Let decorations set for about 5 minutes before serving or storing.
Notes
Coffee enhances chocolate flavor without making it taste like coffee. Don’t rush cooling—warm cupcakes will melt the white chocolate. Use fresh, soft marshmallows for best results. Thin white chocolate with coconut oil for smooth dipping. Work in batches when dipping marshmallows to maintain consistency. Pipe eyes quickly as decorating gel dries fast.
Nutrition
- Serving Size: 1 cupcake
- Calories: 220
- Sugar: 18
- Sodium: 180
- Fat: 9
- Saturated Fat: 3
- Carbohydrates: 33
- Fiber: 2
- Protein: 3
Keywords: ghost cupcakes, Halloween cupcakes, easy Halloween recipe, chocolate cupcakes, marshmallow ghosts, white chocolate ghosts, spooky cupcakes, party dessert


