My brother-in-law, Mark, had claimed for years that air fryers were just “fancy convection ovens for people who don’t know how to cook.” He said it at every family dinner, usually while gesturing with a drumstick. For three Thanksgivings straight, I heard about how real crispy chicken required a deep fryer, a vat of oil, and a proper kitchen thermometer. I didn’t argue. I just kept making my chicken breasts in the oven and nodding along.
Then last spring, I showed up to his barbecue with a platter of these air fryer chicken breasts. I’d spent the morning testing the lemon herb rub for the fourth time—my kitchen smelled like a Mediterranean garden, and I’d almost set off the smoke detector because I got distracted by a phone call. I walked in, set the platter down, and went to grab a drink. When I came back, Mark was on his third piece, and there was a smear of lemon-herb oil on his chin. “These are good,” he said, not meeting my eyes. “Really good.”
I didn’t say a word. I just smiled. That moment—catching someone in the act of proving themselves wrong—is honestly one of the quietest joys of cooking. Maybe you’ve had that feeling, too. The one where you don’t need to say “I told you so” because the empty plate speaks for itself.
This recipe is the one that changed Mark’s mind. It’s not just another air fryer chicken breast—it’s the one with a lemon herb rub that actually sticks, a technique for getting that shatteringly crispy skin without a drop of deep fry oil, and a cooking method that keeps the inside perfectly juicy. I’ve tested this more times than I care to admit, and let me tell you, it works every single time. It’s become my go-to for weeknight dinners, meal prep, and yes, for converting skeptics at family gatherings.
Why You’ll Love This Recipe
I’ve spent years testing chicken breast recipes, and this one checks every box. It’s the kind of dish that makes you close your eyes after the first bite—not because it’s fancy, but because it’s just that satisfying.
- Incredibly Crispy Without the Grease: The air fryer creates a golden, crunchy exterior that rivals deep-fried chicken. No standing over a pot of hot oil, no greasy fingers.
- Bursting with Lemon Herb Flavor: The rub isn’t just sprinkled on top—it’s massaged in, so every bite from edge to center tastes bright, aromatic, and savory.
- Juicy, Not Dry: This is the biggest win. Air fryer chicken breasts have a reputation for drying out, but this method—brining, patting dry, and the right cooking time—guarantees tender, moist meat.
- Ready in Under 30 Minutes: From fridge to plate in about 25 minutes. That’s faster than takeout delivery and way better for you.
- Simple Pantry Ingredients: You probably already have olive oil, lemons, garlic, and dried herbs. No specialty items required.
- Perfect for Hosting: I’ve served this at dinner parties and casual get-togethers, and it always steals the table. It’s impressive enough for guests but easy enough for a Tuesday night.
- Diet-Friendly: Gluten-free, low-carb, keto-friendly, and packed with protein. It fits into almost any eating plan.
What makes this recipe different from the dozens of others out there? It’s the technique. Most recipes tell you to just toss chicken in the air fryer and hope for the best. I’ve learned the hard way that you need to brine briefly, pat dry thoroughly, and let the rub sit for a few minutes to really penetrate the meat. The result is chicken that’s flavorful all the way through, not just on the surface.
Honestly, this recipe is comfort food reimagined—healthier, faster, but with the same soul-soothing satisfaction. Perfect for impressing guests without stress, or turning a simple meal into something memorable.
What Ingredients You Will Need
This recipe uses simple, wholesome ingredients to deliver bold flavor and satisfying texture without the fuss. Most of these are pantry staples, which makes this perfect for last-minute cooking.
For the Chicken
- 2 boneless, skinless chicken breasts (about 6-8 ounces / 170-225g each) — Look for breasts that are similar in size so they cook evenly. If they’re huge, consider cutting them in half horizontally.
- 1 tablespoon kosher salt (for the quick brine) — I use Diamond Crystal; if using table salt, use half the amount
- 2 cups cold water (for the brine)
- 1 tablespoon olive oil — Helps the rub stick and promotes browning
For the Lemon Herb Rub
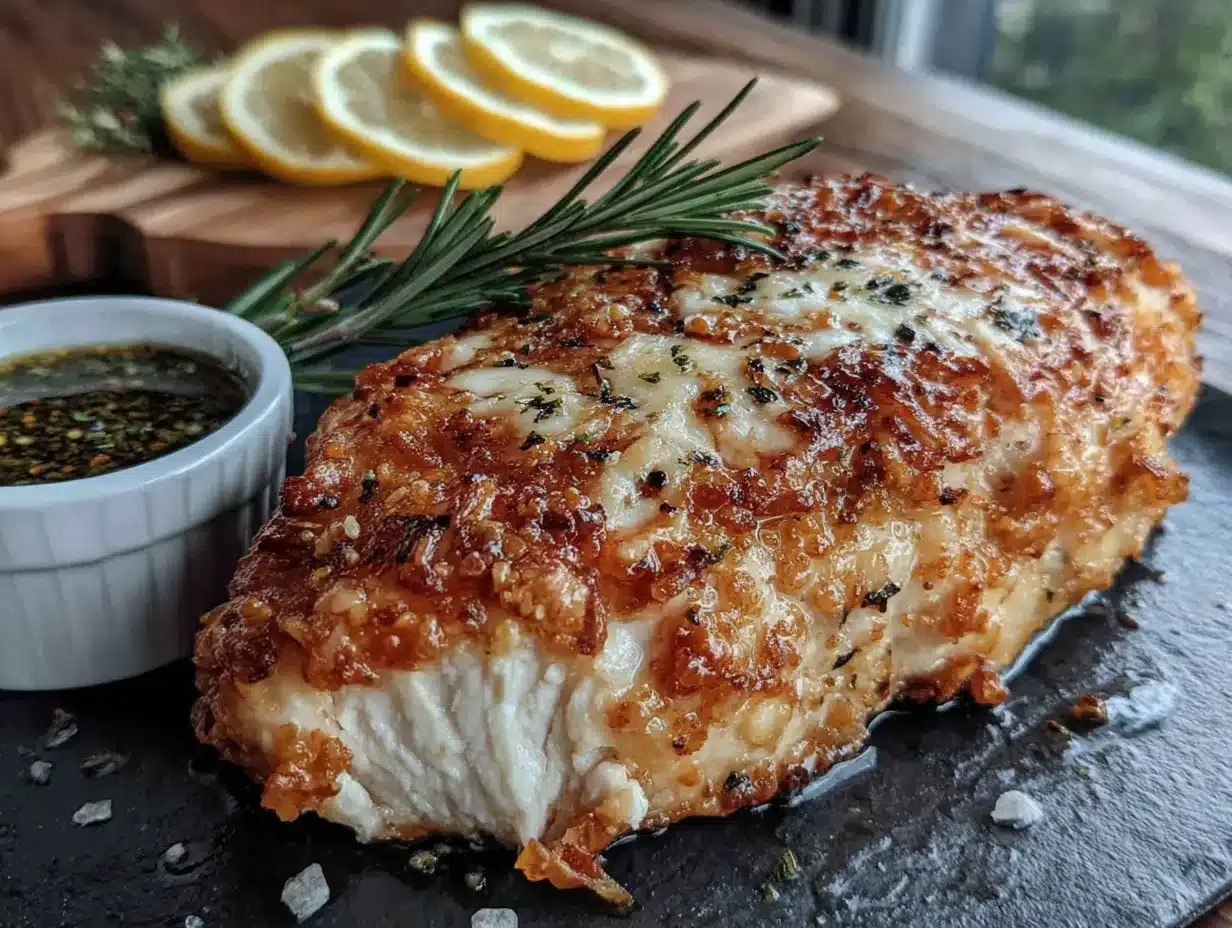
- 2 tablespoons olive oil — Use a good-quality extra virgin for best flavor
- Zest of 1 lemon — About 1 tablespoon. This is where the bright flavor comes from
- 2 tablespoons fresh lemon juice — Adds acidity to balance the richness
- 3 cloves garlic, minced — Fresh is best; jarred minced garlic works in a pinch
- 1 teaspoon dried oregano — I prefer Mediterranean oregano for its floral notes
- 1 teaspoon dried thyme — Adds an earthy, slightly minty flavor
- 1/2 teaspoon dried rosemary, crushed — Crush it between your fingers to release the oils
- 1/2 teaspoon smoked paprika — For color and a subtle smoky depth
- 1/4 teaspoon black pepper, freshly ground
- 1/4 teaspoon red pepper flakes (optional) — Adds a gentle warmth, not heat
For Serving (Optional but Recommended)
- Fresh lemon wedges — For squeezing over the top right before eating
- Fresh parsley or thyme sprigs — For garnish and a pop of color
Ingredient Tips: For the best texture, I recommend using organic chicken breasts if your budget allows—they tend to be less watery and have better flavor. If you’re using dried herbs that have been sitting in your cabinet for years, consider replacing them. Fresh herbs make a difference, but dried herbs work beautifully in this rub because they don’t burn in the air fryer like fresh herbs sometimes do.
Substitutions: No lemon? Use lime zest and juice instead. Don’t have oregano? Try marjoram or a pinch of dried basil. For a spicier version, add an extra 1/2 teaspoon of red pepper flakes. If you’re avoiding oil, you can use a light coating of avocado oil spray, but the rub won’t stick as well.
Equipment Needed
You don’t need a fancy kitchen to make this recipe work. Here’s what you’ll need:
- Air fryer — Any brand works. I use a 5.8-quart basket-style air fryer, and it fits two large chicken breasts perfectly. If yours is smaller, cook in batches.
- Medium bowl — For the quick brine
- Small bowl — For mixing the lemon herb rub
- Tongs — For flipping the chicken without tearing the skin
- Paper towels — Absolutely essential for patting the chicken dry. Don’t skip this step.
- Meat thermometer — This is non-negotiable for perfectly cooked chicken. I prefer an instant-read digital thermometer.
- Cutting board and knife — For mincing garlic and zesting the lemon
- Microplane or zester — For getting that fine lemon zest without the bitter pith
Budget-Friendly Alternatives: If you don’t have a microplane, use the fine side of a box grater. No meat thermometer? You can check doneness by cutting into the thickest part—the juices should run clear and the meat should be opaque all the way through. But honestly, a good thermometer is worth the $10 investment. I’ve saved countless pieces of chicken from the trash since I started using one.
Preparation Method
Let me walk you through this step by step. I’ve made this recipe dozens of times, and these are the exact steps that give you the best results every single time.
Step 1: Quick Brine the Chicken (10 minutes)
In a medium bowl, dissolve 1 tablespoon of kosher salt in 2 cups of cold water. Place the chicken breasts in the brine and let them sit for 10 minutes. This isn’t a long brine—just enough to help the meat stay juicy and seasoned from the inside out. Don’t skip this step! I once did, thinking it wouldn’t matter, and the chicken came out noticeably drier. The brine makes a real difference.
Step 2: Make the Lemon Herb Rub (5 minutes)
While the chicken brines, combine 2 tablespoons olive oil, lemon zest, lemon juice, minced garlic, oregano, thyme, rosemary, smoked paprika, black pepper, and red pepper flakes (if using) in a small bowl. Stir until everything is well combined. The smell at this point is incredible—bright, herbal, and a little bit garlicky. Set it aside to let the flavors meld.
Step 3: Pat the Chicken Dry (2 minutes)
Remove the chicken from the brine and pat it completely dry with paper towels. This is the most important step for crispy skin. Any moisture on the surface will steam instead of crisp. I usually use three or four paper towels per breast and really press down. The chicken should feel tacky to the touch, not wet.
Step 4: Apply the Rub (3 minutes)
Place the dried chicken breasts in a clean bowl. Drizzle with 1 tablespoon of olive oil and rub it all over. Then add the lemon herb rub and massage it into every surface—top, bottom, and sides. Don’t be shy here. Really work it in. Let the chicken sit at room temperature for 5 minutes while your air fryer preheats. This helps the flavors penetrate.
Step 5: Preheat the Air Fryer (3-5 minutes)
Preheat your air fryer to 375°F (190°C). Most air fryers need about 3-5 minutes to preheat. If yours doesn’t have a preheat function, just run it empty for 3 minutes at the temperature. Preheating ensures the chicken starts cooking immediately, which helps with that crispy exterior.
Step 6: Arrange and Cook (12-15 minutes)
Place the chicken breasts in the air fryer basket in a single layer. Make sure they’re not touching—air needs to circulate around each piece for even cooking. If your chicken breasts are large, you might need to cook them in batches. Cook at 375°F (190°C) for 6 minutes, then flip the chicken using tongs and cook for another 6-9 minutes, depending on thickness.
Sensory Cue: At the 6-minute mark, the chicken should be golden brown on the bottom and sizzling. When you flip it, you’ll hear a satisfying crackle—that’s the crispy crust forming.
Step 7: Check Temperature (1 minute)
The most accurate way to check doneness is with a meat thermometer. Insert it into the thickest part of the breast. You’re looking for 160°F (71°C). The chicken will continue cooking as it rests, reaching the safe temperature of 165°F (74°C). If it’s not there yet, cook in 1-2 minute increments and check again.
Step 8: Rest and Serve (5 minutes)
Transfer the chicken to a cutting board and let it rest for 5 minutes. This is crucial—it allows the juices to redistribute throughout the meat. If you cut into it immediately, all those delicious juices will run out onto the board, and you’ll be left with dry chicken. I know it’s tempting, but trust me on this one.
Slice against the grain, squeeze fresh lemon juice over the top, and garnish with parsley or thyme sprigs if desired. Serve immediately.
Cooking Tips & Techniques
After testing this recipe more times than I’d like to admit, I’ve collected a few hard-won lessons. Let me share them so you don’t make the same mistakes I did.
The Biggest Mistake: Not Patting Dry Enough. The first time I made this, I was in a hurry and only used one paper towel. The chicken came out pale and slightly steamed. Now I use at least three paper towels per breast and press firmly. Dry chicken equals crispy chicken. It’s that simple.
Don’t Overcrowd the Basket. I learned this one the hard way when I tried to cook three chicken breasts at once in my 5.8-quart air fryer. They touched each other, and the spots where they touched stayed soft and pale. Leave at least an inch of space between each piece. Cook in batches if you need to—it’s worth the extra few minutes.
Flip at the Right Time. Flipping at 6 minutes gives the second side a chance to crisp up without burning the first side. If you flip too early, the crust hasn’t set and will stick to the basket. If you flip too late, the first side might burn.
Use a Thermometer, Not a Timer. Chicken breast thickness varies wildly. A timer is a guideline, but a thermometer is the truth. I’ve had thin breasts cook in 10 minutes and thick ones take 16. Don’t guess—measure.
Let It Rest. I know I’ve said this already, but it bears repeating. Resting is not optional. Five minutes makes the difference between juicy chicken and dry chicken. Use that time to set the table or make a quick side salad.
Multitasking Tip: While the chicken is in the air fryer, I like to whip up a quick side dish. Steamed broccoli, a simple green salad, or some roasted potatoes all work beautifully. The chicken takes about 15 minutes total, so you can easily have everything ready at the same time.
Variations & Adaptations
One of the best things about this recipe is how easily it adapts to different tastes and dietary needs. Here are a few variations I’ve tried and loved:
Spicy Cajun Version
Swap the lemon herb rub for a Cajun spice blend: 1 tablespoon smoked paprika, 1 teaspoon garlic powder, 1 teaspoon onion powder, 1/2 teaspoon cayenne pepper, 1/2 teaspoon dried thyme, 1/2 teaspoon dried oregano, and salt and pepper to taste. This version is bold, smoky, and has a nice kick. I’ve served it with creamy coleslaw and cornbread for a Southern-inspired meal.
Garlic Parmesan Crust
After applying the lemon herb rub, sprinkle 2 tablespoons of grated Parmesan cheese over each breast before cooking. The cheese melts and crisps up in the air fryer, creating a savory, nutty crust. Just watch it closely in the last few minutes—Parmesan can burn quickly.
Honey Mustard Glaze
For a sweet and tangy twist, skip the lemon herb rub and instead brush the chicken with a mixture of 2 tablespoons Dijon mustard, 1 tablespoon honey, and 1 teaspoon apple cider vinegar. Cook as directed, brushing with additional glaze halfway through. This version is a hit with kids and pairs perfectly with roasted vegetables.
Dietary Adaptations
Keto/Low-Carb: This recipe is naturally keto-friendly. Skip the honey mustard glaze and stick with the lemon herb rub. Serve with cauliflower rice or a big green salad.
Dairy-Free: The recipe is already dairy-free as written. Just be sure to check your Parmesan if you’re making the garlic Parmesan version.
Nut-Free: No nuts in this recipe, so you’re all set. Just be cautious with any store-bought spice blends that might be processed in facilities that handle nuts.
Serving & Storage Suggestions
This chicken is incredibly versatile when it comes to serving. Here’s how I like to present it and what to do with leftovers.
Serving Temperature and Presentation: Serve the chicken hot, straight from the air fryer. Slice it against the grain into 1/2-inch thick pieces and fan them out on a platter. Squeeze fresh lemon juice over the top and garnish with fresh herbs. For a dinner party, I like to serve it on a wooden board with lemon wedges and a small bowl of extra lemon herb oil for drizzling.
What to Serve Alongside: This chicken pairs beautifully with so many sides. Here are a few of my favorites:
- Roasted asparagus or green beans
- A simple arugula salad with lemon vinaigrette
- Garlic mashed potatoes or roasted sweet potatoes
- Quinoa or couscous with fresh herbs
- Crusty bread to soak up any juices
Storage Instructions: Store leftover chicken in an airtight container in the refrigerator for up to 4 days. The crispy exterior will soften over time, but the flavor remains excellent.
Reheating Methods: The best way to reheat is in the air fryer at 350°F (175°C) for 3-4 minutes. This brings back some of the crispiness. You can also reheat in a skillet over medium heat with a splash of chicken broth, or in the microwave for 1-2 minutes (though the texture won’t be as good).
Freezing: Cooked chicken breasts freeze beautifully. Wrap each breast individually in plastic wrap, then place in a freezer-safe bag. They’ll keep for up to 3 months. Thaw in the refrigerator overnight and reheat in the air fryer.
Flavor Development: Interestingly, the lemon herb flavor deepens overnight. Leftover chicken is fantastic sliced cold over salads or sandwiches. I’ve even used it in chicken salad—just chop it up and mix with a little mayo, diced celery, and fresh herbs.
Nutritional Information & Benefits
This recipe is not just delicious—it’s also packed with nutritional benefits. Here’s a breakdown per serving (one chicken breast with rub):
| Nutrient | Amount per Serving |
|---|---|
| Calories | 285 |
| Protein | 38g |
| Fat | 12g |
| Saturated Fat | 2g |
| Carbohydrates | 3g |
| Fiber | 1g |
| Sugar | 1g |
| Sodium | 480mg |
Health Benefits: Chicken breast is an excellent source of lean protein, which supports muscle growth and repair. The lemon provides a healthy dose of vitamin C, and the garlic and herbs offer anti-inflammatory properties. This recipe is naturally gluten-free, low-carb, and keto-friendly. It’s also relatively low in saturated fat compared to fried chicken.
Dietary Considerations: This recipe is suitable for most dietary patterns. It’s free of common allergens like dairy, nuts, and soy. If you’re watching your sodium intake, you can reduce the salt in the brine or skip the brine altogether (though the texture won’t be quite as good).
From a wellness perspective, I love that this recipe lets me enjoy a satisfying, crispy chicken dinner without the guilt of deep frying. It’s proof that healthy eating doesn’t have to be boring.
Conclusion
This perfect crispy air fryer chicken breast with lemon herb rub has become a staple in my kitchen for good reason. It’s quick enough for a busy weeknight, impressive enough for company, and versatile enough to adapt to whatever you’re craving. The lemon herb rub is bright and aromatic, the air fryer gives you that satisfying crunch without the grease, and the meat stays juicy and tender every single time.
I love that this recipe proves you don’t need a deep fryer or complicated techniques to make restaurant-quality chicken at home. It’s honest, straightforward cooking that delivers on flavor and texture. And honestly, it’s the recipe that turned my brother-in-law Mark into an air fryer believer—which is saying something.
I’d love to hear how this recipe turns out for you. Did you try one of the variations? Did you come up with your own twist? Drop a comment below and let me know. And if you share it on social media, tag me—I love seeing your creations. Happy cooking!
Frequently Asked Questions
Can I use chicken thighs instead of breasts?
Absolutely! Boneless, skinless chicken thighs work beautifully in this recipe. They’re more forgiving than breasts and stay juicy even if you cook them a minute or two longer. Cook at the same temperature, but check for doneness at 165°F (74°C). Thighs may take slightly longer—about 14-18 minutes total.
Do I have to brine the chicken?
I strongly recommend it. The quick 10-minute brine helps the chicken stay moist and seasoned throughout. Without it, the chicken can dry out more easily, especially if you’re cooking thicker breasts. That said, if you’re truly in a hurry, you can skip it—just add an extra 1/4 teaspoon of salt to the rub.
Why is my air fryer chicken not crispy?
The most common culprit is moisture. Make sure you pat the chicken extremely dry before applying the rub. Also, don’t overcrowd the basket—air needs to circulate. Finally, make sure your air fryer is fully preheated before adding the chicken. If it’s still cold, the chicken will steam instead of crisp.
Can I make the lemon herb rub ahead of time?
Yes, you can make the rub up to 3 days in advance. Store it in an airtight container in the refrigerator. Let it come to room temperature for about 15 minutes before using, as the olive oil will thicken when cold. The flavors actually meld together beautifully over time.
How do I prevent the chicken from sticking to the air fryer basket?
Lightly spray the air fryer basket with cooking spray or brush it with a thin layer of oil before adding the chicken. The olive oil in the rub also helps prevent sticking. If you’re still having issues, try using a silicone air fryer liner or parchment paper with holes (don’t use regular parchment—it can block airflow).
Pin This Recipe!
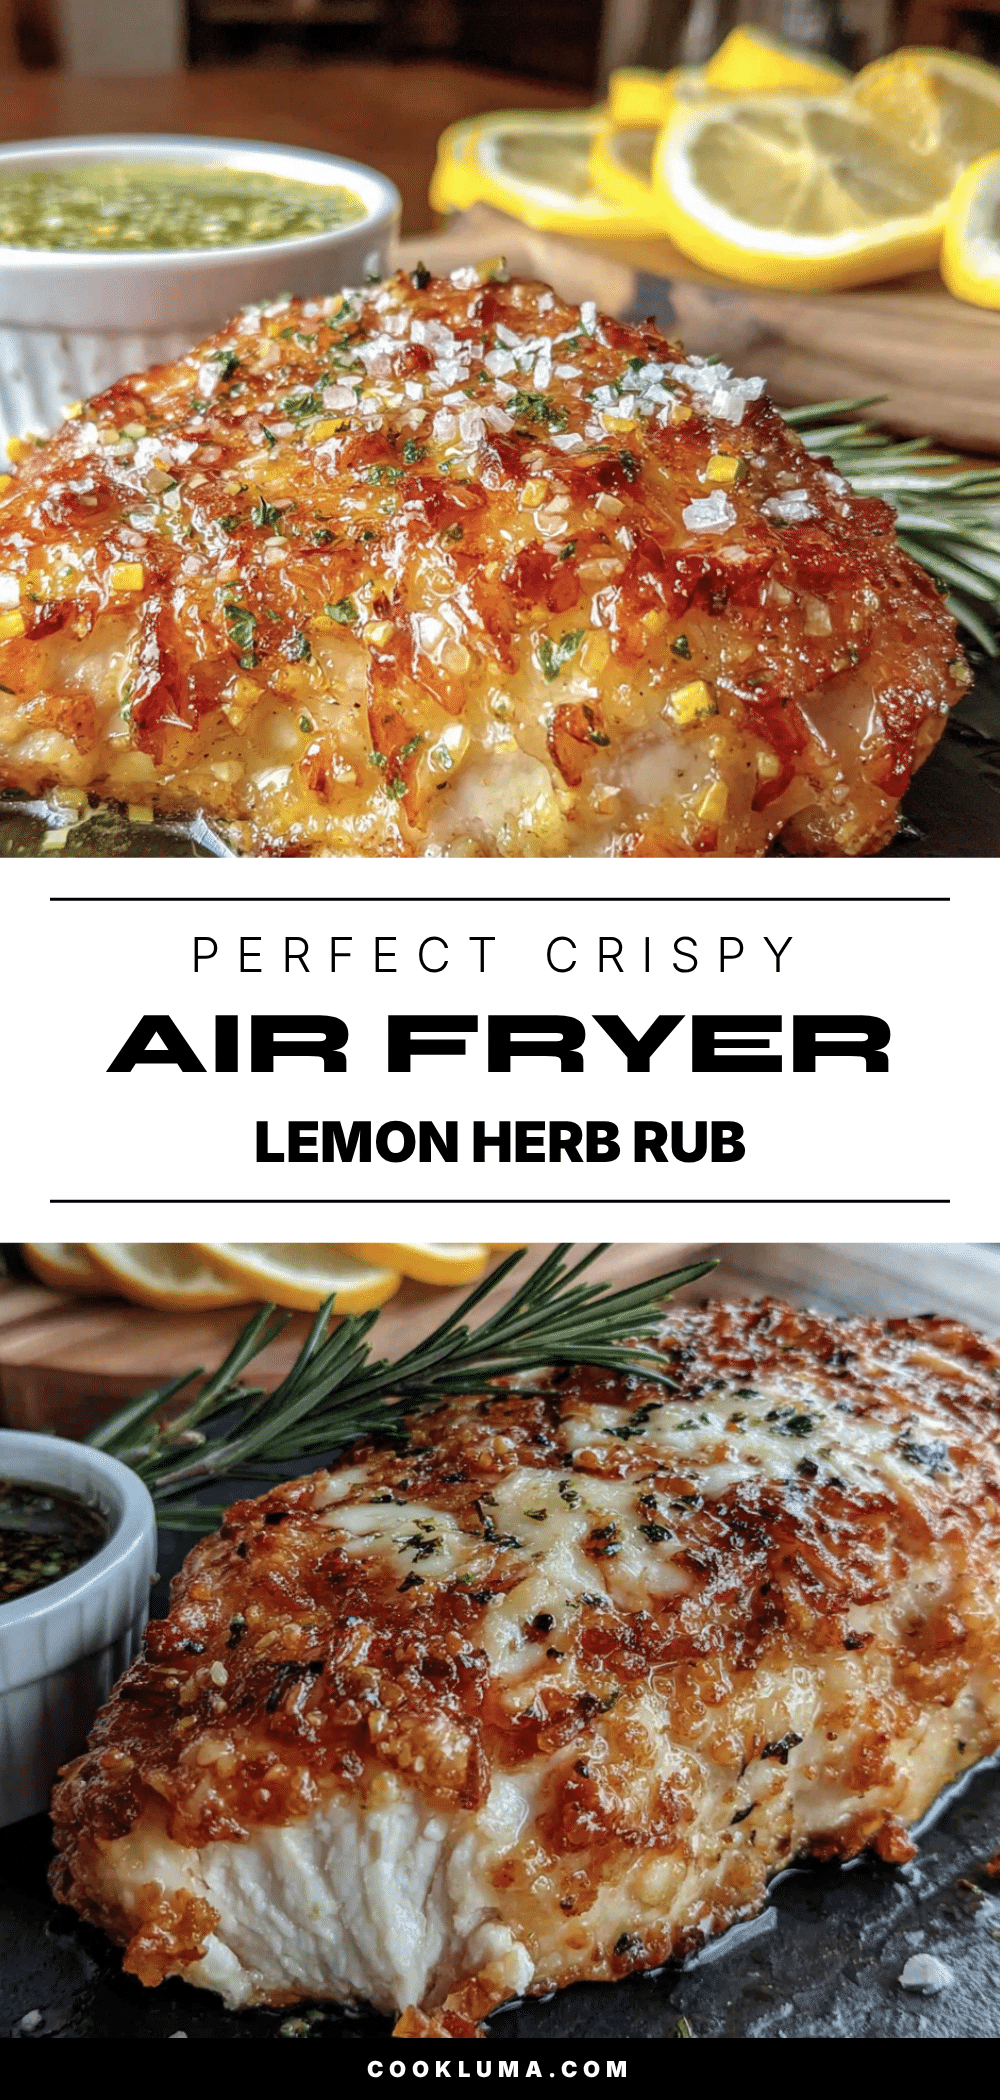
Perfect Crispy Air Fryer Chicken Breast

This air fryer chicken breast features a lemon herb rub that delivers a shatteringly crispy exterior and juicy interior, ready in under 30 minutes. It’s a healthy, gluten-free, and keto-friendly weeknight dinner that converts even the biggest skeptics.
- Prep Time: 15 minutes
- Cook Time: 15 minutes
- Total Time: 30 minutes
- Yield: 2 servings 1x
- Category: Main Course
- Cuisine: American
Ingredients
- 2 boneless, skinless chicken breasts (about 6–8 ounces / 170-225g each)
- 1 tablespoon kosher salt (for the quick brine)
- 2 cups cold water (for the brine)
- 1 tablespoon olive oil
- 2 tablespoons olive oil
- Zest of 1 lemon (about 1 tablespoon)
- 2 tablespoons fresh lemon juice
- 3 cloves garlic, minced
- 1 teaspoon dried oregano
- 1 teaspoon dried thyme
- 1/2 teaspoon dried rosemary, crushed
- 1/2 teaspoon smoked paprika
- 1/4 teaspoon black pepper, freshly ground
- 1/4 teaspoon red pepper flakes (optional)
- Fresh lemon wedges (for serving, optional)
- Fresh parsley or thyme sprigs (for garnish, optional)
Instructions
- Quick Brine the Chicken (10 minutes): In a medium bowl, dissolve 1 tablespoon of kosher salt in 2 cups of cold water. Place the chicken breasts in the brine and let them sit for 10 minutes.
- Make the Lemon Herb Rub (5 minutes): While the chicken brines, combine 2 tablespoons olive oil, lemon zest, lemon juice, minced garlic, oregano, thyme, rosemary, smoked paprika, black pepper, and red pepper flakes (if using) in a small bowl. Stir until well combined.
- Pat the Chicken Dry (2 minutes): Remove the chicken from the brine and pat it completely dry with paper towels. Use three or four paper towels per breast and press firmly until the chicken feels tacky.
- Apply the Rub (3 minutes): Place the dried chicken breasts in a clean bowl. Drizzle with 1 tablespoon of olive oil and rub it all over. Then add the lemon herb rub and massage it into every surface. Let the chicken sit at room temperature for 5 minutes while the air fryer preheats.
- Preheat the Air Fryer (3-5 minutes): Preheat your air fryer to 375°F (190°C). If your air fryer doesn’t have a preheat function, run it empty for 3 minutes at the temperature.
- Arrange and Cook (12-15 minutes): Place the chicken breasts in the air fryer basket in a single layer, ensuring they are not touching. Cook at 375°F (190°C) for 6 minutes, then flip the chicken using tongs and cook for another 6-9 minutes, depending on thickness.
- Check Temperature (1 minute): Insert a meat thermometer into the thickest part of the breast. The target temperature is 160°F (71°C); the chicken will continue cooking to 165°F (74°C) while resting.
- Rest and Serve (5 minutes): Transfer the chicken to a cutting board and let it rest for 5 minutes. Slice against the grain, squeeze fresh lemon juice over the top, and garnish with parsley or thyme sprigs if desired. Serve immediately.
Notes
Pat the chicken extremely dry for maximum crispiness. Do not overcrowd the air fryer basket; leave at least an inch of space between pieces. Use a meat thermometer for accuracy—cooking times vary by thickness. Let the chicken rest for 5 minutes before slicing to retain juices. The lemon herb rub can be made up to 3 days ahead and stored in the refrigerator.
Nutrition
- Serving Size: 1 chicken breast
- Calories: 285
- Sugar: 1
- Sodium: 480
- Fat: 12
- Saturated Fat: 2
- Carbohydrates: 3
- Fiber: 1
- Protein: 38
Keywords: air fryer chicken breast, crispy chicken, lemon herb chicken, gluten-free chicken, keto chicken, quick chicken dinner


