There used to be a tiny bakery on Main Street in my hometown, tucked between a bookstore and a hardware store, that made the most incredible Thanksgiving-themed sugar cookies I have ever tasted. When they closed their doors three years ago — a “For Lease” sign appeared overnight, just like that — I honestly felt a little lost. Those cookies had become as much a part of my November as the turkey itself. After eleven tries — including one batch that looked more like sad, flattened chickens than turkeys — I finally cracked the code. These festive Thanksgiving turkey sugar cookies are the exact recreation of that bakery magic, and let me tell you, they are worth every single minute of trial and error.
The thing is, I’m not usually one to obsess over a cookie. But these were different. They had this perfect combination of a soft, buttery center with just the slightest crisp on the edge. The royal icing was the star — not too sweet, with a texture that set up beautifully without being rock hard. I remember standing at that bakery counter every November, watching the baker pipe those little turkey feathers with such precision. When the bakery disappeared, I figured I’d just find another recipe online. But nothing came close. Not even a little bit.
So I did what any slightly obsessed home cook would do: I started reverse-engineering. I paid attention to every detail I could remember — the way the cookie felt when I bit into it, the slight orange zest undertone, the perfect ratio of icing to cookie. My kitchen was a sugar cookie disaster zone for a solid month. But honestly, that fourth failed batch taught me more than any recipe ever could. Maybe you’ve been there — that moment when you realize the store-bought version just won’t cut it anymore, and you have to figure it out yourself. These festive Thanksgiving turkey sugar cookies became my mission, and now they’re my November tradition. I keep making them because every bite tastes like that little bakery, and that’s a feeling you can’t buy.
Why You’ll Love This Recipe
I’ve tested this recipe more times than I care to admit, and I can tell you with complete confidence — these are not just another sugar cookie. They are the kind of cookie that makes people stop mid-conversation and just stare at the plate. Here is why this version is different from everything else out there:
- Perfectly Soft Centers : The cream cheese in the dough gives these cookies a tenderness that regular sugar cookies just cannot match. No dry, crumbly mess here.
- No Spreading : I learned the hard way that chilling the dough is non-negotiable. These cookies hold their shape beautifully, so your turkeys actually look like turkeys.
- Royal Icing That Works : My first few attempts at royal icing were a sticky disaster. This recipe uses a foolproof ratio that dries glossy and smooth without cracking.
- Kid-Friendly Fun : My niece and nephew spent an entire afternoon decorating these last Thanksgiving. The mess was worth every smile.
- Make-Ahead Magic : The dough freezes beautifully, and the baked cookies stay fresh for over a week. Perfect for holiday prep.
This recipe is the result of countless batches, a few tears, and one very memorable kitchen meltdown over a batch of icing that refused to thicken. But every single failure taught me something. The cream cheese in the dough? That was a happy accident from a batch where I ran out of butter. The chilling time? Learned after my first batch spread into cookie blobs. These festive Thanksgiving turkey sugar cookies are my best version — tested, tweaked, and absolutely foolproof.
What Ingredients You Will Need
This recipe uses simple, everyday ingredients to create something truly special. Most of these are pantry staples, which makes these cookies perfect for last-minute holiday baking. The cream cheese is the secret weapon here — it adds a subtle tang and the most incredible texture.
For the Sugar Cookie Dough
- Unsalted butter, 1 cup (2 sticks), softened to room temperature — I prefer Kerrygold for the rich flavor
- Cream cheese, 4 ounces, softened — full-fat works best for texture
- Granulated sugar, 1 ½ cups
- Large egg, 1, room temperature
- Vanilla extract, 2 teaspoons — pure vanilla, not imitation
- Orange zest, 1 teaspoon (optional but highly recommended — this was the flavor I was missing in my early attempts)
- All-purpose flour, 3 cups, spooned and leveled
- Baking powder, 1 teaspoon
- Salt, ½ teaspoon
For the Royal Icing
- Powdered sugar, 4 cups, sifted — clumps are the enemy of smooth icing
- Meringue powder, 3 tablespoons — I use Wilton brand for consistent results
- Warm water, 5-6 tablespoons
- Vanilla extract, ½ teaspoon
- Gel food coloring in brown, orange, red, yellow, and white — gel is better than liquid because it doesn’t thin the icing
For Decoration
- Candy eyes, small size — you can find these at most craft stores
- Orange sprinkles or small orange candies for the beak
- Edible glitter (optional, but it makes them look magical on a dessert table)
I recommend using a kitchen scale for the flour if you have one — it makes a huge difference in consistency. If you don’t have cream cheese, you can substitute with an additional 4 ounces of butter, but the texture will be slightly different. For a dairy-free version, use vegan butter and dairy-free cream cheese, though the dough will be a bit more delicate to work with.
Equipment Needed
You do not need a professional bakery setup to make these cookies, but a few key tools will make your life much easier. I learned this the hard way after trying to pipe icing with a ziplock bag that exploded halfway through.
- Turkey-shaped cookie cutter — about 3-4 inches in size. I found mine at a kitchen supply store, but online retailers have great options
- Stand mixer or hand mixer — both work fine, but a stand mixer makes the creaming process hands-free
- Baking sheets — heavy-duty ones prevent uneven browning
- Parchment paper or silicone baking mats — silicone mats are my favorite for even baking
- Rolling pin with thickness guides — adjustable rolling pins are worth the investment
- Piping bags with small round tips (size 2 or 3) — disposable bags are less messy
- Cooling racks — wire racks prevent soggy bottoms
- Small offset spatula — for smoothing icing
- Toothpicks — for popping air bubbles in the icing and fixing small mistakes
If you don’t have a turkey cutter, a large round cutter works too — just pipe the feathers freehand. I actually did this my first year and they turned out charmingly rustic. Budget tip: check thrift stores for cookie cutters. I found my favorite turkey cutter for fifty cents.
Preparation Method
This recipe takes about 2 hours total, including chilling and cooling time. The actual hands-on work is about 45 minutes. I like to break it into manageable chunks so it doesn’t feel overwhelming.
- Cream the butter and cream cheese (5 minutes). In a large mixing bowl, beat the softened butter and cream cheese together until smooth and fluffy. Scrape down the sides of the bowl halfway through. You want this mixture to be light and airy — it should look almost like whipped cream cheese.
- Add sugar and egg (3 minutes). Add the granulated sugar and beat until the mixture is light and fluffy, about 2 minutes. Add the egg, vanilla extract, and orange zest (if using). Beat until just combined. Do not overmix at this stage — you don’t want to incorporate too much air.
- Combine dry ingredients (2 minutes). In a separate bowl, whisk together the flour, baking powder, and salt. I learned the hard way that skipping the whisking step leads to pockets of baking powder in the cookies — not pleasant.
- Mix wet and dry (3 minutes). Gradually add the dry ingredients to the wet mixture, mixing on low speed. Stop as soon as the dough comes together. It should be soft but not sticky. If it feels too sticky, add a tablespoon of flour. If it feels dry, add a teaspoon of milk.
- Chill the dough (minimum 1 hour). Divide the dough into two discs, wrap tightly in plastic wrap, and refrigerate for at least 1 hour. This step is non-negotiable — I skipped it once and my cookies spread into unrecognizable blobs. The dough can be refrigerated for up to 3 days or frozen for up to 3 months.
- Preheat and prepare (10 minutes). When you’re ready to bake, preheat your oven to 350°F (175°C). Line your baking sheets with parchment paper or silicone mats.
- Roll and cut (15 minutes). On a lightly floured surface, roll out one disc of dough to about ¼-inch thickness. I use rolling pin rings for consistent thickness. Cut out your turkey shapes and place them 2 inches apart on the prepared baking sheets. Re-roll the scraps once — after that, the dough gets tough.
- Bake (8-10 minutes). Bake for 8-10 minutes, or until the edges are just barely golden. The centers should look set but not brown. My first batch came out overbaked because I waited for the whole cookie to turn golden — don’t make that mistake. Let them cool on the baking sheet for 5 minutes, then transfer to a wire rack to cool completely.
- Make the royal icing (10 minutes). In a clean mixing bowl, combine the powdered sugar and meringue powder. Add 5 tablespoons of warm water and the vanilla extract. Beat on low speed until combined, then increase to medium-high and beat for 5 minutes. The icing should be thick and glossy. Add more water, one teaspoon at a time, until it reaches a “10-second consistency” — when you lift the spoon, the icing should flow back into the bowl and smooth out in about 10 seconds.
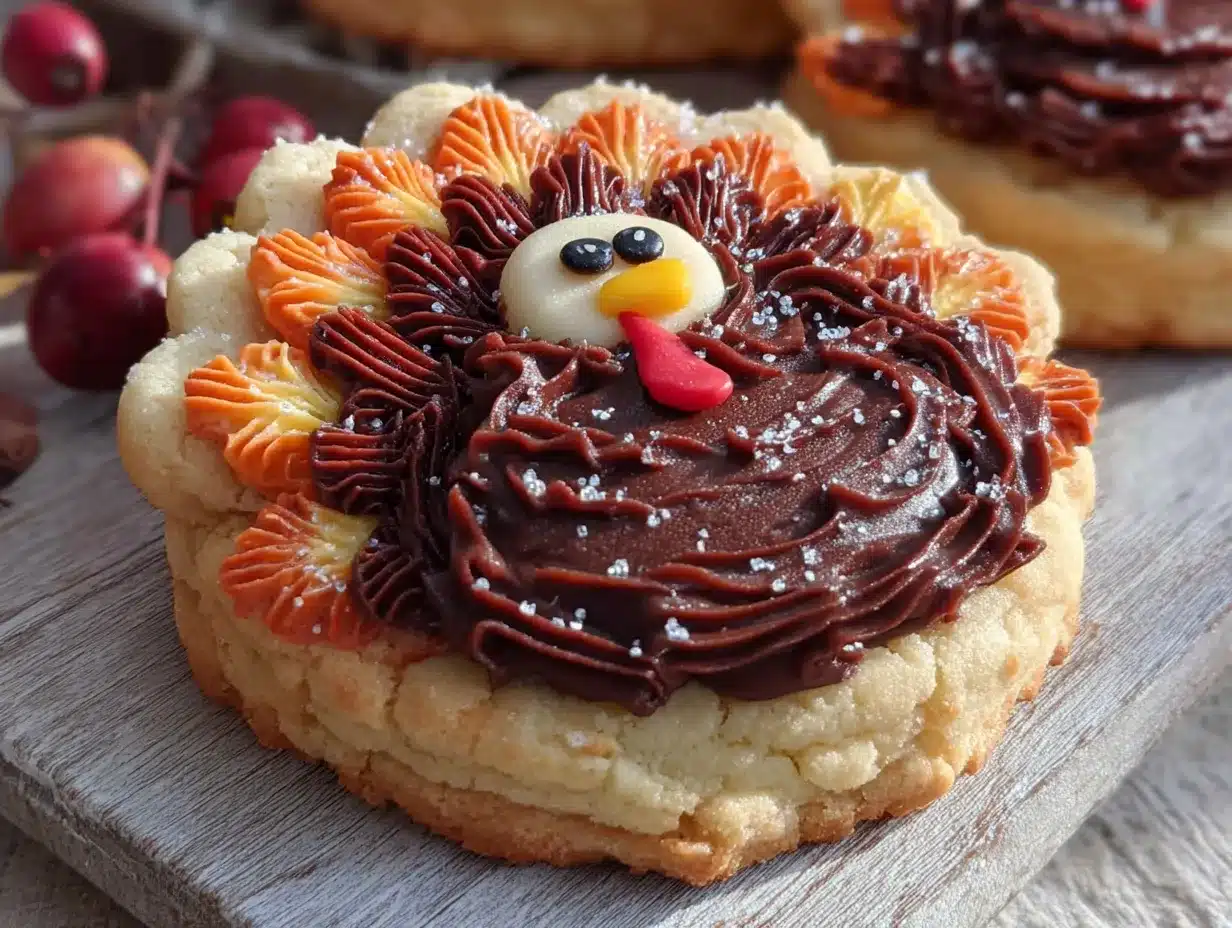
- Color and decorate (30-45 minutes). Divide the icing into separate bowls and color as desired. I use brown for the body, orange for the beak and feet, red for the wattle, and yellow for the feathers. Keep the bowls covered with damp paper towels to prevent the icing from drying out. Pipe the outlines first, then fill with a slightly thinner icing. Use a toothpick to spread the icing into corners and pop any air bubbles.
- Add details (15 minutes). While the base icing is still wet, add the candy eyes and any sprinkles. Let the icing set completely, about 2-4 hours at room temperature. Do not refrigerate — the condensation will ruin the finish.
Your kitchen will smell incredible at this point — buttery, sweet, with just a hint of orange. The cookies should have a slight golden edge and a soft, tender center. If they feel too firm, you might have overbaked them slightly, but they will still taste delicious.
Cooking Tips & Techniques
I have made every mistake in the book with these cookies, and I am sharing them so you don’t have to. Here is what I learned the hard way:
Temperature matters more than you think. Your butter and cream cheese must be at room temperature — not microwaved, not straight from the fridge. Cold butter creates a dense dough that spreads unevenly. I leave mine on the counter for about an hour before starting. If you forget, cut the butter into small cubes and let it sit for 20 minutes.
Chilling is not optional. I cannot stress this enough. The dough needs at least an hour in the fridge to firm up the butter and relax the gluten. If you’re in a hurry, pop the cut-out cookies in the freezer for 15 minutes before baking. This prevents spreading and keeps your turkey shapes intact.
The 10-second icing test changed my life. Before I learned this trick, my royal icing was either too thick to pipe or too thin to hold its shape. The 10-second consistency is the sweet spot — when you lift a spoonful of icing, it should flow back into the bowl and the surface should smooth out in about 10 seconds. If it takes longer, it’s too thick. If it smooths out immediately, it’s too thin.
Work in batches. I used to try to decorate all 24 cookies at once, and the icing would start to crust over before I finished. Now I work in batches of 6 — pipe the outlines, fill them, add details, and then move on to the next batch. It keeps the process manageable and the results consistent.
My biggest failure happened when I tried to speed up the drying process by putting the decorated cookies in the refrigerator. The condensation ruined the glossy finish, and I ended up with streaky, sad-looking turkeys. Let them dry at room temperature, uncovered, for at least 2 hours. Overnight is even better.
Variations & Adaptations
One of the best things about this recipe is how adaptable it is. I have tried several variations over the years, and they all turned out wonderfully.
Gluten-Free Version : Substitute the all-purpose flour with a 1:1 gluten-free baking flour blend. I use Bob’s Red Mill, and the texture is surprisingly close to the original. Add an extra tablespoon of cream cheese to help with moisture.
Vegan Adaptation : Use vegan butter and dairy-free cream cheese. Replace the egg with a flax egg (1 tablespoon ground flaxseed mixed with 3 tablespoons water, let sit for 5 minutes). For the royal icing, use aquafaba (the liquid from a can of chickpeas) instead of meringue powder — 3 tablespoons of aquafaba whipped to stiff peaks works beautifully.
Flavor Twists : Add ½ teaspoon of cinnamon and ¼ teaspoon of nutmeg to the dough for a warm, spiced flavor. Or swap the orange zest for lemon zest and add 1 tablespoon of fresh lemon juice — this gives the cookies a bright, citrusy kick that pairs beautifully with the sweet icing.
Different Decorations : If you don’t have candy eyes, pipe small dots of black icing. For the feathers, use colored sanding sugar instead of icing — it gives a beautiful sparkly effect. I tried this last year and the kids went crazy for the texture.
Mini Version : Use a smaller cutter and reduce the baking time to 6-7 minutes. These are perfect for party favors or cookie platters.
Serving & Storage Suggestions
These festive Thanksgiving turkey sugar cookies are best served at room temperature. I like to arrange them on a large wooden board or a tiered serving platter for maximum visual impact. They make a stunning centerpiece for a dessert table or a thoughtful homemade gift.
For Serving : Pair these cookies with a warm cup of spiced apple cider or a pumpkin spice latte. They also go beautifully with a simple vanilla ice cream for a quick dessert. If you’re hosting Thanksgiving, set them out after the main meal with coffee and tea — they are light enough that guests will still have room.
Storage Instructions : Store the decorated cookies in an airtight container at room temperature for up to 1 week. Place parchment paper between layers to prevent the icing from sticking. Do not refrigerate — the moisture will soften the icing and ruin the texture.
Freezer Instructions : You can freeze the undecorated baked cookies for up to 3 months. Wrap them tightly in plastic wrap and place in a freezer-safe bag. Thaw at room temperature, then decorate as directed. The dough also freezes beautifully — wrap the disc in plastic wrap and place in a freezer bag for up to 3 months. Thaw in the refrigerator overnight before rolling and cutting.
Flavor Development : These cookies actually taste better the next day. The flavors meld together and the texture softens slightly. I always make mine a day ahead of time for the best results.
Nutritional Information & Benefits
Let’s be honest — these are a treat, not a health food. But they are made with real, recognizable ingredients, which is something I feel good about. Here is the estimated nutritional breakdown per cookie (based on 24 cookies):
| Nutrient | Amount per Cookie |
|---|---|
| Calories | 185 |
| Total Fat | 8g |
| Saturated Fat | 5g |
| Carbohydrates | 27g |
| Sugar | 18g |
| Protein | 2g |
| Sodium | 65mg |
The cream cheese adds a small amount of calcium and protein, and the butter provides vitamin A. If you use the orange zest, you get a tiny boost of vitamin C and antioxidants. For a lighter option, you can reduce the sugar in the dough to 1 cup — the cookies will be less sweet but still delicious, especially with the icing.
These cookies are suitable for vegetarians. For egg-free and dairy-free options, see the variations section above. They contain gluten, dairy, and eggs in the standard version, so please adjust accordingly for any allergies.
Frequently Asked Questions
Can I make these cookies without a turkey cookie cutter?
Absolutely. Use a round cutter and pipe the feathers freehand with icing. I actually prefer the look of freehand feathers — they have a charming, handmade quality. You can also use a large leaf-shaped cutter for the feathers and attach them to a round cookie body with a bit of icing.
Why did my cookies spread in the oven?
This usually happens when the dough is not chilled enough. Make sure you chill the dough for at least 1 hour, and if your kitchen is warm, pop the cut-out cookies in the freezer for 10 minutes before baking. Also, check that your butter was not too soft when you started — it should be room temperature, not melted.
Can I use store-bought frosting instead of royal icing?
You can, but it will not dry with the same hard, glossy finish. Store-bought frosting stays soft and will smudge easily. If you want an easier alternative, try a simple powdered sugar glaze (2 cups powdered sugar mixed with 3-4 tablespoons milk) — it dries matte but is much simpler to make.
How far in advance can I make these cookies?
You can make the dough up to 3 days ahead and keep it refrigerated. The baked, undecorated cookies can be stored at room temperature for up to a week. Decorated cookies are best within 3-4 days for the prettiest appearance, but they stay fresh for a full week.
My royal icing is too thin. Can I fix it?
Yes! Add more sifted powdered sugar, one tablespoon at a time, and beat well. If it is too thick, add water one teaspoon at a time. The key is making small adjustments and testing the consistency frequently. I keep a small bowl of extra powdered sugar and a cup of water nearby when I’m making icing.
Conclusion
These festive Thanksgiving turkey sugar cookies are more than just a pretty dessert — they are a taste of nostalgia, a labor of love, and a way to bring people together. Every time I make them, I think about that little bakery on Main Street and the joy those cookies brought to our Novembers. Now they bring that same joy to my own kitchen, and I hope they will bring it to yours too.
Do not be afraid to make these your own. Add your favorite spices, experiment with different decorations, or get the kids involved in the decorating process. The beauty of homemade cookies is that they are never perfect — and that is exactly what makes them special. I would love to hear how yours turn out. Drop a comment below with your favorite variation, or share a photo of your decorated turkeys. Happy baking, and happy Thanksgiving!
Pin This Recipe!

Festive Thanksgiving Turkey Sugar Cookies Best Easy Recipe

These festive Thanksgiving turkey sugar cookies are a perfect recreation of bakery magic, featuring soft, buttery centers with a slight crisp on the edge and a foolproof royal icing that dries glossy and smooth. They are kid-friendly, make-ahead, and absolutely delicious.
- Prep Time: 45 minutes
- Cook Time: 10 minutes
- Total Time: 2 hours (including chilling and cooling)
- Yield: 24 servings 1x
- Category: Dessert
- Cuisine: American
Ingredients
- 1 cup (2 sticks) unsalted butter, softened
- 4 ounces cream cheese, softened
- 1 ½ cups granulated sugar
- 1 large egg, room temperature
- 2 teaspoons vanilla extract
- 1 teaspoon orange zest (optional)
- 3 cups all-purpose flour, spooned and leveled
- 1 teaspoon baking powder
- ½ teaspoon salt
- 4 cups powdered sugar, sifted
- 3 tablespoons meringue powder
- 5–6 tablespoons warm water
- ½ teaspoon vanilla extract
- Gel food coloring (brown, orange, red, yellow, white)
- Small candy eyes
- Orange sprinkles or small orange candies
- Edible glitter (optional)
Instructions
- Cream the butter and cream cheese together until smooth and fluffy.
- Add sugar and beat until light and fluffy, then add egg, vanilla, and orange zest; beat until just combined.
- Whisk together flour, baking powder, and salt in a separate bowl.
- Gradually add dry ingredients to wet mixture, mixing on low until dough comes together.
- Divide dough into two discs, wrap in plastic wrap, and chill for at least 1 hour.
- Preheat oven to 350°F (175°C) and line baking sheets with parchment paper or silicone mats.
- On a lightly floured surface, roll out dough to ¼-inch thickness and cut into turkey shapes.
- Place cutouts 2 inches apart on prepared sheets and bake for 8-10 minutes until edges are just golden.
- Cool on baking sheet for 5 minutes, then transfer to wire rack to cool completely.
- Make royal icing: combine powdered sugar and meringue powder, add 5 tablespoons warm water and vanilla, beat until thick and glossy (10-second consistency).
- Divide icing and color as desired; pipe outlines first, then fill with slightly thinner icing.
- Add candy eyes and sprinkles while icing is wet; let set at room temperature for 2-4 hours.
Notes
Chilling the dough is non-negotiable to prevent spreading. Use room temperature butter and cream cheese. The 10-second consistency test is key for royal icing. Do not refrigerate decorated cookies to avoid condensation. Cookies taste better the next day.
Nutrition
- Serving Size: 1 cookie
- Calories: 185
- Sugar: 18
- Sodium: 65
- Fat: 8
- Saturated Fat: 5
- Carbohydrates: 27
- Protein: 2
Keywords: Thanksgiving cookies, turkey cookies, sugar cookies, royal icing, holiday baking, festive cookies


