There used to be a tiny wine bar tucked between a vintage bookstore and a dry cleaner in my old neighborhood, a place called The Gilded Grape. They had this thing they called the “Harvest Table” – not a charcuterie board, but a whole table covered in cured meats, wedges of cheese, piles of figs, and these roasted grapes that made the whole place smell like a hug. When they closed two summers ago (the landlord tripled the rent, the heartbreak is real), I genuinely mourned it. I mean, where else could you get a plate that felt like a warm autumn sweater? After maybe six attempts — some too salty, some where the cheese didn’t even make it to room temp — I finally cracked the code. This Friendsgiving charcuterie board is that exact experience, scaled up for the people you actually want to share a table with. Honestly, it’s the centerpiece that makes your guests feel like they walked into something special, and trust me, you’ve got this.
Why You’ll Love This Friendsgiving Charcuterie Board
Let’s be real — Friendsgiving is about the vibe, not the stress. You want a table that looks impressive without you sweating in the kitchen for hours. This board delivers exactly that. It’s the kind of spread that makes people pull out their phones before they even sit down.
- Perfect for a Crowd: This board scales beautifully. Whether you’ve got eight friends or eighteen, you just add more of everything. No complicated math required.
- Make-Ahead Magic: Almost everything can be prepped the day before. You’re basically just an assembler on the day, which leaves you time to actually enjoy your own party.
- Seasonal & Showstopping: The fall fruits — think crisp apples, juicy pears, and those sweet-tart pomegranate seeds — add color and freshness that cuts through all the rich cheese and salty meat.
- No Cooking Required (Almost): Okay, you might want to toast some nuts or warm up a dip, but there’s no actual cooking. It’s the ultimate low-effort, high-reward move for a host.
- Guaranteed Crowd-Pleaser: There’s something for everyone. The meat lovers, the cheese fiends, the gluten-free folks, the ones who just want to eat all the grapes. It’s a diplomatic win on a wooden board.
I’ve built this board for three different Friendsgivings now, and it never fails. The trick is balancing the flavors — salty prosciutto with sweet figs, sharp cheddar with honey, creamy brie with a crack of black pepper. It’s not just a snack; it’s an experience. And the best part? You get to take all the credit while barely lifting a finger.
What Ingredients You Will Need
This recipe uses a mix of everyday staples and a few special fall finds to build a board that’s both gorgeous and delicious. The key is variety — think different textures, colors, and flavors that play well together.
- For the Cheeses (3-4 varieties):
- 8 oz Brie or Camembert (a soft-ripened, creamy cheese that’s always a hit)
- 6 oz Sharp Cheddar, aged (the crumbly, nutty kind adds a strong counterpoint)
- 6 oz Manchego or Aged Gouda (a firm, slightly sweet cheese that shaves beautifully)
- 4 oz Blue Cheese like Gorgonzola or Roquefort (for the bold folks at the table)
- For the Cured Meats (3-4 varieties):
- 4 oz Prosciutto, thinly sliced (the salty, silky staple)
- 4 oz Salami, like Genoa or Soppressata (sliced into bite-sized rounds)
- 4 oz Spanish Chorizo (a little smoky, a little spicy)
- Optional: 4 oz Capicola or Speck (for another layer of flavor)
- For the Fall Fruits:
- 2 crisp apples (Honeycrisp or Fuji), sliced and tossed in lemon juice to prevent browning
- 2 ripe pears (Bartlett or Bosc), sliced the same way
- 1 cup fresh figs, halved (if you can find them; they’re a seasonal treasure)
- 1/2 cup pomegranate seeds (for those little bursts of tartness)
- 1 cup red or black grapes, in small clusters
- For the Accompaniments:
- 1/2 cup honey or fig jam (for drizzling over cheese)
- 1/2 cup Marcona almonds or candied pecans (toasted if you have time)
- 1/2 cup dried apricots or dates (chewy sweetness to balance the salt)
- 1 small baguette, sliced and toasted, or a box of good crackers (I like Raincoast Crisps or a simple water cracker)
- Cornichons or pickled onions (for that acidic pop that cuts through fat)
- Optional Garnishes:
- Fresh rosemary sprigs or thyme (for a rustic look)
- Edible flowers or small sage leaves (extra visual pop)
- A sprinkle of flaky sea salt (Maldon is my go-to)
When picking your ingredients, don’t overthink it. I’ve found that a trip to a store like Whole Foods or a local cheese shop is worth it for the variety. For the brie, I’m partial to a double-cream from Vermont — it’s just richer. And for the salami, look for one that’s not too hard; you want it to be easy to bite through. If you can’t find fresh figs, no worries — dried figs or even sliced persimmons work beautifully in their place.
Equipment Needed
You don’t need a ton of fancy gear for this, which is part of the beauty. Here’s what I use every time:
- A Large Board or Platter: A wooden cutting board, a marble slab, or even a large baking sheet lined with parchment paper will work. The bigger the better — you want space to spread everything out. I use a 20-inch round acacia board I found at HomeGoods for $25.
- Small Bowls: For things like honey, jam, olives, or nuts. Little ramekins or even small mason jar lids work great. You’ll need 3-4 of these.
- Cheese Knives: A set of small, separate knives for each cheese so flavors don’t mix. If you don’t have them, just use clean butter knives — it’s fine.
- A Sharp Knife & Cutting Board: For slicing apples, pears, and the baguette. A serrated knife is best for the bread.
- Serving Utensils: Small tongs or toothpicks for the meats and olives. Nothing fancy.
If you’re on a budget, skip the fancy board. A clean, flat surface covered with a piece of parchment or a large baking sheet is perfectly fine. The food is the star, not the board.
Preparation Method
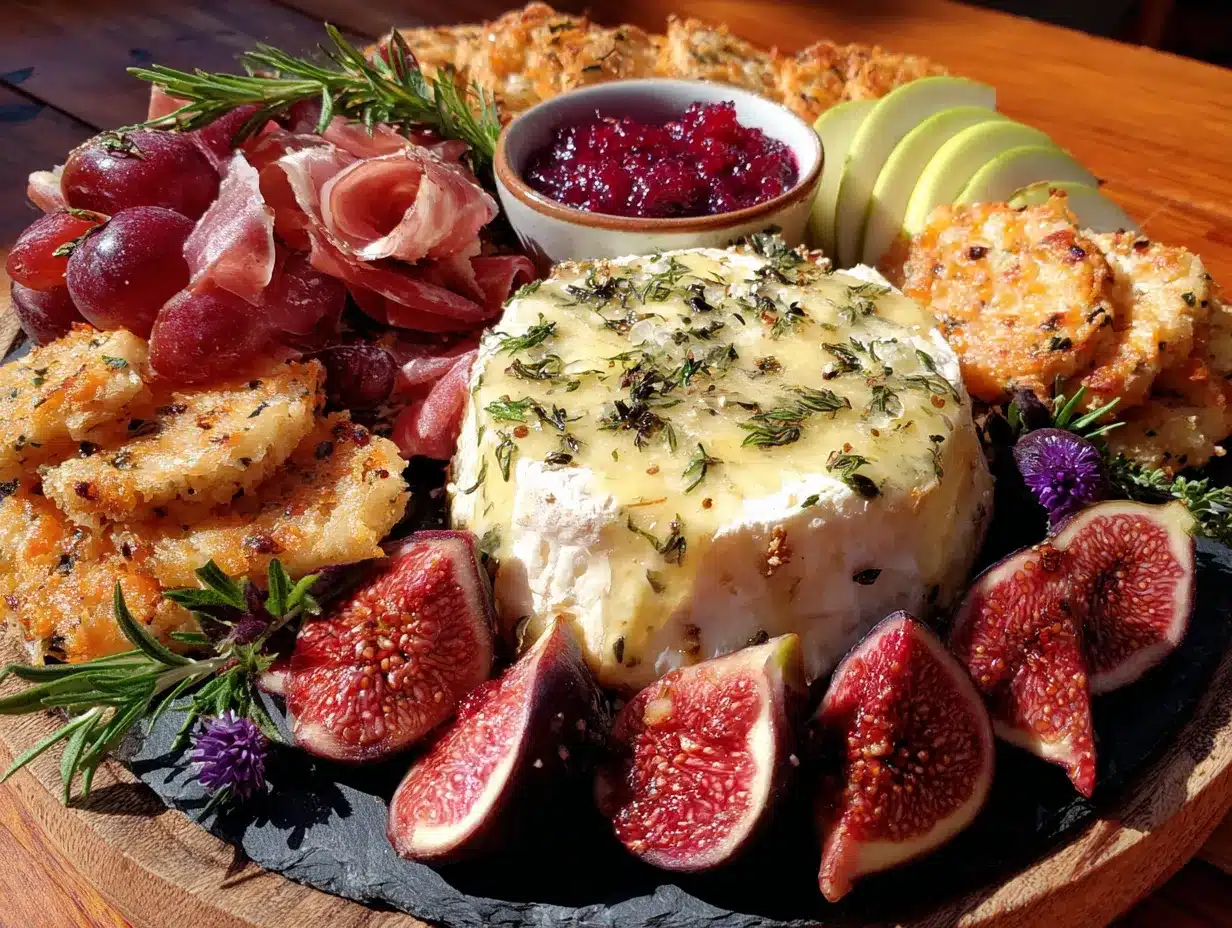
Building a charcuterie board is more art than science, but a little structure helps. Here’s how I do it, step by step.
- Take the Cheese Out Early: About 30-45 minutes before you plan to serve, pull your cheeses out of the fridge. Let them come to room temperature. This is non-negotiable — cold cheese tastes like nothing. Trust me, I learned this the hard way at a party where the brie was basically a hockey puck.
- Prep Your Fruits: Slice your apples and pears just before assembling to keep them from browning too much. Toss them in a little lemon juice (about a tablespoon) to help. Halve the figs and rinse the grapes. Pop the pomegranate seeds out of the skin — do this over a bowl of water to avoid staining your counter.
- Toast the Nuts & Bread: If you’re using nuts, toast them in a dry pan over medium heat for 3-4 minutes until they smell amazing. Do the same for the baguette slices — brush with olive oil and bake at 375°F for 5-7 minutes until golden. Let everything cool completely.
- Arrange the Cheese First: Place your cheese wedges around the board, spaced out. Think of them as anchor points. Put the brie in one corner, the cheddar in another, the manchego in the middle. Leave room for everything else to fit around them.
- Add the Meats: Fold or roll your prosciutto slices into loose ribbons and place them near the cheese. Fan out the salami rounds in a line or a small pile. The chorizo can go in a little cluster. Don’t be too precise — a little messy looks more inviting.
- Fill in with Fruits & Accompaniments: Now, fill the gaps. Tuck the apple slices next to the cheddar, place the figs near the brie, scatter the pomegranate seeds like little jewels. Add clusters of grapes in empty spaces. Put your small bowls of honey, jam, and olives in the remaining spots.
- Add the Crunchy Elements: Scatter the toasted nuts and dried fruits around the board. Arrange the crackers and bread slices in a few small piles, not a solid wall — you want people to reach for them, not feel overwhelmed.
- Garnish & Serve: Tuck a few sprigs of rosemary or thyme here and there for color. Sprinkle a little flaky sea salt over the cheese and fruit. Step back and admire your work. Then put it on the table and let your friends dig in.
A quick note: don’t overfill the board. You want people to be able to grab things without knocking over a bowl of olives. If you have a big group, you can always refill from the kitchen. It’s better to have a little less on the board and a little more in reserve.
Cooking Tips & Techniques
I’ve made my share of mistakes with these boards, so let me save you the trouble. Here’s what I’ve learned.
Balance is everything. You want a mix of soft and hard cheeses, mild and strong meats, sweet and savory fruits. If you put out only sharp cheddar and spicy salami, your guests’ palates will get tired. The sweet figs and honey are there to reset the taste buds. I once did a board with all blue cheese and prosciutto, and it was a salt bomb. Learn from my error.
Don’t slice everything. Leave some cheese wedges whole and some meats in a stack. It looks more rustic and gives people the fun of cutting their own. Plus, pre-sliced cheese dries out fast. I’ll leave the brie whole and let people dig in with a knife — it’s part of the experience.
Think about texture. You need something creamy (brie), something crumbly (aged cheddar), something crunchy (nuts, crackers), and something chewy (dried fruit). If your board is all one texture, it’s boring. I always add a bowl of Marcona almonds for that salty crunch.
Prep in stages. The day before, slice your cheese and meats, wash your fruit, and toast your nuts. Store everything in separate containers in the fridge. On the day of, you just need to arrange. This takes the pressure off completely. I’ve done this for three Friendsgivings in a row, and I’ve never been stressed.
Watch the timing. Take the cheese out 30 minutes before serving, but don’t assemble the board until 15 minutes before people arrive. The crackers will get soft if they sit out too long, and the fruit will start to look sad. A last-minute assembly is the secret to a fresh-looking board.
Variations & Adaptations
This board is super flexible. Here are a few ways to switch it up based on your crowd or what’s in season.
- Vegetarian Version: Skip the cured meats entirely and double up on the cheese. Add more vegetables like roasted red peppers, marinated artichoke hearts, or grilled zucchini strips. The board will still feel abundant. I did this for a friend who’s vegetarian, and she said it was the best board she’d ever had.
- Gluten-Free Adaptation: Use gluten-free crackers or replace the bread with rice cakes or slices of cucumber. The rest of the board is naturally gluten-free. Just make sure your meats and cheeses don’t have any hidden gluten — most don’t, but it’s worth checking.
- Seasonal Swap: In the fall, use apples and pears. In summer, swap in berries, peaches, and cherries. In winter, go for persimmons and pomegranate. The board always works; just change the fruit. I’ve done a summer version with nectarines and it was a hit.
- Spicy Twist: Add a drizzle of hot honey over the brie or include a spicy salami like ‘nduja. It adds a kick that cuts through the richness. My brother-in-law loves this version — he says it wakes up the whole board.
- Dessert Board: Swap the savory meats for dark chocolate, candied ginger, and dried cherries. Keep the cheese (brie and chocolate is a dream combo) and add some shortbread cookies. This is perfect for after the main meal.
Serving & Storage Suggestions
This board is best served at room temperature, so let it sit out for about 15 minutes after you assemble it. The cheese will be at its peak, and the fruit will feel fresh. I like to put it in the center of the table so everyone can reach it easily.
For presentation, don’t overthink it. A wooden board with a few small bowls looks effortlessly elegant. I sometimes add a few fresh herbs or edible flowers for color, but it’s not necessary. The fruit and cheese do all the work.
As for what to serve alongside, this board is a meal in itself. But if you want to round it out, a simple salad with a vinaigrette or a bowl of roasted butternut squash soup works beautifully. For drinks, a crisp apple cider or a light red wine like a Pinot Noir is perfect. I always have a bottle of something bubbly on hand too — it just feels festive.
Storage: If you have leftovers (unlikely, but possible), store the cheeses and meats separately in airtight containers in the fridge. The fruit will get soft, so eat that first. The crackers are best stored in a ziplock bag at room temperature. The board itself can be wiped clean with a damp cloth. Don’t soak it in water — it will warp.
The flavors actually get better after a day in the fridge — the cheese and meat meld together a bit. I’ve been known to have a “leftovers board” for lunch the next day, and it’s always a treat.
Nutritional Information & Benefits
This board is indulgent, but it also has some surprising benefits. Here’s a rough estimate per serving (about 1/8 of the board):
- Calories: Approximately 450-550 (depends on how much cheese you eat — let’s be honest, it’s a lot)
- Protein: 20-25g (from the meats and cheese)
- Fat: 30-35g (mostly from cheese and nuts, which are good fats)
- Carbohydrates: 30-40g (from fruit, crackers, and honey)
- Fiber: 5-7g (thanks to the apples, pears, and nuts)
The fall fruits are packed with vitamins — apples have fiber and vitamin C, pears are full of copper and antioxidants, and pomegranate seeds are a powerhouse of anti-inflammatory compounds. The nuts provide healthy fats and vitamin E. Even the cheese has calcium and protein. So yes, it’s a treat, but it’s not empty calories. I feel good serving this to my friends because it’s nourishing in its own way. Just don’t eat the whole board by yourself — though I won’t judge if you do.
If you’re watching your salt intake, go easy on the cured meats and blue cheese. But for a special occasion like Friendsgiving, this is the kind of food that brings people together. That’s a benefit no nutrition label can measure.
Conclusion
This Friendsgiving charcuterie board is more than just a snack — it’s the centerpiece that sets the tone for the whole meal. It’s easy to put together, looks like you spent hours on it, and gives your guests something to nibble on while they catch up. The combination of creamy cheese, salty meat, sweet fruit, and crunchy nuts is basically irresistible. I’ve made this board for three different Friendsgivings now, and every time, someone asks for the recipe. That’s the best compliment a host can get.
I’d love to hear how yours turns out. Did you add something unexpected? Swap in a different fruit? Let me know in the comments below — I’m always looking for new ideas. And if you share a photo on Pinterest, tag me so I can see your beautiful creation. Honestly, the best part of this recipe is sharing it with the people you care about. So grab a board, pile it high, and toast to friendship. You’ve got this.
Frequently Asked Questions
How far in advance can I assemble this board?
You can prep all the ingredients the day before, but assemble the board no more than an hour before serving. The crackers will get soft, and the fruit will brown if it sits out too long. I like to do a final assembly about 15 minutes before guests arrive.
Can I make this board dairy-free?
Absolutely. Use dairy-free cheeses like cashew-based brie or almond milk cheddar. There are some great options out now that melt and taste like the real thing. Just make sure to check the labels. The meats, fruits, and nuts are all naturally dairy-free.
What if I can’t find fresh figs?
No problem at all. Substitute with dried figs, sliced persimmons, or even a handful of dried apricots. The sweetness will still balance the salty meats. I’ve used dried figs in a pinch, and they work beautifully.
How do I keep the apples from turning brown?
Toss the sliced apples and pears in a little lemon juice (about a tablespoon per fruit). The citric acid slows down the browning. You can also use a bit of pineapple juice or a sprinkle of ascorbic acid powder. They’ll stay fresh-looking for a few hours.
What’s the best way to arrange the board for a large group?
Use a very large board or even a clean baking sheet. Place the cheese and meat first as anchor points, then fill in with fruit and accompaniments. For a large group, consider making two smaller boards instead of one giant one — it’s easier for people to reach everything. I’ve done this for 20 people, and it works perfectly.
Pin This Recipe!
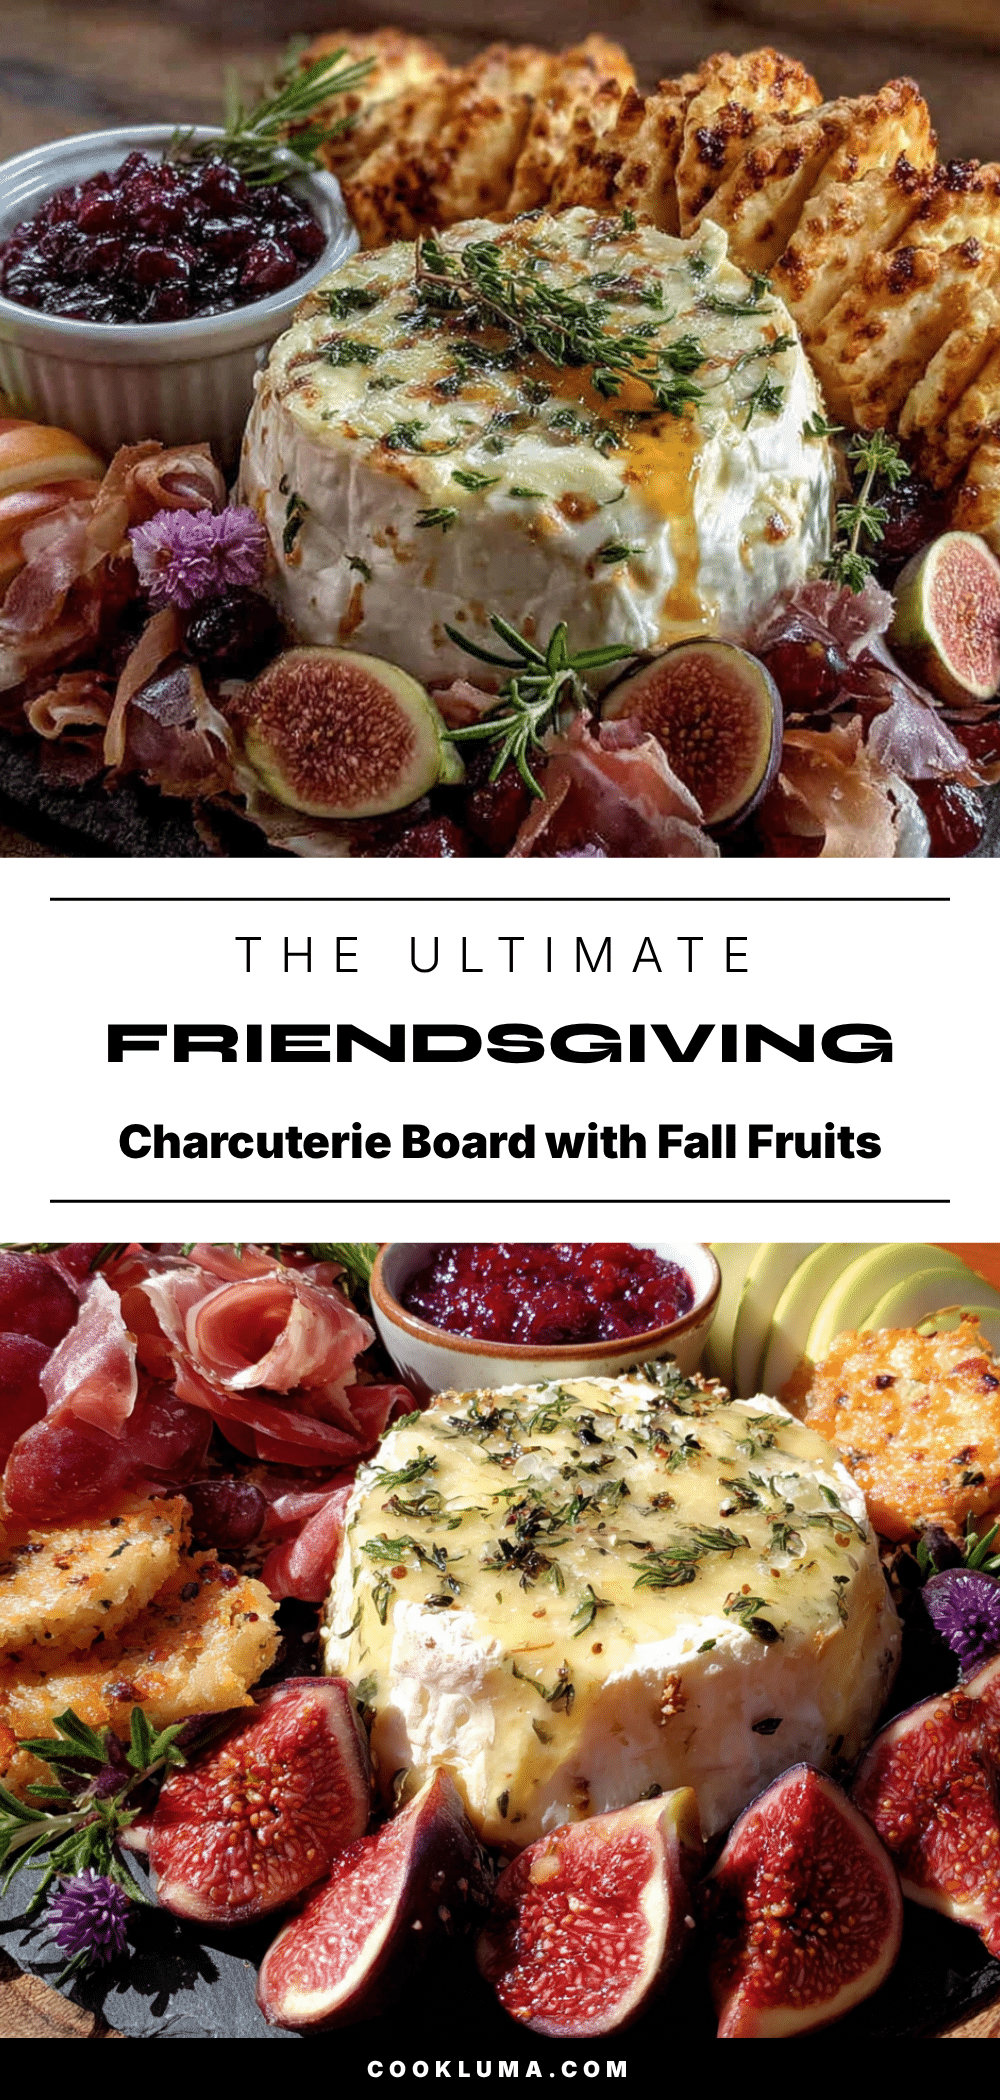
Easy Friendsgiving Charcuterie Board with Fall Fruits
A stunning and effortless charcuterie board featuring creamy cheeses, cured meats, and seasonal fall fruits like apples, pears, and pomegranate seeds. Perfect for Friendsgiving gatherings, this board is a low-effort, high-reward centerpiece that will impress your guests.
- Prep Time: 20 minutes
- Cook Time: 10 minutes
- Total Time: 30 minutes
- Yield: 8 servings 1x
- Category: Appetizer
- Cuisine: American
Ingredients
- 8 oz Brie or Camembert
- 6 oz Sharp Cheddar, aged
- 6 oz Manchego or Aged Gouda
- 4 oz Blue Cheese like Gorgonzola or Roquefort
- 4 oz Prosciutto, thinly sliced
- 4 oz Salami, like Genoa or Soppressata, sliced into bite-sized rounds
- 4 oz Spanish Chorizo
- 4 oz Capicola or Speck (optional)
- 2 crisp apples (Honeycrisp or Fuji), sliced and tossed in lemon juice
- 2 ripe pears (Bartlett or Bosc), sliced and tossed in lemon juice
- 1 cup fresh figs, halved
- 1/2 cup pomegranate seeds
- 1 cup red or black grapes, in small clusters
- 1/2 cup honey or fig jam
- 1/2 cup Marcona almonds or candied pecans, toasted if desired
- 1/2 cup dried apricots or dates
- 1 small baguette, sliced and toasted, or a box of good crackers
- Cornichons or pickled onions
- Fresh rosemary sprigs or thyme (optional garnish)
- Edible flowers or small sage leaves (optional garnish)
- Flaky sea salt (optional garnish)
Instructions
- Take the cheese out of the fridge 30-45 minutes before serving to bring to room temperature.
- Slice apples and pears just before assembling; toss with about 1 tablespoon lemon juice to prevent browning. Halve figs, rinse grapes, and remove pomegranate seeds.
- Toast nuts in a dry pan over medium heat for 3-4 minutes until fragrant. For baguette slices, brush with olive oil and bake at 375°F for 5-7 minutes until golden. Let cool completely.
- Place cheese wedges around the board, spaced out as anchor points.
- Fold or roll prosciutto into loose ribbons and place near cheese. Fan out salami rounds and cluster chorizo.
- Fill gaps with fruits: place apple slices near cheddar, figs near brie, scatter pomegranate seeds, and add grape clusters. Put small bowls of honey, jam, and olives in remaining spots.
- Scatter toasted nuts and dried fruits around the board. Arrange crackers and bread slices in small piles.
- Garnish with rosemary or thyme sprigs and sprinkle flaky sea salt over cheese and fruit. Serve immediately.
Notes
Prep all ingredients the day before and assemble no more than 1 hour before serving. For a vegetarian version, skip meats and double the cheese. For a dairy-free version, use dairy-free cheeses. If fresh figs are unavailable, substitute with dried figs, sliced persimmons, or dried apricots. To keep apples from browning, toss with lemon juice. For large groups, consider making two smaller boards.
Nutrition
- Serving Size: 1/8 of the board
- Calories: 500
- Sugar: 20
- Sodium: 800
- Fat: 32
- Saturated Fat: 12
- Carbohydrates: 35
- Fiber: 6
- Protein: 22
Keywords: Friendsgiving, charcuterie board, fall fruits, appetizer, cheese board, party food, easy entertaining


