The power went out halfway through making breakfast. That’s how I ended up at my neighbor’s kitchen table that rainy October morning, watching her three kids practically vibrate with excitement over a griddle. She wasn’t trying to impress anyone—she was wearing a faded sweatshirt with a coffee stain on the sleeve and slippers that had seen better days. But the smell that hit me when I walked through her back door? Honestly, it stopped me cold. Cinnamon and nutmeg and something warm and sweet, all wrapped up in that cozy scent that makes you feel like everything’s going to be okay.
“It’s just pancakes,” she said, shrugging when I asked what she was making. “The kids wanted something fun for the rainy day.”
Just pancakes. Sure. I mean, I’ve made pancakes before—boxes of mix, fancy recipes from blogs, the whole deal. But these were different. They had this golden-brown color with little darker spots where the pumpkin had caramelized, and she was piping something onto the griddle in shapes. Jack-o-lantern faces. Right there on the pancakes. Her five-year-old was “helping” by sprinkling chocolate chips onto the batter, and let me tell you, the kid was not precise about it. But that was the whole point—it wasn’t about perfection. It was about Tuesday morning in October with the rain tapping on the windows and three kids who thought breakfast was the best part of their day.
I stood there in my neighbor’s kitchen, still damp from the walk over, and watched her flip those fluffy jack-o-lantern pumpkin pancakes like it was nothing. She didn’t even look like she was trying. And that’s when I knew I had to figure out how to make them myself. Maybe you’ve been there—that moment when you realize the best recipes come from people who don’t know they’re doing anything special. These pancakes are that recipe for me.
Why You’ll Love This Recipe
I’ve tested this recipe more times than I want to admit—some batches were too flat, some were too dense, and one memorable attempt involved pancakes that refused to cook in the middle. But after all that trial and error, I landed on something truly special. These fluffy jack-o-lantern pumpkin pancakes hit that perfect sweet spot between festive fun and genuinely good food.
- Kid-Friendly Fun : The jack-o-lantern faces make breakfast feel like a Halloween party. My neighbor’s kids went absolutely wild for them, and I’ve seen the same reaction from every child who’s tried them since.
- Quick & Easy : From mixing bowl to plate in under 25 minutes. These are perfect for busy school mornings or lazy weekend breakfasts when you want something special without spending hours in the kitchen.
- Simple Ingredients : Nothing fancy here—pumpkin puree, flour, eggs, milk, and basic pantry staples. You probably have most of this stuff already, minus maybe the canned pumpkin.
- Actually Nutritious : Pumpkin adds vitamin A and fiber, so you can feel pretty good about serving these for breakfast. They’re indulgent enough to feel like a treat but wholesome enough for everyday meals.
- Naturally Sweetened : I use a combination of maple syrup and just a little brown sugar, so these aren’t overloaded with refined sugar. The pumpkin does a lot of the heavy lifting in the flavor department.
- Crowd-Pleaser : I’ve brought these to playdates, Halloween parties, and family brunches. Adults love them just as much as kids do—there’s something about a jack-o-lantern pancake that makes everyone smile.
What makes these different from every other pumpkin pancake recipe out there? It’s the texture—fluffy on the inside with slightly crispy edges, plus the jack-o-lantern faces that turn breakfast into an activity. You’re not just making food; you’re making memories. And honestly, that’s worth the extra five minutes it takes to pipe those faces onto the griddle.
What Ingredients You Will Need
This recipe uses simple, wholesome ingredients that come together to create something genuinely special. I’ve tested this with various brands and substitutions, so I’ll share what works best based on my experience.
For the Pancake Batter
- 1 ½ cups all-purpose flour (I prefer King Arthur Flour for consistent results, but any brand works fine)
- 2 teaspoons baking powder (make sure it’s fresh—old baking powder is the #1 reason pancakes turn out flat)
- ½ teaspoon baking soda (helps the pancakes rise and gives them that fluffy texture)
- ½ teaspoon salt (don’t skip this—it balances the sweetness)
- 1 teaspoon ground cinnamon (I use Saigon cinnamon for its warm, bold flavor)
- ½ teaspoon ground nutmeg (freshly grated if you have it, but pre-ground works perfectly)
- ½ teaspoon ground ginger (adds a subtle warmth that pairs beautifully with pumpkin)
- ¼ teaspoon ground cloves (optional, but I love the depth it adds)
- 2 large eggs (room temperature—this helps the batter come together smoothly)
- 1 cup pumpkin puree (not pumpkin pie filling! Libby’s is my go-to brand for consistent texture and flavor)
- 1 ¼ cups buttermilk (if you don’t have buttermilk, add 1 tablespoon of lemon juice or vinegar to regular milk and let it sit for 5 minutes)
- 3 tablespoons maple syrup (pure maple syrup, not pancake syrup—the flavor difference is noticeable)
- 2 tablespoons brown sugar (light or dark both work; dark adds more molasses flavor)
- 3 tablespoons melted butter (unsalted, cooled slightly—I use Kerrygold for its richness)
- 1 teaspoon vanilla extract (pure vanilla extract makes a difference here)
For the Jack-o-Lantern Faces
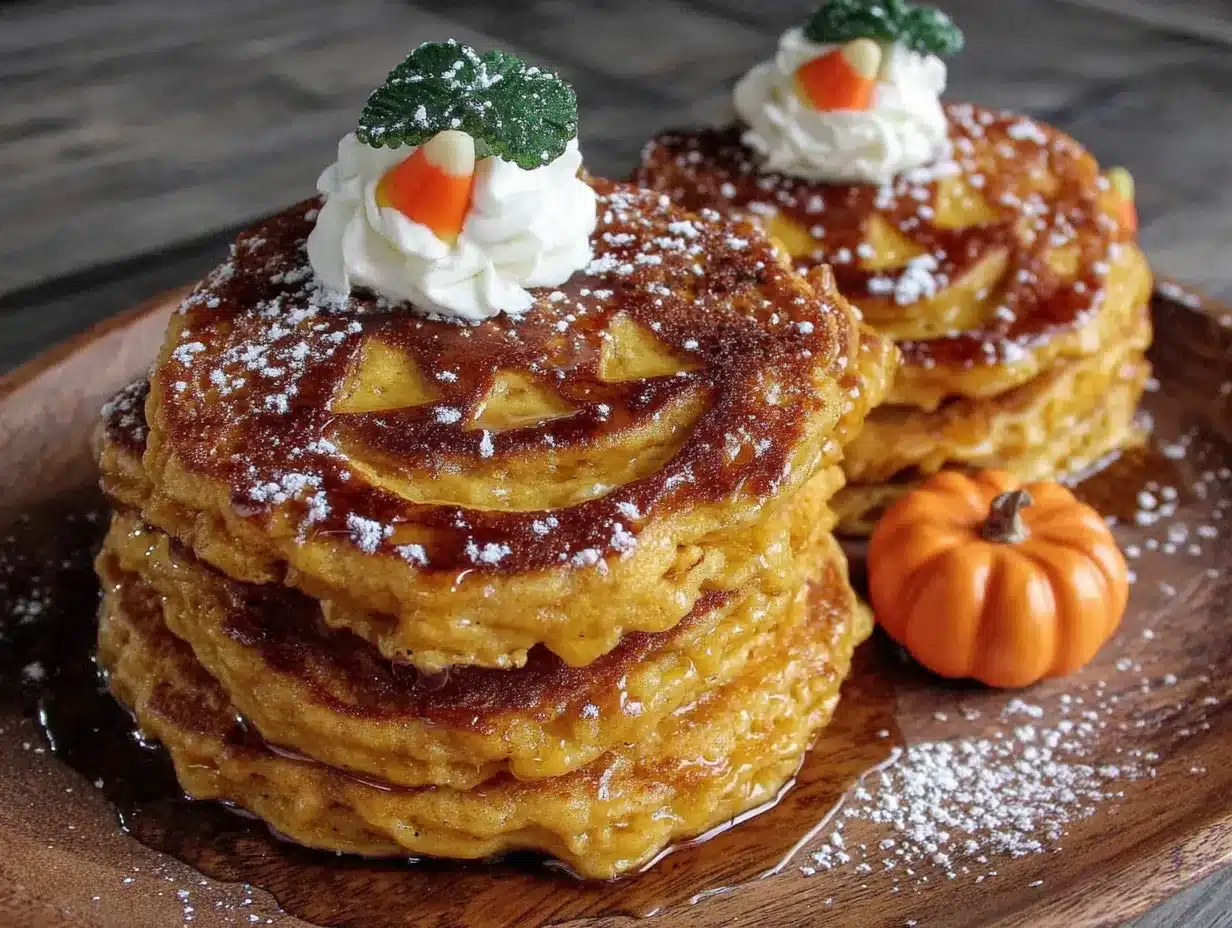
- ¼ cup semi-sweet chocolate chips (melted, for piping the faces—I use Ghirardelli)
- 1 tablespoon coconut oil (helps thin the chocolate for easier piping)
- Optional: extra chocolate chips for “warts” or pumpkin stems (my neighbor’s kids loved adding these)
For Serving
- Extra maple syrup (warmed slightly)
- Whipped cream (optional, but highly recommended for special occasions)
- Sprinkles (orange and black for Halloween vibes)
Substitution Notes: For a gluten-free version, use a 1:1 gluten-free baking flour blend. For a dairy-free option, substitute the buttermilk with almond milk mixed with lemon juice and use coconut oil instead of butter. The texture will be slightly different but still delicious.
Equipment Needed
You don’t need fancy equipment for these pancakes, which is part of why I love this recipe. Here’s what you’ll need:
- Large mixing bowl (any size works, but you want room to whisk without splashing)
- Medium mixing bowl (for combining wet ingredients separately)
- Whisk (a sturdy one—I’ve broken cheap whisks on thick pumpkin batter before)
- Griddle or large non-stick skillet (I use a 12-inch non-stick skillet and it works perfectly; an electric griddle is great if you’re making a big batch)
- Spatula (thin, flexible metal spatulas work best for flipping)
- Piping bag or small zip-top bag (for the jack-o-lantern faces—a zip-top bag with the corner snipped off works great)
- Measuring cups and spoons (accurate measurements matter in baking)
- Small microwave-safe bowl (for melting chocolate chips)
- Cookie scoop or ¼ cup measure (for consistent pancake sizes—this is my secret to even cooking)
If you don’t have a piping bag, don’t worry. I’ve used a plastic sandwich bag with a tiny hole cut in the corner more times than I can count. It works just as well and costs nothing extra. For the griddle, I actually prefer my cast iron skillet when I’m making these—it holds heat more evenly and gives the pancakes those beautiful golden-brown spots.
Preparation Method
Let me walk you through this step by step. I’ve made these pancakes at least twenty times now, so I’ve figured out all the little tricks that make the process smooth and the results consistently perfect.
Step 1: Mix the Dry Ingredients
In your large mixing bowl, whisk together the flour, baking powder, baking soda, salt, cinnamon, nutmeg, ginger, and cloves. Make sure everything is evenly distributed—I usually whisk for about 30 seconds to ensure there are no clumps of baking powder hiding anywhere. The spices should smell warm and inviting at this point. If they don’t, your spices might be old and you should consider replacing them.
Step 2: Combine the Wet Ingredients
In your medium mixing bowl, whisk the eggs until they’re light and frothy—about 1 minute. Add the pumpkin puree, buttermilk, maple syrup, brown sugar, melted butter, and vanilla extract. Whisk until everything is smooth and well combined. The mixture will be a gorgeous deep orange color. Don’t worry if it looks slightly separated; that’s normal with pumpkin puree.
Step 3: Make the Batter
Pour the wet ingredients into the dry ingredients. Here’s the crucial part: stir just until combined. I mean it—stop stirring when you can’t see any more dry flour. A few lumps are totally fine. Overmixing develops gluten and makes pancakes tough and rubbery. I learned this the hard way after a batch of pancakes that could have doubled as frisbees. The batter should be thick but pourable. If it seems too thick, add a tablespoon of milk at a time until it reaches the right consistency.
Step 4: Let the Batter Rest
This is my secret step, and I never skip it. Let the batter rest for 5-10 minutes while your griddle heats up. This allows the gluten to relax and the baking powder to start working, which means fluffier pancakes. I usually use this time to melt the chocolate chips for the faces and get my piping bag ready.
Step 5: Heat the Griddle
Heat your griddle or skillet over medium heat. You want it hot enough that a drop of water sizzles and evaporates immediately, but not so hot that the pancakes burn on the outside before cooking through. I test by flicking a tiny bit of water onto the surface—if it dances and evaporates, it’s ready. Lightly grease the surface with butter or cooking spray.
Step 6: Cook the Pancakes
Using your cookie scoop or ¼ cup measure, pour the batter onto the griddle. Leave about 2 inches between each pancake—they’ll spread a little as they cook. Cook until you see bubbles forming on the surface and the edges look set, about 2-3 minutes. The bottom should be golden brown. Flip carefully and cook for another 1-2 minutes on the second side. The pancakes should feel springy when you press gently on the center.
Step 7: Make the Jack-o-Lantern Faces
While the pancakes are still warm (but not hot), it’s time for the fun part. Melt your chocolate chips with the coconut oil in 20-second intervals in the microwave, stirring between each. Transfer to your piping bag or zip-top bag and snip a tiny corner off. Pipe jack-o-lantern faces onto each pancake—triangle eyes, a jagged smile, maybe a little nose if you’re feeling fancy. My neighbor’s kids insisted on adding chocolate chip “warts” to some of theirs. Let the chocolate set for a minute or two before serving.
Step 8: Serve Immediately
Stack the pancakes on plates, add extra chocolate chips or sprinkles if you want, and serve with warm maple syrup. The pancakes are best eaten right away while they’re still warm and fluffy.
Cooking Tips & Techniques
I’ve made every mistake in the book with these pancakes, so let me save you the trouble. Here’s what I’ve learned:
Don’t overmix the batter. I cannot stress this enough. Stir just until the flour disappears. Lumps are your friends here—they disappear during cooking. Overmixed batter makes dense, tough pancakes that nobody wants to eat.
Keep the heat medium, not high. I once cranked the heat thinking it would speed things up, and ended up with pancakes that were burned on the outside and raw in the middle. Medium heat gives you that perfect golden-brown exterior with a fully cooked, fluffy interior.
Use room temperature ingredients. Cold eggs or buttermilk can make the batter seize up and result in uneven cooking. Take your eggs and buttermilk out of the fridge about 20 minutes before you start mixing. If you forget (I do, constantly), place the eggs in a bowl of warm water for 5 minutes and microwave the buttermilk for 15 seconds.
Test your first pancake. I always cook one test pancake to check the heat and texture. If it’s too dark, lower the heat. If it’s too pale, crank it up a notch. This saves you from ruining an entire batch.
Keep pancakes warm in the oven. If you’re making a big batch, preheat your oven to 200°F and place cooked pancakes on a baking sheet in a single layer. They’ll stay warm and fluffy while you finish cooking the rest.
Pipe faces on warm pancakes. If the pancakes are too hot, the chocolate will melt and run. If they’re too cold, the chocolate won’t stick. Aim for warm—about 2 minutes after they come off the griddle.
Variations & Adaptations
One of the best things about this recipe is how easily it adapts to different tastes and dietary needs. Here are some variations I’ve tried and loved:
Gluten-Free Version
Substitute the all-purpose flour with a 1:1 gluten-free baking blend. I’ve had great results with Bob’s Red Mill Gluten-Free 1-to-1 Baking Flour. The texture is slightly more delicate, so be gentle when flipping. Add an extra tablespoon of buttermilk to compensate for the drier gluten-free flour.
Dairy-Free Version
Use almond milk mixed with 1 tablespoon of lemon juice instead of buttermilk, and substitute the melted butter with coconut oil or vegan butter. The pancakes will be slightly less rich but still deliciously fluffy. I’ve made this version for a friend’s dairy-free toddler and she gobbled them up.
Extra Pumpkin Spice
If you’re a pumpkin spice fanatic (no judgment here), increase the cinnamon to 2 teaspoons and add an extra ¼ teaspoon each of nutmeg and ginger. You can also add 1 tablespoon of pumpkin pie spice blend instead of the individual spices.
Chocolate Chip Pumpkin Pancakes
Fold ½ cup of mini chocolate chips into the batter before cooking. The chocolate melts into little pockets of goodness throughout the pancakes. My neighbor’s kids voted this their favorite variation.
Savory Pumpkin Pancakes
This might sound weird, but hear me out. Reduce the maple syrup to 1 tablespoon, omit the brown sugar, and add ½ teaspoon of black pepper and ¼ teaspoon of cayenne. Serve with crispy bacon and a drizzle of honey. The sweet-savory combo is surprisingly addictive.
Serving & Storage Suggestions
These pancakes are best served warm, right off the griddle, with a generous drizzle of maple syrup. For a truly festive presentation, stack 3-4 pancakes on a plate, add a dollop of whipped cream on top, and sprinkle with orange and black sprinkles. A side of crispy bacon or turkey sausage balances the sweetness perfectly.
For a fun Halloween breakfast party, set up a pancake bar with different toppings: whipped cream, chocolate chips, sprinkles, fresh berries, and extra maple syrup. Let the kids decorate their own pancakes with the jack-o-lantern faces—it’s a great activity and they love eating their creations.
Storage: Leftover pancakes (if you have any) can be stored in an airtight container in the refrigerator for up to 3 days. Place parchment paper between layers to prevent sticking. The chocolate faces might smudge slightly, but they’re still delicious.
Freezing: These pancakes freeze beautifully. Arrange them in a single layer on a baking sheet and freeze for 1 hour, then transfer to a freezer-safe bag. They’ll keep for up to 2 months. To reheat, pop them in the toaster or microwave for 30-45 seconds. The chocolate faces hold up surprisingly well in the freezer.
Reheating: The toaster is actually my preferred method for reheating—it crisps up the edges nicely while keeping the inside fluffy. If you’re reheating a big batch, place them on a baking sheet in a 350°F oven for 5-7 minutes.
Nutritional Information & Benefits
I’m not a nutritionist, but I do pay attention to what goes into my family’s food. These pancakes offer some surprising nutritional benefits thanks to the star ingredient.
Estimated per serving (3 pancakes with syrup): Calories: 385, Fat: 14g, Carbohydrates: 58g, Fiber: 4g, Protein: 10g, Sugar: 24g
Pumpkin Power: Pumpkin puree is packed with vitamin A (over 200% of your daily needs per cup), which supports eye health and immune function. It’s also a good source of fiber, which helps keep everyone full and satisfied until lunchtime.
Whole Grain Option: Swap half the all-purpose flour for whole wheat pastry flour to add extra fiber and nutrients without sacrificing fluffiness.
Lower Sugar Version: Reduce the maple syrup to 1 tablespoon and omit the brown sugar. The pumpkin adds natural sweetness, and you can always add more syrup at the table.
Allergen Notes: This recipe contains wheat, dairy, and eggs. For allergen-friendly versions, see the variations section above.
FAQ
Can I use pumpkin pie filling instead of pumpkin puree?
No, please don’t! Pumpkin pie filling is pre-sweetened and spiced, so it will throw off the entire recipe. Stick with 100% pure pumpkin puree. Libby’s is my go-to brand and it’s available year-round in most grocery stores.
Why did my pancakes turn out flat?
This usually happens for one of three reasons: your baking powder is old, you overmixed the batter, or your griddle wasn’t hot enough. Check your baking powder by dropping a teaspoon into hot water—if it fizzes vigorously, it’s still good. And remember, lumps are okay!
Can I make the batter the night before?
I don’t recommend it. The baking powder starts reacting as soon as it hits the liquid, so overnight batter will lose its lift. If you want to prep ahead, mix the dry ingredients and wet ingredients separately, then combine them in the morning. It takes less than 5 minutes.
How do I get the jack-o-lantern faces to look good?
Practice makes perfect, but here’s my trick: pipe the chocolate onto a piece of parchment paper first to test the flow. You want a steady, thin stream. Start with simple faces—triangle eyes and a crescent smile—then get creative once you’re comfortable. And don’t stress about perfection; kids love imperfect faces even more.
Can I use an electric griddle?
Absolutely! An electric griddle is actually ideal for these pancakes because it maintains a consistent temperature. Set it to 350°F and you’re good to go. Plus, you can cook more pancakes at once, which is perfect for feeding a crowd.
Conclusion
These fluffy jack-o-lantern pumpkin pancakes have become a fall tradition in my house, and I have a feeling they’ll become one in yours too. They’re the kind of recipe that turns an ordinary Tuesday morning into something special—the kind where kids actually want to get out of bed and help in the kitchen, where the smell of cinnamon and pumpkin fills every corner of the house, where breakfast feels like a celebration.
I love that this recipe lets you be creative. Maybe your jack-o-lantern faces will be silly or scary or just plain weird. Maybe your kids will add extra chocolate chips where they don’t belong. That’s the whole point—these pancakes are about having fun and making memories together. The recipe is just the starting point; the magic happens when you make it your own.
So grab that can of pumpkin, heat up your griddle, and get ready to make some breakfast magic. I’d love to hear how your jack-o-lantern pancakes turn out—drop a comment below and share your creations! And if you come up with a fun new face design, definitely share that too. Happy cooking, and happy Halloween!
Pin This Recipe!
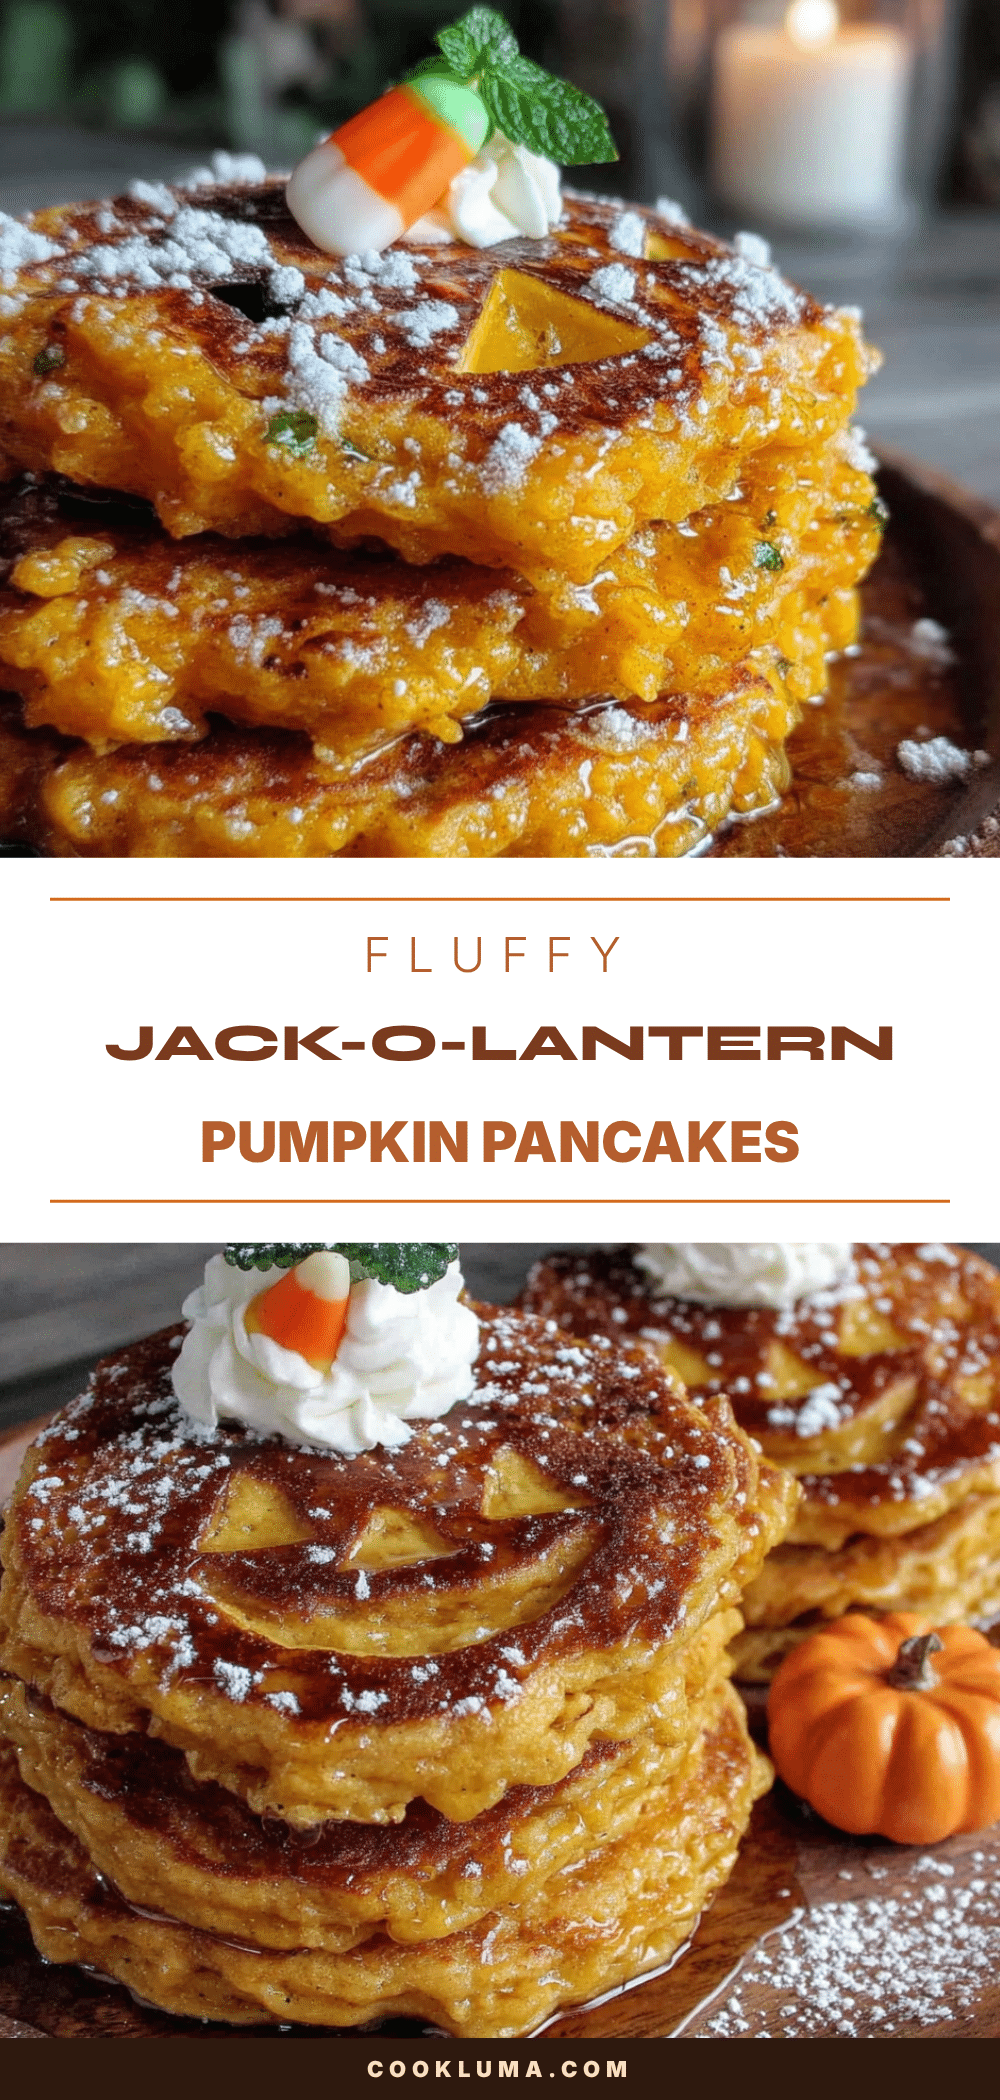
Fluffy Jack-o-Lantern Pumpkin Pancakes: Easy Kid-Friendly Breakfast
These fluffy jack-o-lantern pumpkin pancakes are a festive and fun breakfast that kids love. Made with simple ingredients and ready in under 25 minutes, they feature adorable jack-o-lantern faces piped with chocolate, making breakfast a memorable Halloween activity.
- Prep Time: 10 minutes
- Cook Time: 15 minutes
- Total Time: 25 minutes
- Yield: 4 servings 1x
- Category: Breakfast
- Cuisine: American
Ingredients
- 1 ½ cups all-purpose flour
- 2 teaspoons baking powder
- ½ teaspoon baking soda
- ½ teaspoon salt
- 1 teaspoon ground cinnamon
- ½ teaspoon ground nutmeg
- ½ teaspoon ground ginger
- ¼ teaspoon ground cloves (optional)
- 2 large eggs (room temperature)
- 1 cup pumpkin puree (not pumpkin pie filling)
- 1 ¼ cups buttermilk
- 3 tablespoons maple syrup (pure)
- 2 tablespoons brown sugar (light or dark)
- 3 tablespoons unsalted butter (melted and cooled)
- 1 teaspoon vanilla extract (pure)
- ¼ cup semi-sweet chocolate chips (melted, for faces)
- 1 tablespoon coconut oil (for thinning chocolate)
- Extra chocolate chips for ‘warts’ or pumpkin stems (optional)
- Extra maple syrup (for serving, warmed)
- Whipped cream (optional, for serving)
- Orange and black sprinkles (optional, for serving)
Instructions
- In a large mixing bowl, whisk together the flour, baking powder, baking soda, salt, cinnamon, nutmeg, ginger, and cloves until evenly distributed.
- In a medium mixing bowl, whisk the eggs until light and frothy (about 1 minute). Add the pumpkin puree, buttermilk, maple syrup, brown sugar, melted butter, and vanilla extract. Whisk until smooth and well combined.
- Pour the wet ingredients into the dry ingredients. Stir just until combined—a few lumps are okay. Do not overmix. The batter should be thick but pourable; if too thick, add a tablespoon of milk at a time.
- Let the batter rest for 5-10 minutes while the griddle heats up. Meanwhile, melt the chocolate chips with coconut oil in 20-second intervals in the microwave, stirring between each. Transfer to a piping bag or zip-top bag and snip a tiny corner off.
- Heat a griddle or large non-stick skillet over medium heat. Test by flicking a drop of water onto the surface—if it sizzles and evaporates, it’s ready. Lightly grease with butter or cooking spray.
- Using a cookie scoop or ¼ cup measure, pour batter onto the griddle, leaving about 2 inches between pancakes. Cook until bubbles form on the surface and edges look set (about 2-3 minutes). Flip carefully and cook for another 1-2 minutes until golden brown and springy.
- While pancakes are still warm (but not hot), pipe jack-o-lantern faces onto each pancake using the melted chocolate—triangle eyes, a jagged smile, and optional nose. Add chocolate chip ‘warts’ if desired. Let chocolate set for 1-2 minutes.
- Serve immediately stacked on plates with warm maple syrup, whipped cream, and sprinkles if desired.
Notes
Don’t overmix the batter—lumps are okay. Keep heat at medium to avoid burning. Use room temperature ingredients for best results. Pipe faces on warm (not hot) pancakes to prevent chocolate from melting. Leftover pancakes can be stored in the refrigerator for up to 3 days or frozen for up to 2 months. Reheat in a toaster or oven at 350°F for 5-7 minutes.
Nutrition
- Serving Size: 3 pancakes with syru
- Calories: 385
- Sugar: 24
- Sodium: 520
- Fat: 14
- Saturated Fat: 7
- Carbohydrates: 58
- Fiber: 4
- Protein: 10
Keywords: pumpkin pancakes, jack-o-lantern pancakes, Halloween breakfast, kid-friendly pancakes, fluffy pancakes, fall breakfast, pumpkin spice pancakes


