I was standing in line at the post office, holding a package that was definitely taped together one too many times, when the woman behind me—a retired schoolteacher with the kindest eyes—started talking about Halloween baking. I wasn’t expecting baking advice from a stranger in line, but there I was, shifting my weight from one foot to the other, listening to her describe exactly how to make brownies that look like spider webs. She called them her “grandkids’ favorite thing on earth,” and honestly, she had me at peanut butter.
Her name was Margaret, and she pulled a crumpled recipe card from her purse right there between the counter and the rack of envelopes. The card was stained with what I hoped was chocolate. She laughed about the time she forgot to add the sugar and ended up with something she described as “sad, flat mud.” I mean, we’ve all been there, right? That tiny, imperfect moment made me trust her immediately. She said the trick was using a toothpick—not a knife, not a fork—to drag the peanut butter into those web-like lines. Who knew a trip to the post office would change my brownie game forever?
You know that feeling when you find a recipe that just works? The kind that makes your kids’ eyes go wide and your husband ask if you’re a professional baker? That’s this one. Every time I make these Kid-Approved Peanut Butter Spider Web Brownies, I think of Margaret and her stained recipe card. And honestly, that’s why I keep making them—they’re more than just a treat. They’re a little piece of unexpected connection, wrapped up in chocolate and peanut butter.
Why You’ll Love This Recipe
Let me tell you why these brownies have become my go-to for every school bake sale, Halloween party, and Tuesday night craving. I’ve tested this recipe at least a dozen times, tweaking the ratios until the peanut butter swirl stays put and the brownie stays fudgy. As someone who has burned more batches than I care to admit, I can promise you this one is foolproof.
- Quick & Easy: From start to finish, you’re looking at about 35 minutes. That’s less time than it takes to argue with a kid about homework.
- Simple Ingredients: You probably have everything in your pantry right now. No fancy extracts or specialty flours here—just good old-fashioned baking staples.
- Perfect for Halloween Parties: These spider web brownies are the star of any spooky spread. They look impressive but take almost no effort to decorate.
- Crowd-Pleaser: I’ve yet to meet a kid—or adult, honestly—who can resist the combination of fudgy chocolate and creamy peanut butter.
- Unbelievably Delicious: The texture is next-level comfort food. The brownie is dense and rich, while the peanut butter adds a silky, salty contrast that makes you close your eyes after the first bite.
What makes this recipe different from the rest? It’s the technique. Instead of just dolloping peanut butter on top, you create actual web-like lines that bake into the brownie. It’s not just another version—it’s the best version. And when you pull that pan out of the oven, the smell alone will have everyone gathered around the kitchen island.
This recipe isn’t just good—it is the kind that makes you feel like a hero parent without breaking the bank or spending hours in the kitchen. It’s comfort food reimagined for busy families. Perfect for impressing your kid’s classmates without stress, or turning a regular Wednesday into something memorable.
What Ingredients You Will Need
This recipe uses simple, wholesome ingredients to deliver bold flavor and satisfying texture without the fuss. Most of these are pantry staples, which means you can whip up a batch anytime the craving hits.
For the Brownie Base
- 1/2 cup (113g) unsalted butter, melted (I use Land O’Lakes for consistent results)
- 1 cup (200g) granulated sugar
- 2 large eggs, room temperature (this helps them mix in more smoothly)
- 1 teaspoon vanilla extract
- 1/3 cup (40g) unsweetened cocoa powder (I prefer Ghirardelli for a deep, rich flavor)
- 1/2 cup (65g) all-purpose flour
- 1/4 teaspoon salt
- 1/4 teaspoon baking powder
For the Spider Web Topping
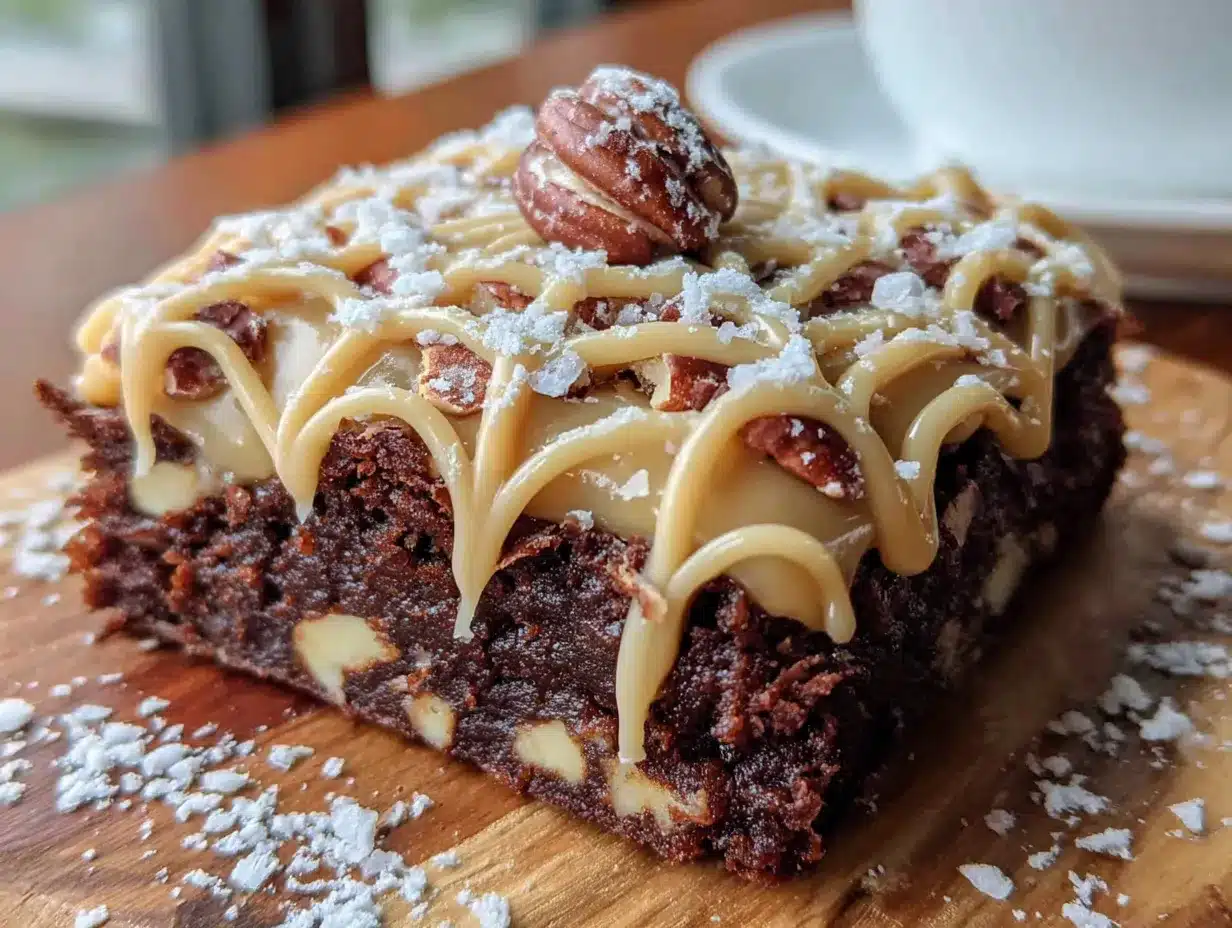
- 1/2 cup (130g) creamy peanut butter (use a brand like Jif or Skippy that doesn’t separate easily)
- 2 tablespoons powdered sugar
- 2-3 tablespoons milk, as needed for consistency
- Optional: 2-3 tablespoons melted chocolate for drizzling over the top after baking
A quick note on the peanut butter: natural-style peanut butters that separate can be tricky here. They tend to be too runny and will bleed into the brownie batter instead of staying put. Stick with a processed creamy peanut butter for the best web effect. If you only have natural, stir it really well and add a bit more powdered sugar to thicken it up.
For the cocoa powder, I’ve tested this with both Dutch-process and natural, and both work beautifully. Dutch-process gives a slightly darker, more sophisticated flavor, while natural cocoa keeps things classic and kid-friendly. Your call entirely.
If you need a dairy-free option, swap the butter for vegan butter sticks and use oat milk in the peanut butter mixture. The texture will be slightly different, but the spider web effect still works great.
Equipment Needed
You don’t need a fancy kitchen to pull these off. Here’s what you’ll need:
- 8×8-inch baking pan (a 9×9 works too, but the brownies will be slightly thinner)
- Parchment paper (for easy lifting—trust me, you want this)
- Mixing bowls (one large, one small)
- Whisk (or a fork, if you’re like me and your whisk is always in the dishwasher)
- Spatula (for scraping every last bit of batter)
- Toothpick (the secret weapon for the spider web design)
- Measuring cups and spoons
If you don’t have an 8×8 pan, a standard 9×9 works fine—just reduce the baking time by about 3-5 minutes. I’ve also used a disposable aluminum pan for bake sales, and it works perfectly. No need to buy anything special.
One tip: line your pan with parchment paper, leaving some overhang on two sides. This makes lifting the entire block of brownies out a breeze. I learned this after spending 15 minutes trying to dig out the first corner piece with a butter knife. Never again.
Preparation Method
Alright, let’s get baking. Follow these steps, and you’ll have spider web brownies that look like they came from a bakery.
- Preheat your oven to 350°F (175°C). Line your 8×8 baking pan with parchment paper, leaving some overhang on two opposite sides. This is your lifeline for getting the brownies out later.
- Melt the butter. In a large microwave-safe bowl, melt the 1/2 cup of butter in 30-second intervals. Let it cool for a minute—you don’t want it hot enough to cook the eggs when you add them.
- Mix in the sugar. Add the 1 cup of granulated sugar to the melted butter and whisk until combined. The mixture will look grainy, and that’s totally fine. Whisk for about a minute to start dissolving the sugar.
- Add the eggs and vanilla. Crack in the 2 eggs and add the 1 teaspoon of vanilla extract. Whisk vigorously for about 30 seconds until the mixture looks smooth and slightly glossy. This is where the brownie gets its shiny top.
- Fold in the dry ingredients. Add the 1/3 cup cocoa powder, 1/2 cup flour, 1/4 teaspoon salt, and 1/4 teaspoon baking powder. Use a spatula to fold everything together gently. Don’t overmix—stop as soon as you don’t see any more streaks of flour. Overmixing makes brownies tough and cakey.
- Pour the batter into the pan. Scrape every bit of that beautiful batter into your prepared pan. Spread it into an even layer using the spatula. It will be thick, so take your time.
- Make the peanut butter mixture. In a small bowl, combine the 1/2 cup creamy peanut butter and 2 tablespoons powdered sugar. Stir until smooth. If it’s too thick to drizzle, add milk one tablespoon at a time until it reaches a drizzling consistency. You want it thick enough to hold its shape but thin enough to flow off a spoon.
- Create the spider web. Drop spoonfuls of the peanut butter mixture randomly over the brownie batter. Use the back of the spoon to spread them into rough circles—don’t worry about perfection here. Then, take a toothpick and drag it from the center of each peanut butter circle outward toward the edges of the pan. Repeat this in a few directions to create web-like lines. Wipe the toothpick clean between drags for the best effect.
- Bake for 20-25 minutes. The brownies are done when the edges look set and a toothpick inserted into the center comes out with a few moist crumbs. If it comes out wet, give them another 2-3 minutes. The peanut butter will look slightly puffed and golden.
- Cool completely before cutting. This is the hardest part, I know. Let the brownies cool in the pan for at least 30 minutes. Then use the parchment paper to lift them out and transfer to a cutting board. For clean cuts, use a sharp knife and wipe it clean between each slice.
One thing I learned the hard way: don’t rush the cooling. I once cut into warm brownies, and the peanut butter web just smeared everywhere. It still tasted amazing, but the spider web effect was completely lost. Patience, my friend.
Cooking Tips & Techniques
After making these brownies more times than I can count, I’ve picked up a few tricks that make a real difference. Let me share them so you don’t have to learn the hard way like I did.
Room temperature eggs matter. I know it sounds fussy, but cold eggs can seize the butter and make the batter lumpy. If you forgot to take them out of the fridge, place them in a bowl of warm water for 5 minutes. Problem solved.
Don’t overbake. The biggest mistake I made early on was leaving the brownies in the oven until the center looked completely set. By then, they were dry and crumbly. Pull them out when the edges are set and the center still has a slight jiggle. They’ll continue cooking as they cool.
The toothpick drag technique. This is where the magic happens. After dropping the peanut butter mixture onto the batter, don’t swirl it randomly. Place your toothpick in the center of a peanut butter circle and drag it straight out toward the edge of the pan. Do this 5-6 times around each circle, and you’ll get a perfect web pattern. Wipe the toothpick clean between each drag for the most defined lines.
Timing is everything. While the brownies are baking, clean up your workspace. That way, when they come out, you can focus on cooling and cutting without a sink full of dishes staring at you. Multitasking like a pro.
Consistency tip: If your peanut butter mixture seems too runny, add another tablespoon of powdered sugar. If it’s too thick, add a splash more milk. You want it to be the consistency of thick pancake batter—flowing but not watery.
Variations & Adaptations
One of the best things about this recipe is how easy it is to tweak. Here are a few variations I’ve tried and loved.
Gluten-Free Version: Swap the all-purpose flour for a 1:1 gluten-free baking blend. I’ve used Bob’s Red Mill with great results. The texture is slightly more tender, but the spider web effect works just as well.
White Chocolate Spider Webs: Instead of peanut butter, use melted white chocolate mixed with a drop of vegetable oil. The white web against dark brownies looks incredibly striking—perfect for a winter-themed party.
Spicy Chocolate Twist: Add 1/4 teaspoon of cayenne pepper to the brownie batter. The heat pairs beautifully with the sweet peanut butter, and it’s a fun surprise for adults. My husband calls these “grown-up brownies.”
Nut-Free Option: Use sunflower seed butter instead of peanut butter. The flavor is different—slightly earthier—but the texture and web effect are identical. Just make sure the sunflower butter is well-stirred before using.
Double Chocolate Version: Stir 1/2 cup of chocolate chips into the batter before pouring it into the pan. The extra pockets of melted chocolate make every bite even more indulgent. My kids beg for this version every single time.
Serving & Storage Suggestions
These brownies are best served at room temperature, but honestly, they’re delicious straight from the fridge too. The cold peanut butter gets firm and almost fudge-like, which is a whole different experience.
For presentation, I like to arrange them on a white platter with a few candy spiders scattered around. It’s a simple touch that makes them look extra festive for Halloween parties. If you’re feeling fancy, drizzle a little melted chocolate over the top using a fork—it adds a professional finish.
Storage is straightforward. Place the brownies in an airtight container at room temperature for up to 3 days. If you stack them, put a piece of parchment paper between layers to keep the spider webs intact. They also freeze beautifully. Wrap individual brownies in plastic wrap, then place them in a freezer bag. They’ll keep for up to 3 months.
When you’re ready to eat a frozen brownie, let it thaw at room temperature for about 20 minutes. Or, if you’re impatient like me, microwave it for 15 seconds. The peanut butter gets slightly warm and gooey, and it’s pure heaven.
One thing I’ve noticed: the flavors actually develop over time. Day-old brownies taste even richer than fresh ones. So don’t feel bad if you make them a day ahead—they’ll be even better.
Nutritional Information & Benefits
Let’s be real—these are brownies, not a health food. But that doesn’t mean they can’t have a few redeeming qualities. Here’s a rough estimate per brownie (based on 12 servings):
- Calories: 280
- Fat: 16g
- Carbohydrates: 32g
- Protein: 6g
- Sugar: 22g
The peanut butter adds a decent amount of protein and healthy fats, which helps balance out the sugar rush. Plus, cocoa powder is packed with antioxidants—so there’s that. If you’re watching your sugar intake, you can reduce the sugar to 3/4 cup without sacrificing too much sweetness. The brownies will be slightly less fudgy, but still delicious.
For those with dietary restrictions, this recipe can be made gluten-free and nut-free with the substitutions I mentioned earlier. It’s not dairy-free unless you swap the butter, but that’s an easy fix.
I’m not here to pretend these are healthy. They’re a treat, plain and simple. But life is short, and sometimes you need a brownie that makes you smile. These spider web brownies do exactly that.
Conclusion
These Kid-Approved Peanut Butter Spider Web Brownies are more than just a Halloween dessert. They’re a way to make memories with your family, impress your neighbors, and satisfy that chocolate craving that hits at the worst possible moment. Margaret’s recipe card might have been stained and crumpled, but it was pure gold.
I hope you give these a try and make them your own. Maybe add a pinch of cinnamon, or swap the peanut butter for Nutella, or double the batch because one pan is never enough. That’s the beauty of baking—you can tweak and adjust until it feels like yours.
I’d love to hear how yours turn out. Drop a comment below and let me know if your kids approved, if the spider web effect worked, or if you came up with a variation I haven’t tried yet. And if you share a photo on Pinterest, tag me—I want to see your creations. Happy baking, friend!
Frequently Asked Questions
Can I use crunchy peanut butter instead of creamy?
You can, but the texture will be different. The crunchy bits might make it harder to create smooth spider web lines. If that’s all you have, warm the peanut butter slightly and stir it well before mixing with the powdered sugar.
How do I keep the peanut butter from sinking into the brownie batter?
The key is making the peanut butter mixture thick enough. If it’s too runny, it will sink. Add enough powdered sugar to create a thick, spreadable consistency. Also, don’t press the spoonfuls into the batter—just drop them gently on top.
Can I make these brownies ahead of time?
Absolutely. They actually taste better the next day. Bake them, cool completely, and store in an airtight container at room temperature. They’ll stay fresh for up to 3 days. You can also freeze them for up to 3 months.
Why did my brownies turn out cakey instead of fudgy?
You likely overmixed the batter or overbaked them. Mix just until the flour disappears, and pull the brownies out when the center still looks slightly underdone. They’ll set as they cool. Also, make sure you’re using the right amount of butter—less fat means drier brownies.
Can I double this recipe for a 9×13 pan?
Yes! Double all the ingredients and bake in a 9×13 pan. The baking time will be similar, but start checking at 22 minutes. You’ll need to make more peanut butter mixture for the spider webs, so double that part too. It’s perfect for large parties.
Pin This Recipe!
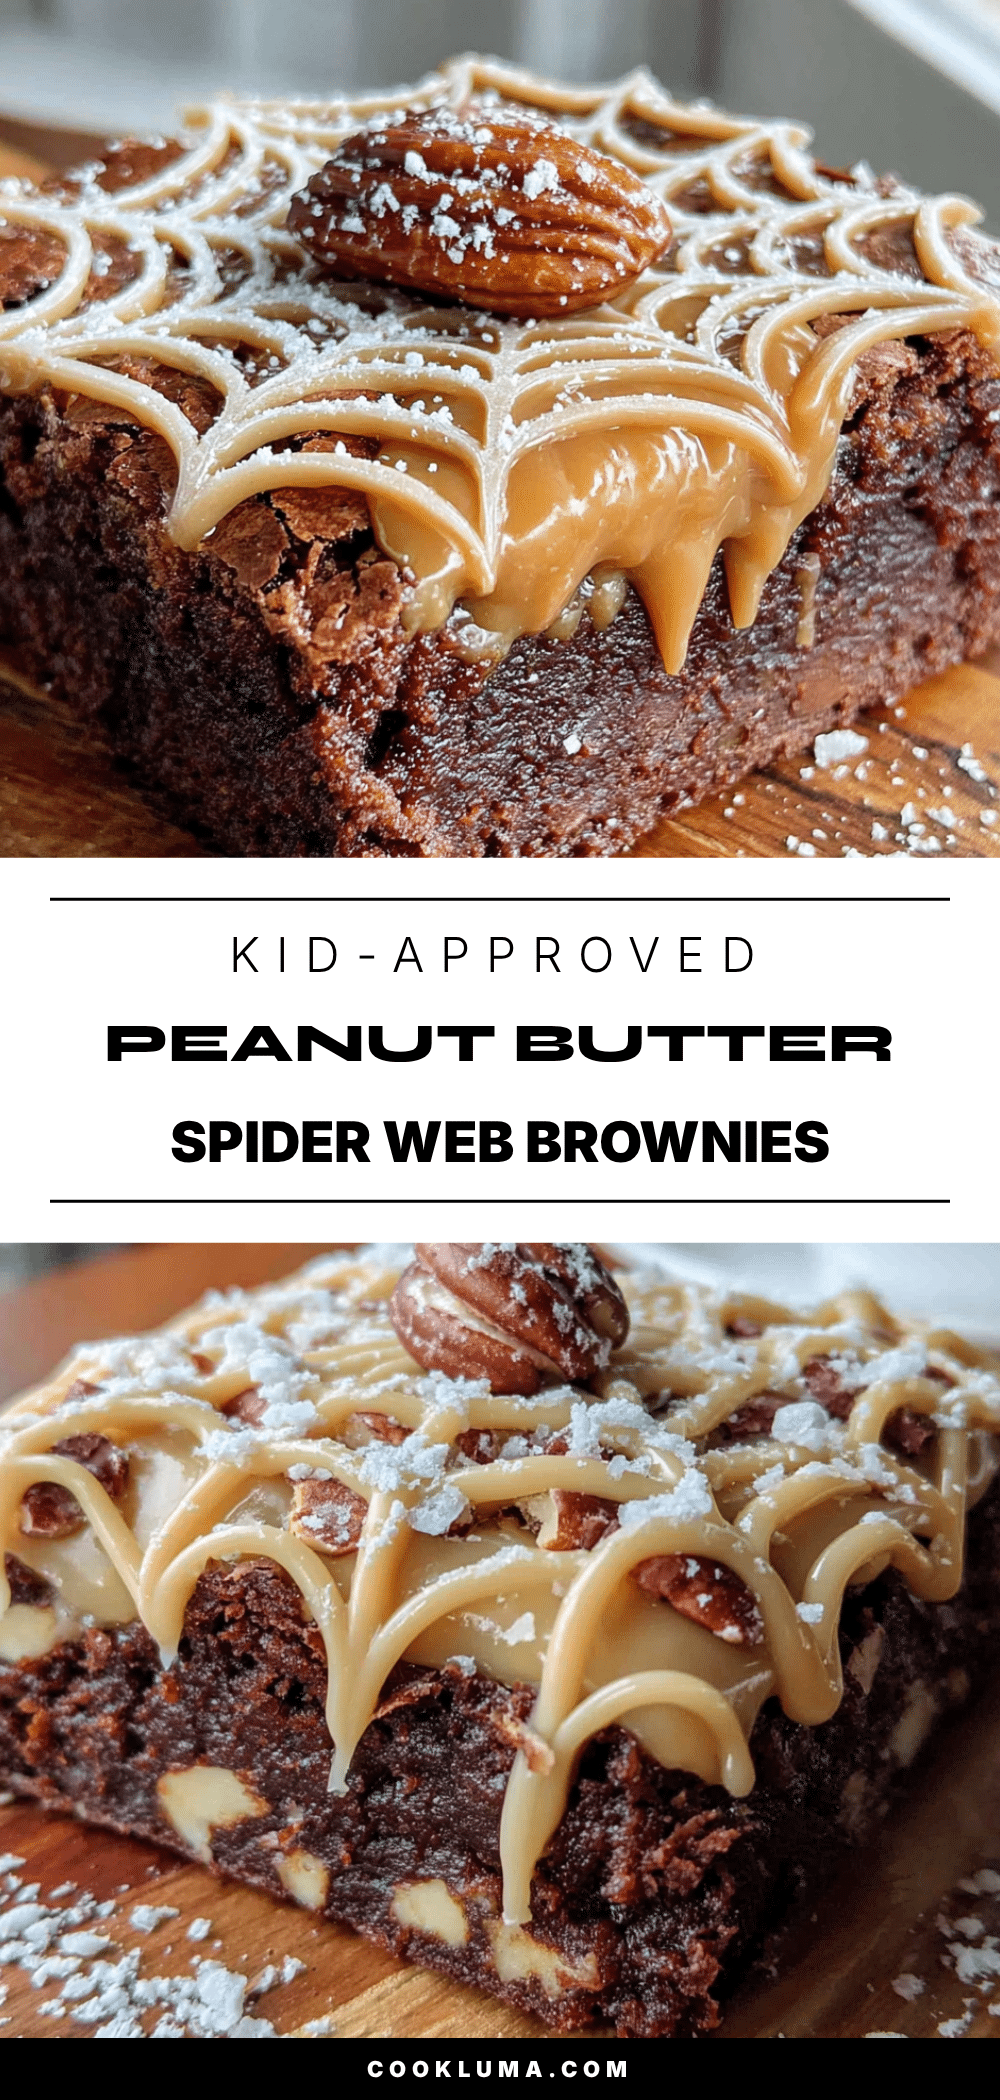
The Best Kid-Approved Peanut Butter Spider Web Brownies
Fudgy chocolate brownies topped with a creamy peanut butter spider web design. A quick and easy Halloween treat that kids and adults love, made with simple pantry ingredients.
- Prep Time: 10 minutes
- Cook Time: 25 minutes
- Total Time: 35 minutes
- Yield: 12 servings 1x
- Category: Dessert
- Cuisine: American
Ingredients
- 1/2 cup (113g) unsalted butter, melted
- 1 cup (200g) granulated sugar
- 2 large eggs, room temperature
- 1 teaspoon vanilla extract
- 1/3 cup (40g) unsweetened cocoa powder
- 1/2 cup (65g) all-purpose flour
- 1/4 teaspoon salt
- 1/4 teaspoon baking powder
- 1/2 cup (130g) creamy peanut butter
- 2 tablespoons powdered sugar
- 2–3 tablespoons milk, as needed
- Optional: 2-3 tablespoons melted chocolate for drizzling
Instructions
- Preheat oven to 350°F (175°C). Line an 8×8-inch baking pan with parchment paper, leaving overhang on two sides.
- In a large microwave-safe bowl, melt the butter in 30-second intervals. Let cool for 1 minute.
- Add the granulated sugar to the melted butter and whisk until combined, about 1 minute.
- Add the eggs and vanilla extract. Whisk vigorously for 30 seconds until smooth and glossy.
- Fold in the cocoa powder, flour, salt, and baking powder with a spatula until just combined. Do not overmix.
- Pour the batter into the prepared pan and spread into an even layer.
- In a small bowl, combine the peanut butter and powdered sugar. Stir until smooth. Add milk 1 tablespoon at a time until drizzling consistency.
- Drop spoonfuls of the peanut butter mixture randomly over the brownie batter. Use the back of a spoon to spread into rough circles.
- Using a toothpick, drag from the center of each peanut butter circle outward to create web-like lines. Wipe the toothpick clean between drags.
- Bake for 20-25 minutes, until edges are set and a toothpick inserted in the center comes out with moist crumbs.
- Cool completely in the pan for at least 30 minutes. Use parchment to lift out, then cut into squares with a sharp knife.
Notes
Use processed creamy peanut butter (like Jif or Skippy) for best web effect. Natural peanut butter may be too runny. For clean cuts, cool completely before slicing. Brownies taste even better the next day.
Nutrition
- Serving Size: 1 brownie
- Calories: 280
- Sugar: 22
- Sodium: 180
- Fat: 16
- Saturated Fat: 7
- Carbohydrates: 32
- Fiber: 2
- Protein: 6
Keywords: peanut butter spider web brownies, Halloween brownies, kid-friendly brownies, fudgy brownies, easy brownie recipe


