I was digging through a box of old cookbooks at a church rummage sale last fall—you know the kind, where the pages smell like someone’s basement and the covers are held together with masking tape—when a handwritten note fluttered out from between two yellowed pages. It was scribbled on the back of a grocery receipt, faded but still readable: “Cake for the apple stand—don’t forget the caramel.” No name, no date, just that cryptic little reminder. I stood there in the church gymnasium, surrounded by mismatched folding tables and the faint smell of coffee, and I couldn’t stop thinking about that cake. Who made it? What apple stand? And why was the caramel so important that it needed to be remembered in writing?
Honestly, I almost put the cookbook back. It was a beat-up spiral-bound thing from 1987, full of recipes for Jell-O salads and casseroles with mysterious canned soups. But that note kept pulling me back in. I bought the whole thing for fifty cents and spent the next week testing variations of what I imagined that cake to be. The result? This cozy brown sugar apple cider cake with salted caramel. It’s the kind of cake that makes you close your eyes after the first bite—and maybe you’ve been there, standing in your kitchen, wondering why you waited so long to make something this good. Let me tell you, it was worth every single test batch.
Why You’ll Love This Recipe
This isn’t just another apple cake recipe. I’ve tested this one about six times to get the texture just right—the first batch came out too dry, the second was so dense it could’ve doubled as a doorstop, and the third… well, let’s just say I learned the hard way that salted caramel and impatient pouring don’t mix. But by batch number four, something clicked. The brown sugar deepened, the apple cider brought this subtle fruitiness, and the caramel? It finally behaved.
- Quick & Easy : Comes together in about 15 minutes of prep time. The oven does the heavy lifting while you make the caramel.
- Simple Ingredients : No fancy grocery trips needed here. Apples, cider, butter, flour, sugar—these are things you probably already have in your kitchen.
- Perfect for Fall Gatherings : This cake screams cozy sweater weather. It’s great for Thanksgiving, apple picking parties, or just a quiet Tuesday when you need something warm and sweet.
- Crowd-Pleaser : I brought it to a neighborhood potluck and three different people asked for the recipe before I even got my coat off.
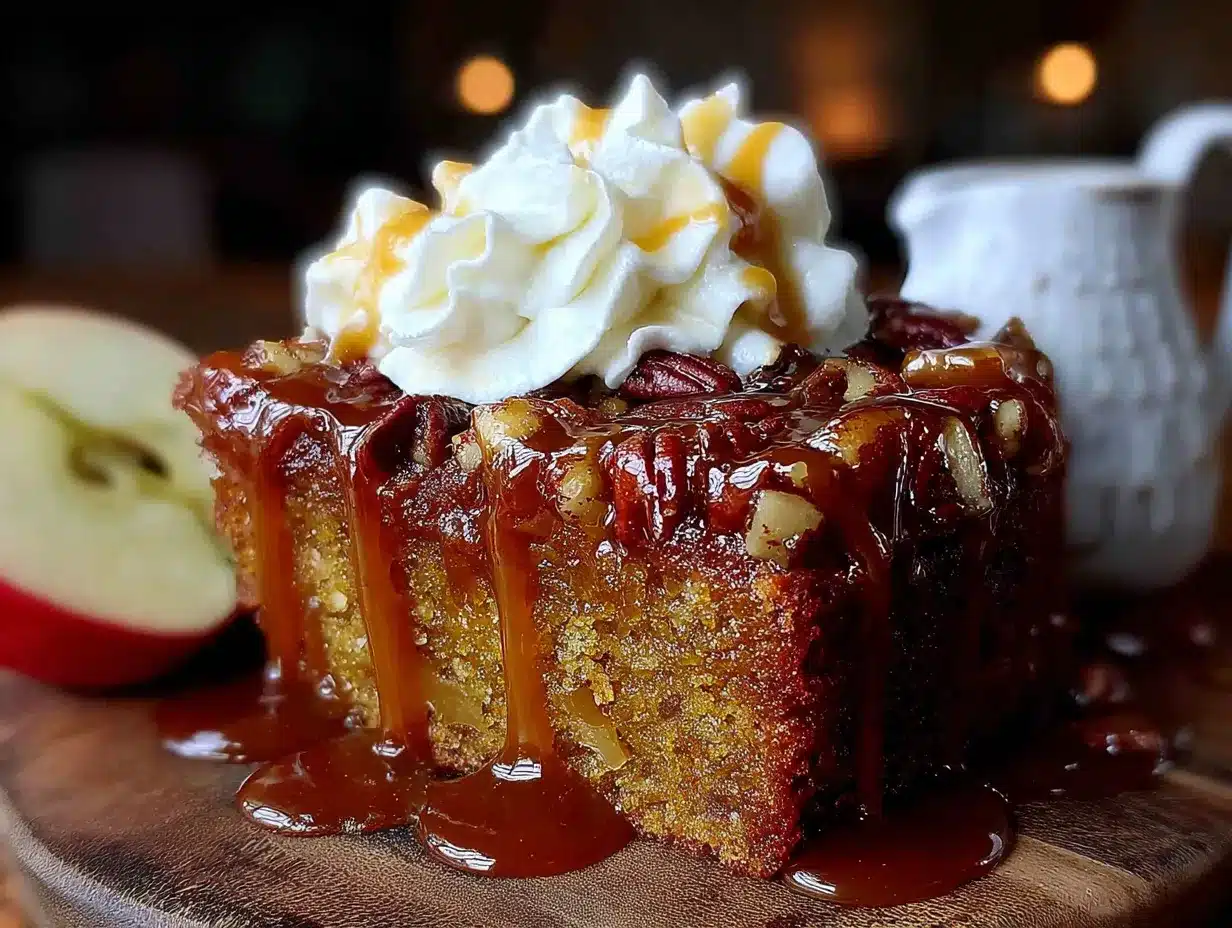
- Unbelievably Delicious : The combination of tender cake, caramelized edges, and that silky salted caramel on top is next-level comfort food.
What makes this version different from all the other apple cider cakes out there? It’s the brown sugar. Using dark brown sugar instead of white gives the cake this almost molasses-like warmth that pairs perfectly with the tartness of fresh apple cider. And the salted caramel isn’t just a drizzle—it soaks into the top of the cake while it’s still warm, creating this magical layer that’s part glaze, part sauce. Trust me, this is the best version.
What Ingredients You Will Need
This recipe uses simple, wholesome ingredients to deliver bold flavor and satisfying texture without the fuss. Most of these are pantry staples, especially if you bake during the fall months.
For the Cake
- 2 cups all-purpose flour (spooned and leveled—don’t scoop directly from the bag or you’ll pack in too much)
- 1 teaspoon baking soda
- 1/2 teaspoon baking powder
- 1/2 teaspoon salt
- 1 1/2 teaspoons ground cinnamon (I prefer Saigon cinnamon for its stronger flavor)
- 1/2 teaspoon ground nutmeg (freshly grated if you have it—it makes a difference)
- 1/4 teaspoon ground cloves
- 1/2 cup unsalted butter, softened (let it sit out for at least 30 minutes)
- 1 cup packed dark brown sugar (light brown works too, but dark gives more depth)
- 2 large eggs, room temperature
- 1 teaspoon vanilla extract
- 1 cup apple cider (unfiltered is best—look for the cloudy kind in the refrigerated section)
- 1 medium apple, peeled and grated (Granny Smith or Honeycrisp work great—adds moisture without making the cake soggy)
For the Salted Caramel
- 1/2 cup unsalted butter, cut into pieces
- 1 cup packed dark brown sugar
- 1/2 cup heavy cream (don’t substitute with milk or half-and-half—it won’t thicken properly)
- 1 teaspoon vanilla extract
- 1/2 teaspoon flaky sea salt (plus more for sprinkling on top—I like Maldon for this)
For the apple, I always use a Granny Smith because its tartness cuts through the sweetness of the brown sugar and caramel. If you’re using a sweeter apple like Fuji or Gala, just know the cake will be a bit sweeter overall—still delicious, just different. And for the cider, I recommend Martinelli’s or a local orchard brand if you can find one. The unfiltered stuff has more flavor and body than the clear, pasteurized kind.
One substitution note: If you’re dairy-free, you can use a good quality vegan butter and coconut cream in place of the heavy cream for the caramel. The texture will be slightly different—a bit softer—but the flavor is still amazing. For a gluten-free version, swap the all-purpose flour with a 1:1 gluten-free baking blend that contains xanthan gum. I’ve tested it with Bob’s Red Mill and it works beautifully.
Equipment Needed
- 9-inch round cake pan (or an 8-inch square pan—just adjust the baking time by about 5 minutes)
- Parchment paper (for lining the pan—trust me, this cake wants to stick)
- Large mixing bowl (for dry ingredients)
- Medium mixing bowl (for wet ingredients)
- Hand mixer or stand mixer (you can do this by hand, but your arm will thank you for the mixer)
- Box grater (for grating the apple—a food processor works too if you’re feeling fancy)
- Small saucepan (for the caramel—use a heavy-bottomed one to prevent scorching)
- Whisk (for the caramel—a silicone one is great because it won’t scratch your pan)
- Cooling rack (essential for even cooling—don’t skip this)
I bought my first cooling rack at a dollar store years ago, and honestly, it warped after three uses. Spend a few extra dollars on a sturdy one—it’ll last forever and your cakes will thank you. If you don’t have a hand mixer, a wooden spoon and some elbow grease work fine. Just make sure your butter is really soft so you don’t wear yourself out before the cake even hits the oven.
Preparation Method
- Preheat your oven to 350°F (175°C). Grease your 9-inch round cake pan with butter or non-stick spray, then line the bottom with a circle of parchment paper. This extra step saves you from the heartbreak of a stuck cake—I learned this the hard way with batch number two.
- Whisk the dry ingredients together. In a large bowl, combine 2 cups all-purpose flour, 1 teaspoon baking soda, 1/2 teaspoon baking powder, 1/2 teaspoon salt, 1 1/2 teaspoons cinnamon, 1/2 teaspoon nutmeg, and 1/4 teaspoon cloves. Whisk until everything is evenly distributed—about 20 seconds. Set this aside.
- Cream the butter and sugar. In a separate medium bowl, beat 1/2 cup softened unsalted butter with 1 cup packed dark brown sugar until light and fluffy. This takes about 3 minutes with a hand mixer on medium speed. You’re looking for a texture that’s almost like wet sand—pale and airy. Scrape down the sides of the bowl halfway through.
- Add the eggs and vanilla. Beat in 2 large eggs one at a time, mixing well after each addition. Then add 1 teaspoon vanilla extract and mix until combined. The mixture might look slightly curdled at this point—that’s totally normal, don’t panic.
- Alternate the dry ingredients and cider. With the mixer on low speed, add about one-third of the flour mixture to the butter mixture, then pour in half of the 1 cup apple cider. Mix until just combined—overmixing here makes the cake tough. Repeat with another third of flour, the remaining cider, and finally the last of the flour. Stop mixing as soon as you don’t see any more white streaks.
- Fold in the grated apple. Using a rubber spatula, gently fold in the grated apple. Don’t overmix—you want those little apple bits distributed evenly throughout the batter, not mashed into oblivion. The batter will be thick and smell incredible at this point.
- Bake the cake. Pour the batter into your prepared pan and smooth the top with the spatula. Bake for 35-40 minutes, or until a toothpick inserted in the center comes out clean or with just a few moist crumbs. The top should be golden brown and the edges should be pulling away from the pan slightly. Let the cake cool in the pan for 10 minutes, then transfer it to a wire rack to cool completely.
- Make the salted caramel. While the cake cools, combine 1/2 cup butter, 1 cup dark brown sugar, and 1/2 cup heavy cream in a small saucepan over medium heat. Stir constantly until the butter melts and the mixture comes to a gentle boil. Let it boil for 3-4 minutes, stirring occasionally, until it thickens slightly. Remove from heat and stir in 1 teaspoon vanilla and 1/2 teaspoon flaky sea salt. Let it cool for 5-10 minutes—it will thicken more as it sits.
- Assemble the cake. Once the cake is completely cool, poke a few holes in the top with a skewer or toothpick. Pour about half of the warm salted caramel over the top, letting it soak in. Spread the remaining caramel over the surface with a spatula. Sprinkle a little extra flaky sea salt on top for that perfect sweet-salty finish.
Cooking Tips & Techniques
I’ve made this cake enough times to know exactly where things can go wrong. Let me save you some trouble.
Don’t overmix the batter. This is the number one mistake I see with quick bread-style cakes. Once you add the flour, mix just until it disappears. Overmixing develops the gluten and gives you a tough, rubbery cake instead of that tender crumb we’re after. I speak from experience—batch one was basically a hockey puck.
Grate the apple, don’t chop it. Grated apple melts into the cake and adds moisture without creating chunks that sink to the bottom. If you chop it, those pieces tend to fall through the batter and create a soggy layer. Plus, grated apple distributes the flavor more evenly throughout every bite.
Watch your caramel carefully. Caramel can go from perfect to burnt in about 30 seconds. Keep stirring and don’t walk away from the stove. The color should be a deep amber—think the color of a penny. If it starts smelling like toasted sugar rather than sweet caramel, you’ve gone too far. I burned my first batch of caramel because I answered the phone. Never again.
Let the cake cool completely before adding caramel. I know it’s tempting to pour that warm caramel over a warm cake, but if the cake is too hot, the caramel will just slide right off and pool at the bottom. Let the cake cool fully on a wire rack—about an hour—then warm the caramel slightly if it’s gotten too thick to pour.
Use a kitchen scale if you have one. Measuring flour by weight (240 grams per cup) is way more accurate than scooping. I’ve noticed my cakes come out more consistent when I weigh rather than measure. But if you don’t have a scale, just remember to spoon the flour into your measuring cup and level it off with a knife—don’t scoop directly from the bag.
Variations & Adaptations
One of the best things about this recipe is how flexible it is. Here are a few ways I’ve changed it up over the years.
Dairy-Free Version : Swap the butter in the cake with vegan butter (I like Miyoko’s for baking) and use coconut cream in the caramel instead of heavy cream. The texture is slightly less tender, but the flavor is still fantastic. I made this version for a friend with dairy allergies and she asked for seconds.
Spiced Apple Cider Cake : Add 1/2 teaspoon of ground ginger and 1/4 teaspoon of cardamom to the dry ingredients. The ginger adds a little warmth and the cardamom gives it this almost floral note that’s really lovely. I tried this variation one rainy Sunday and it’s become my go-to for chilly afternoons.
Apple Cider Bundt Cake : Grease a 10-cup bundt pan thoroughly and bake for 45-50 minutes instead of 35-40. The bundt version looks so impressive with the caramel drizzled over the ridges—perfect for holiday gatherings. Just make sure to let it cool in the pan for 15 minutes before flipping it out, or you’ll end up with a pile of cake crumbs (again, speaking from experience).
Gluten-Free Option : Substitute the all-purpose flour with a 1:1 gluten-free baking blend. I’ve tested this with Bob’s Red Mill and King Arthur’s gluten-free flour, and both worked well. The cake might be a bit more delicate, so let it cool completely in the pan before transferring to a wire rack.
Less Sweet Version : Cut the brown sugar in the cake down to 3/4 cup and reduce the caramel sugar to 3/4 cup as well. The cake will still be sweet, but the apple flavor will shine through more. I actually prefer this version for breakfast—yes, I eat cake for breakfast sometimes. Don’t judge.
Serving & Storage Suggestions
This cake is best served slightly warm or at room temperature. If you’ve made the caramel ahead of time, reheat it gently on the stove or in the microwave (15-second bursts, stirring in between) until it’s pourable again. Pour it over individual slices rather than the whole cake if you’re only eating part of it—this keeps the leftover cake from getting too soggy.
For serving, a dollop of lightly sweetened whipped cream or a scoop of vanilla ice cream takes this cake over the top. The cold creaminess against the warm, caramel-soaked cake is pure magic. I also love serving it with a cup of hot apple cider or a mug of strong coffee—the bitterness of the coffee balances the sweetness beautifully.
Storage : Store leftover cake in an airtight container at room temperature for up to 3 days. If you’ve already added the caramel, the cake will stay moist and tender. Without the caramel, it’s best eaten within 2 days. You can also wrap individual slices in plastic wrap and store them in the freezer for up to 3 months—just thaw at room temperature and warm in the microwave for 15 seconds before serving.
Reheating : Pop individual slices in the microwave for 15-20 seconds to warm them through. For a crispier edge, reheat in a 300°F oven for about 5 minutes. The caramel will get a little gooey again, and the cake will taste almost as good as fresh.
One thing I’ve noticed: the flavors actually deepen after a day or two. The brown sugar and apple cider meld together, and the spices become more pronounced. So if you can resist eating it all on day one, day two is even better.
Nutritional Information & Benefits
Let’s be real—this is a treat, not a health food. But that doesn’t mean it’s completely devoid of redeeming qualities. Here’s the approximate nutritional breakdown per slice (based on 12 servings):
| Nutrient | Amount per Slice |
|---|---|
| Calories | 380 |
| Total Fat | 18g |
| Saturated Fat | 11g |
| Cholesterol | 75mg |
| Sodium | 280mg |
| Total Carbohydrates | 52g |
| Dietary Fiber | 1g |
| Sugars | 38g |
| Protein | 4g |
The apples provide a small amount of fiber and vitamin C, and the cinnamon has anti-inflammatory properties. Plus, there’s something to be said for the mental health benefits of a slice of warm cake on a cold day. I’m a firm believer that food should nourish more than just your body—it should feed your soul too. So go ahead, have that second slice. You deserve it.
For those watching their sugar intake, you can reduce the brown sugar in both the cake and the caramel by about a quarter without sacrificing too much structure. The cake will be slightly less tender, but still delicious.
Conclusion
This cozy brown sugar apple cider cake with salted caramel is the kind of recipe that feels like a hug in food form. It came to me from a forgotten note in a beat-up cookbook, and after all those test batches and burnt caramels, it’s become one of my most-requested desserts. The combination of tender, spiced cake and that silky, salty-sweet caramel is just unbeatable—especially when the leaves start turning and the air gets crisp.
I’d love for you to try this recipe and make it your own. Maybe you’ll add extra cinnamon, swap in pears instead of apples, or drizzle even more caramel on top (I fully support that decision). Whatever you do, let me know how it turns out. Drop a comment below, tag me in your photos, or tell me about the time you found a recipe in the most unexpected place. Happy baking, friends—and don’t forget the caramel.
Frequently Asked Questions
Can I use apple juice instead of apple cider?
You can, but the flavor won’t be as deep. Apple cider is unfiltered and has a more robust, tangy flavor that really shines in this cake. Apple juice is sweeter and more one-dimensional. If you’re in a pinch, use apple juice and add an extra 1/4 teaspoon of cinnamon to compensate.
Why did my caramel turn out grainy?
Grainy caramel usually means the sugar crystallized. This happens when you stir too vigorously or when sugar granules splash onto the sides of the pan. To avoid this, use a clean saucepan, stir gently, and brush down the sides of the pan with a wet pastry brush if you see sugar crystals forming.
Can I make this cake ahead of time?
Absolutely. The cake itself can be baked a day ahead and stored tightly wrapped at room temperature. Make the caramel fresh on the day you plan to serve it—it doesn’t keep as well and can get too thick after refrigeration. Assemble the cake just before serving for the best texture.
How do I know when the cake is done baking?
Insert a toothpick or a thin knife into the center of the cake. If it comes out clean or with just a few moist crumbs clinging to it, the cake is done. If the toothpick has wet batter on it, give it another 3-5 minutes. The top should also be golden brown and spring back slightly when you press it gently.
Can I use a different type of apple?
Yes, but stick with firm, tart apples like Granny Smith, Honeycrisp, or Braeburn. Softer apples like McIntosh or Red Delicious break down too much during baking and can make the cake mushy. I’ve tested it with Honeycrisp and it was lovely—slightly sweeter than Granny Smith but still with enough structure to hold up.
Pin This Recipe!
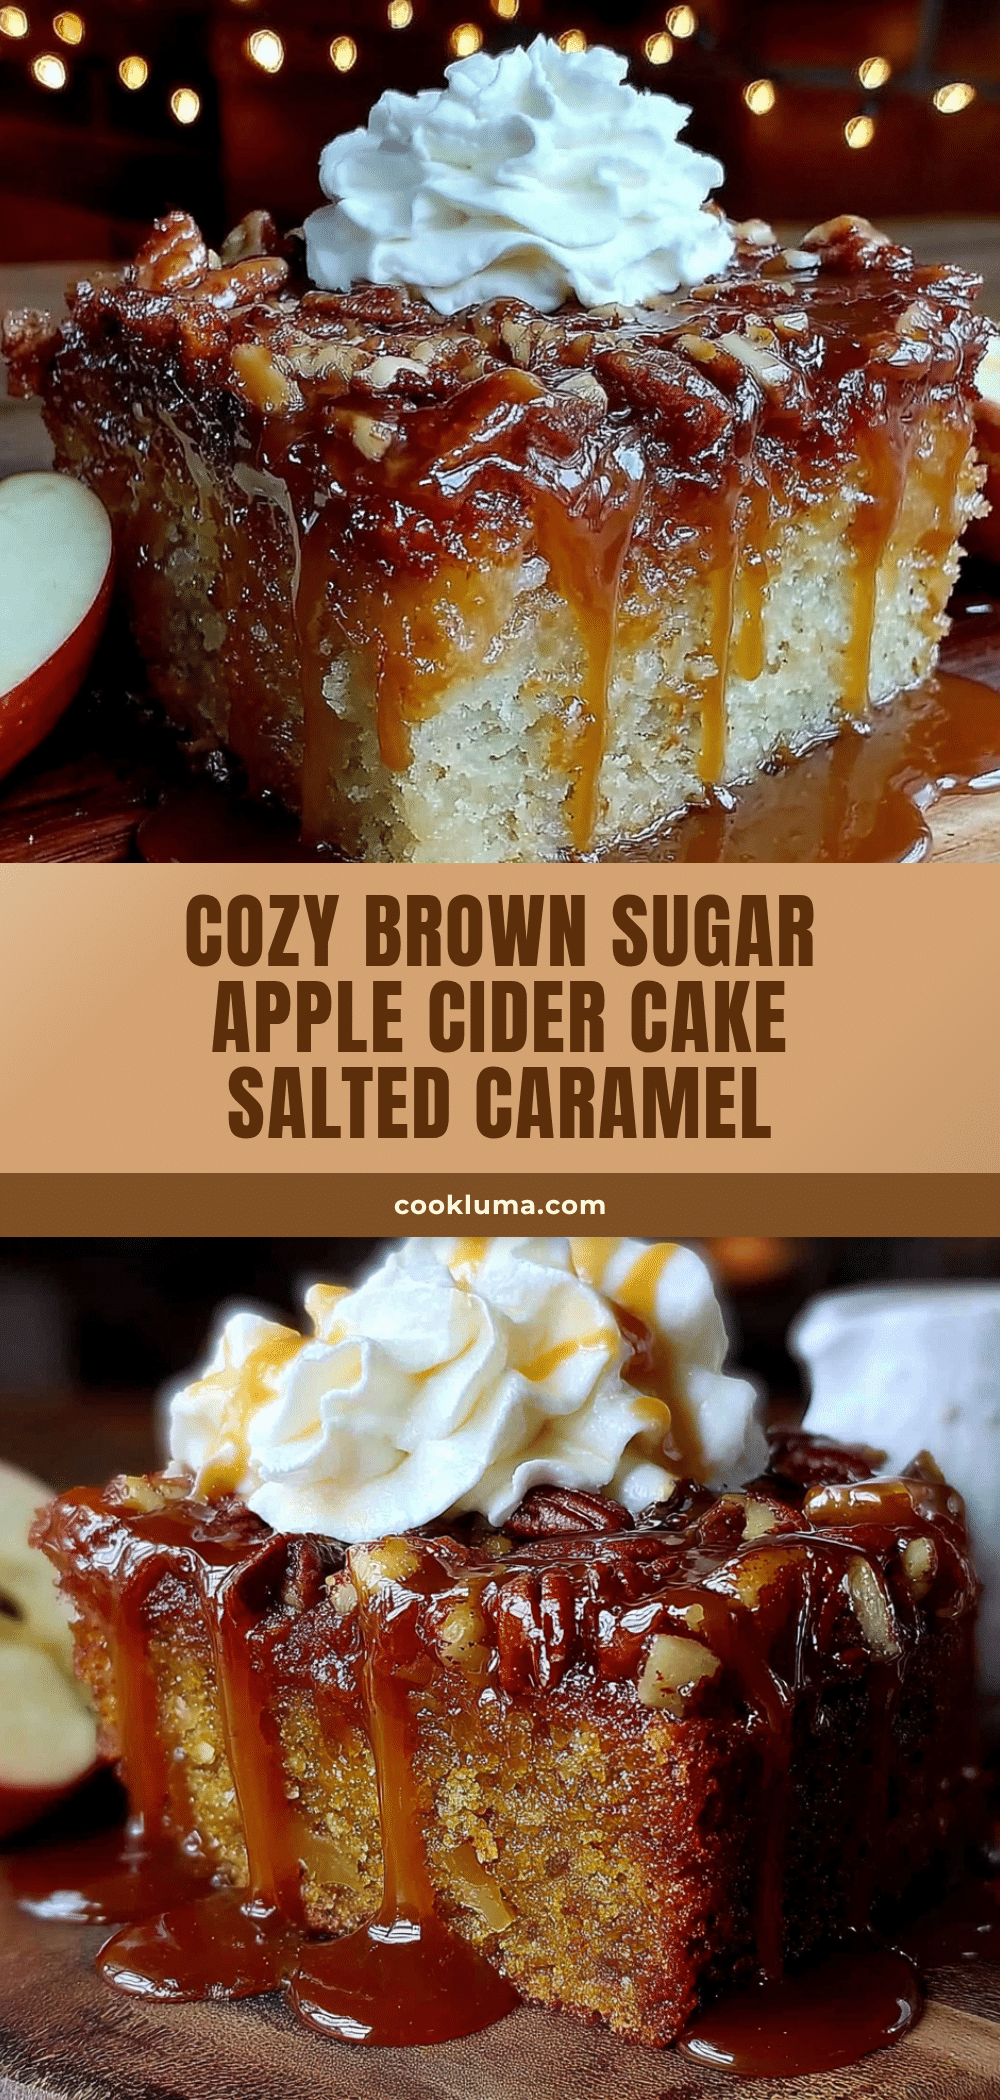
Best Cozy Brown Sugar Apple Cider Cake with Salted Caramel
This cozy brown sugar apple cider cake with salted caramel is the kind of recipe that feels like a hug in food form. The combination of tender, spiced cake and silky, salty-sweet caramel is unbeatable, especially in the fall.
- Prep Time: 15 minutes
- Cook Time: 35-40 minutes
- Total Time: 1 hour 10 minutes
- Yield: 12 servings 1x
- Category: Dessert
- Cuisine: American
Ingredients
- 2 cups all-purpose flour (spooned and leveled)
- 1 teaspoon baking soda
- 1/2 teaspoon baking powder
- 1/2 teaspoon salt
- 1 1/2 teaspoons ground cinnamon (preferably Saigon cinnamon)
- 1/2 teaspoon ground nutmeg (freshly grated if possible)
- 1/4 teaspoon ground cloves
- 1/2 cup unsalted butter, softened
- 1 cup packed dark brown sugar
- 2 large eggs, room temperature
- 1 teaspoon vanilla extract
- 1 cup apple cider (unfiltered is best)
- 1 medium apple, peeled and grated (Granny Smith or Honeycrisp)
- 1/2 cup unsalted butter, cut into pieces (for caramel)
- 1 cup packed dark brown sugar (for caramel)
- 1/2 cup heavy cream (for caramel)
- 1 teaspoon vanilla extract (for caramel)
- 1/2 teaspoon flaky sea salt (for caramel, plus more for sprinkling)
Instructions
- Preheat your oven to 350°F (175°C). Grease a 9-inch round cake pan with butter or non-stick spray, then line the bottom with a circle of parchment paper.
- In a large bowl, whisk together 2 cups all-purpose flour, 1 teaspoon baking soda, 1/2 teaspoon baking powder, 1/2 teaspoon salt, 1 1/2 teaspoons cinnamon, 1/2 teaspoon nutmeg, and 1/4 teaspoon cloves until evenly distributed (about 20 seconds). Set aside.
- In a separate medium bowl, beat 1/2 cup softened unsalted butter with 1 cup packed dark brown sugar until light and fluffy (about 3 minutes with a hand mixer on medium speed). Scrape down the sides halfway through.
- Beat in 2 large eggs one at a time, mixing well after each addition. Then add 1 teaspoon vanilla extract and mix until combined.
- With the mixer on low speed, add about one-third of the flour mixture to the butter mixture, then pour in half of the 1 cup apple cider. Mix until just combined. Repeat with another third of flour, the remaining cider, and finally the last of the flour. Stop mixing as soon as no white streaks remain.
- Using a rubber spatula, gently fold in the grated apple until evenly distributed.
- Pour the batter into the prepared pan and smooth the top. Bake for 35-40 minutes, or until a toothpick inserted in the center comes out clean or with a few moist crumbs. Let the cake cool in the pan for 10 minutes, then transfer to a wire rack to cool completely.
- While the cake cools, make the salted caramel: In a small saucepan over medium heat, combine 1/2 cup butter, 1 cup dark brown sugar, and 1/2 cup heavy cream. Stir constantly until the butter melts and the mixture comes to a gentle boil. Let it boil for 3-4 minutes, stirring occasionally, until slightly thickened. Remove from heat and stir in 1 teaspoon vanilla and 1/2 teaspoon flaky sea salt. Let cool for 5-10 minutes.
- Once the cake is completely cool, poke a few holes in the top with a skewer or toothpick. Pour about half of the warm salted caramel over the top, letting it soak in. Spread the remaining caramel over the surface with a spatula. Sprinkle extra flaky sea salt on top.
Notes
Don’t overmix the batter to avoid a tough cake. Grate the apple instead of chopping it for even moisture distribution. Watch the caramel carefully to prevent burning. Let the cake cool completely before adding caramel. Use a kitchen scale for more accurate flour measurement if available.
Nutrition
- Serving Size: 1 slice
- Calories: 380
- Sugar: 38
- Sodium: 280
- Fat: 18
- Saturated Fat: 11
- Carbohydrates: 52
- Fiber: 1
- Protein: 4
Keywords: apple cider cake, brown sugar cake, salted caramel, fall dessert, apple cake, easy cake recipe


