There used to be a tiny bakery tucked between a laundromat and a vintage shop on Main Street that made the most incredible pumpkin cheesecake bar. When they closed three summers ago—just a handwritten sign on the door saying “Thanks for the memories”—I honestly felt a little lost. That first autumn without them, I tried every pumpkin dessert I could find, but nothing came close to that perfect swirl of creamy cheesecake and spiced pumpkin. After twelve tries—twelve, let me tell you, my coworkers were getting very tired of being taste-testers—I finally got it.
The secret wasn’t some fancy technique or hard-to-find ingredient. It was realizing that the best version didn’t need an oven at all. That bakery’s magic was in the texture: silky, almost mousse-like, with a crust that stayed crunchy without baking. I spent a whole weekend testing no-bake methods, and when that first successful batch came together, I actually texted my sister a photo with way too many exclamation points. She called me crazy, but she also asked for the recipe within the hour.
These Easy No-Bake Pumpkin Cheesecake Bars are my love letter to that little bakery. They’re the kind of dessert that makes people close their eyes after the first bite—I’ve seen it happen at three different dinner parties now. The best part? You don’t need to be a pastry chef or own a stand mixer to pull them off. If you’ve been looking for a pumpkin dessert that actually delivers on flavor without heating up your kitchen, you’re in the right place. Let me show you how it’s done.
Why You’ll Love This Recipe
Let’s be real for a second. Weeknight dessert decisions are hard enough without adding complicated baking projects to the mix. These no-bake pumpkin cheesecake bars solve that problem completely. They come together in about 20 minutes of active work—the rest is just fridge time, which is basically magic.
- Quick & Easy: No oven required, no water baths, no temperamental baking times. You mix, you press, you chill. That’s it.
- Simple Ingredients: You probably already have most of these in your pantry. Cream cheese, pumpkin puree, graham crackers—nothing weird or expensive.
- Perfect for Fall Gatherings: Whether it’s a potluck, Thanksgiving dinner, or just a Tuesday that needs some pumpkin energy, these bars deliver.
- Crowd-Pleaser: I’ve served these to kids, picky eaters, and self-proclaimed pumpkin haters. Every single person asked for seconds.
- Unbelievably Delicious: The texture is what gets everyone. It’s creamy but firm, with that perfect crunch from the crust. Honestly, it tastes way more impressive than the effort suggests.
What makes this recipe different from all the other no-bake pumpkin desserts out there? It’s the balance. Most versions are either too dense or too soft, and the pumpkin flavor either disappears or hits you like a truck. This one has a light, mousse-like texture that lets the pumpkin spice shine without overwhelming everything else. Plus, the crust stays crisp—no soggy bottoms here, I promise.
This is the kind of dessert that makes you feel like you’ve got your life together, even when you definitely don’t. It’s comfort food that doesn’t require a whole production, and honestly, isn’t that what we all need?
What Ingredients You Will Need
This recipe uses simple, wholesome ingredients that work together to create something truly special. Most of these are pantry staples, especially if you’re already in full fall mode.
For the Crust
- 2 cups graham cracker crumbs (about 16 full sheets, crushed finely)
- 1/2 cup unsalted butter, melted (salted butter works too, just skip the added salt)
- 1/4 cup granulated sugar
- 1/4 teaspoon ground cinnamon (optional, but it adds a lovely warmth)
For the Pumpkin Cheesecake Filling
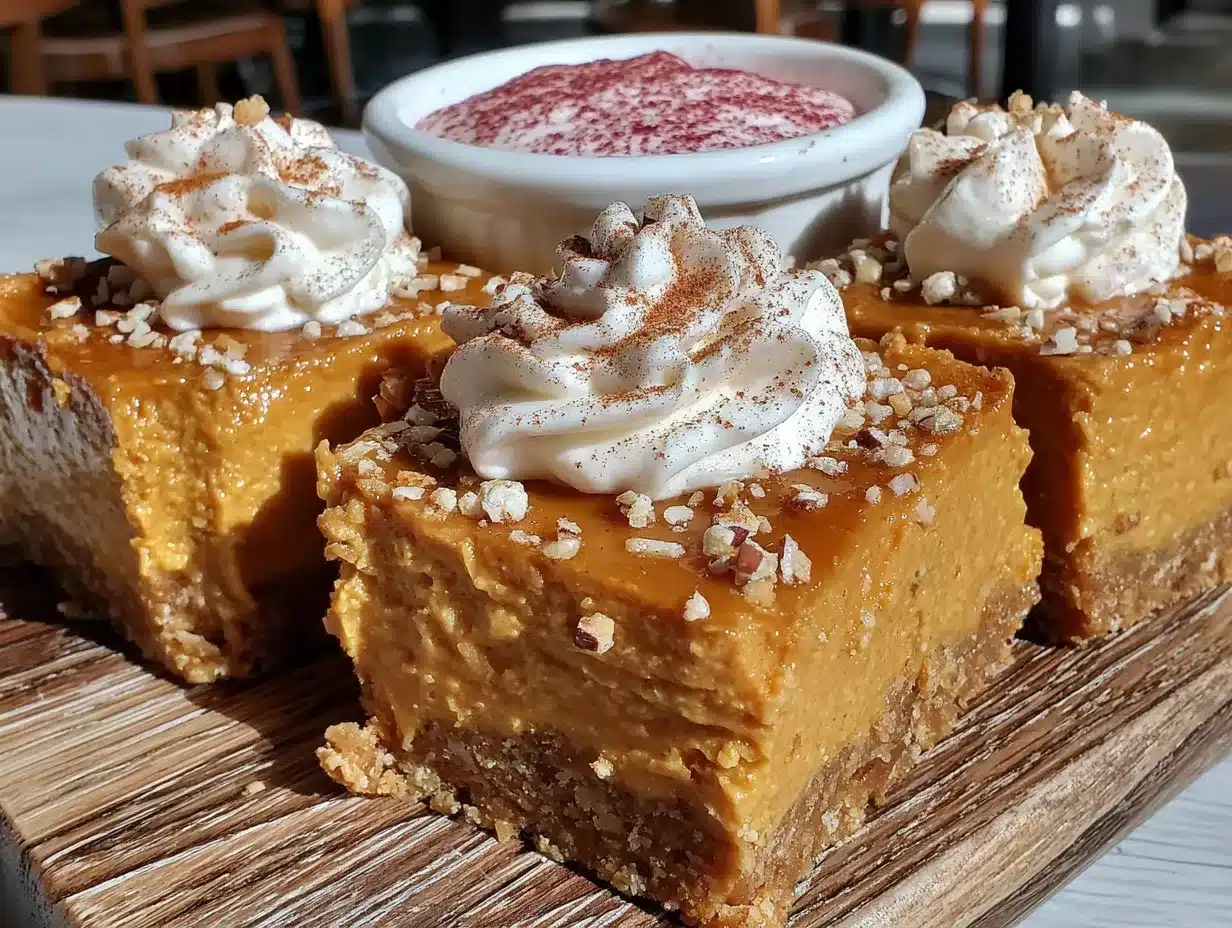
- 16 ounces cream cheese, softened to room temperature (I prefer Philadelphia for consistently smooth results)
- 1 cup pumpkin puree (not pumpkin pie filling—make sure it’s 100% pure pumpkin)
- 3/4 cup powdered sugar (granulated sugar can leave a grainy texture, so stick with powdered)
- 1 teaspoon vanilla extract
- 1 teaspoon pumpkin pie spice (or make your own with cinnamon, nutmeg, ginger, and cloves)
- 1/2 teaspoon ground cinnamon
- 1/4 teaspoon salt (this balances the sweetness and makes the flavors pop)
- 1 1/2 cups heavy cream, cold (this is what gives the filling that light, airy texture)
For the Topping (Optional but Recommended)
- 1/2 cup heavy cream, cold
- 2 tablespoons powdered sugar
- 1/4 teaspoon vanilla extract
- Caramel sauce, for drizzling
- Crushed pecans or graham crackers, for garnish
A few notes on ingredients: Make sure your cream cheese is truly at room temperature—cold cream cheese will leave you with lumps that no amount of mixing can fix. For the pumpkin puree, I’ve tested this with both Libby’s and store brands, and both work great. Just don’t grab the pumpkin pie filling by accident; it has added sugar and spices that will throw off the whole balance.
If you’re dairy-free, you can use full-fat coconut cream in place of the heavy cream and dairy-free cream cheese. The texture will be slightly different but still delicious. For a gluten-free version, use gluten-free graham crackers or crushed gluten-free cookies.
Equipment Needed
- 9×9-inch baking pan (an 8×8 works too, your bars will just be slightly thicker)
- Parchment paper (for easy removal—trust me on this one)
- Large mixing bowls (at least two)
- Electric hand mixer or stand mixer (you can whisk by hand, but your arm will hate you)
- Food processor or zip-top bag and rolling pin (for crushing graham crackers)
- Rubber spatula
- Measuring cups and spoons
I used to skip the parchment paper and just grease the pan, but let me tell you—getting the first bar out was always a disaster. The parchment paper creates little handles that let you lift the whole thing out in one piece. It’s a game-changer. If you don’t have a 9×9 pan, a 9×13 will work; the bars will just be thinner and may need slightly less chilling time.
For the electric mixer, anything works. I’ve used a $20 hand mixer from the grocery store for years, and it’s never let me down. No need for fancy equipment here.
Preparation Method
- Prepare your pan. Line your 9×9-inch baking pan with parchment paper, leaving about 2 inches of overhang on two opposite sides. This creates handles for lifting the bars out later. Set aside.
- Make the crust. In a medium bowl, combine 2 cups graham cracker crumbs, 1/4 cup granulated sugar, and 1/4 teaspoon cinnamon (if using). Pour in 1/2 cup melted butter and stir until every crumb is moistened. The mixture should look like wet sand and hold together when you squeeze it.
- Press the crust. Transfer the crust mixture to your prepared pan. Press it down firmly and evenly—I use the bottom of a measuring cup for this. Make sure to get the edges too. Pop it in the refrigerator while you make the filling.
- Whip the cream. In a large bowl, pour 1 1/2 cups cold heavy cream. Using your electric mixer, beat on medium-high speed until stiff peaks form. This takes about 3-4 minutes. You’ll know it’s ready when you lift the beaters and the cream holds its shape without drooping. Set aside in the fridge.
- Beat the cream cheese. In another large bowl, beat the softened cream cheese with your electric mixer until smooth and creamy, about 2 minutes. Scrape down the sides and bottom of the bowl with your spatula.
- Add the pumpkin and flavorings. Add 1 cup pumpkin puree, 3/4 cup powdered sugar, 1 teaspoon vanilla extract, 1 teaspoon pumpkin pie spice, 1/2 teaspoon cinnamon, and 1/4 teaspoon salt. Beat on medium speed until everything is well combined and smooth. Again, scrape down the bowl. The mixture should be thick and fragrant.
- Fold in the whipped cream. This is the most important step. Take your whipped cream out of the fridge. Add about one-third of it to the pumpkin mixture and fold gently with your spatula. Once it’s mostly incorporated, add the rest and fold until no white streaks remain. Be gentle—you want to keep that airy texture. The final mixture should be light, fluffy, and a beautiful pale orange.
- Assemble the bars. Take your crust out of the fridge. Spoon the filling over the crust and spread it evenly. Give the pan a few gentle taps on the counter to release any air bubbles.
- Chill. Cover the pan with plastic wrap or foil and refrigerate for at least 6 hours, but overnight is better. I know it’s hard to wait, but the texture really sets up perfectly after a full night in the fridge.
- Make the topping (optional). When you’re ready to serve, beat 1/2 cup cold heavy cream with 2 tablespoons powdered sugar and 1/4 teaspoon vanilla until stiff peaks form. Spread or pipe over the chilled bars.
- Slice and serve. Use the parchment paper handles to lift the whole block out of the pan. Use a sharp knife to cut into squares—wipe the knife clean between cuts for neat edges. Drizzle with caramel sauce and sprinkle with crushed pecans if you’re feeling fancy.
A quick note on timing: The active prep time is about 20 minutes, but you need that 6-hour chill time. I usually make these the night before I need them. That way, I can just slice and serve the next day with zero stress.
Cooking Tips & Techniques
Let me save you from my mistakes. The first time I made these, I was in a rush and used cold cream cheese straight from the fridge. The filling was lumpy, and no amount of beating fixed it. Take the extra 30 minutes to let your cream cheese soften on the counter. Your future self will thank you.
Another thing I learned the hard way: don’t overmix the filling once you add the whipped cream. I got distracted by my phone once and kept folding, and the mixture deflated into a dense, sad mess. Fold just until combined—a few streaks are totally fine.
For the crust, press it firmly. I mean really press. If your crust is too loose, it’ll crumble when you cut the bars. Use the bottom of a glass or measuring cup to get it nice and compact. And don’t skip the chilling step for the crust—it helps it hold together better.
If you’re making these in advance (which I highly recommend), add the whipped cream topping and caramel drizzle just before serving. The topping will deflate and get watery if it sits too long. The bars themselves, though, keep beautifully for days.
One more tip: use a sharp knife and wipe it clean between each cut. This gives you those beautiful, Instagram-worthy edges. If your knife is dull, it’ll drag through the filling and make a mess.
Variations & Adaptations
Vegan Version: Use dairy-free cream cheese and full-fat coconut cream instead of heavy cream. The texture will be slightly different—a bit denser—but still incredibly delicious. I tested this for a friend’s birthday and nobody even noticed the difference.
Gluten-Free Version: Swap the graham crackers for gluten-free graham crackers or crushed gluten-free cookies. I’ve used gluten-free shortbread cookies before, and honestly, they made the crust even better.
Chocolate Pumpkin Swirl: Melt 1/4 cup of dark chocolate and swirl it into the filling before chilling. The chocolate and pumpkin combination is absolutely heavenly. Drizzle some extra on top for good measure.
Maple Pecan Twist: Add 2 tablespoons of maple syrup to the filling and top with candied pecans. The maple flavor pairs beautifully with the pumpkin spice. I made this version for Thanksgiving last year, and it was the first dessert to disappear.
Individual Cups: Instead of a pan, layer the crust and filling in small jars or glasses. This is perfect for parties or if you want portion control. Plus, they look adorable.
Extra Spicy: If you love bold flavors, add an extra 1/2 teaspoon of pumpkin pie spice and a pinch of cayenne pepper. The heat sneaks up on you in the best way.
Serving & Storage Suggestions
These bars are best served cold, straight from the fridge. Let them sit at room temperature for about 5 minutes before serving—this softens them just enough to make slicing easier without losing that firm texture.
For presentation, I love drizzling caramel sauce in a zigzag pattern over the top and sprinkling crushed graham crackers or pecans around the edges. A dollop of fresh whipped cream on each bar never hurts either. If you’re serving these at a fall gathering, arrange them on a wooden board with some cinnamon sticks and mini pumpkins for that cozy aesthetic.
Storage: Keep the bars in an airtight container in the refrigerator for up to 5 days. The crust stays surprisingly crisp for the first 3 days, then starts to soften slightly. They’re still delicious, just a bit more tender.
Freezing: These freeze beautifully. Wrap the entire pan (or individual bars) tightly in plastic wrap, then foil, and freeze for up to 3 months. Thaw in the refrigerator overnight before serving. Add fresh topping after thawing. I always keep a batch in the freezer for unexpected guests or late-night pumpkin cravings.
One thing I’ve noticed: the flavors actually get better after a day or two in the fridge. The pumpkin spice melds with the cream cheese and becomes more rounded and complex. So don’t worry if you make them ahead—they’ll be even better.
Nutritional Information & Benefits
Here’s the approximate nutritional breakdown per bar (based on 9 servings, without optional toppings):
- Calories: 385
- Fat: 28g
- Carbohydrates: 30g
- Fiber: 2g
- Sugar: 18g
- Protein: 5g
- Vitamin A: 120% DV
- Calcium: 6% DV
- Iron: 8% DV
These bars are a treat, no question, but they do have some redeeming qualities. Pumpkin is packed with vitamin A and fiber, which supports eye health and digestion. Cream cheese provides calcium and protein, and the heavy cream adds healthy fats that keep you satisfied. Plus, since they’re no-bake, you’re not losing any of the nutrients that heat can degrade.
If you’re watching your sugar intake, you can reduce the powdered sugar to 1/2 cup without a major texture change. The pumpkin and cream cheese are naturally sweet enough to carry the flavor. For a lower-fat option, use reduced-fat cream cheese and replace half the heavy cream with Greek yogurt. The texture will be slightly tangier but still creamy.
As always, this recipe contains dairy and gluten. For allergen-friendly versions, check the variations section above.
Conclusion
These Easy No-Bake Pumpkin Cheesecake Bars are everything I wanted that little bakery’s recipe to be—creamy, spiced perfectly, and completely satisfying without any oven time. They’ve become my go-to fall dessert, and I honestly make them year-round now because they’re just that good.
The best part? You can make them your own. Add more spice, swap the crust, drizzle with chocolate—whatever feels right. That’s the beauty of a simple recipe done well. It becomes a canvas for your own creativity.
I’d love to hear how yours turn out. Did you add a twist? Did your family fight over the last piece? Drop a comment below and let me know. And if you’re feeling generous, share this recipe with a friend who needs a little pumpkin magic in their life. Happy no-baking, friends!
Frequently Asked Questions
Can I use pumpkin pie filling instead of pumpkin puree?
I wouldn’t recommend it. Pumpkin pie filling has added sugar and spices that will throw off the balance of this recipe. Stick with 100% pure pumpkin puree for the best results. Your filling will be too sweet and potentially runny if you use pie filling.
How long do these bars need to chill?
At least 6 hours, but overnight is ideal. The filling needs time to set up properly so you can cut clean slices. If you’re in a hurry, you can try 4 hours, but the texture won’t be as firm. Patience pays off here.
Can I use a different crust?
Absolutely. Ginger snaps, vanilla wafers, or shortbread cookies all make excellent crusts. If you use ginger snaps, the crust will have a lovely spicy kick that complements the pumpkin. Just adjust the butter slightly—denser cookies may need a bit more.
Why did my filling turn out lumpy?
Most likely, your cream cheese wasn’t soft enough. Cold cream cheese doesn’t blend smoothly and leaves those annoying lumps. Next time, let it sit on the counter for 30-60 minutes before starting. If you’re in a rush, microwave it in 10-second bursts until soft but not hot.
Can I make these into a pumpkin cheesecake pie instead?
Yes! Press the crust into a 9-inch pie dish instead of a square pan. The filling amount is perfect for a deep-dish pie. Just increase the chill time to at least 8 hours since the pie is thicker. Top with whipped cream and you’ve got a stunning no-bake pumpkin pie.
Pin This Recipe!
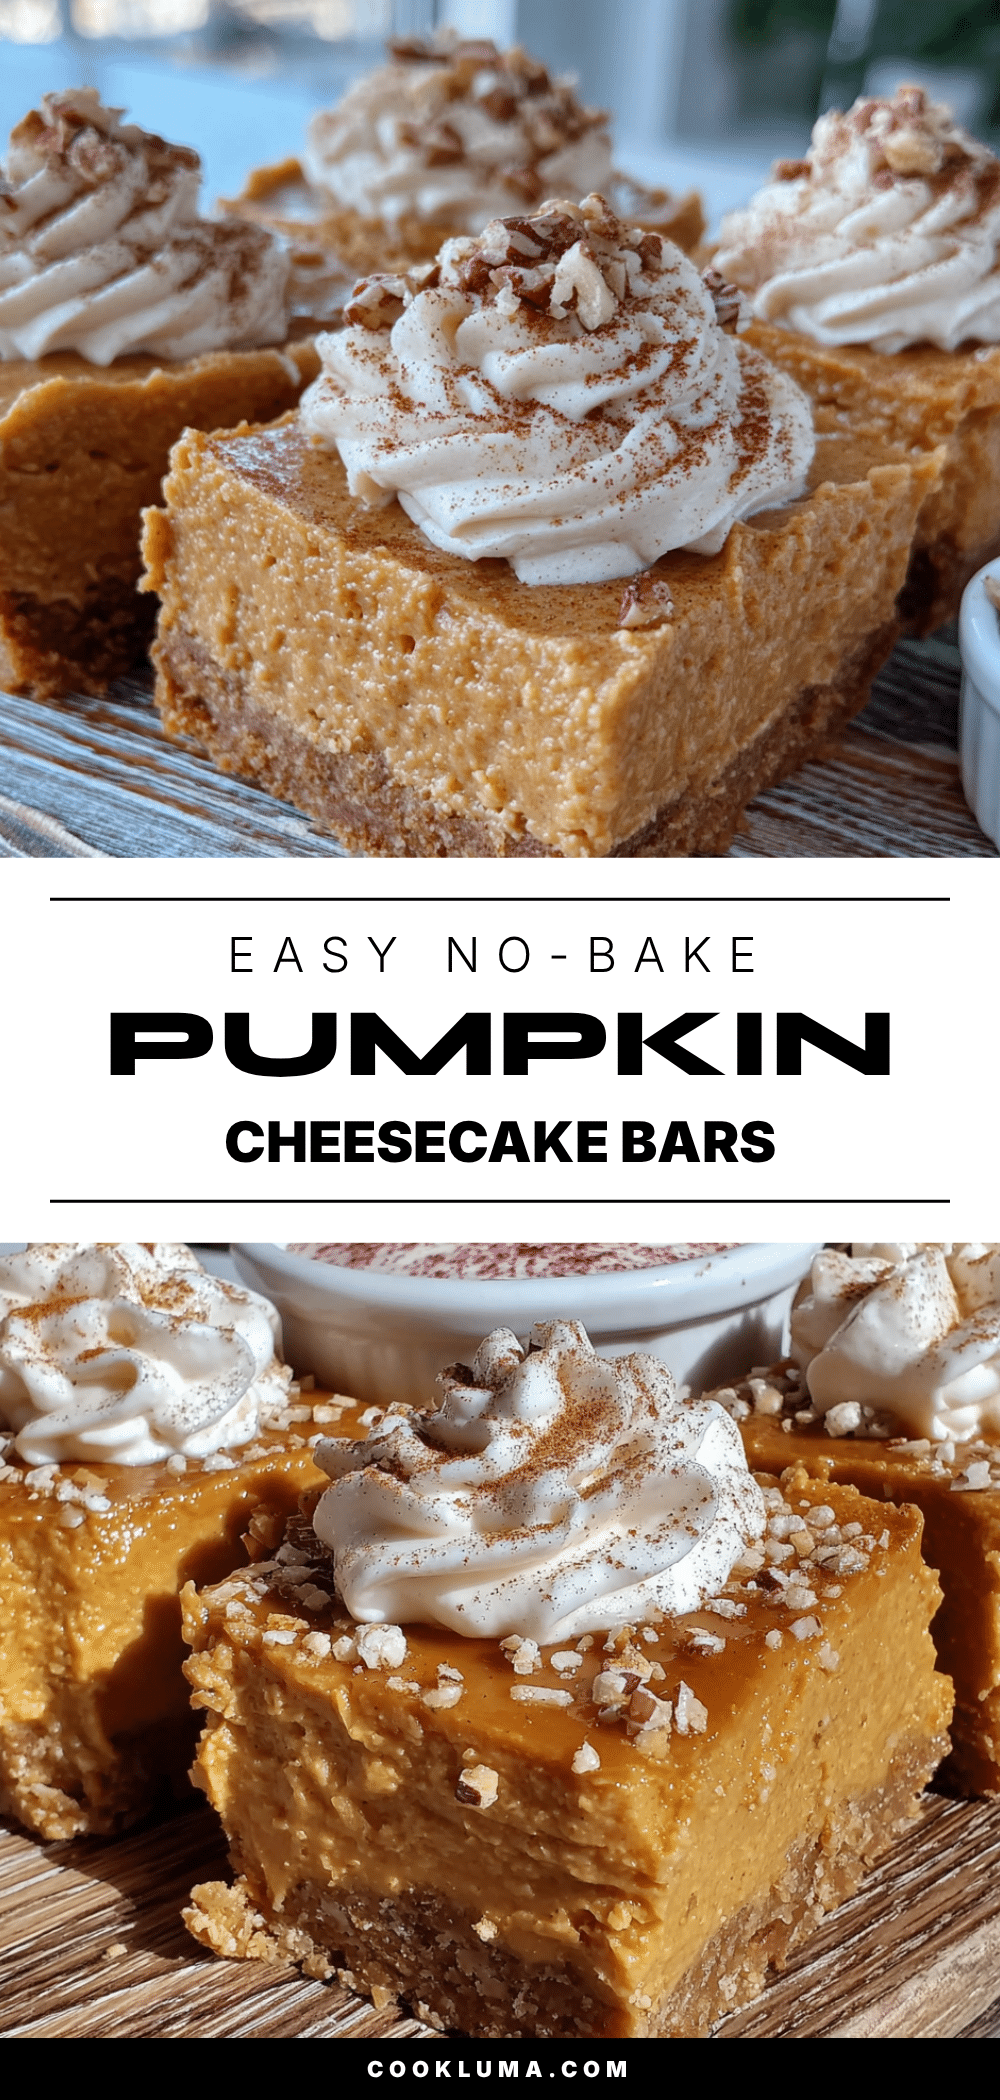
Easy No-Bake Pumpkin Cheesecake Bars: Best Fall Treat
These no-bake pumpkin cheesecake bars are creamy, spiced perfectly, and completely satisfying without any oven time. They come together in about 20 minutes of active work and are perfect for fall gatherings.
- Prep Time: 20 minutes
- Cook Time: 0 minutes
- Total Time: 6 hours 20 minutes (includes chilling)
- Yield: 9 servings 1x
- Category: Dessert
- Cuisine: American
Ingredients
- 2 cups graham cracker crumbs (about 16 full sheets, crushed finely)
- 1/2 cup unsalted butter, melted
- 1/4 cup granulated sugar
- 1/4 teaspoon ground cinnamon (optional)
- 16 ounces cream cheese, softened to room temperature
- 1 cup pumpkin puree (not pumpkin pie filling)
- 3/4 cup powdered sugar
- 1 teaspoon vanilla extract
- 1 teaspoon pumpkin pie spice
- 1/2 teaspoon ground cinnamon
- 1/4 teaspoon salt
- 1 1/2 cups heavy cream, cold
- 1/2 cup heavy cream, cold (for topping)
- 2 tablespoons powdered sugar (for topping)
- 1/4 teaspoon vanilla extract (for topping)
- Caramel sauce, for drizzling
- Crushed pecans or graham crackers, for garnish
Instructions
- Line a 9×9-inch baking pan with parchment paper, leaving about 2 inches of overhang on two opposite sides.
- In a medium bowl, combine graham cracker crumbs, granulated sugar, and cinnamon. Pour in melted butter and stir until every crumb is moistened.
- Press the crust mixture firmly into the prepared pan using the bottom of a measuring cup. Refrigerate while making the filling.
- In a large bowl, beat cold heavy cream with an electric mixer on medium-high speed until stiff peaks form, about 3-4 minutes. Set aside in the fridge.
- In another large bowl, beat softened cream cheese until smooth and creamy, about 2 minutes. Scrape down the sides.
- Add pumpkin puree, powdered sugar, vanilla extract, pumpkin pie spice, cinnamon, and salt. Beat on medium speed until well combined and smooth.
- Fold in the whipped cream gently in thirds until no white streaks remain, being careful not to deflate the mixture.
- Spoon the filling over the crust and spread evenly. Tap the pan gently on the counter to release air bubbles.
- Cover with plastic wrap and refrigerate for at least 6 hours, preferably overnight.
- When ready to serve, beat cold heavy cream with powdered sugar and vanilla until stiff peaks form. Spread or pipe over the chilled bars.
- Use parchment paper handles to lift the block out of the pan. Cut into squares with a sharp knife, wiping clean between cuts. Drizzle with caramel sauce and sprinkle with crushed pecans if desired.
Notes
Make sure cream cheese is at room temperature to avoid lumps. Do not overmix the filling once whipped cream is added. For best results, chill overnight. Add whipped cream topping just before serving. Bars can be stored in an airtight container in the refrigerator for up to 5 days or frozen for up to 3 months.
Nutrition
- Serving Size: 1 bar
- Calories: 385
- Sugar: 18
- Fat: 28
- Carbohydrates: 30
- Fiber: 2
- Protein: 5
Keywords: no-bake pumpkin cheesecake bars, pumpkin dessert, fall dessert, easy cheesecake bars, no-bake dessert


