Let me tell you a story about being wrong. My seven-year-old nephew asked me last Tuesday why I couldn’t just dump everything in one bowl instead of creaming the butter and sugar separately. I started to explain why that wouldnt work — then stopped. I mean, Ive been baking for over fifteen years, and Ive always done it the “right” way. But honestly? I had no good answer for why a kid couldnt just toss pumpkin puree, butter, and sugar into the same bowl and call it a day.
So I tried it. Against every instinct my pastry-trained brain had, I handed him the whisk and let him go to town. The batter looked different — looser, wetter, almost like it was broken. I was already planning the apology text to my sister about wasted ingredients. But then the bars came out of the oven, and I swear the whole kitchen went quiet. They were perfectly chewy. Not cakey, not dry, not dense — just that ideal, bendy, soft texture you chase after in every cookie bar recipe.
The secret, as it turns out, is that pumpkin already brings so much moisture and fat to the table that the traditional creaming method is almost redundant. My nephew didnt know that. He just knew that extra steps felt silly, and he was right. These chewy pumpkin chocolate chip cookie bars have become the official after-school snack in our house, and I make them exactly the way he taught me — one bowl, no fuss, maximum flavor.
Why You’ll Love These Chewy Pumpkin Chocolate Chip Cookie Bars
These arent just another pumpkin dessert. They are the kind of bar that disappears from the cooling rack before you can even slice them. Here is why they work so well for real families:
- One Bowl, No Mixer — You dont need a stand mixer or even a hand mixer. A whisk and a bowl, and you are done in ten minutes of prep.
- Budget-Friendly Ingredients — Everything comes from the regular grocery store. No specialty flours, no fancy extracts, no trips to three different shops.
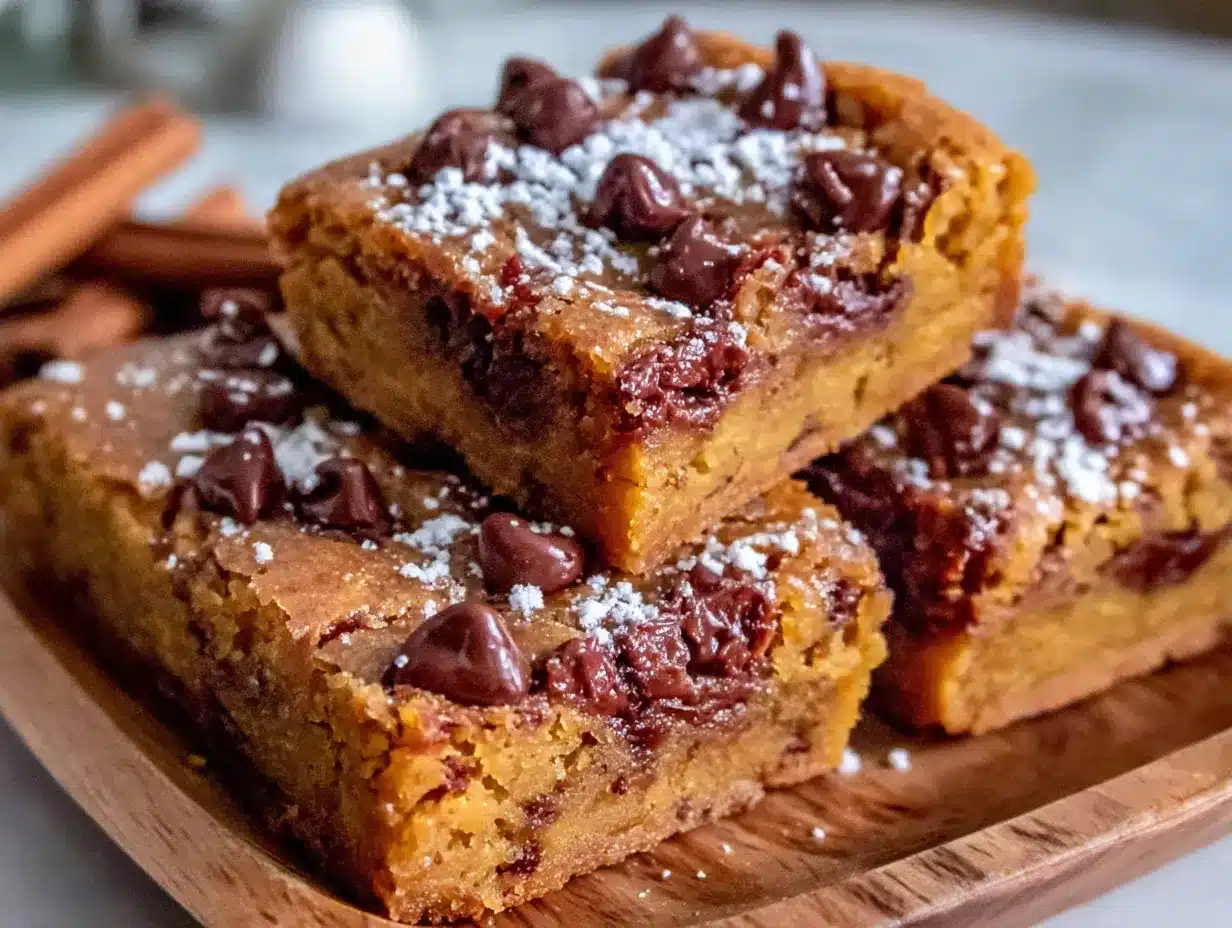
- Kid-Approved Texture — The edges are slightly firm, the centers are soft and chewy, and the chocolate chips melt into little pockets of goodness. Picky eaters actually ask for seconds.
- Perfect for Lunchboxes — These bars hold up beautifully in a lunchbox. They dont crumble, they dont get soggy, and they taste even better the next day.
- Freezes Like a Dream — Make a batch on Sunday, freeze half, and you have homemade snacks ready for weeks. Reheat in the microwave for fifteen seconds, and they taste fresh-baked.
Ive tested this recipe seven times in the last month. I tried adding an extra egg, cutting the butter, using dark brown sugar instead of light. Every time, the bars came out slightly different, but this version — the one my nephew accidentally invented — was the clear winner. It is the kind of recipe that makes you wonder why you ever did it the hard way.
What Ingredients You Will Need
This recipe uses simple, everyday ingredients that you probably already have in your pantry. The combination of pumpkin puree and melted butter is what gives these bars their signature chewy texture, so dont be tempted to swap those out without reading the variations section first.
For the Cookie Bars
- 1/2 cup unsalted butter, melted and slightly cooled (I use Kerrygold for the richer flavor, but any brand works)
- 3/4 cup canned pumpkin puree — not pumpkin pie filling. Make sure it says 100% pumpkin on the label. Libbys is my go-to.
- 1 cup light brown sugar, packed (adds moisture and that deep, caramel-like sweetness)
- 1/4 cup granulated sugar (helps with the slightly crispy edges)
- 1 large egg, room temperature (cold egg will seize the melted butter)
- 1 teaspoon vanilla extract (pure, not imitation, if you can swing it)
- 1 and 1/2 cups all-purpose flour (spooned and leveled — scooping directly from the bag packs in too much flour)
- 1 teaspoon baking soda (fresh baking soda matters. If it has been open for more than six months, buy a new box)
- 1/2 teaspoon salt (fine sea salt or table salt)
- 1 and 1/2 teaspoons pumpkin pie spice (or make your own: 1/2 teaspoon cinnamon, 1/4 teaspoon ginger, 1/4 teaspoon nutmeg, 1/8 teaspoon cloves, 1/8 teaspoon allspice)
- 1 cup semi-sweet chocolate chips (I prefer Ghirardelli, but Nestle Toll House works great too)
Optional Add-Ins
- 1/2 cup chopped pecans or walnuts — adds a nice crunch if your kids are into nuts
- 1/4 cup white chocolate chips — for a sweeter, more decadent bar
- 1/2 teaspoon flaky sea salt — sprinkle on top before baking for that salted caramel vibe
A quick note on the pumpkin puree: I always buy an extra can during fall because it keeps for months in the pantry, and these bars are good enough to make year-round. If you have leftover puree after making this recipe (most cans hold about 1 and 3/4 cups), you can freeze it in an airtight container for up to three months.
Equipment You Will Need
You dont need a fancy kitchen to make these bars. Here is what I use:
- 8×8 inch baking pan — glass, ceramic, or metal all work. I prefer a light-colored metal pan because it bakes more evenly. Dark pans can cause the bottom to brown too quickly.
- Mixing bowls — one large bowl for the wet ingredients, one small bowl for the dry ingredients
- Whisk — a sturdy whisk is better than a wooden spoon here because it incorporates the pumpkin into the butter more smoothly
- Rubber spatula — for scraping every last bit of batter into the pan
- Parchment paper — this is non-negotiable. It makes lifting the bars out of the pan so much easier, and cleanup takes ten seconds
- Cooling rack — lets air circulate under the pan so the bars cool evenly
If you dont have parchment paper, you can grease the pan thoroughly with butter or non-stick spray, but the bars will be harder to remove cleanly. I learned that the hard way when I tried to skip it once and ended up with a crumbled mess.
How to Make Chewy Pumpkin Chocolate Chip Cookie Bars
This is the part where my nephews method really shines. Follow these steps, and you will have perfect bars every single time.
Step 1: Preheat and Prepare the Pan
Preheat your oven to 350°F (175°C). Line your 8×8 inch baking pan with parchment paper, leaving a little overhang on two opposite sides. This creates handles that let you lift the entire block of bars out after baking. Lightly grease the parchment with butter or non-stick spray.
Step 2: Mix the Wet Ingredients
In a large mixing bowl, combine the melted butter, pumpkin puree, brown sugar, and granulated sugar. Whisk vigorously for about 30 seconds until everything is smooth and well combined. The mixture will look glossy and slightly thick. Add the egg and vanilla extract, then whisk again until fully incorporated. Dont worry if it looks a little separated at first — keep whisking, and it will come together.
Step 3: Combine the Dry Ingredients
In a separate small bowl, whisk together the flour, baking soda, salt, and pumpkin pie spice. Make sure there are no clumps of baking soda or spice. This step is important because you want the leavening and seasoning evenly distributed throughout the batter.
Step 4: Bring It All Together
Pour the dry ingredients into the wet ingredients. Use your rubber spatula to fold everything together gently. Stop mixing as soon as you no longer see streaks of flour. Overmixing will develop the gluten in the flour, which can make the bars tough instead of tender. The batter will be thick and slightly sticky — thats exactly what you want.
Step 5: Add the Chocolate Chips
Fold in the chocolate chips with a few quick strokes. Reserve about a tablespoon of chips to sprinkle on top of the batter after its in the pan. This makes the bars look prettier and ensures every bite has chocolate right at the surface.
Step 6: Spread the Batter in the Pan
Transfer the batter to your prepared pan. Use the spatula to spread it evenly into all four corners. The batter is thick, so take your time here. Wet your spatula slightly if the batter sticks too much. Sprinkle the reserved chocolate chips on top, pressing them in gently so they stick.
Step 7: Bake to Perfection
Bake for 25 to 30 minutes. Start checking at the 22-minute mark if your oven runs hot. The bars are done when the edges are set and lightly golden, and the center looks just barely set — it should still jiggle slightly when you gently shake the pan. A toothpick inserted into the center should come out with a few moist crumbs, not wet batter.
Here is the trick: if you overbake these bars, they will be dry. I pulled my first batch out at 32 minutes, and they were fine but not chewy. At 28 minutes, they were perfect. Trust the jiggle test more than the toothpick test.
Step 8: Cool Completely
Place the pan on a cooling rack and let the bars cool completely in the pan. This takes about 1 to 2 hours. I know its tempting to cut into them warm, but they need this time to set up properly. If you cut them too soon, they will crumble and fall apart. Once cool, use the parchment paper handles to lift the entire block out onto a cutting board. Slice into 16 squares.
My Best Tips for Perfect Cookie Bars Every Time
I have made more batches of these bars than I care to count, and I have messed up plenty along the way. Here is what I learned so you dont have to learn the hard way:
- Measure your flour correctly. Spoon it into your measuring cup and level it off with a knife. Scooping directly from the bag compacts the flour, and you will end up with dry, cakey bars instead of chewy ones.
- Use room temperature egg. A cold egg will seize the melted butter, creating little flecks of solid butter in your batter. Leave the egg on the counter for 30 minutes before you start, or place it in a bowl of warm water for 5 minutes.
- Do not overbake. This is the number one mistake people make. The bars continue to cook from residual heat after they come out of the oven, so pulling them when the center is still slightly soft is the right call.
- Let them cool completely. I cant stress this enough. The texture improves dramatically as they cool. Warm bars are delicious, but cooled bars have that perfect chewy texture.
- Use good chocolate chips. Cheap chocolate chips often have stabilizers that prevent them from melting properly. Spend the extra dollar on a quality brand, and you will taste the difference.
One more thing — if your bars come out too cakey, you probably used too much pumpkin or too much flour. Next time, reduce the pumpkin by two tablespoons or spoon your flour more carefully. It took me three tries to nail the ratio, and now I write it on a sticky note taped inside my cabinet.
Variations and Adaptations
This recipe is forgiving, and I have tried several variations that turned out great. Here are a few to try:
Gluten-Free Version
Swap the all-purpose flour for a 1:1 gluten-free baking flour blend. I have used Bobs Red Mill and King Arthur Measure for Measure with excellent results. Do not use almond flour or coconut flour alone — the texture will be completely different and likely crumbly.
Dairy-Free Version
Use a plant-based butter stick (like Miyokos or Country Crock Plant Butter) in place of regular butter. Most dairy-free butters have a higher water content, so the bars may be slightly softer. Chill the batter for 15 minutes before baking to help them hold their shape.
Spice It Up
If you love warm spices, add an extra 1/4 teaspoon of cinnamon and a pinch of cardamom. I did this for a fall gathering, and everyone asked for the recipe. You can also swap the pumpkin pie spice for an equal amount of chai spice blend for a completely different flavor profile.
Pumpkin Chocolate Chip Cookie Bars with Cream Cheese Swirl
This is my favorite indulgent variation. Soften 4 ounces of cream cheese, then mix it with 2 tablespoons of sugar and 1/2 teaspoon of vanilla. Drop spoonfuls of the cream cheese mixture over the batter before baking, then swirl it gently with a knife. Bake as directed. The tangy cream cheese pairs beautifully with the sweet pumpkin.
Lower Sugar Option
Reduce the brown sugar to 3/4 cup and the granulated sugar to 2 tablespoons. The bars will be less sweet but still flavorful. You can also use coconut sugar in place of brown sugar, though the texture will be slightly grainier.
Serving and Storage Suggestions
These bars are incredibly versatile when it comes to serving. Here is how I handle them:
At Room Temperature: This is how we eat them most of the time. They are soft, chewy, and the chocolate chips are perfectly set. Serve them on a plate with a glass of cold milk, and you have an instant hit.
Warmed Up: Pop a bar in the microwave for 10 to 15 seconds. The chocolate gets all melty, and the bar becomes almost fudgy. This is my preferred way to eat them on a chilly afternoon.
With Ice Cream: Warm a bar slightly, top it with a scoop of vanilla ice cream, and drizzle with caramel sauce. It is a dessert that looks fancy but takes two minutes to assemble.
In Lunchboxes: These bars travel incredibly well. I pack them in a small container with a piece of parchment paper between layers. They stay fresh and delicious for hours.
Storage: Keep the bars in an airtight container at room temperature for up to 4 days. If you live in a humid climate, store them in the refrigerator to prevent them from getting too soft. They will keep in the fridge for up to a week.
Freezing: These bars freeze beautifully. Wrap individual bars tightly in plastic wrap, then place them in a freezer-safe bag or container. They will keep for up to 3 months. To thaw, leave them at room temperature for about 30 minutes, or microwave for 15 seconds straight from frozen.
One thing I love about this recipe is that the flavor actually improves after a day. The pumpkin spice has time to meld with the chocolate, and the texture becomes even more chewy. So dont worry if you make them a day ahead — they might be even better.
Nutritional Information and Benefits
Here is the approximate nutritional breakdown for one bar (based on 16 servings):
- Calories: 210
- Total Fat: 10g
- Saturated Fat: 6g
- Cholesterol: 35mg
- Sodium: 180mg
- Total Carbohydrates: 29g
- Dietary Fiber: 1g
- Sugars: 19g
- Protein: 3g
Pumpkin is packed with vitamin A, which is great for eye health and immune function. It also provides fiber and potassium. The chocolate chips add a little antioxidants, and the butter and egg provide some protein and healthy fats. Are these a health food? No. But they are a treat made with real ingredients, and there is something to be said for that.
If you are watching your sugar intake, you can reduce the sugar as mentioned in the variations section. You can also use dark chocolate chips with 70% cacao to lower the sugar content slightly while adding more antioxidants.
These bars are not gluten-free, dairy-free, or vegan in their standard form, but the variations section has options for most dietary needs. As always, check your labels if you are cooking for someone with allergies.
Frequently Asked Questions
Can I use fresh pumpkin instead of canned?
Yes, but you need to make sure the fresh pumpkin is very dry. Roast the pumpkin, puree it, then strain it through a cheesecloth or fine-mesh sieve to remove as much water as possible. Fresh pumpkin has much higher water content than canned, and too much moisture will make the bars soggy instead of chewy.
Why did my bars turn out cakey?
Cakey bars usually mean too much flour or too much pumpkin. Make sure you are measuring your flour correctly by spooning it into the cup and leveling it off. Also, make sure your pumpkin puree is not watery — some brands are thinner than others. If your puree looks runny, blot it with a paper towel before using.
Can I double this recipe?
Absolutely. Double all the ingredients and bake in a 9×13 inch pan. The baking time will be slightly longer — start checking at 30 minutes and add time as needed. You may need to bake for 35 to 40 minutes total. The bars will be a little thicker, so let them cool completely before cutting.
Can I use chocolate chunks instead of chips?
Yes, chocolate chunks work great. They create bigger pockets of melted chocolate throughout the bars. I actually prefer chunks for this recipe because they give you those dramatic chocolatey bites. Just chop a chocolate bar into rough 1/2-inch pieces and use the same amount.
How do I know when the bars are done baking?
The edges should be set and lightly golden, and the center should look just barely set — it will jiggle slightly when you shake the pan. A toothpick inserted into the center should come out with a few moist crumbs, not wet batter. If the toothpick comes out clean, the bars are overbaked. When in doubt, pull them out a minute early. They will continue to set as they cool.
Final Thoughts
I still think about that Tuesday afternoon when my nephew showed me up in my own kitchen. He didnt know he was breaking baking rules. He just knew that washing extra bowls felt like a waste of time, and honestly, he was onto something. These chewy pumpkin chocolate chip cookie bars are proof that sometimes the simplest way really is the best way.
I hope you make these bars for your family. I hope they fill your kitchen with that warm, spicy pumpkin smell that makes everyone wander in asking what is for dessert. And I hope you enjoy that first bite — the one where the chocolate is still slightly warm and the pumpkin spice hits your nose before the sweetness hits your tongue.
If you try this recipe, I would love to hear how it turned out. Leave a comment below and let me know if your kids had any suggestions. You never know — they might just teach you something new.
Pin This Recipe!
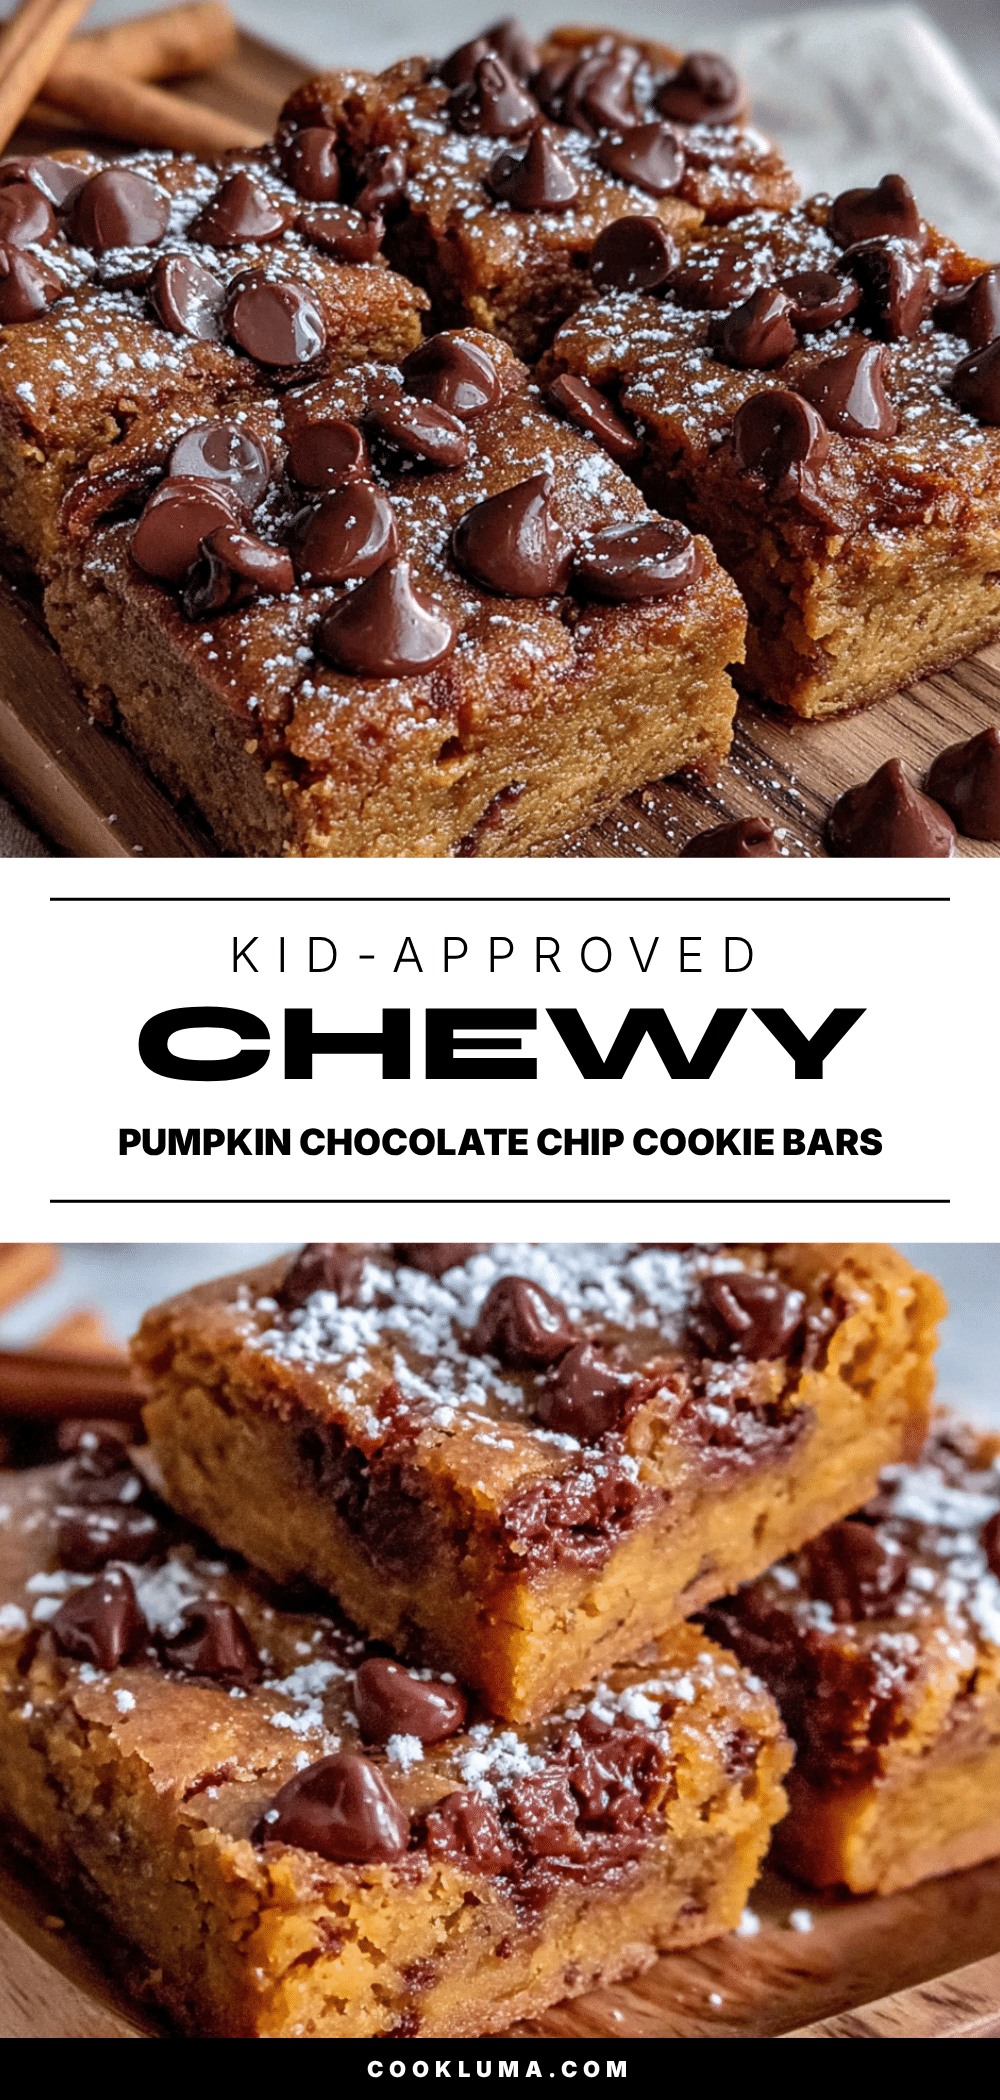
Chewy Pumpkin Chocolate Chip Cookie Bars
These one-bowl pumpkin chocolate chip cookie bars are perfectly chewy, kid-approved, and made with simple ingredients. A quick and easy dessert that disappears fast!
- Prep Time: 10 minutes
- Cook Time: 28 minutes
- Total Time: 38 minutes
- Yield: 16 servings 1x
- Category: Dessert
- Cuisine: American
Ingredients
- 1/2 cup unsalted butter, melted and slightly cooled
- 3/4 cup canned pumpkin puree (100% pumpkin, not pie filling)
- 1 cup light brown sugar, packed
- 1/4 cup granulated sugar
- 1 large egg, room temperature
- 1 teaspoon vanilla extract (pure)
- 1 and 1/2 cups all-purpose flour (spooned and leveled)
- 1 teaspoon baking soda
- 1/2 teaspoon salt (fine sea salt or table salt)
- 1 and 1/2 teaspoons pumpkin pie spice
- 1 cup semi-sweet chocolate chips
- Optional: 1/2 cup chopped pecans or walnuts
- Optional: 1/4 cup white chocolate chips
- Optional: 1/2 teaspoon flaky sea salt (for topping)
Instructions
- Preheat oven to 350°F (175°C). Line an 8×8 inch baking pan with parchment paper, leaving overhang on two sides. Lightly grease the parchment.
- In a large bowl, whisk together melted butter, pumpkin puree, brown sugar, and granulated sugar until smooth and glossy (about 30 seconds).
- Add egg and vanilla extract, whisk until fully incorporated.
- In a separate small bowl, whisk together flour, baking soda, salt, and pumpkin pie spice.
- Pour dry ingredients into wet ingredients. Fold gently with a rubber spatula until just combined (do not overmix). Batter will be thick and slightly sticky.
- Fold in chocolate chips, reserving about 1 tablespoon for topping.
- Spread batter evenly into prepared pan. Sprinkle reserved chocolate chips on top and press gently.
- Bake for 25-30 minutes, or until edges are set and lightly golden and center is just barely set (jiggles slightly when shaken). Start checking at 22 minutes.
- Cool completely in the pan on a cooling rack (1-2 hours). Use parchment handles to lift out, then slice into 16 squares.
Notes
Measure flour correctly by spooning into cup and leveling off. Use room temperature egg to avoid seizing melted butter. Do not overbake; bars continue to cook from residual heat. Cool completely before cutting for best texture. For gluten-free, use 1:1 gluten-free flour blend. For dairy-free, use plant-based butter and chill batter 15 minutes before baking. Bars keep in airtight container at room temperature for up to 4 days, or freeze for up to 3 months.
Nutrition
- Serving Size: 1 bar
- Calories: 210
- Sugar: 19
- Sodium: 180
- Fat: 10
- Saturated Fat: 6
- Carbohydrates: 29
- Fiber: 1
- Protein: 3
Keywords: pumpkin chocolate chip cookie bars, chewy pumpkin bars, easy pumpkin dessert, one bowl pumpkin bars, kid-friendly pumpkin recipe


