My nephew showed up at my door at 4:30 PM on Halloween dressed as a half-unrolled mummy—the gauze was already trailing behind him on the porch—and announced he was starving. The only thing in the fridge was a half-eaten block of cream cheese, a bag of black beans I’d soaked the night before for no real reason, and some sad-looking scallions. My sister was texting from the car, stuck in costume-drop-off traffic, and I had maybe twenty minutes before the whole neighborhood descended for trick-or-treating.
So I did what any slightly panicked aunt would do—I started pulling things out of the pantry and hoping for the best. Tortilla chips? Check. Taco seasoning that expired last July? Probably fine. Sour cream? Barely enough. And then I saw the string cheese in the back of the drawer, and it just clicked. Mummy. Taco dip. The bandage strips practically assembled themselves.
Honestly, I wasn’t trying to be clever. I was just trying to feed a hungry kid in a costume before he unraveled completely. But when I set that platter down on the counter, with the sour cream mummy strips crisscrossed over the black bean filling and two little olive eyes staring up at him, he actually stopped mid-whine. “Whoa, Auntie. That’s creepy.” Coming from a seven-year-old, that’s basically a Michelin star.
This easy black bean mummy taco dip for Halloween became an accidental tradition that year. It’s the kind of recipe that doesn’t try too hard—it just shows up, looks ridiculous, and tastes like actual taco night. No elaborate carving, no fondant, no stress. Just beans, cheese, and a little bit of theatrical sour cream work.
Why You’ll Love This Recipe
I’ve tested this dip at three Halloween parties now, two school potlucks, and one very confused Friendsgiving where someone brought it “ironically” and then it got devoured. Here’s why it works every single time:
- Ready in 15 Minutes: No oven required. No waiting. You can make this between answering the doorbell and refilling the candy bowl.
- Simple Ingredients: Canned black beans, cream cheese, taco seasoning, sour cream, and cheese. That’s it. You probably have all of it right now.
- Perfect for Halloween Gatherings: It’s spooky without being complicated. Kids love the mummy face, adults love that it’s actual food and not just sugar.
- Crowd-Pleaser: I’ve watched people who “don’t like beans” go back for thirds. The creamy base changes minds.
- Unbelievably Delicious: The texture contrast between the warm, savory black bean layer and the cool, tangy sour cream mummy strips is genuinely addictive. It’s not just a gimmick—it’s a really good dip.
What makes this different from every other taco dip out there? It’s the cream cheese base. Most recipes use refried beans as the foundation, which can be heavy and one-note. By blending black beans with cream cheese and taco seasoning, you get a smoother, richer base that actually holds its shape when you spread it. The mummy design isn’t just decoration—it creates the perfect sour cream-to-dip ratio in every single scoop.
This is the kind of appetizer that makes people close their eyes after the first bite. It’s comfort food dressed up in a costume, and honestly, isn’t that what Halloween is really about?
What Ingredients You Will Need
This recipe uses simple, mostly pantry-stable ingredients to deliver that bold taco flavor and creepy presentation without any fuss. Most of these are things you’d grab for a regular taco Tuesday, just with a little more sour cream and string cheese involved.
For the Black Bean Base
- 1 can (15 oz) black beans, drained and rinsed (I prefer Goya or Bush’s for consistent texture—avoid brands that turn mushy)
- 8 oz cream cheese, softened to room temperature (full-fat works best for a stable base, but Neufchâtel is fine if you want to cut some calories)
- 1 packet (1 oz) taco seasoning (I like McCormick or homemade—just make sure it’s not the reduced-sodium kind, which can taste flat)
- 1/2 cup shredded Mexican blend cheese (or cheddar, or Monterey Jack—whatever melts nicely)
- 2 tablespoons milk (to thin the base slightly; use any kind you have)
For the Mummy Design
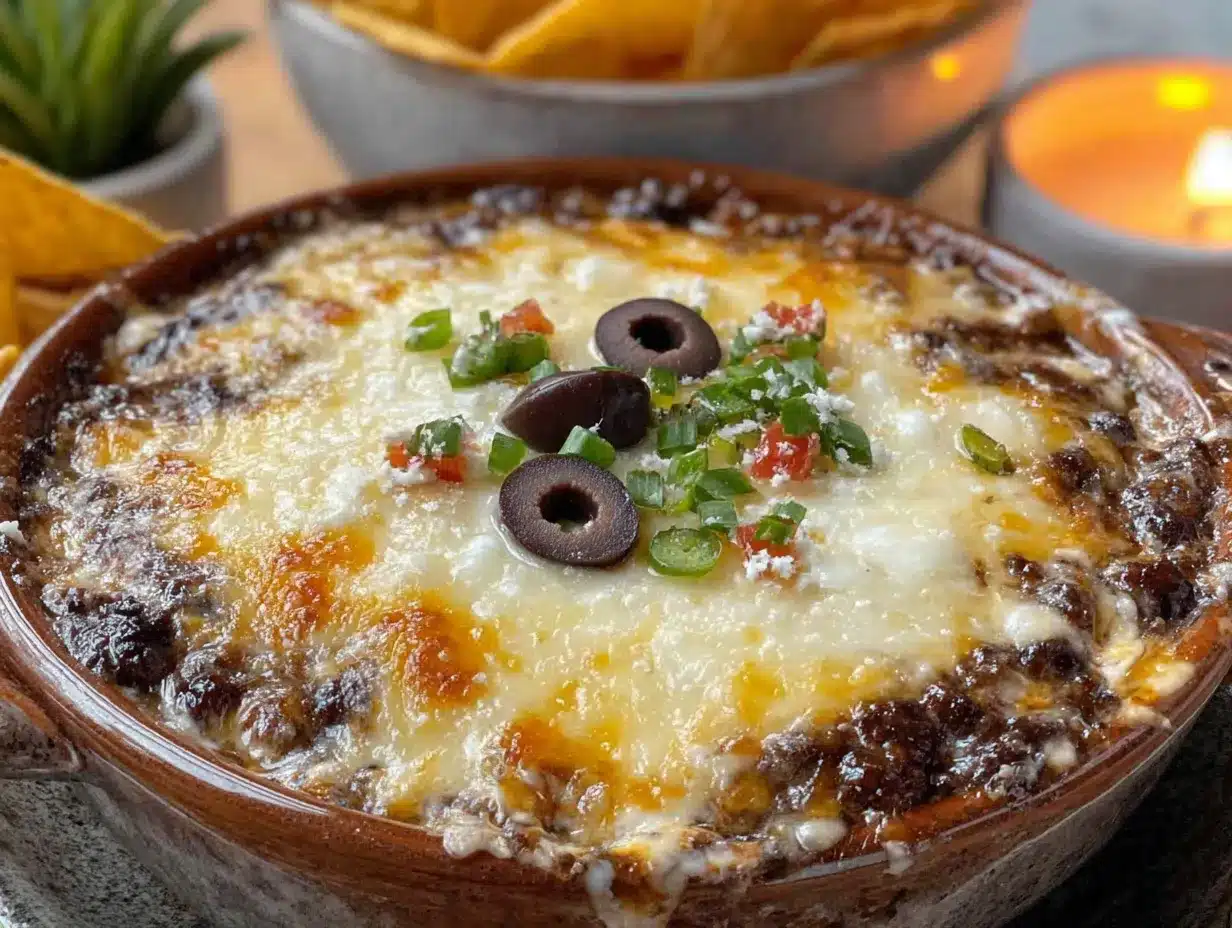
- 1 cup sour cream (full-fat holds up better for piping, but light sour cream works in a pinch)
- 2-3 string cheese sticks (mozzarella—these become the mummy bandages on top)
- 2 black olives, sliced crosswise into rounds (for the eyes—use canned sliced olives for convenience)
- Optional: 1/4 cup sliced green onions or fresh cilantro (for garnish, to look like spooky grass or mummy wrappings)
For Serving
- Tortilla chips (I recommend Tostitos Scoops for maximum dip-to-chip ratio—the scoops also look like little bones or teeth on the platter)
- Optional: Extra shredded lettuce, diced tomatoes, or jalapeños (for topping individual servings)
Ingredient Selection Tip: Don’t skip softening the cream cheese. If it’s cold, you’ll end up with lumpy base that won’t spread evenly. Leave it on the counter for 30 minutes, or microwave it in 10-second bursts until it’s soft but not melted. For the black beans, look for cans labeled “low sodium” so you can control the salt level—taco seasoning already brings plenty of sodium to the party.
Equipment Needed
You don’t need anything fancy for this recipe, which is part of the charm. Here’s what I use:
- Small mixing bowl (for the black bean base—any medium bowl works)
- Hand mixer or wooden spoon (a hand mixer makes the cream cheese blending effortless, but a strong arm and a sturdy spoon will get you there too)
- Spatula (for scraping every last bit of that creamy bean mixture out of the bowl)
- Serving platter or pie dish (a round dish works best for the mummy shape—I use a 9-inch pie plate or a small wooden board)
- Piping bag or zip-top bag (for the sour cream mummy strips—a zip-top bag with the corner snipped off is honestly easier and less messy than a real piping bag)
- Small knife (for slicing olives and cutting string cheese into strips)
- Cutting board (for prep work)
Budget-Friendly Alternative: If you don’t have a hand mixer, just mash the beans with a fork first, then stir vigorously into the cream cheese. It takes an extra minute but works perfectly. And if you don’t have a piping bag, a sturdy sandwich bag with the corner snipped is actually my preferred method—less cleanup, and you can throw it away after.
Preparation Method
This whole thing comes together in about 15 minutes, start to finish. I’ve timed it. Here’s exactly how I do it:
- Soften the cream cheese: Take your cream cheese out of the fridge at least 30 minutes before starting, or microwave it in 10-second intervals until it’s soft to the touch but not hot. If you microwave it, check every 10 seconds—cream cheese gets angry and melts fast.
- Make the black bean base: In a small mixing bowl, combine the softened cream cheese, drained and rinsed black beans, taco seasoning, shredded Mexican cheese, and milk. Mix with a hand mixer on medium speed until everything is well combined and relatively smooth. You want some bean texture remaining—don’t puree it into baby food. The mixture should be thick but spreadable, like a very chunky hummus. If it looks too stiff, add another tablespoon of milk.
- Spread the base: Transfer the bean mixture to your serving platter or pie dish. Use a spatula to spread it into an even layer, about 1/2 to 3/4 inch thick. Round it into a nice oval or circle shape—think mummy body, not a perfect geometric shape. Leave a little border around the edges if you’re using a platter, so the dip doesn’t spill over when people start digging in.
- Prepare the string cheese bandages: Take your string cheese sticks and peel them into thin strips lengthwise. Each stick should give you about 4-6 strips depending on how careful you are. Some will break—that’s fine, use the shorter pieces for the edges. This is the most satisfying step, honestly. It feels like arts and crafts.
- Layer the bandages: Lay the string cheese strips across the black bean base in a crisscross pattern, leaving a gap in the center for the eyes. Don’t overthink the placement—real mummies have messy wrappings. Some strips overlapping, some slightly askew. You want it to look a little chaotic, like a zombie wrapped itself in a hurry.
- Pipe the sour cream: Spoon the sour cream into a zip-top bag, seal it, and snip off a tiny corner (about 1/8 inch). Pipe thin lines of sour cream over the string cheese strips, following the same crisscross pattern. The sour cream should peek out between the cheese strips, creating that layered mummy look. Don’t cover the entire surface—leave some of the black bean base visible for contrast.
- Add the eyes: Place two olive slices in the center gap where you left space. Position them slightly apart, like mummy eyes peeking out from the wrappings. For extra creepiness, add a tiny dot of sour cream in the center of each olive—this gives the mummy pupils and makes it look alive. My nephew said this step “makes it look like it’s watching you eat it.” Perfect.
- Garnish (optional): Sprinkle sliced green onions or fresh cilantro around the edges of the platter, like spooky grass or loose wrappings. This step is purely aesthetic but adds a nice pop of green against the black beans and white sour cream.
- Serve immediately: Surround the mummy with tortilla chips and let people dig in. The dip is best at room temperature, so you don’t need to warm it unless you want to—if you do, pop the whole platter in a 350°F oven for 5-7 minutes before adding the sour cream and olives.
Sensory Check: At step 2, the mixture should smell like a taco shell—warm, slightly smoky, with that familiar cumin-chili aroma. The texture should be thick enough to hold a spoon upright but soft enough to spread easily. If it’s too stiff, add milk a teaspoon at a time until it loosens up.
Cooking Tips & Techniques
I’ve made this dip probably a dozen times now, and I’ve learned a few things the hard way. Here’s what I wish someone had told me:
Don’t overmix the beans. The first time I made this, I used a food processor and ended up with black bean paste. It was smooth, sure, but it lost all that satisfying texture. You want some whole beans in there—it makes the dip feel more substantial and less like baby food. Hand mixer on medium, 30 seconds max. If you see the beans disappearing, stop.
Room temperature cream cheese is non-negotiable. I know, I know, we’re all impatient. But cold cream cheese will leave you with white streaks in your black bean base, and it won’t spread smoothly. Set it out before you start anything else. If you forget, microwave it in 10-second bursts, rotating the block each time. Trust me on this—I’ve made the lumpy version, and it’s not pretty.
String cheese peels better when it’s cold. Counterintuitive, right? But warm string cheese gets stretchy and falls apart. Take it straight from the fridge, peel it slowly, and you’ll get nice clean strips. If it starts getting sticky, put it back in the fridge for five minutes.
Pipe the sour cream with confidence. Don’t try to make perfect lines—mummies are messy. I’ve had batches where the sour cream came out in wobbly, uneven strips, and those actually looked more authentic. If you mess up a line, just smear it slightly and call it “ancient wrappings.” No one will know.
The timing trick: If you’re making this for a party, prep the black bean base and peel the string cheese ahead of time. Assemble everything right before serving—the sour cream and cheese strips look best when they’re fresh. You can keep the base covered in the fridge for up to 24 hours, just let it come to room temperature before spreading.
Variations & Adaptations
This recipe is surprisingly flexible. Here are some ways I’ve tweaked it over the years:
Vegetarian/Vegan Version: Use dairy-free cream cheese and vegan sour cream (I like Kite Hill or Violife). Swap the shredded cheese for a vegan Mexican blend. The texture will be slightly less creamy, but the flavor holds up surprisingly well. I tested this for a vegan friend’s Halloween party, and no one noticed the difference until I pointed it out.
Spicy Mummy: Add 1/4 cup diced pickled jalapeños to the black bean base, or mix in a teaspoon of chipotle powder with the taco seasoning. For extra heat, top the finished dip with sliced fresh jalapeños before serving. My brother-in-law requests this version every year—he says the mummy should have “a little bite.”
Loaded Mummy: After spreading the black bean base, sprinkle a layer of seasoned ground beef or turkey over it before adding the cheese strips. This turns it from a dip into a full meal. I used this version for a football party last fall, and it disappeared faster than the ultimate loaded game day nacho bar with pulled pork I also brought. The mummy presentation made people laugh, but the beef layer made them come back.
Gluten-Free: This recipe is naturally gluten-free as long as you check your taco seasoning label. Some brands use wheat flour as a filler. McCormick and Simply Organic are safe bets. Serve with gluten-free tortilla chips or veggie sticks.
Breakfast Mummy: Okay, this one’s weird but I tried it. Swap the taco seasoning for everything bagel seasoning, use scallion cream cheese in the base, and serve with bagel chips instead of tortilla chips. The mummy design still works, and it’s a fun brunch option for Halloween morning. My sister called it “unhinged” and then ate half the platter.
Serving & Storage Suggestions
This dip is best served at room temperature, straight from the platter. The cream cheese base softens as it sits, making it easier to scoop. If you’re serving it at a party, I recommend assembling it no more than 30 minutes before guests arrive—the string cheese strips start to dry out if they sit too long, and the sour cream can get weepy.
What to Serve With It: Tortilla chips are the obvious choice, but I’ve also served this with cucumber rounds (for a low-carb option), bell pepper strips, and even pretzel sticks. The salty crunch of the chips really complements the creamy bean base, though. For a full Halloween spread, pair it with best homemade spooky spiderweb cheese ball for Halloween and easy mummy meatball skewers for a complete spooky appetizer table.
Storage: Leftover dip (if you have any) keeps in an airtight container in the refrigerator for up to 3 days. The string cheese and sour cream will get a little sad, but the black bean base reheats beautifully. Just scoop out the leftovers, microwave for 30 seconds, and stir. The mummy design won’t survive storage, but the flavor will.
Reheating: Microwave individual portions for 20-30 seconds, or reheat the whole base in a small skillet over medium-low heat, stirring occasionally. Add a splash of milk if it seems too thick. Don’t reheat the sour cream—add fresh sour cream after warming.
Flavor Development: Honestly, this dip tastes better the next day. The flavors meld overnight, and the black bean base gets even creamier. If you’re planning ahead, make the base the day before, refrigerate it, then assemble the mummy design fresh before serving. Best of both worlds.
Nutritional Information & Benefits
Let’s be real—this is a party dip, not a health food. But it’s not as bad as you might think. Here’s the approximate breakdown per serving (based on 8 servings, with chips):
| Nutrient | Amount Per Serving |
|---|---|
| Calories | 280 |
| Total Fat | 18g |
| Saturated Fat | 10g |
| Cholesterol | 45mg |
| Sodium | 620mg |
| Total Carbohydrates | 20g |
| Dietary Fiber | 6g |
| Sugars | 3g |
| Protein | 10g |
Health Highlights: Black beans are packed with fiber and plant-based protein—6 grams of fiber per serving is nothing to sneeze at. They also contain folate, magnesium, and antioxidants. Cream cheese provides calcium and a little protein, though it’s also the main source of saturated fat here. If you want to lighten it up, use reduced-fat cream cheese and Greek yogurt instead of sour cream (just note that Greek yogurt doesn’t pipe as smoothly).
Dietary Considerations: This recipe is vegetarian and can be made gluten-free with the right taco seasoning. It’s not dairy-free in its standard form, but the vegan adaptations work well. If you’re watching sodium, use low-sodium black beans and a homemade taco seasoning blend—packets are convenient but salty.
Conclusion
This easy black bean mummy taco dip for Halloween has become my go-to party trick, and not just because it looks cool. It’s genuinely delicious—creamy, savory, with just enough spice to keep things interesting. The mummy design is fun without being fussy, and the whole thing comes together in the time it takes to answer the doorbell twice.
I love that this recipe doesn’t take itself too seriously. It’s Halloween food, meant to be eaten with your hands while wearing a costume and laughing at something ridiculous. You can dress it up with fancy garnishes or keep it simple with just beans and sour cream. Either way, it works.
Try it for your next Halloween gathering, or honestly, just make it for a Tuesday. The mummy face works for any occasion where you want people to smile before they eat. If you make it, let me know in the comments—I’d love to hear how your mummy turned out, what variations you tried, and whether anyone in your house said “that’s creepy” in a good way.
Happy Halloween, and happy dipping!
Frequently Asked Questions
Can I make this dip ahead of time?
Yes! Make the black bean base up to 24 hours in advance and store it covered in the fridge. Assemble the mummy design (string cheese, sour cream, olives) right before serving for the best presentation.
Can I use refried beans instead of black beans?
Absolutely. Canned refried beans work great—just skip the milk since they’re already soft. The texture will be smoother and more traditional for taco dip, but you’ll lose some of the fiber and whole-bean texture.
How do I make the sour cream pipe smoothly?
Make sure your sour cream is cold but not stiff. Spoon it into a zip-top bag, seal it, and snip a tiny corner—smaller than you think you need. You can always cut the hole bigger, but you can’t make it smaller. If the sour cream is too thick, stir in a teaspoon of milk before piping.
Can I bake this dip?
You can! Spread the black bean base in an oven-safe dish, top with the string cheese strips, and bake at 350°F for 10-12 minutes until bubbly. Let it cool for 5 minutes, then add the sour cream mummy strips and olive eyes. The warm base makes the sour cream extra melty and delicious.
What if I don’t have string cheese?
No problem. Use thin strips of mozzarella cheese, or just pipe extra sour cream in a crisscross pattern to create the mummy wrappings. You can also use sliced provolone cut into strips, or skip the cheese strips entirely and go full sour cream mummy.
Pin This Recipe!
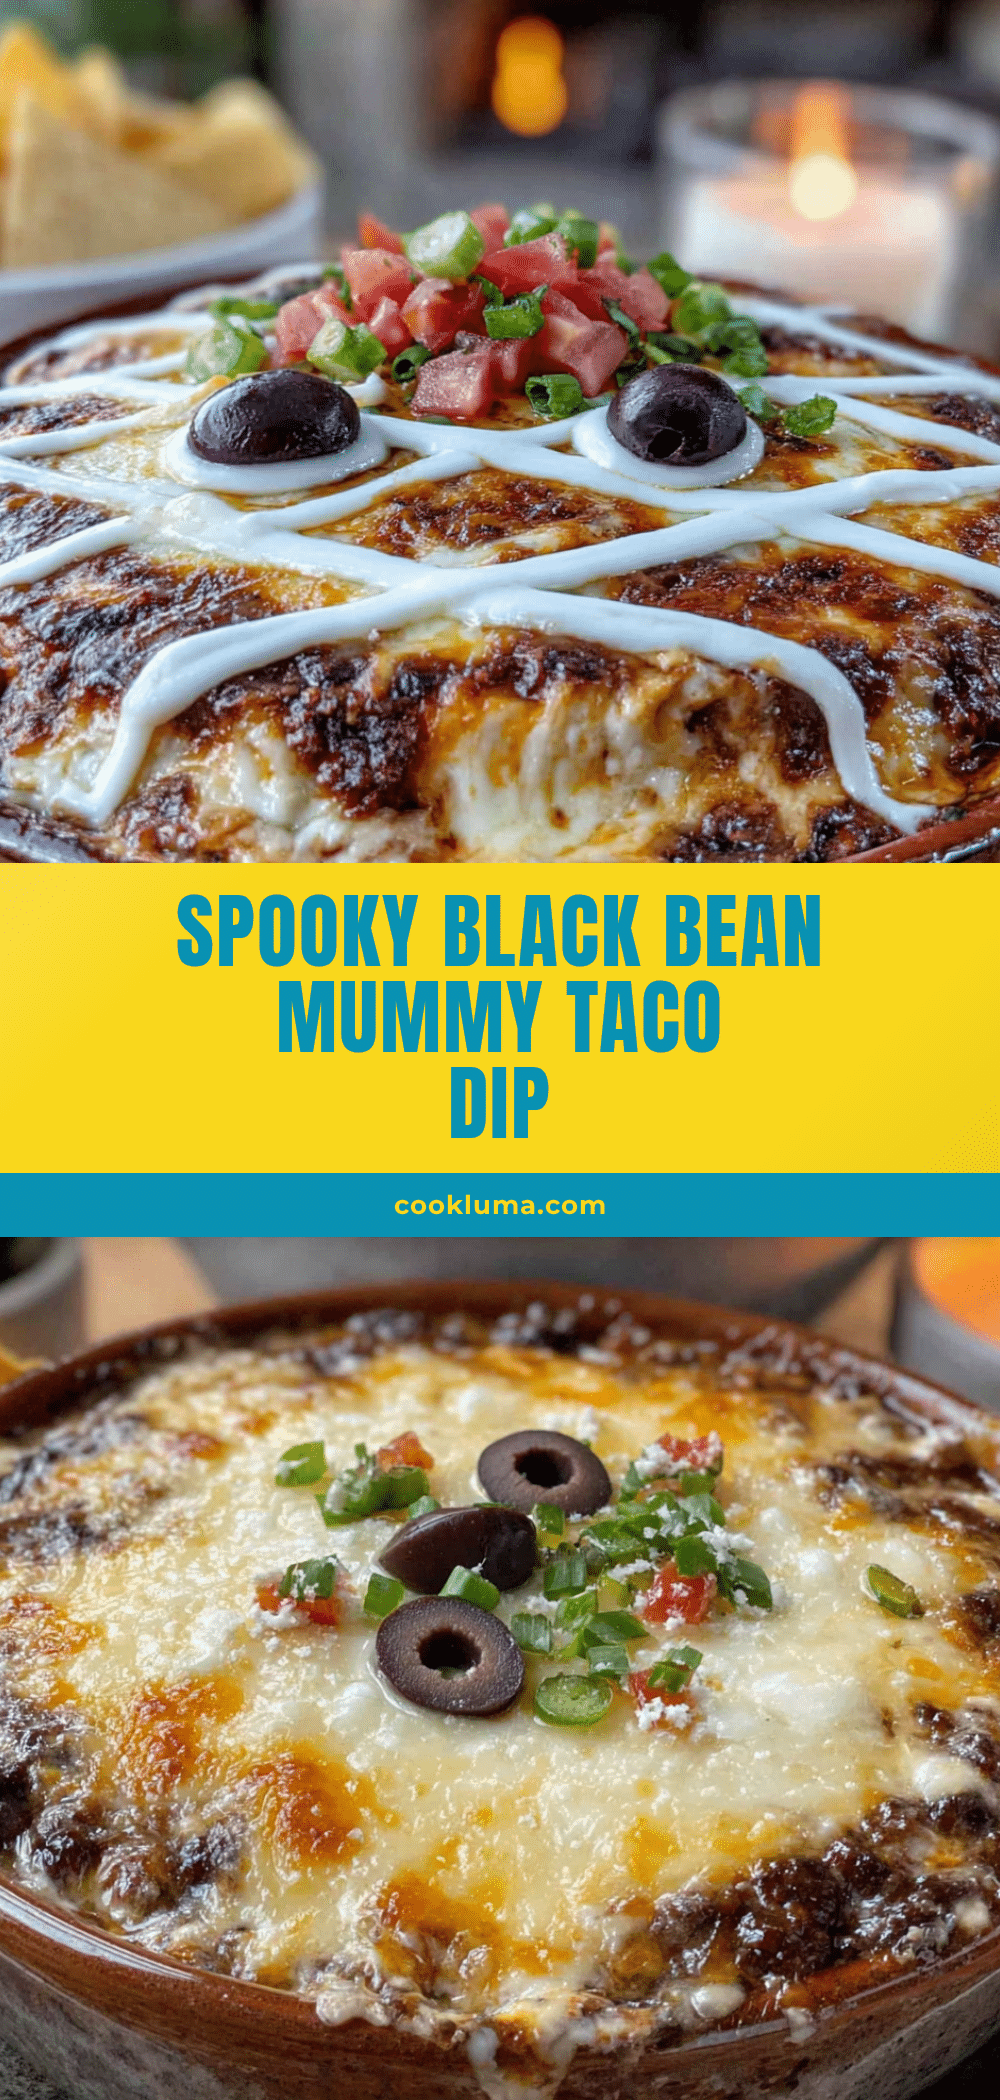
Easy Black Bean Mummy Taco Dip: Best Halloween Appetizer

A quick and fun Halloween appetizer featuring a creamy black bean taco dip base topped with string cheese bandages and sour cream mummy strips, perfect for parties and trick-or-treating.
- Prep Time: 15 minutes
- Cook Time: 0 minutes
- Total Time: 15 minutes
- Yield: 8 servings 1x
- Category: Appetizer
- Cuisine: Mexican-American
Ingredients
- 1 can (15 oz) black beans, drained and rinsed
- 8 oz cream cheese, softened
- 1 packet (1 oz) taco seasoning
- 1/2 cup shredded Mexican blend cheese
- 2 tablespoons milk
- 1 cup sour cream
- 2–3 string cheese sticks (mozzarella)
- 2 black olives, sliced crosswise into rounds
- Optional: 1/4 cup sliced green onions or fresh cilantro for garnish
- Tortilla chips for serving
- Optional: extra shredded lettuce, diced tomatoes, or jalapeños for topping
Instructions
- Soften the cream cheese: Take your cream cheese out of the fridge at least 30 minutes before starting, or microwave it in 10-second intervals until it’s soft to the touch but not hot.
- Make the black bean base: In a small mixing bowl, combine the softened cream cheese, drained and rinsed black beans, taco seasoning, shredded Mexican cheese, and milk. Mix with a hand mixer on medium speed until well combined and relatively smooth, leaving some bean texture.
- Spread the base: Transfer the bean mixture to your serving platter or pie dish. Use a spatula to spread it into an even layer, about 1/2 to 3/4 inch thick, shaped into a round or oval.
- Prepare the string cheese bandages: Peel the string cheese sticks into thin strips lengthwise, about 4-6 strips per stick.
- Layer the bandages: Lay the string cheese strips across the black bean base in a crisscross pattern, leaving a gap in the center for the eyes.
- Pipe the sour cream: Spoon the sour cream into a zip-top bag, seal it, and snip off a tiny corner (about 1/8 inch). Pipe thin lines of sour cream over the string cheese strips, following the same crisscross pattern.
- Add the eyes: Place two olive slices in the center gap. For extra creepiness, add a tiny dot of sour cream in the center of each olive.
- Garnish (optional): Sprinkle sliced green onions or fresh cilantro around the edges of the platter.
- Serve immediately: Surround the mummy with tortilla chips and serve at room temperature.
Notes
Don’t overmix the beans; leave some texture. Room temperature cream cheese is essential for smooth blending. String cheese peels better when cold. Pipe sour cream with confidence—messy lines look more authentic. Prep the base and peel cheese ahead; assemble just before serving.
Nutrition
- Serving Size: 1 serving (about 1/8
- Calories: 280
- Sugar: 3
- Sodium: 620
- Fat: 18
- Saturated Fat: 10
- Carbohydrates: 20
- Fiber: 6
- Protein: 10
Keywords: Halloween appetizer, mummy taco dip, black bean dip, easy Halloween recipe, spooky dip, taco dip, party dip


