I watched a grown man in a hot dog costume nearly cry. Not from sadness—from pure, unfiltered joy at the sight of a platter of deviled eggs that looked like tiny, eight-legged creatures. It was my neighbor, Steve, at our block’s Halloween party last year. He pointed at the platter, looked at me, and whispered, “You made spiders. Out of eggs. I don’t know if I’m impressed or terrified.” I knew right then I had stumbled onto something special. The plate was empty in under fifteen minutes, and three people asked me to send them the recipe before the pumpkin-carving contest even started.
Honestly, I didn’t set out to create a Halloween legend. I was just tired of the same old candy bowls and store-bought cookies. I wanted something that felt grown-up enough for the adults but still fun enough to make the kids squeal (in a good way). I had a carton of eggs, a jar of olives, and a desperate need to not be the person who brought a bag of chips. The first batch looked more like sad, squashed beetles than spiders, but after a few tweaks—and a lot of eaten evidence—I landed on this version. It’s the kind of appetizer that makes people stop mid-conversation and say, “Wait, are those spiders?”
These Perfect Spooky Spider Deviled Eggs for Halloween aren’t just a gimmick. They’re genuinely the best deviled eggs I’ve ever made, with a creamy, tangy filling that stands on its own. The spider legs are just the delicious, edible costume. It’s the recipe that made me realize you don’t need fancy tools or hours of prep to create something memorable. You just need a little imagination and a steady hand with a piping bag.
Why You’ll Love This Recipe
Let me tell you why these little guys are going to be the star of your Halloween spread. I’ve tested this recipe at three different parties now, and the reaction is always the same—a mix of delighted laughter and genuine hunger.
- Quick & Easy: From start to finish, you’re looking at about 30 minutes of active work. The eggs boil while you prep the filling. It’s a breeze, even if you’re juggling a costume and a house full of guests.
- Simple Ingredients: You probably have almost everything in your fridge right now. Eggs, mayonnaise, mustard, and a can of black olives. No special trips to a fancy grocery store required.
- Perfect for Halloween Parties: Whether it’s a kid-friendly classroom party or an adult costume bash, these fit right in. They’re elegant enough for a cocktail hour but silly enough for a spooky movie night.
- Crowd-Pleaser: I’ve never seen a deviled egg get turned down at a party, and these are no exception. The spider design is just the hook—the creamy, classic flavor is what keeps people coming back for seconds.
- Unbelievably Delicious: The filling is silky smooth, perfectly seasoned, and has that little tang from pickle relish that makes deviled eggs so addictive. The olive spiders add a briny pop that complements the yolk perfectly.
What makes this recipe different from all the other Halloween deviled eggs out there? It’s the texture. I learned the hard way that over-boiling eggs makes the yolks gray and crumbly. I’ll share my foolproof method below, but trust me—this filling is so creamy, you’ll want to eat it with a spoon. It’s not just another Halloween snack; it’s a Perfect Spooky Spider Deviled Eggs for Halloween recipe that actually delivers on flavor, not just looks.
What Ingredients You Will Need
This recipe uses simple, wholesome ingredients to deliver bold flavor and satisfying texture without the fuss. Most of these are pantry staples, which is perfect for last-minute Halloween prep.
- 12 large eggs (room temperature works best for even cooking, but cold is fine too)
- 1/3 cup mayonnaise (I prefer Duke’s or Hellmann’s for that perfect tangy creaminess)
- 1 tablespoon yellow mustard (adds color and a classic tang)
- 1 tablespoon sweet pickle relish (drained well—this is key for texture)
- 1/2 teaspoon salt (plus more for the boiling water)
- 1/4 teaspoon black pepper
- 1/4 teaspoon paprika (smoked paprika works beautifully too)
- 1 can (6 ounces) large pitted black olives (look for jumbo or colossal sizes for the spider bodies)
- 1 can (4 ounces) sliced black olives (these become the spider legs—make sure they’re the sliced kind, not whole)
- Optional: 1 tablespoon white vinegar (added to the boiling water helps the eggs peel cleaner)
- Optional garnish: extra paprika or fresh chives (for a pop of color)
Let me talk about the olives for a second because this is where the magic happens. You need two types. The whole, pitted olives become the spider bodies. I like the jumbo ones because they look more substantial sitting on top of the egg. The sliced olives become the legs. Now, here’s a tip I learned after my first failed batch: drain the sliced olives and pat them dry with a paper towel. If they’re too wet, they’ll slide right off the egg yolk. You want them dry enough to stick but still flexible enough to bend into little spider legs.
For the mayonnaise, don’t skimp here. A cheap mayo can make your filling taste watery or overly sweet. I’ve tested this with full-fat and light mayo, and honestly, the full-fat version gives you that luxurious, silky texture that makes deviled eggs so satisfying. If you’re dairy-free or egg-free, you can use a vegan mayo, but the texture will be slightly different.
Equipment Needed
You don’t need a lot of fancy gadgets for this recipe, which is part of why I love it. Here’s what you’ll need:
- Large pot (big enough to hold 12 eggs in a single layer)
- Slotted spoon (for lowering eggs into boiling water and fishing them out)
- Large bowl of ice water (for shocking the eggs after boiling—this is non-negotiable for easy peeling)
- Sharp knife (a paring knife works perfectly for cutting the eggs cleanly)
- Small mixing bowl (for the yolk mixture)
- Fork or potato masher (for mashing the yolks)
- Piping bag or zip-top bag (a zip-top bag with the corner snipped off works like a charm)
- Cutting board
- Paper towels (for drying olives and patting eggs)
- Serving platter (a dark-colored platter makes the spiders pop!)
I’ve made these with both a piping bag and a simple zip-top bag, and honestly, the zip-top bag is easier to control. Just fill it, twist the top, and snip a small corner. Start with a tiny opening—you can always make it bigger, but you can’t undo a cut that’s too large. If you’re using a piping bag, a star tip adds a nice decorative ridge to the filling, but a plain round tip works just fine.
Preparation Method
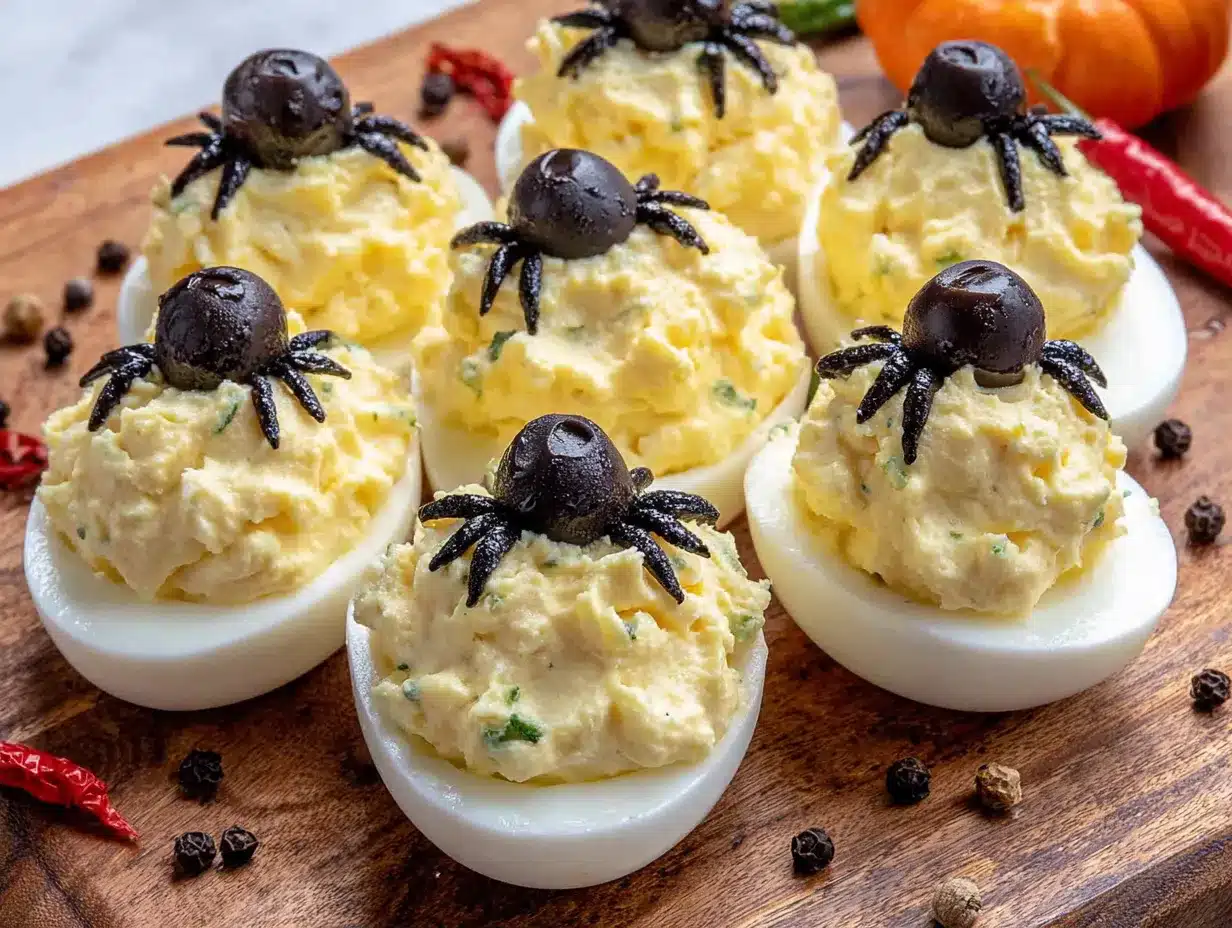
Alright, let’s make some spiders. I’ll walk you through every step so you get perfect results, even if it’s your first time making deviled eggs.
- Boil the eggs. Place your eggs in a large pot and cover them with cold water by about an inch. Add a generous pinch of salt and the optional tablespoon of vinegar. Bring the water to a full, rolling boil over high heat. Once it’s boiling, cover the pot, turn off the heat, and let the eggs sit for exactly 10 minutes. Set a timer—this is the sweet spot for hard-boiled eggs with creamy, fully-cooked yolks and no green ring.
- Shock the eggs. While the eggs are sitting, prepare a large bowl of ice water. As soon as the timer goes off, use your slotted spoon to transfer the eggs directly into the ice bath. Let them chill for at least 5 minutes, but 10 is better. This step stops the cooking process and shocks the shells, making them much easier to peel. I’ve skipped this step when I was in a hurry, and I regretted it—the shells stuck like glue.
- Peel the eggs. Gently tap each egg on the counter to crack the shell all over, then roll it between your palms to loosen the shell. Start peeling from the wider end, where the air pocket is. Rinse the peeled eggs under cool water to remove any tiny shell fragments. Pat them dry with a paper towel.
- Slice the eggs. Using a sharp knife, slice each egg in half lengthwise. Wipe the knife clean between cuts for the neatest results. Gently pop out the yolks into your small mixing bowl. Arrange the egg white halves on your serving platter, cut-side up.
- Make the filling. Add the mayonnaise, yellow mustard, drained pickle relish, salt, pepper, and paprika to the bowl with the yolks. Mash everything together with a fork until it’s well combined. Now, here’s the secret to silky smooth filling: keep mashing. Press the mixture against the side of the bowl until there are no lumps. Taste it and adjust the seasoning. I usually add a pinch more salt and pepper here.
- Fill the eggs. Spoon the yolk mixture into your piping bag or zip-top bag. Snip a small corner off the bag. Pipe the filling into each egg white half, swirling slightly to create a nice mound. You want it to be generous—about level with the top of the egg white or slightly mounded. Don’t overfill, or the spider body won’t sit properly.
- Prepare the spider bodies. Drain the whole black olives and pat them dry. Cut each olive in half crosswise (not lengthwise). You’ll use one half per spider. The cut side will sit flat on the yolk filling.
- Create the spider legs. Drain the sliced black olives and pat them very dry. For each spider, you need 8 “legs.” I use four slices per side, arranged in a fan pattern. The slices are naturally curved, so they look like spider legs already! Place two slices on the left side of the yolk mound, pointing outward. Place two slices on the right side. Then, place two more slices slightly behind the first ones on each side, creating a second set of legs. You want them to look like they’re crawling.
- Attach the spider body. Gently press one olive half, cut-side down, onto the center of the yolk mound, right on top of where the legs meet. It should stick nicely to the creamy filling. If it’s sliding around, your filling might be too wet—just pat the olive dry again and try a different spot.
- Garnish and serve. Sprinkle a tiny bit of paprika over the entire platter for a spooky “dust” effect. If you’re feeling extra creative, you can use a tiny dot of sriracha or ketchup for spider eyes on the olive bodies. Serve immediately or refrigerate.
A quick note on timing: these steps flow naturally. While the eggs are boiling, you can drain the olives and set up your piping bag. While the eggs are cooling in the ice bath, you can make the filling. The whole process from start to finish takes about 30 minutes of active work, plus 10 minutes of passive boiling and cooling time.
Cooking Tips & Techniques
I’ve made these Perfect Spooky Spider Deviled Eggs for Halloween more times than I care to admit, and I’ve learned a few things the hard way. Let me save you some trouble.
The biggest mistake: over-boiling the eggs. I know it’s tempting to let them sit longer to make sure they’re done, but 10 minutes off the heat is all you need. Any longer, and the yolks develop that unappealing green-gray ring and a chalky texture. Your filling will be crumbly instead of creamy. Trust the process.
Peeling frustration: If you’re struggling with peeling, your eggs might be too fresh. Eggs that are a week or two old peel much easier than farm-fresh ones. If you only have fresh eggs, try steaming them instead of boiling. Place them in a steamer basket over boiling water, cover, and steam for 12 minutes. Then shock them in ice water. This method often produces cleaner peels.
Leg placement is everything: The first time I made these, I placed all four olive slices on one side and called it a leg. It looked like a lopsided crab. Take the extra 10 seconds to fan them out evenly. Use the natural curve of the sliced olives to your advantage—they’re already shaped like bent spider legs! If you want more legs, you can carefully slice each olive slice in half again, but honestly, four per side looks perfect and is less fussy.
Make ahead tip: You can boil, peel, and slice the eggs up to two days in advance. Store the egg white halves and the yolk mixture separately in the refrigerator. Assemble the spiders on the day of your party. The olive legs will start to dry out and curl if they sit on the filling for too long, so aim to assemble within 2-3 hours of serving.
Variations & Adaptations
One of the best things about this recipe is how easy it is to customize. Here are a few variations I’ve tried and loved:
- Spicy Spider Eggs: Add 1/2 teaspoon of sriracha or a pinch of cayenne pepper to the yolk mixture. The heat pairs beautifully with the briny olives. I made these for a Halloween party with a “hot” theme, and they disappeared first.
- Avocado Deviled Spiders: Replace half the mayonnaise with mashed avocado. The filling turns a gorgeous pale green, which looks even spookier against the black olives. Add a squeeze of lime juice to keep the avocado from browning.
- Bacon-Wrapped Bodies: For an extra indulgent version, wrap each olive half with a small strip of cooked bacon before placing it on the egg. Secure it with a toothpick if needed. It adds a smoky, salty crunch that’s incredible.
- Smoked Paprika Spiders: Swap the regular paprika for smoked paprika in the filling. The smoky flavor complements the olives and gives the eggs a deeper, more complex taste.
- Vegan Spider Eggs: Use silken tofu or a vegan egg substitute for the filling. I’ve tested this with a tofu-based recipe, and while the texture is slightly different, the flavor is surprisingly close. The olives are already vegan, so you’re halfway there.
If you’re looking for more Halloween appetizers to round out your spread, I highly recommend my Best Homemade Spooky Spiderweb Cheese Ball for Halloween. It pairs perfectly with these deviled eggs and keeps the creepy-crawly theme going. For a heartier option, these Easy Mummy Meatball Skewers are always a hit and come together in under 20 minutes.
Serving & Storage Suggestions
These deviled eggs are best served chilled, straight from the refrigerator. The cold temperature keeps the filling firm and the olive legs crisp. Arrange them on a dark-colored platter or a black serving board to make the white eggs and black olives really stand out. I like to scatter a few extra sliced olives around the platter to look like loose spider legs—it’s a fun, creepy touch.
For a complete Halloween spread, serve these alongside other spooky snacks like Spooky Jack-O’-Lantern Stuffed Bell Peppers for a main dish and Perfect Peanut Butter Spider Web Brownies for dessert. The combination of savory and sweet will keep everyone happy.
Storage: Store any leftover deviled eggs in an airtight container in the refrigerator for up to 2 days. I don’t recommend freezing them—the texture of the egg whites becomes rubbery when thawed. The olive legs may soften slightly after a day in the fridge, but they’ll still look good. If you’re making them a day ahead, assemble the spiders without the legs, then add the sliced olives just before serving for the freshest appearance.
Reheating: Do not reheat these. They’re meant to be served cold. If they’ve been sitting out at room temperature for more than 2 hours, discard any leftovers for food safety.
Nutritional Information & Benefits
While these are a treat, they’re actually a healthier option compared to most Halloween party snacks. Here’s the estimated nutritional breakdown per spider (one deviled egg half):
- Calories: 85-95
- Protein: 6g
- Fat: 7g
- Carbohydrates: 1g
- Fiber: 0g
- Sugar: 0.5g
Eggs are a fantastic source of high-quality protein and contain important nutrients like choline, which supports brain health. Black olives are rich in healthy monounsaturated fats and antioxidants. While the mayonnaise adds fat, it’s what gives the filling that luxurious texture. If you’re watching your calories, you can use light mayonnaise or substitute half with plain Greek yogurt.
Dietary Considerations: This recipe is naturally gluten-free, low-carb, and keto-friendly. It contains eggs and dairy (from the mayonnaise), so it’s not suitable for vegans or those with egg allergies. For a dairy-free version, use a vegan mayonnaise.
Conclusion
These Perfect Spooky Spider Deviled Eggs for Halloween are proof that you don’t need to spend hours in the kitchen to create something that wows a crowd. They’re simple enough for a beginner to tackle but impressive enough to make you look like a culinary genius. The combination of creamy, tangy filling and briny, crunchy olives is just plain delicious, and the spider design is guaranteed to get a reaction.
I love this recipe because it brings people together. There’s something about a platter of food that looks like it might crawl away that makes everyone laugh and loosen up. It breaks the ice at parties and makes even the most serious adults crack a smile. That’s what Halloween is all about—having fun, being a little silly, and eating good food with the people you care about.
I’d love to hear how your spiders turn out! Did you add any creative twists? Did the kids love them? Drop a comment below and let me know. And if you’re looking for more Halloween inspiration, don’t forget to check out my Spooky White Chocolate Witch Finger Pretzels for a sweet treat that’s just as fun to make. Happy Halloween, and happy cooking!
Frequently Asked Questions
Can I make these deviled eggs a day ahead of time?
Absolutely! You can boil, peel, and slice the eggs up to two days in advance. Store the egg white halves and the yolk filling separately in the refrigerator. Assemble the spiders with the olive legs on the day of your party for the freshest look. The legs can dry out if they sit on the filling for too long.
How do I keep the olive legs from falling off?
Make sure the sliced olives are very dry before placing them on the yolk filling. Pat them with a paper towel to remove excess moisture. Also, pipe a generous mound of filling—the olive legs need something to stick to. If they’re still sliding, try pressing them gently into the filling so they’re slightly embedded.
What if I can’t find jumbo black olives?
No problem! Use regular-sized whole black olives for the spider bodies. They’ll look like smaller spiders, which is actually kind of cute. You can also use two smaller olive halves stacked on top of each other to create a larger body shape. Just secure the top one with a tiny dab of filling.
Can I use a different type of olive?
You can, but black olives give the most authentic spider look. Green olives or Kalamata olives will work, but the color will be different. Green olives have a brinier, sharper flavor that can overpower the delicate egg filling. If you’re using Kalamata olives, make sure they’re pitted.
How long can these sit out at a party?
For food safety, deviled eggs should not sit at room temperature for more than 2 hours. If your party is longer, place the platter on a bed of ice or serve them in batches, keeping the rest refrigerated. They’re best enjoyed within the first hour of assembly when the olive legs are still crisp and the filling is perfectly chilled.
Pin This Recipe!
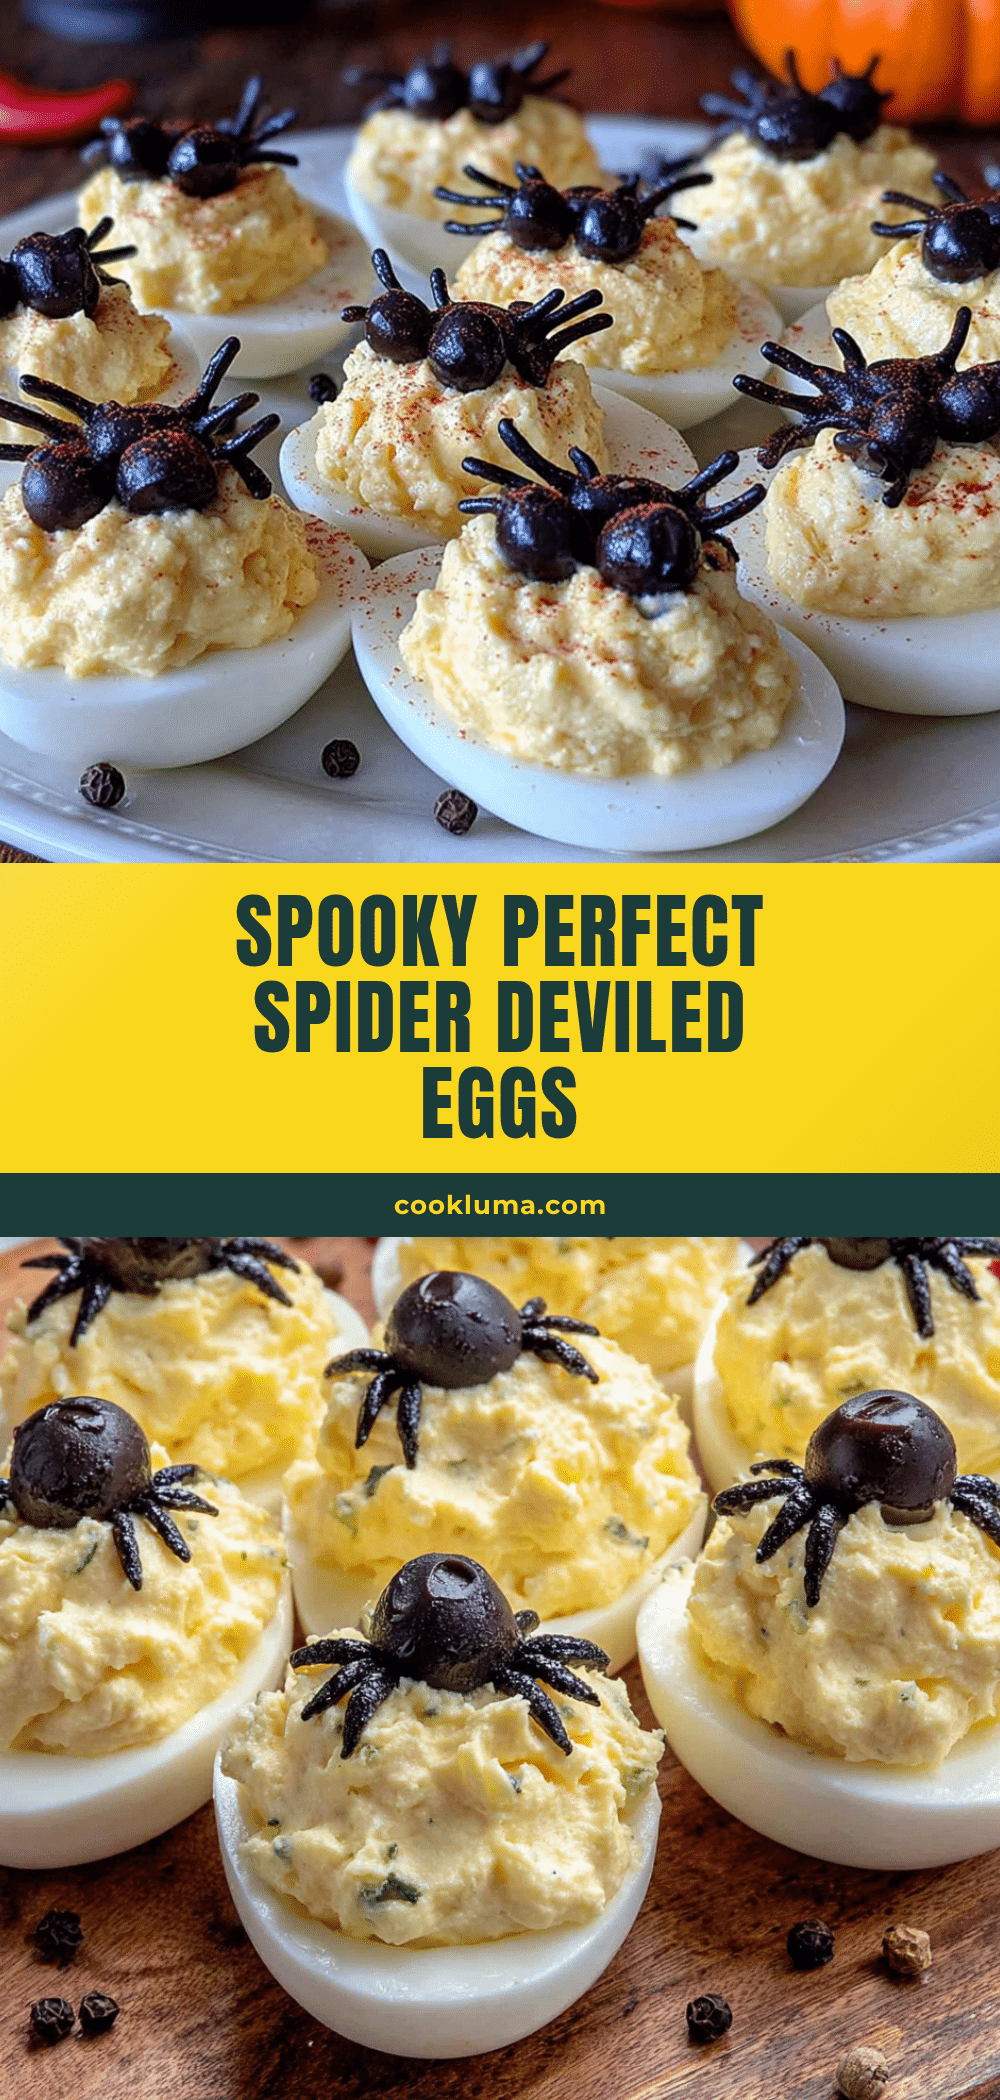
Perfect Spooky Spider Deviled Eggs for Halloween
These spooky spider deviled eggs are a fun and delicious Halloween appetizer. Creamy, tangy filling topped with olive spiders makes them a crowd-pleaser that’s both impressive and easy to make.
- Prep Time: 30 minutes
- Cook Time: 10 minutes
- Total Time: 40 minutes
- Yield: 24 servings 1x
- Category: Appetizer
- Cuisine: American
Ingredients
- 12 large eggs (room temperature works best for even cooking, but cold is fine too)
- 1/3 cup mayonnaise (I prefer Duke’s or Hellmann’s for that perfect tangy creaminess)
- 1 tablespoon yellow mustard (adds color and a classic tang)
- 1 tablespoon sweet pickle relish (drained well—this is key for texture)
- 1/2 teaspoon salt (plus more for the boiling water)
- 1/4 teaspoon black pepper
- 1/4 teaspoon paprika (smoked paprika works beautifully too)
- 1 can (6 ounces) large pitted black olives (look for jumbo or colossal sizes for the spider bodies)
- 1 can (4 ounces) sliced black olives (these become the spider legs—make sure they’re the sliced kind, not whole)
- Optional: 1 tablespoon white vinegar (added to the boiling water helps the eggs peel cleaner)
- Optional garnish: extra paprika or fresh chives (for a pop of color)
Instructions
- Boil the eggs. Place your eggs in a large pot and cover them with cold water by about an inch. Add a generous pinch of salt and the optional tablespoon of vinegar. Bring the water to a full, rolling boil over high heat. Once it’s boiling, cover the pot, turn off the heat, and let the eggs sit for exactly 10 minutes. Set a timer—this is the sweet spot for hard-boiled eggs with creamy, fully-cooked yolks and no green ring.
- Shock the eggs. While the eggs are sitting, prepare a large bowl of ice water. As soon as the timer goes off, use your slotted spoon to transfer the eggs directly into the ice bath. Let them chill for at least 5 minutes, but 10 is better. This step stops the cooking process and shocks the shells, making them much easier to peel.
- Peel the eggs. Gently tap each egg on the counter to crack the shell all over, then roll it between your palms to loosen the shell. Start peeling from the wider end, where the air pocket is. Rinse the peeled eggs under cool water to remove any tiny shell fragments. Pat them dry with a paper towel.
- Slice the eggs. Using a sharp knife, slice each egg in half lengthwise. Wipe the knife clean between cuts for the neatest results. Gently pop out the yolks into your small mixing bowl. Arrange the egg white halves on your serving platter, cut-side up.
- Make the filling. Add the mayonnaise, yellow mustard, drained pickle relish, salt, pepper, and paprika to the bowl with the yolks. Mash everything together with a fork until it’s well combined. Now, here’s the secret to silky smooth filling: keep mashing. Press the mixture against the side of the bowl until there are no lumps. Taste it and adjust the seasoning.
- Fill the eggs. Spoon the yolk mixture into your piping bag or zip-top bag. Snip a small corner off the bag. Pipe the filling into each egg white half, swirling slightly to create a nice mound. You want it to be generous—about level with the top of the egg white or slightly mounded. Don’t overfill, or the spider body won’t sit properly.
- Prepare the spider bodies. Drain the whole black olives and pat them dry. Cut each olive in half crosswise (not lengthwise). You’ll use one half per spider. The cut side will sit flat on the yolk filling.
- Create the spider legs. Drain the sliced black olives and pat them very dry. For each spider, you need 8 ‘legs.’ I use four slices per side, arranged in a fan pattern. The slices are naturally curved, so they look like spider legs already! Place two slices on the left side of the yolk mound, pointing outward. Place two slices on the right side. Then, place two more slices slightly behind the first ones on each side, creating a second set of legs.
- Attach the spider body. Gently press one olive half, cut-side down, onto the center of the yolk mound, right on top of where the legs meet. It should stick nicely to the creamy filling.
- Garnish and serve. Sprinkle a tiny bit of paprika over the entire platter for a spooky ‘dust’ effect. If you’re feeling extra creative, you can use a tiny dot of sriracha or ketchup for spider eyes on the olive bodies. Serve immediately or refrigerate.
Notes
For easy peeling, use eggs that are a week or two old. If using fresh eggs, steam them instead of boiling. The olive legs will start to dry out if they sit on the filling for too long, so assemble within 2-3 hours of serving. Store leftovers in an airtight container in the refrigerator for up to 2 days. Do not freeze or reheat.
Nutrition
- Serving Size: 1 deviled egg half
- Calories: 90
- Sugar: 0.5
- Sodium: 180
- Fat: 7
- Saturated Fat: 2
- Carbohydrates: 1
- Protein: 6
Keywords: Halloween deviled eggs, spider deviled eggs, spooky appetizer, Halloween party food, deviled eggs recipe


