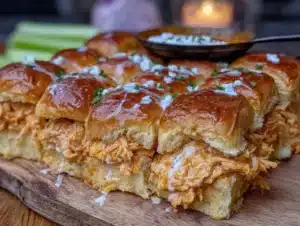
My husband took one bite of these sliders, looked me dead in the eye, and said, “Don’t ever make regular burgers again.” I laughed, but honestly? He wasn’t wrong. I’d been tinkering with a loaded bacon cheeseburger slider recipe for weeks, trying to get that perfect balance of juicy beef, melty cheese, crispy bacon, and a soft, buttery bun that doesn’t fall apart after the first bite. This version finally nailed it.
It happened on a random Tuesday night, not some big weekend cookout. I had a pound of ground beef thawed, some leftover slider buns from a party, and a serious craving for something indulgent. I wanted that classic cheeseburger experience but in a smaller, more manageable package—something you could eat with one hand while standing over the stove. The first batch disappeared in about four minutes flat. My kids, who usually pick at dinner, each ate three.
These ultimate loaded bacon cheeseburger sliders are the kind of recipe that feels like a cheat code for dinner. They come together in under 30 minutes, use simple ingredients you probably already have, and taste like something you’d order at a diner. The secret is in the layering—toasting the buns, seasoning the meat just right, and letting the cheese get gloriously bubbly under the broiler. It’s comfort food at its finest, and I think you’re going to love how easy it is.
Why You’ll Love This Recipe
I’ve made a lot of burgers in my day, but these sliders are different. Here’s why they’ve become a staple in my kitchen:
- 30 Minutes Start to Finish : From the moment you pull out the ground beef to the moment you’re biting into a warm, cheesy slider, it takes about half an hour. Perfect for those nights when you need dinner on the table fast but still want something that feels special.
- Simple, Everyday Ingredients : No fancy grocery runs required. Ground beef, cheddar, bacon, slider buns, and a few pantry staples are all you need. I bet you have most of this stuff right now.
- Perfect for Game Day or Weeknight Dinner : These sliders are versatile. They’re a hit at Super Bowl parties, but they’re also my go-to for busy weeknights when everyone’s hungry and cranky.
- Crowd-Pleaser, Guaranteed : I’ve served these to picky kids, burger snobs, and vegetarian friends who “just had one bite.” Every single person has asked for the recipe. They’re that good.
- Unbelievably Juicy and Flavorful : The combination of seasoned beef, smoky bacon, sharp cheddar, and a tangy special sauce is next-level. It’s not just another slider recipe—it’s the one you’ll come back to again and again.
This isn’t just another version of a cheeseburger slider. It’s the best version. I’ve tested the ratios, the cooking method, and the toppings until everything clicked. The buns stay soft but sturdy, the meat is seasoned perfectly, and every bite has a little bit of everything. It’s the kind of recipe that makes you close your eyes after the first bite and just enjoy the moment.
What Ingredients You Will Need
This recipe uses simple, wholesome ingredients to deliver bold flavor and satisfying texture without the fuss. Most of these are pantry staples, and I’ve included some substitution notes so you can make it work with what you have.
- 1 pound ground beef (80/20) : I recommend 80/20 ground beef for the best flavor and juiciness. The fat content keeps the sliders moist. If you use leaner beef, like 93/7, the sliders will be drier—add a tablespoon of olive oil or a splash of Worcestershire sauce to compensate.
- 8 slider buns : I prefer soft, slightly sweet brioche slider buns, but Hawaiian rolls or classic white slider buns work great too. Just make sure they’re fresh and soft.
- 8 slices sharp cheddar cheese : Sharp cheddar gives you that bold, tangy flavor that stands up to the beef and bacon. You can use American cheese for extra meltiness, or pepper jack for a spicy kick.
- 8 slices bacon : Thick-cut bacon is my go-to here. It stays meaty and doesn’t get lost in the slider. Cook it until crispy but not burnt—you want a little chew.
- 2 tablespoons unsalted butter, melted : For brushing the buns before toasting. It adds richness and helps the buns get golden and slightly crisp.
- 1 tablespoon Worcestershire sauce : This adds a deep, savory umami flavor to the beef. Don’t skip it—it makes a difference.
- 1 teaspoon garlic powder : For seasoning the beef. It adds a subtle savory note without being overpowering.
- 1 teaspoon onion powder : Complements the garlic and adds a little sweetness.
- ½ teaspoon salt : Use kosher salt for even seasoning.
- ½ teaspoon black pepper : Freshly ground is best.
- For the special sauce:
- ½ cup mayonnaise : I use full-fat mayo for the creamiest texture.
- 2 tablespoons ketchup : Adds sweetness and tang.
- 1 tablespoon yellow mustard : For that classic burger joint flavor.
- 1 tablespoon sweet pickle relish : Adds sweetness and a little crunch.
- ½ teaspoon smoked paprika : For a hint of smoky depth.
- Optional toppings: Lettuce, tomato slices, red onion slices, pickles. I like to add a few thin slices of red onion for a little bite.
Ingredient Notes: I’ve tested this recipe with different types of ground beef, and 80/20 really is the sweet spot. If you want to make it a little lighter, you can use ground turkey or chicken, just add a tablespoon of olive oil to the pan to keep it moist. For a gluten-free version, use gluten-free slider buns and double-check your Worcestershire sauce (some brands contain gluten).
Equipment Needed
You don’t need a lot of fancy equipment to make these sliders, which is part of why I love this recipe. Here’s what you’ll need:
- Large skillet or cast iron pan : For cooking the beef and bacon. A cast iron skillet gives you the best sear on the meat, but any large non-stick pan works fine.
- Baking sheet or oven-safe dish : For assembling and broiling the sliders. A 9×13-inch baking dish is perfect.
- Small bowl : For mixing the special sauce.
- Pastry brush : For brushing the melted butter on the buns. If you don’t have one, just use a spoon or your fingers.
- Sharp knife and cutting board : For slicing the buns and any toppings.
- Paper towels : For draining the bacon.
- Spatula : For flipping the beef patties.
Budget-Friendly Tip: If you don’t have a pastry brush, you can use a folded paper towel to dab the melted butter on the buns. It’s not as precise, but it gets the job done. Also, if you don’t have a cast iron pan, a regular non-stick skillet works just fine—just make sure it’s hot before you add the beef so you get a good sear.
Preparation Method
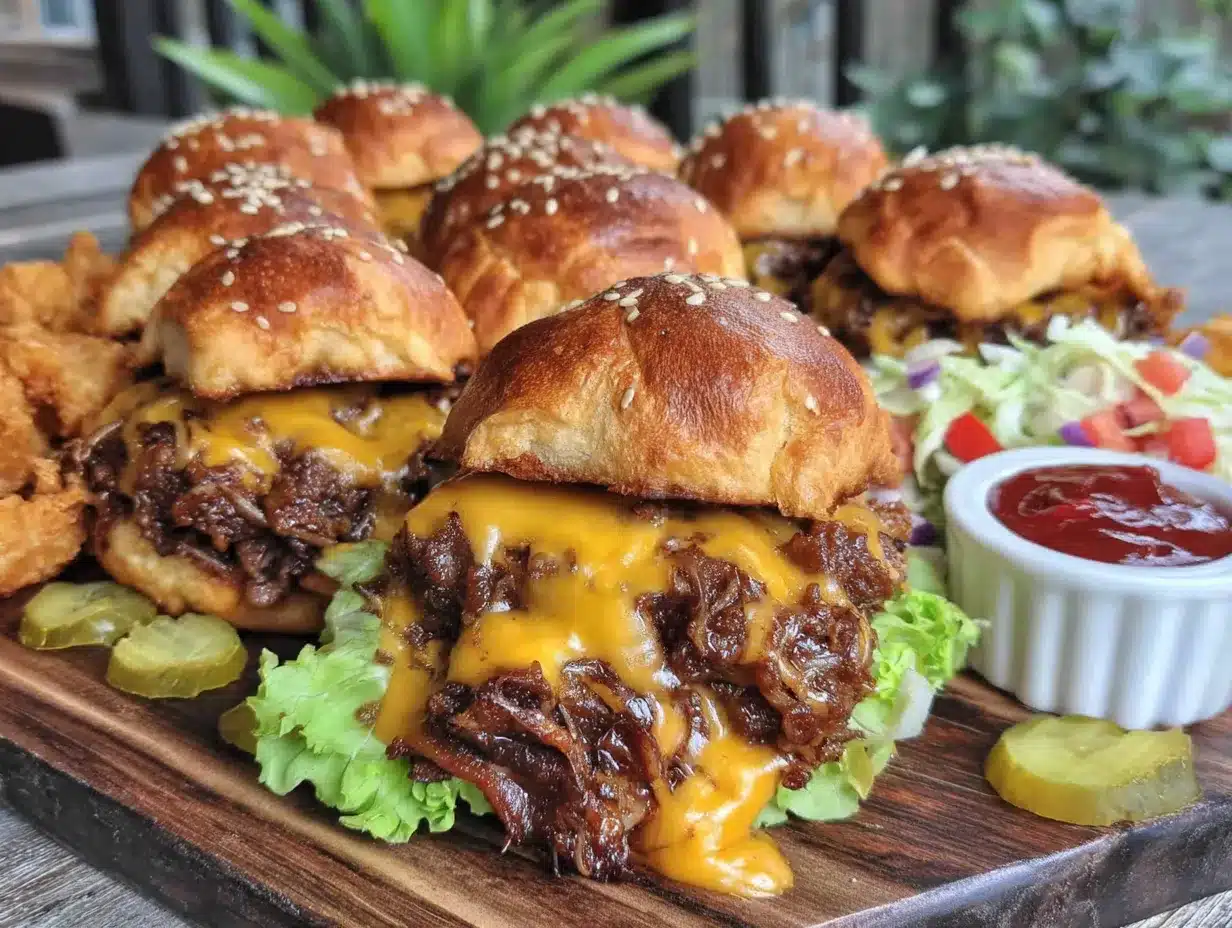
Let’s get cooking. I’ll walk you through every step so you get perfect sliders every time.
-
Cook the bacon. Place the bacon slices in a cold skillet. Turn the heat to medium and cook for 6-8 minutes, flipping once, until crispy but not burnt. Transfer the bacon to a plate lined with paper towels to drain. Once cool, chop the bacon into small pieces. Leave about 1 tablespoon of bacon fat in the skillet—it adds incredible flavor to the beef.
Sensory cue: You’ll know the bacon is ready when it’s deep golden brown and the fat has rendered out. The kitchen should smell smoky and amazing at this point.
-
Make the special sauce. In a small bowl, mix together the mayonnaise, ketchup, yellow mustard, sweet pickle relish, and smoked paprika. Stir until well combined. Set aside. You can make this ahead of time and keep it in the fridge for up to a week.
-
Season and form the beef patties. In a large bowl, combine the ground beef, Worcestershire sauce, garlic powder, onion powder, salt, and black pepper. Mix gently with your hands until just combined—don’t overwork the meat or the sliders will be tough. Divide the mixture into 8 equal portions and shape them into thin patties, slightly larger than your slider buns (they shrink as they cook). Make a small indentation in the center of each patty with your thumb—this helps them cook evenly and prevents them from puffing up.
Personal tip: I learned the hard way that overworking the meat makes sliders dense and dry. Be gentle. Also, wet your hands slightly before shaping the patties to prevent sticking.
-
Cook the beef patties. Heat the same skillet with the reserved bacon fat over medium-high heat. Once the pan is hot (you should see a slight shimmer), add the patties in a single layer. You may need to work in batches if your pan isn’t large enough. Cook for 2-3 minutes per side for medium doneness. The patties should have a nice brown crust on the outside.
Sensory cue: When the patties are ready to flip, the edges will look cooked and the bottom will be deep golden brown. You should hear a satisfying sizzle when you add them to the pan.
-
Toast the buns. While the patties are cooking, preheat your oven broiler. Split the slider buns in half and place them cut-side up on a baking sheet. Brush the cut sides with the melted butter. Broil for 1-2 minutes, watching carefully, until the buns are golden and lightly toasted. Remove from the oven.
Warning: Broilers work fast. Don’t walk away from the oven—I’ve burned more buns than I care to admit.
-
Assemble the sliders. Place the bottom halves of the toasted buns on the baking sheet. Spread a generous layer of special sauce on each bottom bun. Place a cooked beef patty on top of the sauce. Add a slice of cheese on each patty, then sprinkle the chopped bacon evenly over the cheese. Place the top buns on the sliders.
Pro tip: If you want extra melty cheese, you can place the assembled sliders back under the broiler for 30-60 seconds. Just watch them so the buns don’t burn.
-
Serve immediately. Transfer the sliders to a platter and add any optional toppings like lettuce, tomato, or pickles. Serve warm and watch them disappear.
Timing note: The entire process, from start to finish, takes about 25-30 minutes. If you’re making a double batch, you can cook the bacon and beef in separate pans to save time.
Cooking Tips & Techniques
I’ve made these sliders more times than I can count, and I’ve learned a few things along the way. Here are my best tips for getting perfect results every time.
Don’t skip the bacon fat. Cooking the beef patties in the rendered bacon fat adds an incredible layer of smoky, savory flavor that you just can’t get from oil or butter. It’s a small step that makes a big difference.
Press the center of each patty. I mentioned this in the instructions, but it’s worth repeating. Burgers and sliders tend to puff up in the middle as they cook, creating a dome shape that makes them hard to stack. Pressing a small indentation in the center of each patty helps them cook flat and even.
Don’t overcrowd the pan. If you put too many patties in the skillet at once, the temperature drops and the meat steams instead of searing. This means you won’t get that beautiful brown crust. Cook in batches if needed, and let the pan come back up to temperature between batches.
Toast the buns under the broiler, not in a toaster. The broiler gives you even, golden toasting without drying out the buns. Plus, you can toast all the buns at once, which is faster than using a toaster in batches.
Let the meat rest for a minute. After you cook the patties, let them rest on a plate for about a minute before assembling the sliders. This allows the juices to redistribute, so the meat stays juicy instead of running all over the buns.
My biggest failure: The first time I made these, I used lean ground beef and didn’t add any fat to the pan. The patties were dry and crumbly, and the whole thing fell apart. I also forgot to toast the buns, so they got soggy from the sauce and meat juices. It was a sad, sad dinner. Learn from my mistakes—use 80/20 beef and always toast the buns.
Multitasking tip: While the bacon is cooking, you can mix the special sauce and season the beef. While the patties are cooking, you can toast the buns. This way, everything comes together at the same time and you’re not scrambling at the end.
Variations & Adaptations
One of the best things about this recipe is how easy it is to customize. Here are some of my favorite variations:
-
Spicy Jalapeño Sliders: Add 2 tablespoons of finely chopped pickled jalapeños to the beef mixture before forming the patties. Top the sliders with pepper jack cheese and a few fresh jalapeño slices for extra heat. This is my husband’s favorite version.
-
BBQ Bacon Cheeseburger Sliders: Swap the special sauce for your favorite barbecue sauce. I like a smoky, sweet Kansas City-style sauce. Add a few slices of crispy onion straws on top for crunch. This variation is perfect for summer cookouts.
-
Turkey Bacon Cheeseburger Sliders (Lighter Option): Use ground turkey instead of beef, and add 1 tablespoon of olive oil and an extra teaspoon of Worcestershire sauce to keep it moist. Use turkey bacon for the topping. The flavor is slightly different, but it’s still delicious and a bit lighter.
-
Smash Burger Style Sliders: For an ultra-crispy, lacy edge, form the beef into balls instead of patties. Place a ball in the hot skillet and smash it flat with a spatula until it’s very thin. Cook for 2 minutes without moving it, then flip. This gives you those crispy, caramelized edges that smash burgers are famous for.
-
Breakfast Sliders: Add a fried egg and a slice of Canadian bacon to each slider for a breakfast-for-dinner twist. The runny yolk adds a rich, creamy sauce that’s incredible with the beef and cheese.
Dietary Adaptations: For a gluten-free version, use gluten-free slider buns and double-check your Worcestershire sauce. For a dairy-free version, use dairy-free cheese slices and a dairy-free butter alternative. The flavor won’t be exactly the same, but it’s still very tasty.
Serving & Storage Suggestions
These sliders are best served warm, right after assembly. The cheese is melty, the buns are soft but sturdy, and everything is at its peak.
Serving temperature: Serve the sliders immediately after assembling. If you’re making them for a party, you can keep them warm in a 200°F oven for up to 30 minutes. Just place them on a baking sheet and cover loosely with foil so the buns don’t dry out.
What to serve with them: These sliders are a meal on their own, but they pair beautifully with a few simple sides. I love serving them with crispy air fryer cinnamon pita chips for a sweet-salty contrast, or a fresh Greek yogurt ranch pasta salad for a cool, creamy side. For a lighter option, a simple green salad with a tangy vinaigrette works great. And if you’re feeling indulgent, a side of brown butter mashed potato casserole is absolutely incredible with these sliders.
Storage: If you have leftovers (unlikely, but possible), store the sliders in an airtight container in the refrigerator for up to 3 days. I recommend storing the components separately if you can—the buns can get soggy if they sit with the sauce and meat for too long.
Reheating: The best way to reheat these sliders is in a skillet over medium heat. Place the slider in the pan, cover with a lid, and cook for 2-3 minutes per side until warmed through and the cheese is melty again. You can also use the microwave, but the buns will be softer and the bacon won’t be as crispy.
Flavor development: Honestly, these sliders are best fresh. The buns lose their texture after a day or two, and the bacon softens. But if you have leftover cooked patties and bacon, you can reheat them and assemble fresh sliders with new buns—that works great.
Nutritional Information & Benefits
Let’s be real—these are indulgent sliders. They’re not health food, and that’s okay. But I do want to give you a rough idea of what’s in each serving so you can plan accordingly.
Estimated nutritional values per slider (1 slider, without optional toppings):
| Nutrient | Amount |
|---|---|
| Calories | ~420 |
| Total Fat | 28g |
| Saturated Fat | 12g |
| Cholesterol | 85mg |
| Sodium | 720mg |
| Total Carbohydrates | 22g |
| Dietary Fiber | 1g |
| Sugars | 6g |
| Protein | 24g |
Health benefits of key ingredients: Ground beef is a great source of protein, iron, and B vitamins, which support energy levels and red blood cell production. Bacon, while high in fat and sodium, does provide some protein and B vitamins. Cheddar cheese offers calcium and protein. The special sauce, made with mayonnaise and ketchup, is mostly fat and sugar, so use it sparingly if you’re watching your intake.
Dietary considerations: This recipe contains gluten (buns, Worcestershire sauce), dairy (cheese, butter, mayonnaise), and eggs (mayonnaise). It is not suitable for a vegan or vegetarian diet. For a lower-carb option, you can serve the patties and toppings on lettuce wraps instead of buns. For a lower-sodium version, use low-sodium bacon and reduce the added salt.
My personal perspective: I believe in balance. These sliders are a treat, not an everyday meal. I make them for game days, birthday dinners, or when I just need something comforting and satisfying. Pair them with a big green salad or some roasted vegetables, and you’ve got a meal that feels indulgent but still has some nutritional value.
Conclusion
These ultimate loaded bacon cheeseburger sliders are everything I want in a comfort food recipe—quick, easy, and absolutely delicious. They come together in 30 minutes with simple ingredients, but they taste like something you’d get at a fancy burger joint. The combination of juicy beef, crispy bacon, melty cheese, and tangy special sauce on a soft, buttery bun is just perfect.
I love this recipe because it’s forgiving. You can swap ingredients, adjust the seasonings, or change up the toppings, and it still works. It’s the kind of recipe that becomes a family favorite because everyone can customize their own slider exactly how they like it.
I’d love to hear how these turn out for you. Did you add any fun toppings? Did you try one of the variations? Leave a comment below and let me know—I read every single one. And if you share a photo on social media, tag me so I can see your creation. Happy cooking, friends!
Frequently Asked Questions
Can I make these sliders ahead of time?
You can prep the components ahead of time—cook the bacon, make the special sauce, and form the patties—then assemble and cook the sliders right before serving. The patties can be refrigerated for up to 24 hours before cooking.
Can I use a different type of cheese?
Absolutely. Sharp cheddar is my go-to, but American cheese, pepper jack, Swiss, or provolone all work great. Just make sure it’s a good melting cheese.
How do I keep the sliders from getting soggy?
Toasting the buns is key. It creates a barrier that prevents the sauce and meat juices from soaking into the bread. Also, don’t overload the sliders with sauce—a generous but not excessive layer is perfect.
Can I cook these sliders on a grill?
Yes! Cook the patties over medium-high heat for 2-3 minutes per side on a clean, oiled grill grate. Toast the buns on the grill for about 30 seconds per side. The smoky flavor from the grill is amazing.
What’s the best way to reheat leftover sliders?
The best method is in a skillet over medium heat, covered, for 2-3 minutes per side. This helps re-crisp the bacon and re-melt the cheese without drying out the buns. The microwave works in a pinch, but the texture won’t be as good.
Pin This Recipe!
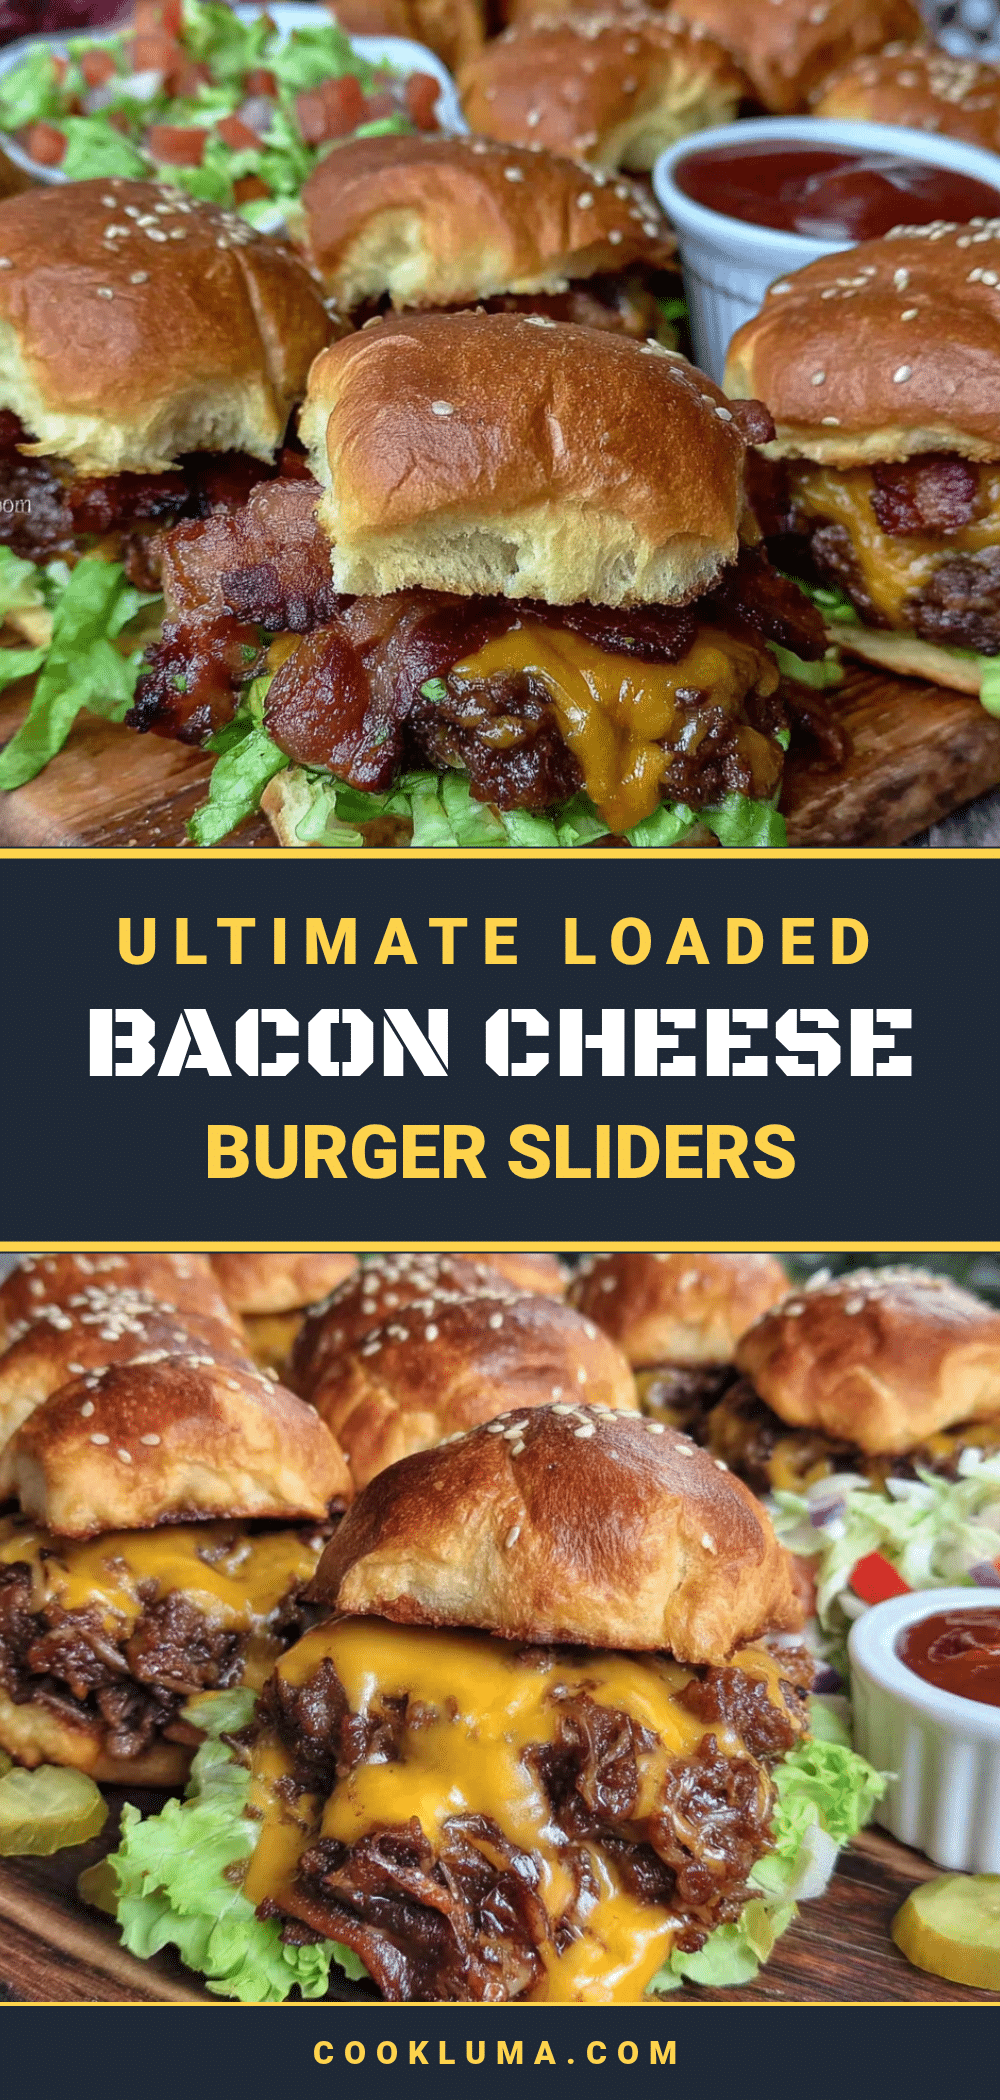
Ultimate Loaded Bacon Cheeseburger Sliders: Easy 30-Min Recipe
These ultimate loaded bacon cheeseburger sliders are the kind of recipe that feels like a cheat code for dinner. They come together in under 30 minutes, use simple ingredients you probably already have, and taste like something you’d order at a diner.
- Prep Time: 10 minutes
- Cook Time: 20 minutes
- Total Time: 30 minutes
- Yield: 8 sliders 1x
- Category: Main Course
- Cuisine: American
Ingredients
- 1 pound ground beef (80/20)
- 8 slider buns
- 8 slices sharp cheddar cheese
- 8 slices bacon
- 2 tablespoons unsalted butter, melted
- 1 tablespoon Worcestershire sauce
- 1 teaspoon garlic powder
- 1 teaspoon onion powder
- ½ teaspoon salt
- ½ teaspoon black pepper
- ½ cup mayonnaise
- 2 tablespoons ketchup
- 1 tablespoon yellow mustard
- 1 tablespoon sweet pickle relish
- ½ teaspoon smoked paprika
- Optional toppings: lettuce, tomato slices, red onion slices, pickles
Instructions
- Cook the bacon. Place the bacon slices in a cold skillet. Turn the heat to medium and cook for 6-8 minutes, flipping once, until crispy but not burnt. Transfer the bacon to a plate lined with paper towels to drain. Once cool, chop the bacon into small pieces. Leave about 1 tablespoon of bacon fat in the skillet.
- Make the special sauce. In a small bowl, mix together the mayonnaise, ketchup, yellow mustard, sweet pickle relish, and smoked paprika. Stir until well combined. Set aside.
- Season and form the beef patties. In a large bowl, combine the ground beef, Worcestershire sauce, garlic powder, onion powder, salt, and black pepper. Mix gently with your hands until just combined. Divide the mixture into 8 equal portions and shape them into thin patties, slightly larger than your slider buns. Make a small indentation in the center of each patty with your thumb.
- Cook the beef patties. Heat the same skillet with the reserved bacon fat over medium-high heat. Once the pan is hot, add the patties in a single layer. Cook for 2-3 minutes per side for medium doneness.
- Toast the buns. While the patties are cooking, preheat your oven broiler. Split the slider buns in half and place them cut-side up on a baking sheet. Brush the cut sides with the melted butter. Broil for 1-2 minutes, watching carefully, until the buns are golden and lightly toasted.
- Assemble the sliders. Place the bottom halves of the toasted buns on the baking sheet. Spread a generous layer of special sauce on each bottom bun. Place a cooked beef patty on top of the sauce. Add a slice of cheese on each patty, then sprinkle the chopped bacon evenly over the cheese. Place the top buns on the sliders.
- Serve immediately. Transfer the sliders to a platter and add any optional toppings like lettuce, tomato, or pickles. Serve warm.
Notes
Use 80/20 ground beef for best juiciness. Don’t skip toasting the buns to prevent sogginess. Press an indentation in each patty to prevent puffing. Let cooked patties rest for a minute before assembling. For extra melty cheese, place assembled sliders under broiler for 30-60 seconds.
Nutrition
- Serving Size: 1 slider
- Calories: 420
- Sugar: 6
- Sodium: 720
- Fat: 28
- Saturated Fat: 12
- Carbohydrates: 22
- Fiber: 1
- Protein: 24
Keywords: sliders, bacon cheeseburger, loaded sliders, 30-minute recipe, game day food, weeknight dinner, comfort food