My sister-in-law, Claire, had sworn off scones for a solid five years. Five years! She claimed they were nothing more than dry, crumbly hockey pucks dressed up in bakery windows. Every time I offered her a bite of one I’d made, she’d give me that pitying look—the one that says “bless your heart, you tried.” Then, last November, I caught her. I walked into her kitchen unannounced (I have a key, it’s fine) and found her standing at the counter, elbow-deep in a batch of my cranberry orange scones. She had a smear of vanilla glaze on her chin and a look of pure, caught-in-the-act guilt. “These are different,” she mumbled around a mouthful. “These are… lighter.” And honestly, she was right. This recipe was born from a stubborn refusal to let scones be boring, or heavy, or disappointing. It’s the scone that changed my sister-in-law’s mind, and I have a feeling it might just change yours, too. Maybe you’ve been there—bitten into one too many dry pastries and given up hope. Let me tell you, this one is worth a second chance.
Why You’ll Love This Recipe
Let’s be real for a second. Most scone recipes are basically butter delivery systems with a little flour holding them together. They taste great, sure, but they leave you feeling like you need a nap. This version? It’s different. It’s a scone that actually lets you enjoy the flavor without the food coma.
- Deliciously Lighter: We swap out a chunk of the heavy cream for buttermilk and cut back on the butter just enough to make a difference without sacrificing that tender, flaky texture. You get all the satisfaction with less of the guilt.
- Bursting with Fresh Flavor: The combo of tart, juicy cranberries and sweet, zesty orange is a classic for a reason. It’s bright, it’s festive, and it feels like a little celebration in every bite.
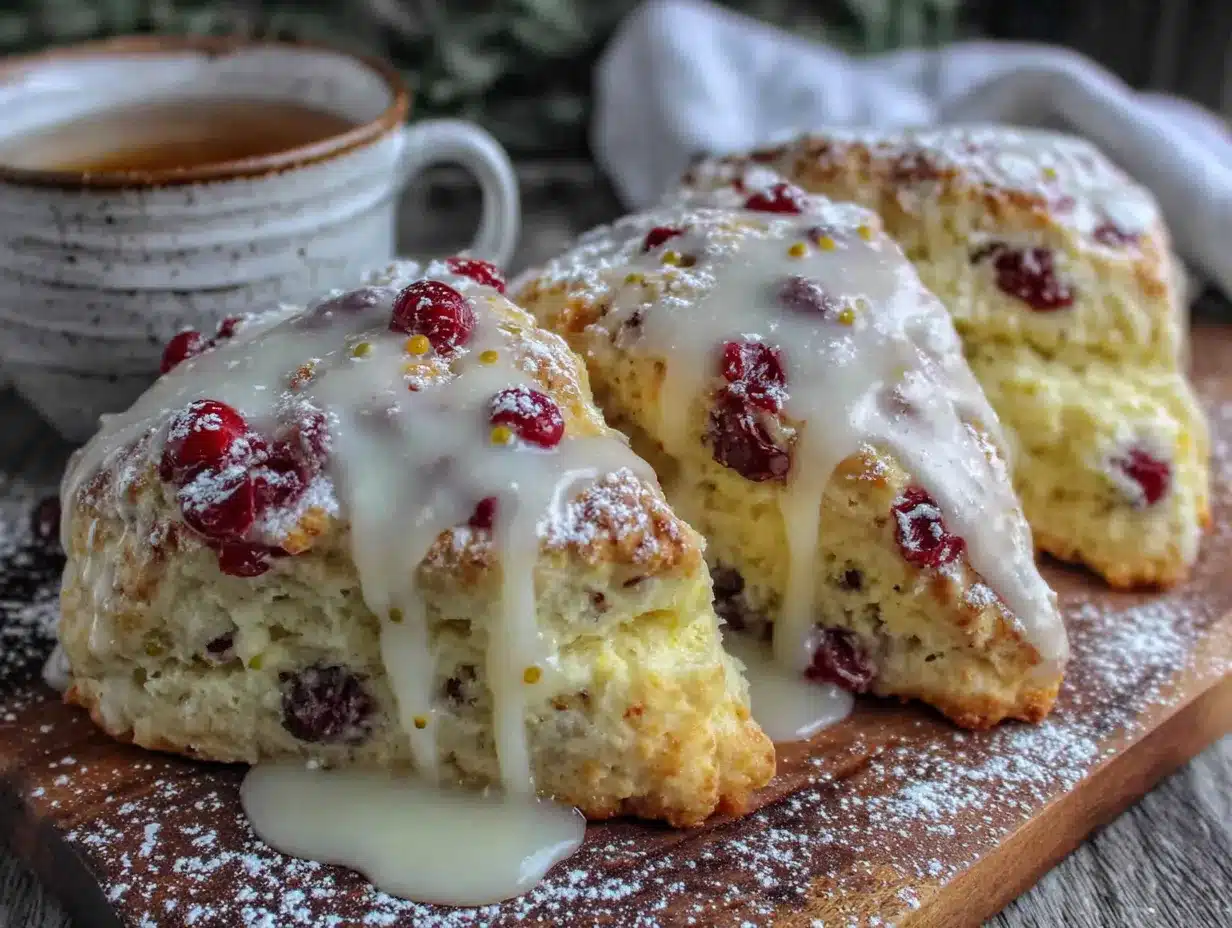
- That Perfect Vanilla Bean Glaze: We’re not messing around with imitation extract here. Real vanilla bean specks in a simple powdered sugar glaze take these scones from “good” to “absolutely irresistible.” It’s the kind of detail that makes people think you spent all day in the kitchen.
- Simple, Honest Ingredients: No weird additives or hard-to-find specialty flours. You probably have most of this stuff in your pantry right now. It’s real food, made simply.
- Perfect for Any Occasion: These are fancy enough for a holiday brunch or a tea party, but easy enough for a quiet Saturday morning with a good book. They make the best homemade gift, too.
This isn’t just another scone recipe. It’s the one I’ve tested a dozen times to get the perfect balance of lightness, flavor, and that signature crumbly-yet-tender texture. It’s the recipe that proves you don’t need a stick of butter to make something truly soul-satisfying.
What Ingredients You Will Need
This recipe uses simple, wholesome ingredients to deliver bold flavor and a satisfyingly tender crumb without the heavy feeling. Most of these are pantry staples, which makes these scones perfect for a spontaneous baking session.
For the Scones
- 2 cups (250g) all-purpose flour – Spoon and level it for the most accurate measure. I’ve tested this with King Arthur Flour and it works beautifully.
- 1/3 cup (65g) granulated sugar – Just enough to sweeten without overpowering the fruit.
- 1 tablespoon baking powder – The key to a good rise. Make sure it’s fresh!
- 1/2 teaspoon salt – Balances the sweetness and enhances all the flavors.
- 1/2 cup (113g) cold unsalted butter, cubed – Keep it cold. This is non-negotiable for flaky layers. We’re using less than a traditional recipe, so quality matters here.
- 1/2 cup (120ml) cold buttermilk – The secret ingredient for tenderness! The acid in the buttermilk reacts with the baking powder for a lighter crumb. If you don’t have buttermilk, you can make a quick substitute by adding 1/2 tablespoon of lemon juice or white vinegar to regular milk and letting it sit for 5 minutes.
- 1/4 cup (60ml) cold heavy cream – Adds richness back into the dough. Don’t skip it, but don’t feel like you need more.
- 1 large egg – Binds everything together and adds structure.
- 1 tablespoon orange zest – From about one large orange. This is where the bright, punchy flavor comes from. Zest it before you juice it!
- 1 teaspoon vanilla extract – A solid base for the flavor profile.
- 1 cup (120g) dried cranberries – I prefer dried over fresh here because they don’t release as much moisture into the dough, keeping the scones from getting soggy. Look for ones that are plump and soft.
For the Vanilla Bean Glaze
- 1 cup (120g) powdered sugar – Sifted if it’s clumpy.
- 2-3 tablespoons milk or heavy cream – Milk makes a thinner glaze; cream makes it richer and a bit thicker.
- 1/2 vanilla bean pod – Or 1 teaspoon of vanilla bean paste. This is the star of the show, so don’t use imitation vanilla here. The little black specks are what make it feel so special.
Equipment Needed
You don’t need a fancy bakery setup for these. Here’s what you’ll want handy:
- Large mixing bowl – For combining your dry ingredients.
- Pastry cutter or two forks – To cut the cold butter into the flour. I’ve used both, and honestly, a pastry cutter is faster and gives you a more consistent crumb. But forks work in a pinch.
- Box grater – For zesting that orange. A microplane is even better if you have one.
- Baking sheet – Line it with parchment paper for easy cleanup.
- Parchment paper – Seriously, don’t skip this. It prevents sticking and makes the scones lift right off.
- Sharp knife or bench scraper – For cleanly cutting the dough into wedges. A dull knife can squish the layers together.
- Cooling rack – Essential for letting the glaze set without getting soggy on the bottom.
- Small whisk or fork – For the glaze.
If you don’t have a pastry cutter, you can freeze your butter and grate it into the flour using a box grater. It’s a great trick I learned from a pastry chef friend, and it makes the process even easier.
Preparation Method
Alright, let’s get to the fun part. The key to perfect scones is keeping everything as cold as possible and not overworking the dough. Trust me on this one.
- Preheat and Prep (5 minutes): Preheat your oven to 400°F (200°C). Line your baking sheet with parchment paper. Get your butter out of the fridge and cut it into small cubes. Pop it back in the fridge while you measure your other ingredients.
- Whisk the Dry Ingredients (3 minutes): In your large mixing bowl, whisk together the flour, sugar, baking powder, and salt. Make sure the baking powder is well distributed—nobody wants a pocket of it in their scone.
- Cut in the Butter (5 minutes): Add the cold butter cubes to the flour mixture. Using your pastry cutter or two forks, cut the butter into the flour until it resembles coarse meal with some pea-sized butter pieces remaining. You want to see those little bits of butter—they’re what create steam pockets and flaky layers as the scones bake. Don’t overdo it here; a few bigger chunks are fine.
- Combine the Wet Ingredients (2 minutes): In a separate small bowl or liquid measuring cup, whisk together the buttermilk, heavy cream, egg, orange zest, and vanilla extract. Make sure the egg is fully incorporated.
- Bring it Together (3 minutes): Pour the wet mixture into the dry mixture. Add the dried cranberries. Use a rubber spatula or your hands to gently fold everything together until just combined. The dough will look shaggy and a little dry in spots. That’s exactly what you want! Stop mixing the second there’s no more visible dry flour. Overmixing is the #1 cause of tough scones.
- Shape the Dough (5 minutes): Turn the dough out onto a lightly floured surface. Gently bring it together with your hands, patting it into a circle about 3/4-inch thick. Don’t knead it—just coax it into shape. Use your bench scraper or a sharp knife to cut the circle into 8 wedges, like you’re cutting a pizza.
- Chill the Scones (15-30 minutes): Place the scones on your prepared baking sheet, spacing them about 2 inches apart. Pop the whole sheet in the fridge for at least 15 minutes. This is a crucial step! Chilling the dough re-solidifies the butter, which means less spreading in the oven and taller, flakier scones. I forgot this step once, and my scones turned into flat, greasy pancakes. Learn from my mistake.
- Bake (15-18 minutes): Bake the chilled scones in your preheated oven for 15-18 minutes, or until they are lightly golden brown on the bottom and edges. The tops should be pale. A toothpick inserted into the center should come out clean or with a few moist crumbs.
- Cool (10 minutes): Let the scones cool on the baking sheet for 5 minutes, then transfer them to a wire rack to cool completely before glazing. If you glaze them while they’re warm, the glaze will just melt right off and soak in.
- Make the Glaze (5 minutes): While the scones are cooling, make the glaze. In a small bowl, whisk together the powdered sugar and 2 tablespoons of milk or cream. Split the vanilla bean pod lengthwise and scrape the tiny black seeds into the bowl. Whisk until smooth. If the glaze is too thick, add a tiny splash more milk. If it’s too thin, add a bit more powdered sugar. You want it thick enough to drizzle but thin enough to flow.
- Glaze and Set (15 minutes): Drizzle the glaze over the cooled scones. Let it set for about 15 minutes before serving. The wait is worth it for that beautiful, crackly top.
Cooking Tips & Techniques
I’ve made these scones more times than I can count, and I’ve learned a few things the hard way. Here are my best tips for scone success.
Keep Everything Cold. I cannot stress this enough. If your kitchen is warm, pop your mixing bowl and flour in the fridge for 10 minutes before you start. If your butter starts to feel soft at any point, stop and stick the whole bowl in the fridge for 15 minutes. Cold butter is the secret to flaky layers. Warm butter gets absorbed into the flour, and you end up with a dense, shortbread-like texture instead of a light, flaky scone.
Don’t Overwork the Dough. The more you handle it, the more the gluten develops, and the tougher your scones will be. Mix until just combined, and pat it into shape gently. A shaggy dough is a good dough. I once watched a friend knead scone dough like it was bread, and the result was… not great. Be gentle.
Use a Sharp Cutter. When you cut the dough into wedges, use a sharp knife or bench scraper and press straight down. Don’t twist or saw at the dough. Twisting seals the edges and prevents the scones from rising properly. Clean cuts = tall scones.
Rotate the Pan Halfway Through. All ovens have hot spots. Halfway through the baking time, give your baking sheet a 180-degree turn to ensure even browning. This simple step has saved me from burnt bottoms more times than I can count.
Test for Doneness. Scones are done when the bottoms are golden brown and the edges look set. The tops will still be pale. If you’re unsure, a toothpick inserted into the center of a scone should come out clean. Overbaking is the fastest way to dry them out, so keep a close eye on them in the last few minutes.
Variations & Adaptations
One of the best things about this recipe is how adaptable it is. Play around with it and make it your own!
Citrus Swap: Don’t have an orange? No problem. Use lemon zest and a little lemon juice in the glaze instead. Lemon and cranberry are a classic pair. You could even try lime or grapefruit for a different twist.
Berry Blast: Swap the dried cranberries for dried blueberries, cherries, or even chopped dried apricots. Each one brings a different sweetness and chewiness to the table. I made a batch with dried tart cherries and a touch of almond extract once, and they were gone in an hour.
Nutty Addition: Add 1/2 cup of chopped toasted pecans or walnuts along with the cranberries. The crunch adds a wonderful texture contrast to the tender scone. Toast the nuts first for the best flavor—it really wakes them up.
Gluten-Free Version: You can substitute the all-purpose flour with a good 1:1 gluten-free baking flour blend (like King Arthur Measure for Measure or Bob’s Red Mill). Add an extra tablespoon of buttermilk to help hydrate the gluten-free flour. The texture will be slightly more tender and a little less flaky, but still delicious.
Dairy-Free Adaptation: Use cold, solid coconut oil or a high-quality vegan butter stick in place of the dairy butter. Substitute the buttermilk with unsweetened almond or oat milk mixed with 1/2 tablespoon of lemon juice, and use full-fat coconut cream instead of the heavy cream. The flavor will be a little different, but the texture holds up surprisingly well.
Serving & Storage Suggestions
These scones are best enjoyed the day they’re made, ideally still slightly warm from the oven with a cup of strong coffee or a pot of tea. The glaze gets that perfect crackly shell, and the inside is tender and soft.
For a brunch spread, serve them alongside a frittata or a fresh fruit salad. They’re also wonderful as a simple dessert with a dollop of lightly sweetened whipped cream or a scoop of vanilla ice cream. Honestly, they’re perfect all on their own.
Storage: Store leftover scones in an airtight container at room temperature for up to 2 days. Do not refrigerate them—the fridge will dry them out. If you need to keep them longer, it’s better to freeze them.
Freezing: You can freeze either the baked scones or the unbaked dough. To freeze unbaked scones, arrange the cut wedges on a baking sheet and freeze until solid, then transfer them to a freezer bag. Bake from frozen, adding 2-3 minutes to the baking time. To freeze baked scones, cool them completely without the glaze, wrap them tightly in plastic wrap and foil, and freeze for up to 3 months. Thaw at room temperature, then reheat and glaze.
Reheating: The best way to revive a day-old scone is in a 300°F (150°C) oven for about 5-7 minutes. It brings back the crisp exterior and warms the soft interior. The microwave will make them rubbery, so avoid it if you can.
One thing I’ve noticed: the flavors actually meld together even more beautifully the next day. The orange and cranberry get a little more cozy with each other. So don’t worry if you have leftovers—they’re a treat tomorrow, too.
Nutritional Information & Benefits
Let’s be honest, a scone is a treat. But this version is designed to be a little friendlier than the rest. By reducing the butter and using buttermilk, we’ve cut down on saturated fat without sacrificing that wonderful texture. The buttermilk also adds a tiny bit of protein and calcium.
Cranberries are packed with antioxidants and vitamin C, and orange zest provides a nice dose of immune-supporting nutrients as well. So you’re getting a little bit of goodness in every bite.
Estimated Nutritional Information (per scone, with glaze):
- Calories: ~280
- Fat: ~10g
- Saturated Fat: ~6g
- Carbohydrates: ~44g
- Sugar: ~22g
- Protein: ~4g
- Fiber: ~1g
These numbers are estimates and will vary based on the specific brands you use. If you’re watching your sugar intake, you can reduce the sugar in the scone dough to 1/4 cup and use a lighter hand with the glaze. This recipe is a wonderful way to enjoy a bakery-style treat that fits into a balanced, wholesome lifestyle.
Conclusion
These Lighter Cranberry Orange Scones with Vanilla Bean Glaze are proof that you don’t have to choose between delicious and mindful. They have all the buttery, flaky, tender qualities of a classic scone, but they leave you feeling satisfied instead of sluggish. The bright pop of orange, the chewy tartness of the cranberries, and that gorgeous vanilla bean glaze make them feel truly special.
I love this recipe because it’s forgiving, adaptable, and always gets a reaction. People can’t believe something this good can be this light. It’s become my go-to for holiday mornings, lazy weekends, and anytime I want to make someone’s day a little brighter.
Now I want to hear from you! Have you tried making these? Did you add your own twist? Drop a comment below and let me know how they turned out. And if you loved them, please share this post with a friend who needs a good scone in their life. Happy baking!
Frequently Asked Questions
Can I use fresh cranberries instead of dried?
I don’t recommend it for this particular recipe. Fresh cranberries release a lot of moisture as they bake, which can make the scones soggy and turn them a funny color. Dried cranberries give you that concentrated tartness and chewy texture without the extra liquid. If you really want to use fresh, toss them in a tablespoon of flour first and expect a slightly different texture.
Why didn’t my scones rise?
This usually happens for one of three reasons: your baking powder is old, your butter was too warm, or you overworked the dough. Make sure your baking powder is fresh (test it by dropping a bit in hot water—it should fizz vigorously). Keep your butter cold, and handle the dough as little as possible. Chilling the shaped scones before baking also helps them rise up instead of spreading out.
Can I make the dough ahead of time?
Absolutely! You can shape the scones, arrange them on a parchment-lined baking sheet, cover them tightly with plastic wrap, and refrigerate them for up to 24 hours. You can even freeze them for longer storage (see the storage section above). Bake them straight from the fridge or freezer, adding a few extra minutes to the baking time if needed.
My glaze is too thick/thin. How do I fix it?
No worries! Glaze is very forgiving. If it’s too thick to drizzle, add a tiny splash more milk or cream and whisk again. If it’s too thin and running right off the scones, whisk in a little more powdered sugar, a tablespoon at a time, until you reach the right consistency. You want it to be thick enough to coat the back of a spoon but still flow slowly.
Can I skip the vanilla bean and use extract?
You can, but I really encourage you to try the bean or vanilla bean paste if you can find it. The tiny black specks are what make the glaze look so beautiful and professional, and the flavor is deeper and more complex. If you only have extract, use 1 1/2 teaspoons of pure vanilla extract. It will still taste great, just without the visual wow factor.
Pin This Recipe!

Lighter Cranberry Orange Scones with Easy Vanilla Glaze

These lighter cranberry orange scones are tender, flaky, and bursting with fresh flavor, topped with a beautiful vanilla bean glaze. They prove you don’t need a stick of butter to make a truly soul-satisfying scone.
- Prep Time: 20 minutes
- Cook Time: 18 minutes
- Total Time: 1 hour 10 minutes
- Yield: 8 servings 1x
- Category: Breakfast
- Cuisine: American
Ingredients
- 2 cups (250g) all-purpose flour
- 1/3 cup (65g) granulated sugar
- 1 tablespoon baking powder
- 1/2 teaspoon salt
- 1/2 cup (113g) cold unsalted butter, cubed
- 1/2 cup (120ml) cold buttermilk
- 1/4 cup (60ml) cold heavy cream
- 1 large egg
- 1 tablespoon orange zest
- 1 teaspoon vanilla extract
- 1 cup (120g) dried cranberries
- 1 cup (120g) powdered sugar
- 2–3 tablespoons milk or heavy cream
- 1/2 vanilla bean pod (or 1 teaspoon vanilla bean paste)
Instructions
- Preheat oven to 400°F (200°C). Line a baking sheet with parchment paper. Cut butter into small cubes and return to fridge.
- In a large bowl, whisk together flour, sugar, baking powder, and salt.
- Cut cold butter into flour mixture using a pastry cutter or two forks until it resembles coarse meal with pea-sized butter pieces.
- In a separate bowl, whisk together buttermilk, heavy cream, egg, orange zest, and vanilla extract.
- Pour wet mixture into dry mixture. Add dried cranberries. Fold gently until just combined; dough will be shaggy.
- Turn dough onto a lightly floured surface. Pat into a 3/4-inch thick circle. Cut into 8 wedges.
- Place scones on prepared baking sheet, spacing 2 inches apart. Chill for 15-30 minutes.
- Bake for 15-18 minutes until lightly golden on bottom and edges. Cool on sheet for 5 minutes, then transfer to wire rack to cool completely.
- For glaze: whisk powdered sugar with 2 tablespoons milk or cream. Split vanilla bean and scrape seeds into bowl; whisk until smooth. Adjust consistency as needed.
- Drizzle glaze over cooled scones. Let set for 15 minutes before serving.
Notes
Keep all ingredients cold for flaky layers. Do not overwork the dough. Chilling shaped scones before baking is crucial for height. Glaze only when completely cool.
Nutrition
- Serving Size: 1 scone
- Calories: 280
- Sugar: 22
- Sodium: 280
- Fat: 10
- Saturated Fat: 6
- Carbohydrates: 44
- Fiber: 1
- Protein: 4
Keywords: cranberry orange scones, lighter scones, vanilla glaze, breakfast pastry, brunch recipe


