There used to be a tiny bakery tucked behind a dry cleaner on the corner of Elm and 4th that made the most incredible eggnog cheesecake bars I have ever tasted. When they closed their doors two winters ago — a “For Lease” sign taped to the window where the twinkle lights used to hang — I honestly felt a little lost. Those bars were my December ritual. The creamy, spiced filling. That buttery crust. The way the eggnog flavor hit you without being too sweet or artificial.
After seventeen tries — and let me tell you, some of those attempts were straight-up disasters — I finally got it. My kitchen looked like a nutmeg bomb had gone off. I ruined a good springform pan. I bought three different brands of eggnog to compare. My neighbor probably thought I was running a speakeasy from my apartment based on the number of times I knocked on her door with sample squares. But that last batch? That was the one. The texture was silky, the flavor was spot-on, and the best part? No oven required.
These cozy no-bake eggnog cheesecake bars are my love letter to that lost bakery. They are the kind of dessert that makes you slow down, take a breath, and actually enjoy the season instead of racing through it. Maybe you have been there too — chasing a flavor from a place that no longer exists, trying to bottle up a memory in your own kitchen. If you have, you are going to love this recipe.
Why You’ll Love This Recipe
Let’s be honest — the holidays are already chaotic enough. Between the gift wrapping, the travel plans, and the endless to-do lists, the last thing you need is a complicated dessert that requires precise oven timing and a sink full of dirty dishes. These cozy no-bake eggnog cheesecake bars are here to save your sanity.
- No Oven Required: Your oven is already working overtime. These bars set up beautifully in the fridge, freeing up valuable oven space for other holiday goodies.
- Simple Ingredients: You probably have most of these in your pantry already. No hunting down obscure extracts or specialty flours.
- Perfect for Holiday Gatherings: Whether it’s a cookie swap, a family dinner, or a cozy night in, these bars travel well and look impressive on any dessert table.
- Crowd-Pleaser: I have served these to kids, adults, and even my picky aunt who “doesn’t like cheesecake.” They disappear every single time.
- Unbelievably Delicious: The texture is creamy without being heavy, and the eggnog flavor is warm and authentic — not like those artificial holiday drinks from a carton.
What makes these bars different from every other no-bake cheesecake recipe out there is the technique. Instead of just dumping everything in a bowl, I use a clever trick with whipped cream and a touch of gelatin that gives you that perfect sliceable texture without the jiggly, unstable mess. It is comfort food at its finest — rich, satisfying, and made with love.
This is the kind of dessert that makes you close your eyes after the first bite. It is cozy. It is nostalgic. And it is exactly what you need this holiday season.
What Ingredients You Will Need
This recipe uses simple, wholesome ingredients to deliver that signature holiday flavor without any fuss. Most of these are pantry staples during December, which makes these bars incredibly easy to whip up on a whim.
For the Crust
- 2 cups (200g) graham cracker crumbs — about 14-15 full sheets, crushed finely. You can also use vanilla wafer crumbs or shortbread cookies for a different twist.
- 1/2 cup (115g) unsalted butter, melted — use real butter here, not margarine. It makes a difference in flavor and texture.
- 2 tablespoons (25g) granulated sugar — just a touch to sweeten the crust and help it hold together.
- 1/4 teaspoon ground nutmeg — freshly grated if you have it, but pre-ground works fine too.
For the Eggnog Cheesecake Filling
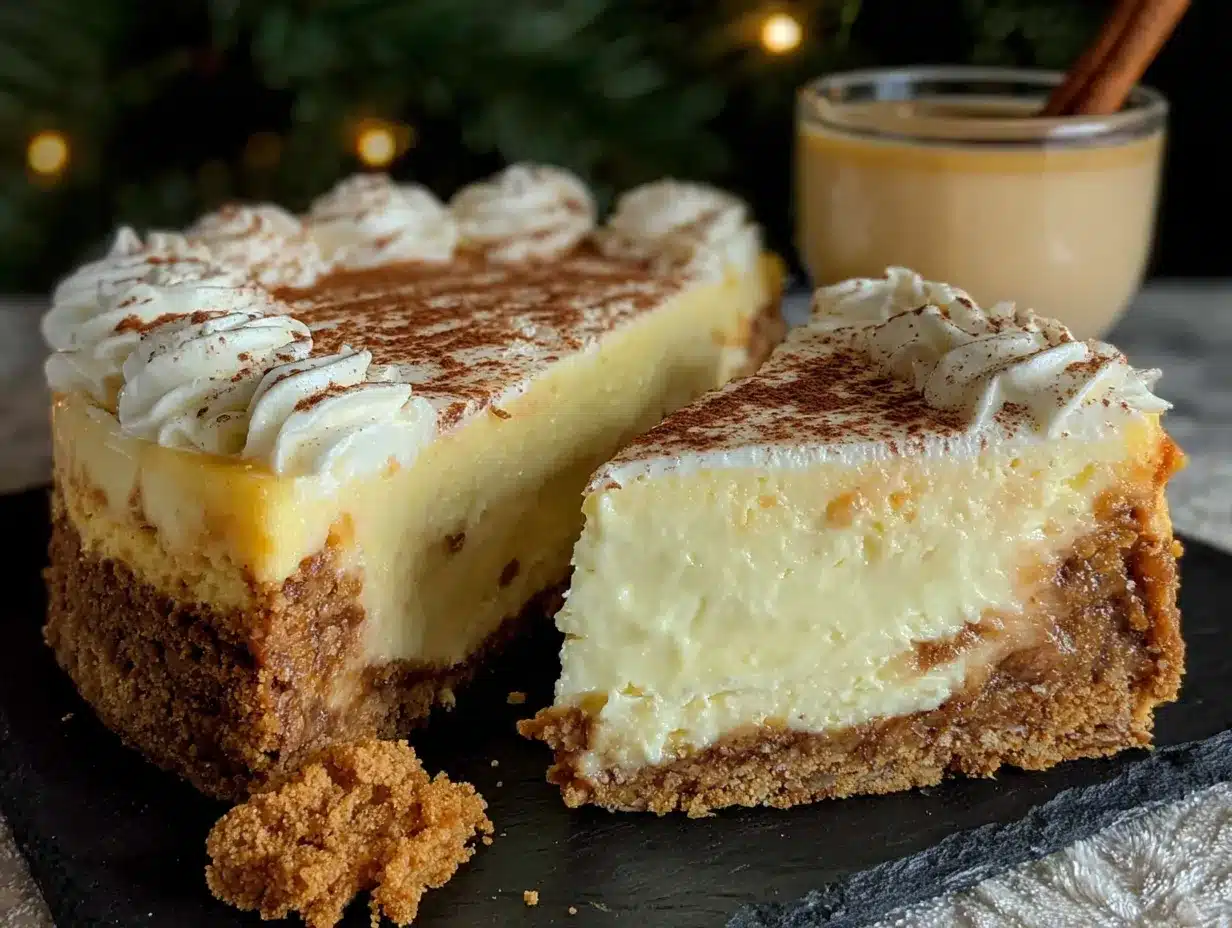
- 16 ounces (450g) cream cheese, softened to room temperature — I recommend Philadelphia brand for the creamiest texture. Let it sit out for at least 30 minutes before starting.
- 1 cup (200g) granulated sugar — regular white sugar works best here. Brown sugar would overpower the eggnog flavor.
- 1 cup (240ml) high-quality eggnog — this is important. Use a brand you actually enjoy drinking. I prefer a thicker, creamier eggnog for best results.
- 1 teaspoon vanilla extract — pure vanilla, not imitation. It rounds out the flavors beautifully.
- 1/2 teaspoon ground nutmeg — plus extra for garnish on top.
- 1/4 teaspoon ground cinnamon — just a whisper to warm up the spice profile.
- 1 tablespoon (7g) unflavored gelatin powder — this is the secret to sliceable no-bake cheesecake. Don’t skip it.
- 3 tablespoons (45ml) cold water — for blooming the gelatin.
- 1 1/2 cups (360ml) heavy whipping cream — cold from the fridge. This gets whipped into the filling for lightness and structure.
For the Topping (Optional but Recommended)
- 1/2 cup (120ml) heavy whipping cream — for making whipped cream rosettes or dollops.
- 1 tablespoon powdered sugar — to sweeten the whipped cream.
- Freshly grated nutmeg — for that beautiful, Instagram-worthy finish.
- Cinnamon sticks — for garnish, if you are feeling fancy.
Substitution Note: If you need a gelatin-free version, you can substitute with 2 teaspoons of agar-agar powder mixed with 3 tablespoons of water. The texture will be slightly different, but it works. For a dairy-free option, use vegan cream cheese and coconut cream instead of heavy cream, though the flavor will shift a bit.
Equipment Needed
You do not need a fancy kitchen to make these bars. Here is what you will need:
- 9×9-inch square baking pan — an 8×8 works too, but your bars will be slightly thicker. Line it with parchment paper for easy removal.
- Electric hand mixer or stand mixer — you could whisk by hand, but your arm will thank you for using a mixer. Trust me on this one.
- Medium mixing bowls — at least two, preferably three, for separating your crust, filling, and whipped cream components.
- Small microwave-safe bowl — for blooming and melting the gelatin mixture.
- Measuring cups and spoons — accuracy matters in no-bake desserts.
- Rubber spatula — for folding the whipped cream into the cream cheese mixture without deflating it.
- Plastic wrap or aluminum foil — for covering the pan while it chills.
- Parchment paper — this is non-negotiable for easy bar removal. Let the paper hang over the edges like slings.
I used a cheap hand mixer for years before upgrading to a stand mixer, and honestly, both work fine. Do not let equipment hold you back. The real magic is in the technique.
Preparation Method
Alright, let’s get to the good part. Follow these steps carefully, and you will have creamy, dreamy eggnog cheesecake bars that rival any bakery version.
- Prepare the pan. Line your 9×9-inch baking pan with parchment paper, leaving about 2 inches of overhang on two opposite sides. This creates handles for lifting the bars out later. Set aside.
- Make the crust. In a medium bowl, combine the graham cracker crumbs, 2 tablespoons of sugar, and 1/4 teaspoon of nutmeg. Pour in the melted butter and stir with a fork until the mixture looks like wet sand and holds together when pressed. Transfer to your prepared pan and press firmly into an even layer. I use the bottom of a measuring cup to get it really compact. Pop this in the fridge while you make the filling.
- Bloom the gelatin. In a small microwave-safe bowl, sprinkle the gelatin over the cold water. Let it sit for 5 minutes without stirring. It will look like a weird, jiggly blob — that is exactly what you want. After 5 minutes, microwave it for 10-15 seconds until it becomes liquid again. Stir gently and set aside.
- Whip the cream. In a large bowl, pour in 1 1/2 cups of cold heavy cream. Beat with an electric mixer on medium-high speed until soft peaks form. You want the cream to hold its shape but still be soft and pillowy. Set this in the fridge while you work on the cream cheese mixture.
- Make the cheesecake base. In another large bowl, beat the softened cream cheese with an electric mixer on medium speed until smooth and creamy — about 2 minutes. Add the sugar and beat for another 2 minutes until light and fluffy. Scrape down the sides of the bowl as needed.
- Add the flavorings. Pour in the eggnog, vanilla extract, 1/2 teaspoon of nutmeg, and 1/4 teaspoon of cinnamon. Beat on low speed until just combined. Do not overmix here, or the filling can become too thin.
- Incorporate the gelatin. With the mixer running on low, slowly pour in the bloomed gelatin mixture. Mix until fully incorporated, about 30 seconds. The gelatin is what gives these bars that perfect sliceable texture, so make sure it is evenly distributed.
- Fold in the whipped cream. Take the whipped cream out of the fridge. Using a rubber spatula, gently fold about one-third of the whipped cream into the cream cheese mixture. Once incorporated, fold in the remaining whipped cream. Be gentle here — you want to keep as much air in the mixture as possible for a light, mousse-like texture.
- Assemble the bars. Pour the filling over the chilled crust. Spread it evenly with a spatula, giving the pan a few gentle taps on the counter to release any air bubbles. Smooth the top as best you can.
- Chill. Cover the pan with plastic wrap and refrigerate for at least 6 hours, but overnight is better. I know it is hard to wait, but the texture really benefits from a full night of chilling. The bars need time to set properly.
- Add the topping. When the bars are fully set, make the optional whipped cream topping. Beat 1/2 cup of heavy cream with 1 tablespoon of powdered sugar until stiff peaks form. Pipe or dollop onto the bars, then sprinkle with freshly grated nutmeg.
- Slice and serve. Use the parchment paper slings to lift the entire block of cheesecake out of the pan. Place it on a cutting board and use a sharp knife to cut into squares. Wipe the knife clean between cuts for neat edges.
Cooking Tips & Techniques
I have made these bars more times than I care to admit, and I have learned a few things the hard way. Here are my best tips for success:
Room temperature cream cheese is not optional. I learned this lesson after my first failed batch. Cold cream cheese creates lumps that no amount of beating can fix. Let it sit on the counter for at least 30 minutes. If you forget, cut it into small cubes and microwave it in 10-second bursts until softened but not melted.
Do not overbeat the cream cheese mixture. Once you add the eggnog and gelatin, keep the mixer on low. Overmixing incorporates too much air, which can cause cracks and a spongy texture instead of that silky, dense cheesecake feel.
Patience is everything. I know you want to eat these immediately. I get it. But cutting into them too early is the number one mistake people make. The gelatin needs time to fully set, and the flavors need time to meld together. Overnight chilling is your friend.
Use a sharp knife for clean slices. Run the knife under hot water, dry it off, then slice. Wipe the blade clean between each cut. This gives you those beautiful, bakery-style edges.
If your filling seems too thin, do not panic. Sometimes the gelatin takes a moment to activate. As long as you followed the blooming step correctly, it will set up in the fridge. Just give it time.
Variations & Adaptations
One of the best things about this recipe is how versatile it is. Here are some ways to make it your own:
- Boozy Eggnog Bars: Add 2 tablespoons of dark rum or bourbon to the filling along with the eggnog. The alcohol adds warmth and depth without making the bars taste like a cocktail. Just note that alcohol can slightly affect the set, so chill for a full 8 hours.
- Gingerbread Crust: Swap the graham crackers for crushed gingersnap cookies. The spicy, molasses flavor pairs beautifully with the eggnog filling. Use about 2 cups of gingersnap crumbs and reduce the sugar to 1 tablespoon since the cookies are already sweet.
- Chocolate Eggnog Dream: Drizzle melted dark chocolate over the top before chilling, or swirl 1/4 cup of melted chocolate into the filling for a marbled effect. The chocolate and eggnog combination is honestly underrated.
- Pumpkin Eggnog Fusion: Replace half of the eggnog with pumpkin puree and add an extra teaspoon of pumpkin pie spice. This is a fun Thanksgiving-to-Christmas transition dessert that always gets compliments.
- Mini Bar Bites: Press the crust into a mini muffin tin lined with paper liners, fill with the cheesecake mixture, and chill for a bite-sized holiday treat. Perfect for parties or cookie platters.
I tried the gingerbread crust variation last Christmas, and honestly, it might be even better than the original. Something about that spicy crunch against the creamy eggnog filling just works.
Serving & Storage Suggestions
These bars are best served cold, straight from the fridge. The texture is firm but creamy, like a dreamy slice of cheesecake mousse. I like to let them sit at room temperature for about 5 minutes before serving — just enough to take the chill off without losing the structure.
Presentation Ideas: Arrange the bars on a festive platter and dust with freshly grated nutmeg. Add a cinnamon stick to each bar for a rustic, holiday look. If you are feeling extra, pipe rosettes of whipped cream on top and sprinkle with gold sanding sugar.
What to Serve Alongside: These bars pair beautifully with a cup of hot coffee, spiced chai, or a classic eggnog latte. For a dessert spread, serve them alongside gingerbread cookies, peppermint bark, or a simple fruit salad with pomegranate seeds.
Storage: Store leftover bars in an airtight container in the refrigerator for up to 5 days. The texture actually improves after the first day as the flavors continue to meld. I have never had them last longer than that because they disappear too quickly.
Freezing: These bars freeze beautifully. Wrap individual slices tightly in plastic wrap, then place them in a freezer-safe bag or container. They will keep for up to 2 months. Thaw in the refrigerator overnight before serving. Do not thaw at room temperature, or they may become too soft.
Reheating: Do not reheat these bars. They are meant to be served cold. If you want a warm dessert, try the pumpkin eggnog variation baked in a water bath — but that is a different recipe entirely.
Nutritional Information & Benefits
Let’s be real — these are an indulgence. But that is okay. The holidays are about treating yourself and the people you love. Here is the estimated nutritional breakdown per bar (based on 16 servings):
- Calories: 385
- Total Fat: 28g
- Saturated Fat: 17g
- Cholesterol: 95mg
- Sodium: 210mg
- Total Carbohydrates: 30g
- Dietary Fiber: 0g
- Sugars: 24g
- Protein: 5g
Health Benefits: Eggnog is traditionally made with milk and eggs, which provide calcium and protein. The nutmeg and cinnamon in this recipe are not just for flavor — they have anti-inflammatory properties and can aid digestion. The cream cheese adds a dose of vitamin A and healthy fats that help keep you satisfied.
Dietary Considerations: This recipe contains dairy, gluten, and eggs. For a gluten-free version, use gluten-free graham crackers or crushed gluten-free cookies. For a dairy-free version, use vegan cream cheese and coconut cream, though the flavor and texture will differ.
Allergen Note: This recipe contains milk, wheat, and eggs. If you are serving guests with allergies, make sure to label the bars clearly.
I personally believe in balance. These bars are a treat, not a daily staple. Enjoy them with zero guilt and a whole lot of holiday cheer.
Conclusion
These cozy no-bake eggnog cheesecake bars are everything I hoped they would be when I started that obsessive quest to recreate a lost bakery memory. They are creamy, spiced, and perfectly sliceable. They fill your kitchen with the warm aroma of nutmeg and cinnamon without heating up the house. And they bring that same feeling of comfort and nostalgia that made those original bars so special.
I love this recipe because it proves that you do not need a fancy bakery or complicated techniques to create something truly magical. You just need good ingredients, a little patience, and the willingness to try again when the first batch does not turn out perfectly. Trust me — I have been there.
I would love to hear how these turn out for you. Did you try a variation? Did they remind you of a favorite holiday memory? Drop a comment below and let me know. And if you share them on social media, tag me so I can see your beautiful creations. Happy holidays, and happy baking — or rather, happy no-baking!
Frequently Asked Questions
Can I use low-fat cream cheese for this recipe?
You can, but I do not recommend it. Low-fat cream cheese has a higher water content, which can make the filling too soft and prevent it from setting properly. Full-fat cream cheese gives you that rich, creamy texture that makes these bars so irresistible.
How do I know when the gelatin is properly bloomed?
After sprinkling the gelatin over cold water and letting it sit for 5 minutes, it should look like a firm, jiggly mass. If it is still watery, let it sit for another minute or two. If it is too hard, you used too much gelatin. The texture should be similar to set Jell-O before it is fully chilled.
Can I make these bars vegan?
Yes, with some adjustments. Use vegan cream cheese, coconut cream instead of heavy cream, and a plant-based eggnog. For the gelatin, use 2 teaspoons of agar-agar powder bloomed in 3 tablespoons of water. The texture will be slightly different — more mousse-like — but still delicious.
Why did my filling turn out grainy?
Grainy texture usually happens when the cream cheese is too cold or when the gelatin is not fully dissolved. Make sure your cream cheese is at room temperature before beating, and ensure the bloomed gelatin is completely liquid before adding it to the mixture. If it clumps up, microwave it for another 5 seconds.
How far in advance can I make these bars?
These bars are perfect for make-ahead holiday planning. You can prepare them up to 3 days in advance and keep them covered in the refrigerator. For longer storage, freeze individual slices for up to 2 months. Just thaw overnight in the fridge before serving.
Pin This Recipe!
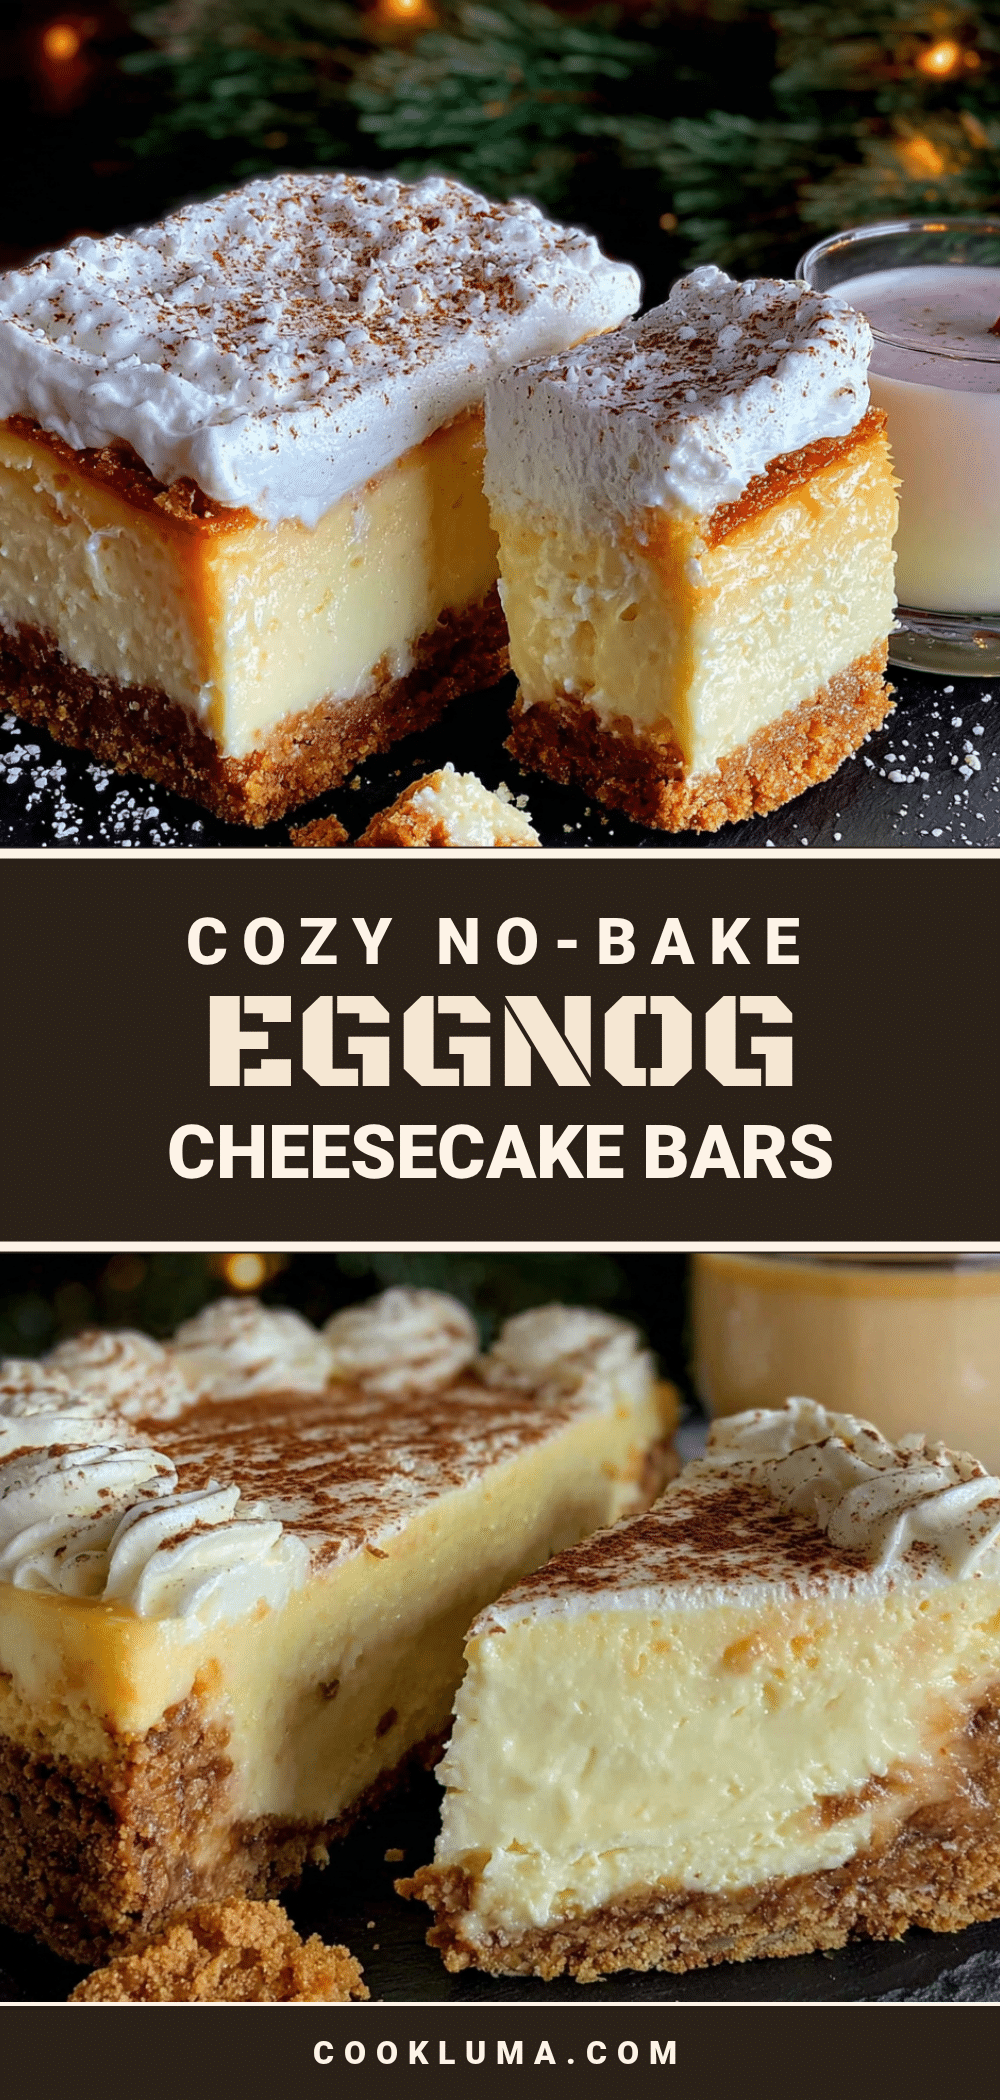
Cozy No-Bake Eggnog Cheesecake Bars: Easy Holiday Dessert
These creamy, spiced no-bake eggnog cheesecake bars are the perfect easy holiday dessert. With a buttery graham cracker crust and a silky, sliceable filling, they capture the nostalgic flavor of a lost bakery favorite without needing an oven.
- Prep Time: 30 minutes
- Cook Time: 0 minutes
- Total Time: 6 hours 30 minutes (includes chilling time)
- Yield: 16 servings 1x
- Category: Dessert
- Cuisine: American
Ingredients
- 2 cups (200g) graham cracker crumbs (about 14–15 full sheets)
- 1/2 cup (115g) unsalted butter, melted
- 2 tablespoons (25g) granulated sugar
- 1/4 teaspoon ground nutmeg
- 16 ounces (450g) cream cheese, softened to room temperature
- 1 cup (200g) granulated sugar
- 1 cup (240ml) high-quality eggnog
- 1 teaspoon vanilla extract
- 1/2 teaspoon ground nutmeg
- 1/4 teaspoon ground cinnamon
- 1 tablespoon (7g) unflavored gelatin powder
- 3 tablespoons (45ml) cold water
- 1 1/2 cups (360ml) heavy whipping cream, cold
- 1/2 cup (120ml) heavy whipping cream (for topping)
- 1 tablespoon powdered sugar (for topping)
- Freshly grated nutmeg (for garnish)
- Cinnamon sticks (for garnish, optional)
Instructions
- Line a 9×9-inch baking pan with parchment paper, leaving about 2 inches of overhang on two opposite sides. Set aside.
- In a medium bowl, combine graham cracker crumbs, 2 tablespoons sugar, and 1/4 teaspoon nutmeg. Pour in melted butter and stir until mixture resembles wet sand. Press firmly into an even layer in the prepared pan. Refrigerate while making the filling.
- In a small microwave-safe bowl, sprinkle gelatin over cold water. Let sit for 5 minutes without stirring. Microwave for 10-15 seconds until liquid. Stir gently and set aside.
- In a large bowl, beat 1 1/2 cups cold heavy cream with an electric mixer on medium-high speed until soft peaks form. Refrigerate.
- In another large bowl, beat softened cream cheese on medium speed until smooth, about 2 minutes. Add 1 cup sugar and beat for another 2 minutes until light and fluffy. Scrape down sides as needed.
- Add eggnog, vanilla extract, 1/2 teaspoon nutmeg, and 1/4 teaspoon cinnamon. Beat on low speed until just combined.
- With mixer running on low, slowly pour in bloomed gelatin. Mix until fully incorporated, about 30 seconds.
- Gently fold one-third of the whipped cream into the cream cheese mixture using a rubber spatula. Fold in remaining whipped cream until just combined.
- Pour filling over chilled crust. Spread evenly and tap pan gently on counter to release air bubbles. Smooth the top.
- Cover with plastic wrap and refrigerate for at least 6 hours, preferably overnight.
- For topping, beat 1/2 cup heavy cream with 1 tablespoon powdered sugar until stiff peaks form. Pipe or dollop onto bars. Sprinkle with freshly grated nutmeg and garnish with cinnamon sticks if desired.
- Use parchment slings to lift cheesecake out of pan. Place on cutting board and slice into squares with a sharp knife, wiping blade clean between cuts.
Notes
Room temperature cream cheese is essential for a smooth texture. Do not overmix the filling once eggnog and gelatin are added. For best results, chill overnight. Use a sharp knife run under hot water for clean slices. For a gelatin-free version, substitute with 2 teaspoons agar-agar powder mixed with 3 tablespoons water. For dairy-free, use vegan cream cheese and coconut cream.
Nutrition
- Serving Size: 1 bar
- Calories: 385
- Sugar: 24
- Sodium: 210
- Fat: 28
- Saturated Fat: 17
- Carbohydrates: 30
- Protein: 5
Keywords: no-bake cheesecake, eggnog cheesecake bars, holiday dessert, easy cheesecake, no-bake dessert, Christmas dessert, eggnog dessert


