My friend Sarah asked why I couldn’t just roll the stuffing into balls and bake them instead of fussing with a casserole dish. I started to explain why that wouldn’t work — then stopped. Honestly, I had no good reason. I’d been making the same Thanksgiving stuffing for a decade, following my grandmother’s method like it was scripture. But Sarah was hosting her first Friendsgiving, and she was nervous, and she wanted something that felt special but didn’t require a carving knife. So I shrugged, grabbed the cookie scoop, and we made these ridiculous, golden, crispy little nuggets on a Tuesday night just for fun.
The first batch came out of the oven looking like something you’d pay twelve dollars for at a gastropub. Sarah grabbed one before I could stop her, burned her tongue, and didn’t care. “These are it,” she said, mouth full, waving a napkin. And she was right. I’d spent years perfecting my casserole technique — the exact bread-to-broth ratio, the precise bake time — and never once thought to ask if there was a better way. There was. And it wasn’t even my idea.
That’s the thing about cooking for a crowd. You get stuck in your ways because you know what works. But sometimes the person who’s never made the dish before sees something you don’t. Maybe you’ve been there — someone suggests a shortcut or a swap, and you feel that little twinge of protectiveness. I felt it. And I almost talked her out of it. But I’m so glad I didn’t, because these crispy sausage and sage stuffing balls have become my go-to for every gathering since. They’re easier, they’re more fun, and they disappear faster than anything I’ve ever put on a table.
Why You’ll Love This Recipe
Let me tell you what makes these little flavor bombs different from every other stuffing you’ve tried. First, they’re completely foolproof. I mean that. If you can mix ingredients in a bowl and roll them into balls, you can make these. No worrying about whether your casserole is soggy or dry, no fighting for space in the oven with your turkey. They bake up on a single sheet pan, crispy on all sides, and they’re ready in under 40 minutes.
- Perfect for Parties : These are made for gatherings. They’re handheld, they’re bite-sized, and they don’t require plates or forks. Your guests can grab one, take a bite, and keep mingling. For a host, that’s pure gold.
- Make-Ahead Magic : You can prep these the night before, keep them in the fridge, and pop them in the oven right when guests arrive. Your kitchen stays clean, and you actually get to enjoy the party.
- Simple Ingredients : Nothing fancy here. Stale bread, sausage, onion, celery, sage, and a few pantry staples. You probably have most of it right now.
- Crowd-Pleaser Guaranteed : I’ve served these at Thanksgiving, Christmas parties, game day gatherings, and casual dinners. They get devoured every single time. Even the picky eaters go back for seconds.
- That Texture Though : The outside gets perfectly golden and crispy, while the inside stays tender and moist. It’s the best of both worlds — no dry edges, no mushy centers.
What really sets this recipe apart is the technique. Instead of baking stuffing in a dish where the top gets crispy and everything underneath steams, rolling it into balls exposes way more surface area to heat. Every single side gets that gorgeous crunch. Plus, the sausage adds richness and savory depth that plain stuffing just doesn’t have. It’s comfort food that feels a little bit fancy, without any extra effort.
What Ingredients You Will Need
This recipe uses simple, hearty ingredients that come together to create something genuinely special. Most of these are pantry staples, especially if you cook during the holidays. Here’s what you’ll need and why each one matters.
For the Stuffing Balls
- 12 cups stale bread cubes — About one standard loaf of French bread or sourdough. Stale bread absorbs the broth better and holds its shape. If your bread is fresh, cube it and leave it out overnight, or toast it in a 300°F oven for 10 minutes.
- 1 pound ground pork sausage — I prefer Jimmy Dean’s regular or sage-flavored sausage for the best flavor. The fat from the sausage keeps the stuffing balls moist and adds incredible richness. If you can find bulk sausage (not in casings), it’s easier to work with.
- 1 large yellow onion, finely diced — About 1 ½ cups. Onion adds sweetness and depth. Dice it small so it distributes evenly without creating big chunks.
- 3 celery stalks, finely diced — About 1 cup. Celery gives that classic stuffing flavor and a little bit of crunch. Don’t skip it — it’s essential for the texture.
- 4 cloves garlic, minced — Fresh garlic is non-negotiable here. The jarred stuff won’t give you the same punch.
- 3 tablespoons fresh sage, chopped — Fresh sage is miles ahead of dried for this recipe. It’s more aromatic and less dusty-tasting. If you only have dried, use 1 tablespoon.
- 2 teaspoons fresh thyme leaves — Or ¾ teaspoon dried thyme. Thyme and sage are best friends in this dish.
- 1 ½ cups low-sodium chicken broth — Low-sodium is important here because the sausage is already salty. You can control the seasoning better this way.
- 2 large eggs, lightly beaten — Eggs bind everything together so the balls hold their shape during baking. Don’t skip them.
- 4 tablespoons unsalted butter — For sautéing the vegetables. Butter adds flavor that oil just can’t match.
- Salt and black pepper to taste — Go easy on the salt until you taste the mixture. The sausage and broth bring plenty of saltiness.
Optional Additions
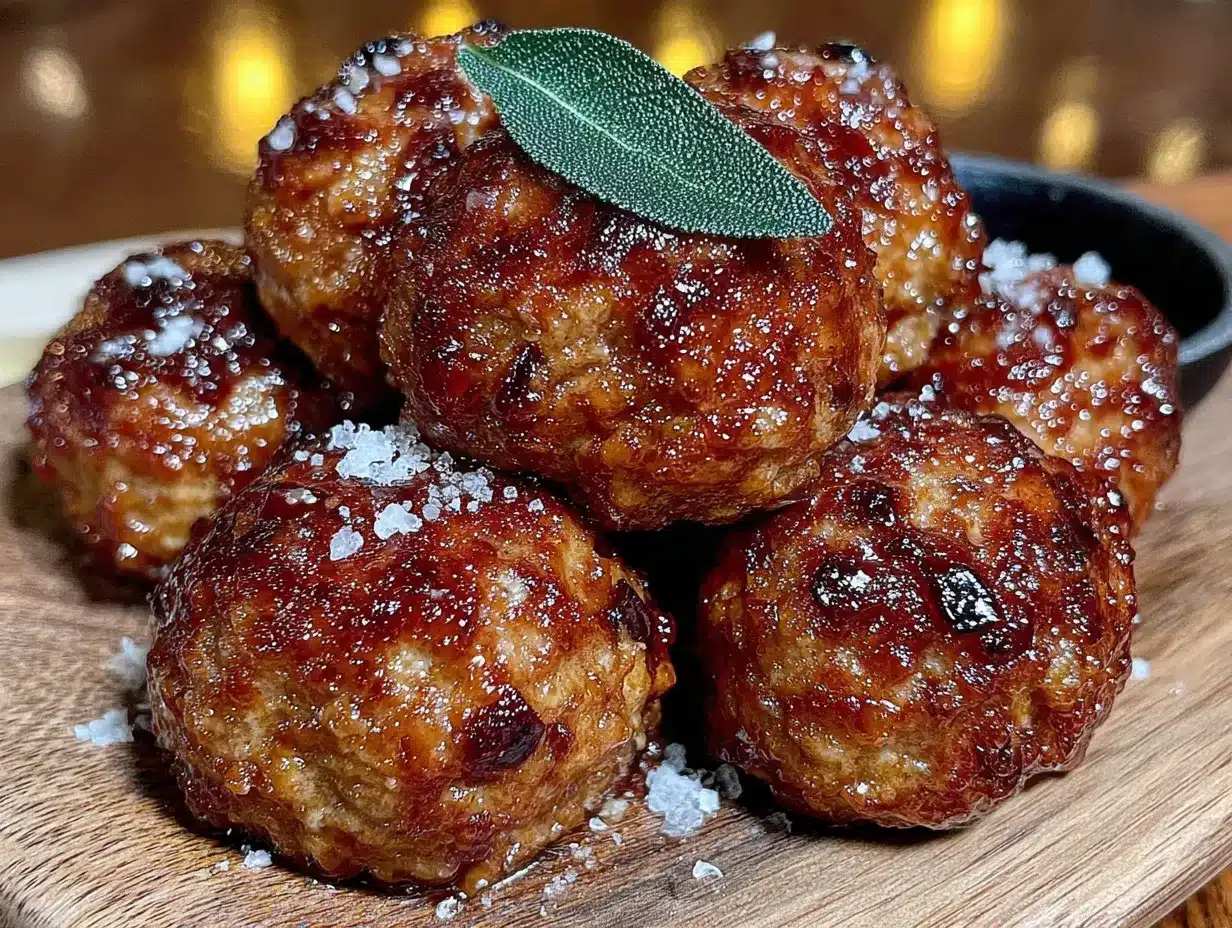
- ½ cup dried cranberries — Adds little pops of sweetness that contrast beautifully with the savory sausage and sage. I add these when I’m serving them at holiday parties.
- ¼ cup fresh parsley, chopped — For garnish and a fresh finish. It brightens up the flavor right before serving.
- ¼ cup grated Parmesan cheese — Mix this into the stuffing for extra savory depth. It melts into the bread and creates an even crispier exterior.
Ingredient Tips
For the bread, sourdough is my top choice because it has enough structure to hold up without turning to mush. French bread works great too. Avoid soft sandwich bread — it’ll compress into dense, sad little balls. And please, for the love of good food, use real butter. Margarine or oil won’t give you that same rich flavor when you sauté the vegetables.
If you’re feeding a crowd that includes vegetarians, you can swap the sausage for a plant-based version and use vegetable broth. I’ve tested it with Beyond Sausage and it works surprisingly well, though the texture is slightly softer.
Equipment Needed
You don’t need much for this recipe, which is part of why I love it. Here’s what you’ll want on hand:
- Large skillet — For cooking the sausage and sautéing the vegetables. A 12-inch skillet gives you plenty of room.
- Large mixing bowl — Big enough to hold all the bread cubes and mix everything together without spilling. I use my grandmother’s old ceramic bowl, but any large bowl works.
- Baking sheet — A half-sheet pan (18×13 inches) is perfect. Line it with parchment paper for easy cleanup.
- Cookie scoop or measuring cup — A ¼-cup scoop makes uniform balls that cook evenly. If you don’t have one, use your hands — just make sure they’re slightly damp so the mixture doesn’t stick.
- Sharp knife and cutting board — For dicing the vegetables and chopping the herbs.
- Parchment paper — Non-negotiable for easy cleanup and preventing sticking.
If you don’t have a cookie scoop, wet your hands slightly before rolling. The moisture prevents the mixture from sticking to your palms and gives you smoother, rounder balls. I learned that trick after my first batch looked like misshapen asteroids.
Preparation Method
This recipe comes together in stages, but none of them are complicated. I’ll walk you through each step so you know exactly what to look for.
Step 1: Prepare the Bread
If your bread isn’t stale, cut it into ½-inch cubes and spread them on a baking sheet. Toast them at 300°F for 10-12 minutes, stirring halfway through. You want them dry but not browned. Let them cool completely before using. This step is crucial — fresh bread will turn your stuffing balls into soggy, dense lumps.
Step 2: Cook the Sausage
Heat a large skillet over medium-high heat. Add the sausage and break it apart with a wooden spoon. Cook for 6-8 minutes, stirring occasionally, until it’s browned and cooked through. Use a slotted spoon to transfer the sausage to a plate, leaving the rendered fat in the skillet. Don’t drain the fat — that’s pure flavor right there.
Step 3: Sauté the Vegetables
Add the butter to the same skillet with the sausage fat. Once it melts, add the diced onion and celery. Cook over medium heat for 6-8 minutes, stirring occasionally, until the vegetables are soft and translucent. Add the minced garlic, chopped sage, and thyme, and cook for 1 more minute until fragrant. You should be able to smell the herbs clearly at this point — that’s how you know they’ve released their oils.
Step 4: Combine the Mixture
In your large mixing bowl, combine the toasted bread cubes, cooked sausage, and sautéed vegetables. Toss everything together gently with your hands or a spatula until it’s evenly distributed. In a separate small bowl, whisk together the chicken broth and beaten eggs. Pour this over the bread mixture and gently fold until everything is moistened. Let it sit for 5 minutes so the bread can absorb the liquid. The mixture should hold together when you squeeze a handful — if it’s too dry, add a splash more broth.
Step 5: Shape the Balls
Preheat your oven to 375°F. Line a baking sheet with parchment paper. Using a ¼-cup scoop or your hands, form the stuffing mixture into balls about the size of a golf ball. Place them on the prepared baking sheet, spacing them about an inch apart. You should get 18-20 balls from this recipe. If the mixture feels too loose to hold its shape, refrigerate it for 15 minutes before rolling.
Step 6: Bake to Golden Perfection
Bake the stuffing balls for 20-25 minutes, rotating the pan halfway through. They’re done when they’re golden brown on the outside and crispy to the touch. If you want them extra crispy, broil for 1-2 minutes at the end — but watch closely so they don’t burn. Let them rest on the baking sheet for 5 minutes before transferring to a serving platter. This resting time lets them set so they don’t fall apart when you move them.
Cooking Tips & Techniques
I’ve made these crispy sausage and sage stuffing balls more times than I can count, and I’ve learned a few things the hard way. Here’s what I wish someone had told me.
Don’t overmix the stuffing. I know it’s tempting to keep stirring until everything looks perfectly uniform, but overmixing breaks down the bread too much and gives you dense, paste-like balls. Fold gently until everything is just combined. A few uneven spots are fine — they add texture.
Chill the mixture if it feels loose. The first time I made these, I was rushing and skipped the resting step. My balls flattened into sad little discs in the oven. If your mixture seems wet or doesn’t hold its shape when you squeeze it, pop it in the fridge for 15-20 minutes. The cold helps the fat solidify slightly, making the balls easier to shape and less likely to spread.
Use a thermometer if you’re nervous. The internal temperature should reach 165°F. I don’t always check mine because I’ve made them so many times, but if you’re serving a crowd and want to be safe, this is the easiest way to know they’re done.
Make extra. Seriously. I always double this recipe for parties because they disappear faster than you’d expect. One batch serves 6-8 people as a side dish, but if these are the main appetizer, you’ll want at least two batches.
Space them out on the pan. Crowding the baking sheet creates steam instead of dry heat, and you’ll end up with soft, pale stuffing balls instead of crispy golden ones. Give them room to breathe. If you’re making a double batch, use two pans and swap their positions halfway through baking.
Variations & Adaptations
This recipe is incredibly flexible. Here are some of my favorite ways to switch it up.
Dietary Variations
- Gluten-Free : Use gluten-free bread cubes — I like Schar or Canyon Bakehouse brands. Everything else in the recipe is naturally gluten-free, so this swap works perfectly.
- Vegetarian : Replace the sausage with plant-based crumbles and use vegetable broth. Sauté the “sausage” in olive oil instead of butter to keep it vegan-friendly.
- Low-Carb : Substitute the bread cubes with cauliflower florets that have been roasted and finely chopped. The texture is different but delicious, and you’ll save a ton of carbs.
Flavor Twists
- Apple and Sage : Add 1 finely diced apple (Granny Smith or Honeycrisp) when you sauté the onions. The sweetness balances the savory sausage beautifully.
- Spicy Sausage : Use hot Italian sausage instead of mild. The heat cuts through the richness and wakes up your taste buds.
- Herb Garden : Mix in 2 tablespoons each of fresh rosemary and flat-leaf parsley. Rosemary adds an earthy, piney note that pairs well with sage.
Different Cooking Methods
- Air Fryer : Cook at 375°F for 10-12 minutes, shaking the basket halfway through. They come out extra crispy with less oil. You may need to work in batches depending on your air fryer size.
- Deep Fry : Heat oil to 350°F and fry the balls for 3-4 minutes until deep golden brown. This is the indulgent version — perfect for when you want to go all out.
- Make-Ahead and Freeze : Shape the balls, place them on a baking sheet, and freeze until solid. Transfer to a freezer bag. Bake from frozen at 375°F for 25-30 minutes. No need to thaw first.
Serving & Storage Suggestions
These crispy sausage and sage stuffing balls are at their absolute best fresh from the oven, but they’re still pretty amazing the next day. Here’s how to serve and store them like a pro.
Serving Ideas
Arrange them on a large wooden board or platter with a bowl of warm gravy for dipping. I like to garnish with a sprinkle of fresh parsley and a few extra sage leaves for color. For holiday parties, I serve them alongside cranberry sauce and a dollop of mascarpone mixed with a pinch of nutmeg. The creamy, tangy mascarpone is a surprising but perfect pairing.
If you’re hosting a dinner party, these work beautifully as a side dish alongside roasted turkey, chicken, or pork. They also make an excellent appetizer for cocktail hour — just stick a toothpick in each one and let guests grab and go.
Storage Instructions
Store leftover stuffing balls in an airtight container in the refrigerator for up to 4 days. To reheat, place them on a baking sheet in a 350°F oven for 8-10 minutes until heated through and crispy again. The microwave will make them soggy — avoid it if you can.
For longer storage, freeze the baked and cooled balls in a single layer on a baking sheet, then transfer to a freezer bag. They’ll keep for up to 3 months. Reheat from frozen at 350°F for 15-18 minutes.
Flavor Development
Here’s a little secret — these stuffing balls actually taste better the next day. The flavors have time to meld and deepen overnight. If you’re serving them at a party, consider making them a day ahead and reheating just before guests arrive. Your kitchen will smell amazing, and the texture will still be perfect.
Nutritional Information & Benefits
Each serving (about 2 stuffing balls) contains approximately:
- Calories : 285
- Protein : 14g
- Fat : 16g
- Carbohydrates : 22g
- Fiber : 2g
- Sodium : 580mg
These numbers are estimates and will vary based on your specific ingredients and portion sizes. The sausage provides a good amount of protein and B vitamins, while the celery and onion add fiber and antioxidants. The sage isn’t just for flavor — it’s been studied for its anti-inflammatory properties and may help with digestion.
If you’re watching your sodium, use low-sodium broth and go easy on the added salt. You can also swap half the sausage for ground turkey to reduce the fat content, though you’ll lose a bit of that rich flavor.
I’m not a nutritionist, but I’ve learned that balance is what matters. These stuffing balls are indulgent, yes, but they’re made from real ingredients. Serve them alongside a big green salad or roasted vegetables, and you’ve got a meal that feels both satisfying and nourishing.
Conclusion
These crispy sausage and sage stuffing balls have become my most-requested recipe for a reason. They’re easy enough for a weeknight, impressive enough for a holiday table, and adaptable enough to please just about everyone. Every time I make them, I think about that Tuesday night with Sarah, standing in my tiny kitchen, laughing at how wrong I was about the whole thing. She still brings it up every Thanksgiving.
I hope you’ll try them and make them your own. Add apples if you like things sweet, or throw in some cayenne if you want heat. Serve them with gravy, cranberry sauce, or just a cold beer. However you do it, I promise they’ll disappear fast. And when someone asks for the recipe — because they will — you can tell them the story about how the best ideas sometimes come from the people who’ve never made the dish before.
If you make these, I’d love to hear about it. Drop a comment below and let me know how they turned out, or tag me in your photos. Happy cooking, friend!
Frequently Asked Questions
Can I make these ahead of time for a party?
Absolutely. You can shape the balls and refrigerate them unbaked for up to 24 hours. Just cover them tightly with plastic wrap. When you’re ready to bake, add 3-5 minutes to the cooking time since they’ll be cold from the fridge. You can also bake them fully, cool them, and reheat at 350°F for 8-10 minutes right before serving.
Why did my stuffing balls fall apart in the oven?
This usually happens when the mixture is too dry or too wet. If it’s too dry, the bread doesn’t have enough moisture to bind together. Add a little more broth, a tablespoon at a time, until the mixture holds together when squeezed. If it’s too wet, the balls spread and lose their shape. Add a handful more bread cubes to absorb the excess liquid. Also, make sure you let the mixture rest for 5 minutes before shaping so the bread can fully absorb the broth.
Can I use dried sage instead of fresh?
You can, but use less. Dried herbs are more concentrated than fresh. Substitute 1 tablespoon of dried sage for the 3 tablespoons of fresh called for in the recipe. The flavor won’t be quite as bright, but it’ll still be delicious. If you have time, rub the dried sage between your palms before adding it — this releases the oils and gives you more aroma.
How do I get them extra crispy on the outside?
Two tricks. First, make sure your bread cubes are thoroughly dried before mixing — any moisture in the bread will steam instead of crisp. Second, after baking, switch your oven to broil for 1-2 minutes. Watch closely because they can go from golden to burnt very quickly. You can also brush the tops with a little melted butter before broiling for an even crunchier finish.
Can I freeze the unbaked stuffing balls?
Yes, and this is one of my favorite meal prep tricks. Shape the balls, place them on a parchment-lined baking sheet, and freeze until solid (about 2 hours). Transfer them to a freezer bag or airtight container. When you’re ready to bake, place them frozen on a baking sheet and add 5-7 minutes to the baking time. No need to thaw first. They’ll keep in the freezer for up to 3 months.
Pin This Recipe!
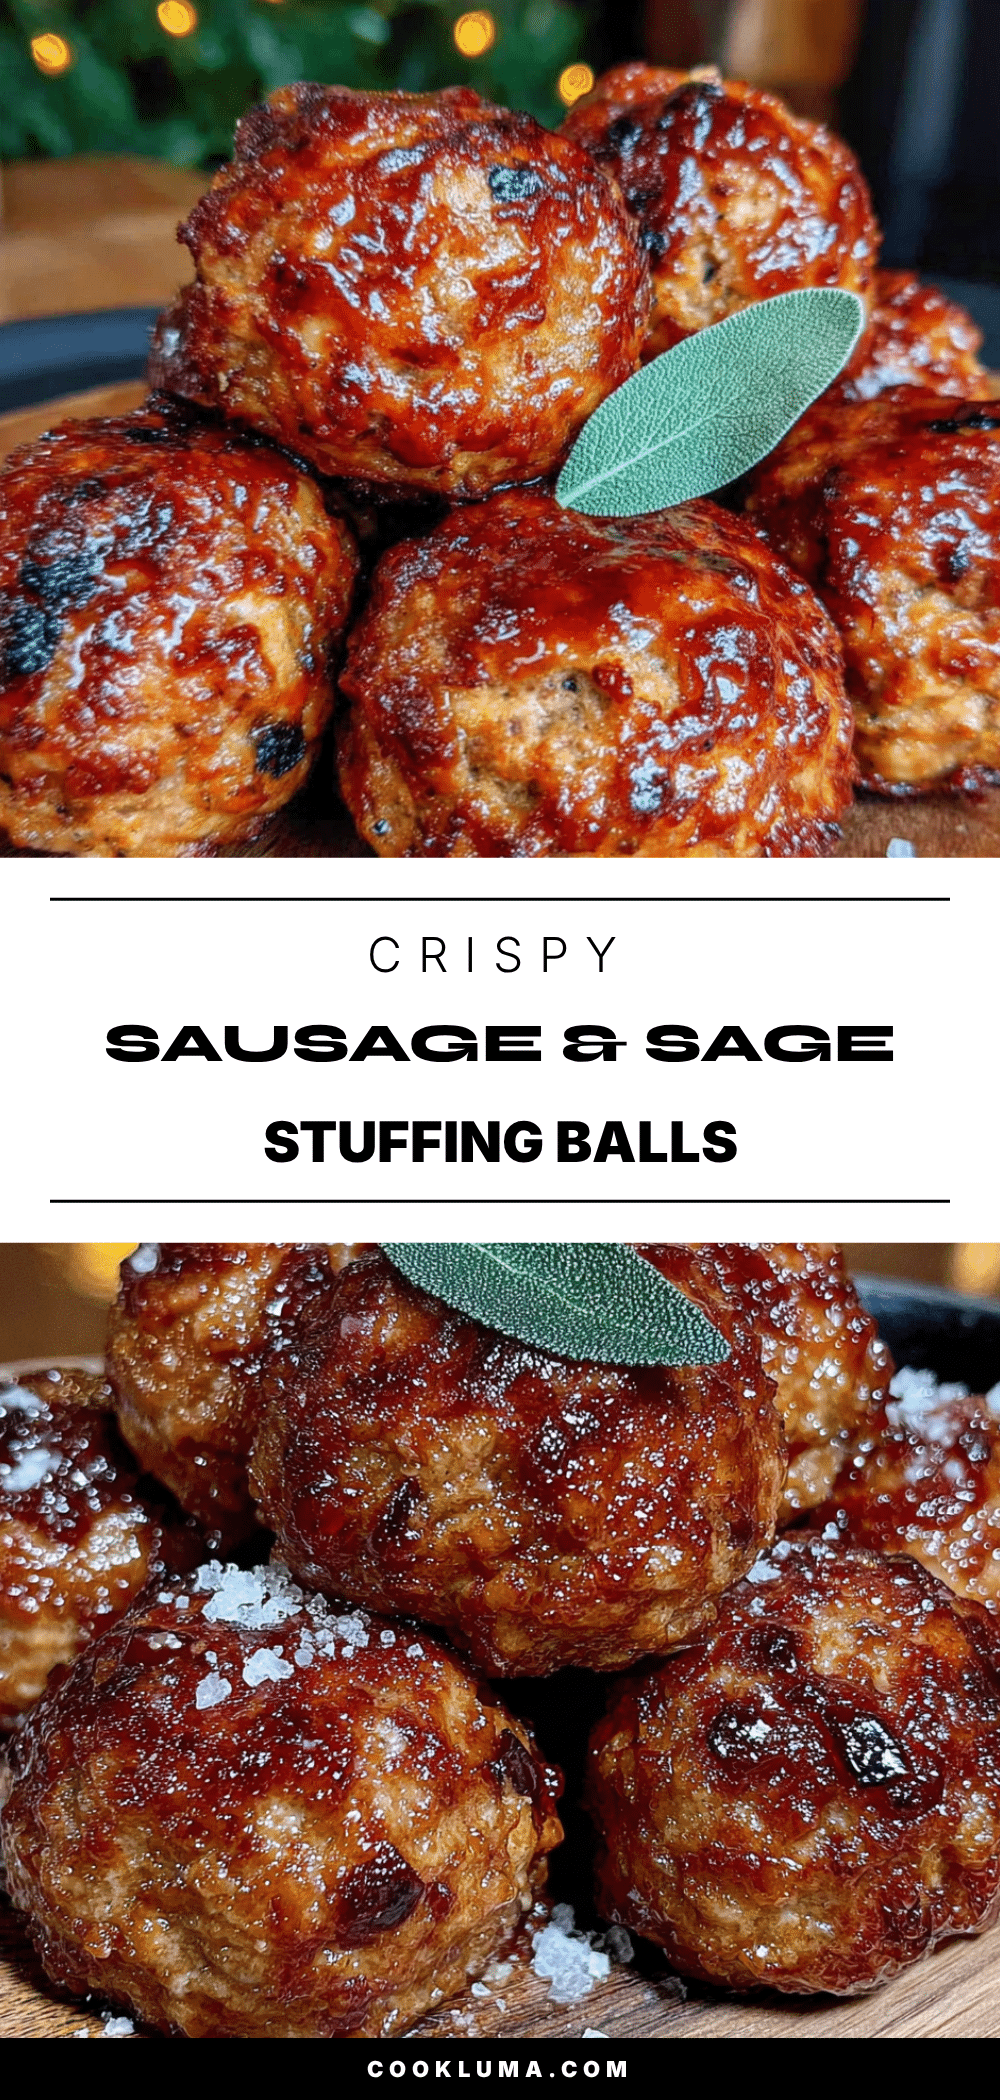
Best Crispy Sausage and Sage Stuffing Balls Recipe

These golden, crispy stuffing balls are a fun and foolproof twist on traditional stuffing. Made with savory sausage, fresh sage, and toasted bread cubes, they bake up perfectly on a sheet pan and are ideal for parties, holidays, or any gathering.
- Prep Time: 20 minutes
- Cook Time: 25 minutes
- Total Time: 45 minutes
- Yield: 6-8 servings 1x
- Category: Side Dish
- Cuisine: American
Ingredients
- 12 cups stale bread cubes (about 1 loaf French or sourdough)
- 1 pound ground pork sausage (regular or sage-flavored)
- 1 large yellow onion, finely diced (about 1 ½ cups)
- 3 celery stalks, finely diced (about 1 cup)
- 4 cloves garlic, minced
- 3 tablespoons fresh sage, chopped
- 2 teaspoons fresh thyme leaves
- 1 ½ cups low-sodium chicken broth
- 2 large eggs, lightly beaten
- 4 tablespoons unsalted butter
- Salt and black pepper to taste
- ½ cup dried cranberries (optional)
- ¼ cup fresh parsley, chopped (optional, for garnish)
- ¼ cup grated Parmesan cheese (optional)
Instructions
- If bread isn’t stale, cut into ½-inch cubes and toast at 300°F for 10-12 minutes until dry but not browned. Let cool completely.
- Heat a large skillet over medium-high heat. Cook sausage, breaking it apart, for 6-8 minutes until browned. Transfer to a plate with a slotted spoon, leaving fat in skillet.
- Add butter to the skillet with sausage fat. Sauté onion and celery over medium heat for 6-8 minutes until soft. Add garlic, sage, and thyme; cook 1 minute until fragrant.
- In a large bowl, combine toasted bread cubes, cooked sausage, and sautéed vegetables. Toss gently.
- In a small bowl, whisk together chicken broth and beaten eggs. Pour over bread mixture and fold gently until moistened. Let sit 5 minutes. Mixture should hold together when squeezed; add more broth if too dry.
- Preheat oven to 375°F. Line a baking sheet with parchment paper.
- Using a ¼-cup scoop or damp hands, form mixture into golf ball-sized balls (about 18-20). Place on prepared sheet, spacing 1 inch apart. Refrigerate 15 minutes if mixture feels loose.
- Bake for 20-25 minutes, rotating pan halfway, until golden brown and crispy. For extra crispiness, broil 1-2 minutes at the end. Let rest 5 minutes before serving.
Notes
For extra crispiness, broil for 1-2 minutes after baking. To make ahead, shape balls and refrigerate unbaked for up to 24 hours, then add 3-5 minutes to bake time. Freeze unbaked balls for up to 3 months; bake from frozen adding 5-7 minutes. Use low-sodium broth to control saltiness. Sourdough bread is recommended for best texture.
Nutrition
- Serving Size: 2 stuffing balls
- Calories: 285
- Sugar: 4
- Sodium: 580
- Fat: 16
- Saturated Fat: 6
- Carbohydrates: 22
- Fiber: 2
- Protein: 14
Keywords: stuffing balls, crispy stuffing, sausage stuffing, Thanksgiving stuffing, holiday side dish, make-ahead stuffing, party appetizer


