My youngest had claimed to hate corn for three years. Three years. The kid would pick every single kernel out of soup, push them to the side of the plate during taco night, and sigh dramatically if I so much as mentioned the word “cornbread.” Then last Thanksgiving, I made this casserole just for the grown-up table. I figured the adults deserved something a little special, you know? Something with a bit of heat and a lot of cheese. I set it down next to the turkey and walked away. Ten minutes later, I turned around and there he was, standing on tiptoe, shoving a second spoonful into his mouth like he hadn’t just spent three years waging war on the entire corn family. I didn’t say a word. I just smiled and went back to stirring the gravy. Honestly, catching him in the act was the best Thanksgiving gift I got that year.
The thing is, I didn’t set out to trick anyone. I wasn’t trying to prove a point or sneak vegetables into a dish. I just wanted a side that was creamy, a little sweet, a little savory, and sturdy enough to hold its own next to a big holiday spread. The jalapeño was for me—I like a little kick—and the cheddar was just because, well, cheese makes everything better. But something about the combination clicked. The sweetness of the corn balanced the heat of the pepper. The cheese melted into the custard and made everything feel rich without being heavy. And the texture? Soft, almost pudding-like, but with enough structure to hold a spoonful upright. It was comfort food, plain and simple. Maybe you’ve been there—a recipe you threw together for yourself that ended up being the dish everyone fought over.
That casserole has been on repeat ever since. I’ve made it for weeknight dinners when I needed something fast and filling. I’ve made it for potlucks where it disappeared before the main course hit the table. And yes, I’ve made it for that kid who supposedly hates corn. He asks for it now. By name. So if you’ve got a picky eater at your table, or if you’re just looking for a side dish that actually delivers on flavor without a million ingredients, this one’s for you. It’s simple, it’s forgiving, and it just might change a few minds.
Why You’ll Love This Recipe
I’ve tested this casserole more times than I can count. I’ve made it with fresh corn in the summer, frozen corn in the winter, and canned corn when I was in a pinch. I’ve swapped the jalapeño for bell pepper when feeding spice-averse guests, and I’ve doubled the cheddar just to see what would happen (spoiler: it was glorious). Every single version worked. That’s the beauty of this recipe—it’s sturdy. It’s forgiving. And it’s built for real life.
- Quick & Easy: From start to table in about 45 minutes. Most of that is hands-off oven time, so you can focus on the rest of the meal.
- Simple Ingredients: You probably already have most of these in your pantry. No trips to a specialty store required. I mean it.
- Perfect for Family Dinners: It’s sweet enough for the kids, savory enough for the adults, and the jalapeño adds just enough warmth to keep things interesting without scaring anyone off.
- Crowd-Pleaser: I’ve served this to toddlers, teenagers, in-laws, and neighbors. It gets empty-dish reactions every single time.
- Unbelievably Delicious: The texture is what gets people. It’s creamy but not runny, soft but not mushy, and the cheese pulls everything together into one irresistible bite.
What makes this different from every other corn casserole out there? It’s the balance. Most versions are either too sweet or too heavy. This one hits that sweet spot—pun intended—where the corn’s natural sweetness plays off the sharp cheddar and the faint heat from the jalapeño. It’s not just another side dish. It’s the one people ask for by name.
What Ingredients You Will Need
This recipe keeps things simple. You don’t need anything fancy, just a handful of good-quality ingredients that work together to create something truly special. Here’s what you’ll need:
For the Casserole Base
- Unsalted butter, melted: 4 tablespoons (½ stick). Adds richness and helps the top get that nice golden crust. I use Land O’Lakes because it’s reliable, but any unsalted butter works.
- Large eggs: 2, at room temperature. They help bind the casserole and give it structure. If you forget to set them out, just place them in a bowl of warm water for five minutes.
- Sour cream: 1 cup (8 ounces). Full-fat works best here for creaminess, but light sour cream is fine in a pinch. Do not use fat-free—it gets watery.
- Whole milk: ½ cup. You can substitute 2% if that’s what you have, but whole milk gives the best texture.
- Granulated sugar: 1 tablespoon. Just enough to enhance the corn’s natural sweetness without making it dessert-like.
- All-purpose flour: ¼ cup. This helps thicken the casserole so it sets properly. For a gluten-free version, use a 1:1 gluten-free flour blend.
- Yellow cornmeal: ¼ cup. Adds a subtle corn flavor and a tiny bit of texture. I prefer Bob’s Red Mill for its consistent grind.
- Baking powder: 1 teaspoon. Gives the casserole a little lift so it’s not too dense.
- Salt: 1 teaspoon. Use fine sea salt for even distribution.
- Black pepper: ½ teaspoon, freshly ground.
The Corn & Add-Ins
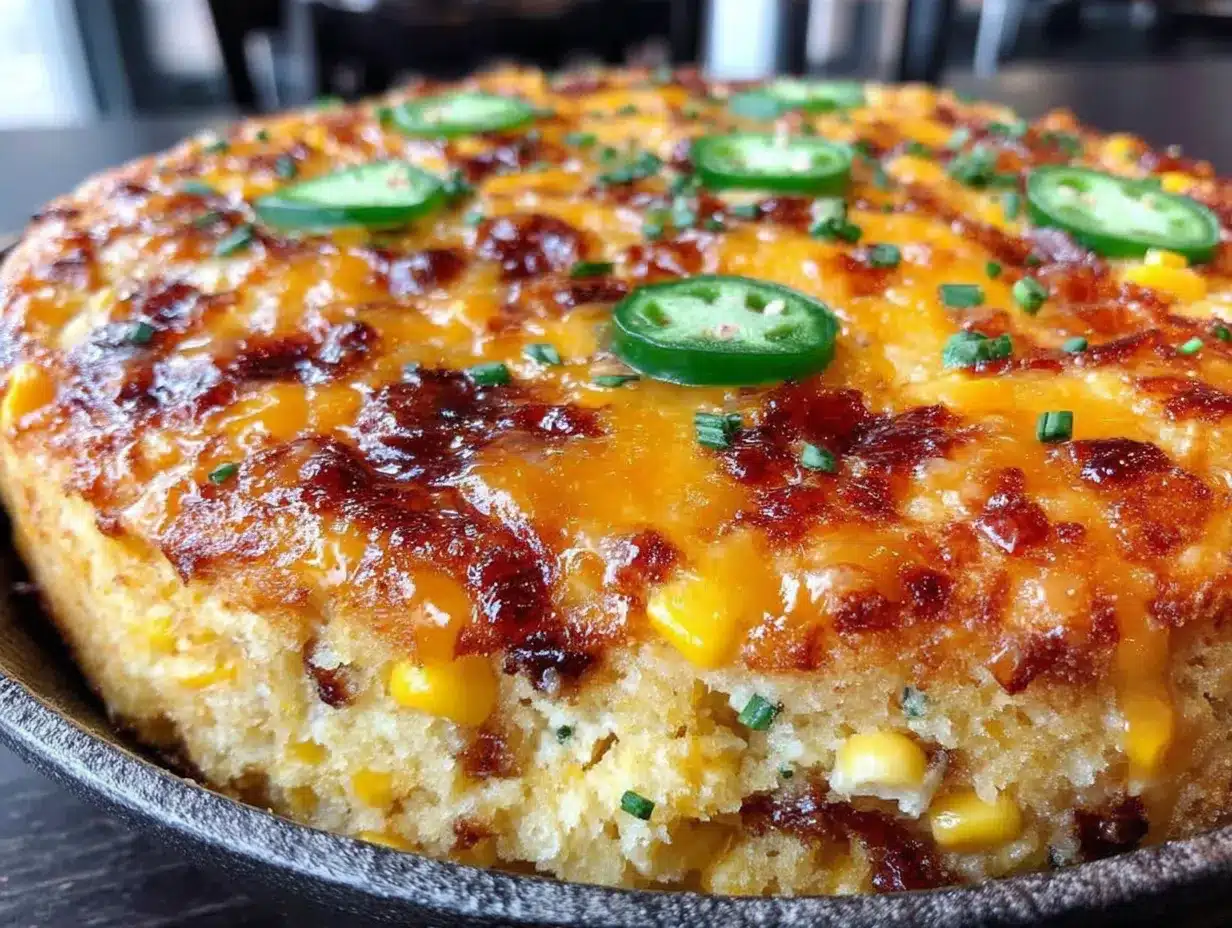
- Sweet corn kernels: 3 cups. Fresh corn cut from the cob is best in summer (about 4 ears). Frozen corn works beautifully year-round—just thaw and drain it well. Canned corn is okay in a pinch, but drain it thoroughly and expect a slightly softer texture. I’ve used all three, and honestly, frozen is my go-to for convenience and consistent results.
- Sharp cheddar cheese, shredded: 1½ cups (about 6 ounces). Please shred it yourself. Pre-shredded cheese has anti-caking agents that prevent it from melting smoothly. I use Cabot’s sharp cheddar—it melts like a dream and has that tangy flavor that cuts through the sweetness.
- Jalapeño, seeded and finely diced: 1 small (about 2 tablespoons). Remove the seeds and membranes if you want mild heat. Leave them in if you’re feeling brave. For kids, you can substitute a small diced bell pepper—green or red both work.
For Topping (Optional but Recommended)
- Extra shredded cheddar: ¼ cup, for sprinkling on top during the last five minutes of baking.
- Chopped fresh cilantro or chives: A small handful, for garnish. Adds a pop of color and freshness.
Equipment Needed
You don’t need a fancy kitchen to make this casserole. Here’s what I use:
- 8×8-inch baking dish: Glass or ceramic works best. I’ve had my Pyrex dish for years, and it’s never let me down. If you’re feeding a crowd, you can double the recipe and use a 9×13-inch dish—just add about 10 minutes to the baking time.
- Large mixing bowl: For whisking the wet ingredients. Any big bowl will do.
- Medium bowl: For mixing the dry ingredients separately. It’s an extra bowl to wash, but it ensures even distribution.
- Whisk: For smoothing out the eggs and sour cream. A fork works in a pinch, but a whisk is faster.
- Rubber spatula: For folding everything together gently. I love my OXO spatula—it’s sturdy and easy to clean.
- Chef’s knife and cutting board: For dicing the jalapeño. A sharp knife makes all the difference.
- Box grater: For shredding the cheese. A food processor with a shredding disc works too, but the box grater is easier to clean.
- Measuring cups and spoons: Standard set. Nothing fancy needed.
If you don’t have an 8×8 dish, you can use a 9-inch pie plate or a small cast-iron skillet. Just keep an eye on the cooking time—cast iron holds heat differently and may cook faster.
Preparation Method
- Preheat your oven to 350°F (175°C). Place the rack in the center position. While it’s heating, grease your 8×8 baking dish with a little butter or non-stick spray. I like to use butter because it adds flavor to the edges, but spray works just fine.
- In a large mixing bowl, whisk together the melted butter, eggs, sour cream, and milk. Whisk until the mixture is smooth and pale yellow, about 30 seconds. Don’t rush this—you want the eggs fully incorporated so the casserole bakes evenly. If you see little streaks of egg white, keep whisking.
- In a separate medium bowl, stir together the sugar, flour, cornmeal, baking powder, salt, and pepper. Use a fork or a small whisk to break up any lumps. The cornmeal can be a little clumpy, so take an extra 10 seconds to make sure it’s evenly distributed.
- Add the dry ingredients to the wet ingredients. Stir gently with a rubber spatula until just combined. A few small lumps are fine—overmixing will make the casserole tough. The batter should look like a thick pancake batter at this point.
- Fold in the corn kernels, 1½ cups of shredded cheddar, and the diced jalapeño. Use the spatula to fold gently, scraping the bottom and sides of the bowl. Make sure the corn and cheese are evenly distributed throughout the batter. The batter will look chunky and a little lumpy—that’s exactly what you want.
- Pour the batter into the prepared baking dish. Use the spatula to spread it into an even layer. Give the dish a gentle tap on the counter to release any air bubbles. The batter should fill the dish about three-quarters of the way full.
- Bake for 35 to 40 minutes. At the 30-minute mark, check the casserole. The edges should be set and golden brown, and the center should be slightly jiggly but not liquid. If you insert a knife into the center, it should come out mostly clean with a few moist crumbs attached.
- If using the optional cheese topping, sprinkle the remaining ¼ cup of cheddar over the top during the last 5 minutes of baking. This gives you a beautiful golden, bubbly crust. If you add it too early, the cheese can burn before the casserole is fully set.
- Remove from the oven and let it cool for 10 minutes. This step is important—it allows the casserole to finish setting up. If you cut into it right away, it will be too loose. The texture firms up beautifully as it rests.
- Garnish with chopped cilantro or chives if desired, and serve warm. The casserole is best served fresh from the oven, but it’s also delicious at room temperature.
Sensory Check: At the 35-minute mark, your kitchen should smell like toasted corn and melted cheese. The top should be golden brown with slightly darker edges. If you jiggle the dish gently, the center should wobble just a little—like a firm custard. That’s your cue that it’s ready.
Cooking Tips & Techniques
I’ve made this casserole at least two dozen times, and I’ve learned a few things the hard way. Here’s what I wish someone had told me:
Don’t skip the cornmeal. I tried making this without it once because I was out, and the texture was flat. The cornmeal adds a subtle graininess that keeps the casserole from being one-note creamy. It’s a small ingredient with a big job.
Shred your own cheese. I know, I know—it’s an extra step. But pre-shredded cheese is coated in cellulose and potato starch to prevent clumping, which means it doesn’t melt as smoothly. Homemade shredded cheese melts into the batter and creates that silky, gooey texture that makes this casserole so good. Trust me on this one.
Watch your jalapeño heat. Jalapeños vary wildly in spiciness. One pepper might be mild as a bell pepper, and the next might light your mouth on fire. Always taste a tiny piece before adding it to the batter. If it’s too hot, use half. If it’s too mild, add a pinch of cayenne pepper to the batter for a little kick.
Let it rest. I made the mistake of cutting into this casserole straight out of the oven the first time. It was a soupy mess. That 10-minute rest isn’t optional—it’s essential. The casserole continues to cook from residual heat, and the starches absorb excess moisture. You’ll get clean, beautiful slices every time.
Room temperature eggs matter. Cold eggs can cause the butter to seize up, creating lumps in your batter. If you forget to pull them out ahead of time, place them in a bowl of warm water for 5 minutes. Problem solved.
Variations & Adaptations
This recipe is a chameleon. Here are some ways I’ve adapted it over the years:
Mild & Kid-Friendly Version: Swap the jalapeño for a small diced green bell pepper. You’ll still get that slight vegetal flavor and a little crunch, but zero heat. My kids eat this version like it’s going out of style. I’ve also added ½ cup of frozen peas for extra color and sweetness—they loved it.
Spicy Southwestern Twist: Add ½ cup of drained canned black beans, ¼ cup of chopped cilantro mixed into the batter, and a pinch of cumin. Use pepper jack cheese instead of cheddar for an extra layer of heat. This version is fantastic alongside grilled chicken or fish.
Gluten-Free Adaptation: Substitute the all-purpose flour with a 1:1 gluten-free baking flour blend. I’ve used Bob’s Red Mill 1-to-1 Baking Flour with great results. Make sure your cornmeal is labeled gluten-free, as some brands are processed in facilities that handle wheat.
Make It a Meal: Add 1 cup of shredded cooked chicken or crumbled cooked bacon to the batter before baking. It turns this side dish into a hearty main course. Serve with a simple green salad, and dinner is done.
Dairy-Free Version: Use a high-quality vegan butter (I like Miyoko’s), a dairy-free sour cream (Tofutti works well), and a plant-based milk like oat or unsweetened almond. For the cheese, use a dairy-free cheddar shred that melts well—Violife is my go-to. The texture will be slightly different, but it’s still delicious.
Serving & Storage Suggestions
This casserole is incredibly versatile when it comes to serving. Here’s how I handle it:
Serving Temperature: Serve warm, straight from the oven. The cheese is at its stretchiest, and the custard is perfectly set. It’s also delicious at room temperature, which makes it ideal for potlucks and buffets. I’ve even eaten leftovers cold straight from the fridge—don’t judge me, it’s that good.
What to Serve With It: This casserole is a natural partner for roasted chicken, grilled pork chops, or a simple baked ham. It also works beautifully alongside a bowl of chili or a hearty soup. For a vegetarian meal, pair it with a black bean salad and some avocado slices. Honestly, it goes with almost anything.
Storage: Leftover casserole keeps well in the refrigerator for up to 4 days. Store it in an airtight container or cover the baking dish tightly with plastic wrap or foil. The flavors actually meld together overnight, so leftovers might taste even better the next day.
Reheating: The best way to reheat is in the oven at 350°F for 10 to 15 minutes, or until warmed through. The microwave works in a pinch—just heat in 30-second intervals to avoid drying it out. If the casserole seems dry after reheating, add a small pat of butter on top before warming.
Freezing: This casserole freezes surprisingly well. Bake it completely, let it cool, then wrap it tightly in plastic wrap and a layer of foil. Freeze for up to 3 months. To serve, thaw overnight in the refrigerator and reheat in a 350°F oven until warmed through. I’ve frozen individual portions for quick lunches—just wrap each piece in plastic wrap and foil, then reheat as needed.
Nutritional Information & Benefits
Here’s the approximate nutritional breakdown for one serving (based on 8 servings per recipe):
- Calories: 285
- Total Fat: 18g
- Saturated Fat: 10g
- Cholesterol: 95mg
- Sodium: 480mg
- Total Carbohydrates: 24g
- Dietary Fiber: 2g
- Sugars: 8g
- Protein: 10g
Health Benefits: Corn is a good source of fiber, which supports digestive health, and it provides B vitamins like thiamine and folate. Jalapeños contain capsaicin, which has anti-inflammatory properties and may boost metabolism. Cheddar cheese adds calcium for bone health and protein for satiety. This casserole isn’t health food, but it’s made with real ingredients you can feel good about serving to your family.
Dietary Considerations: This recipe contains dairy, eggs, and gluten. For gluten-free, dairy-free, or egg-free adaptations, see the Variations section above. It’s naturally nut-free and soy-free (unless using dairy-free substitutes).
Conclusion
This corn casserole has become a staple in my kitchen for good reason. It’s simple enough for a Tuesday night, special enough for Thanksgiving, and flexible enough to adapt to whatever you have on hand. The combination of sweet corn, sharp cheddar, and a hint of jalapeño hits that perfect balance between comfort and excitement. And the best part? It pleases everyone at the table—from the pickiest kid to the most discerning adult.
I love this recipe because it reminds me that you don’t need complicated techniques or fancy ingredients to make something memorable. Sometimes the best dishes come from throwing a few things together and trusting your instincts. That first Thanksgiving when my son got caught sneaking a bite? That moment reminded me why I love cooking in the first place. It’s not about perfection. It’s about creating something that brings people together.
Now I want to hear from you. Have you made this casserole? Did you add your own twist? Did a picky eater at your table surprise you? Drop a comment below and let me know how it turned out. Don’t forget to share this recipe with a friend who needs a crowd-pleasing side dish in their life. Happy cooking, friends!
Frequently Asked Questions
Can I use canned corn instead of fresh or frozen?
Yes, you can. Drain the canned corn very well and pat it dry with paper towels to remove excess moisture. The texture will be slightly softer than fresh or frozen, but it still works beautifully. I’d recommend using two 15-ounce cans, drained.
Can I make this casserole ahead of time?
Absolutely. You can assemble the casserole completely, cover it, and refrigerate it for up to 24 hours before baking. When you’re ready to bake, add about 5 to 10 minutes to the baking time since you’re starting from cold. I’ve done this for holiday dinners, and it’s a lifesaver.
How do I know when the casserole is fully baked?
The edges should be golden brown and pulling away slightly from the sides of the dish. The center should be set but still slightly jiggly—like a firm custard. A knife inserted into the center should come out mostly clean with a few moist crumbs. If it comes out wet, give it another 5 minutes.
Can I reduce the heat level for kids?
Definitely. Swap the jalapeño for a small diced green bell pepper. You’ll still get the texture and a mild vegetal flavor without any heat. You can also leave out the pepper entirely—the casserole is still delicious with just corn and cheese.
Can I double this recipe?
Yes! Double all the ingredients and bake in a 9×13-inch baking dish. The baking time will increase to about 45 to 50 minutes. Check for doneness using the same knife test. This is perfect for large gatherings or when you want leftovers for the week.
Pin This Recipe!
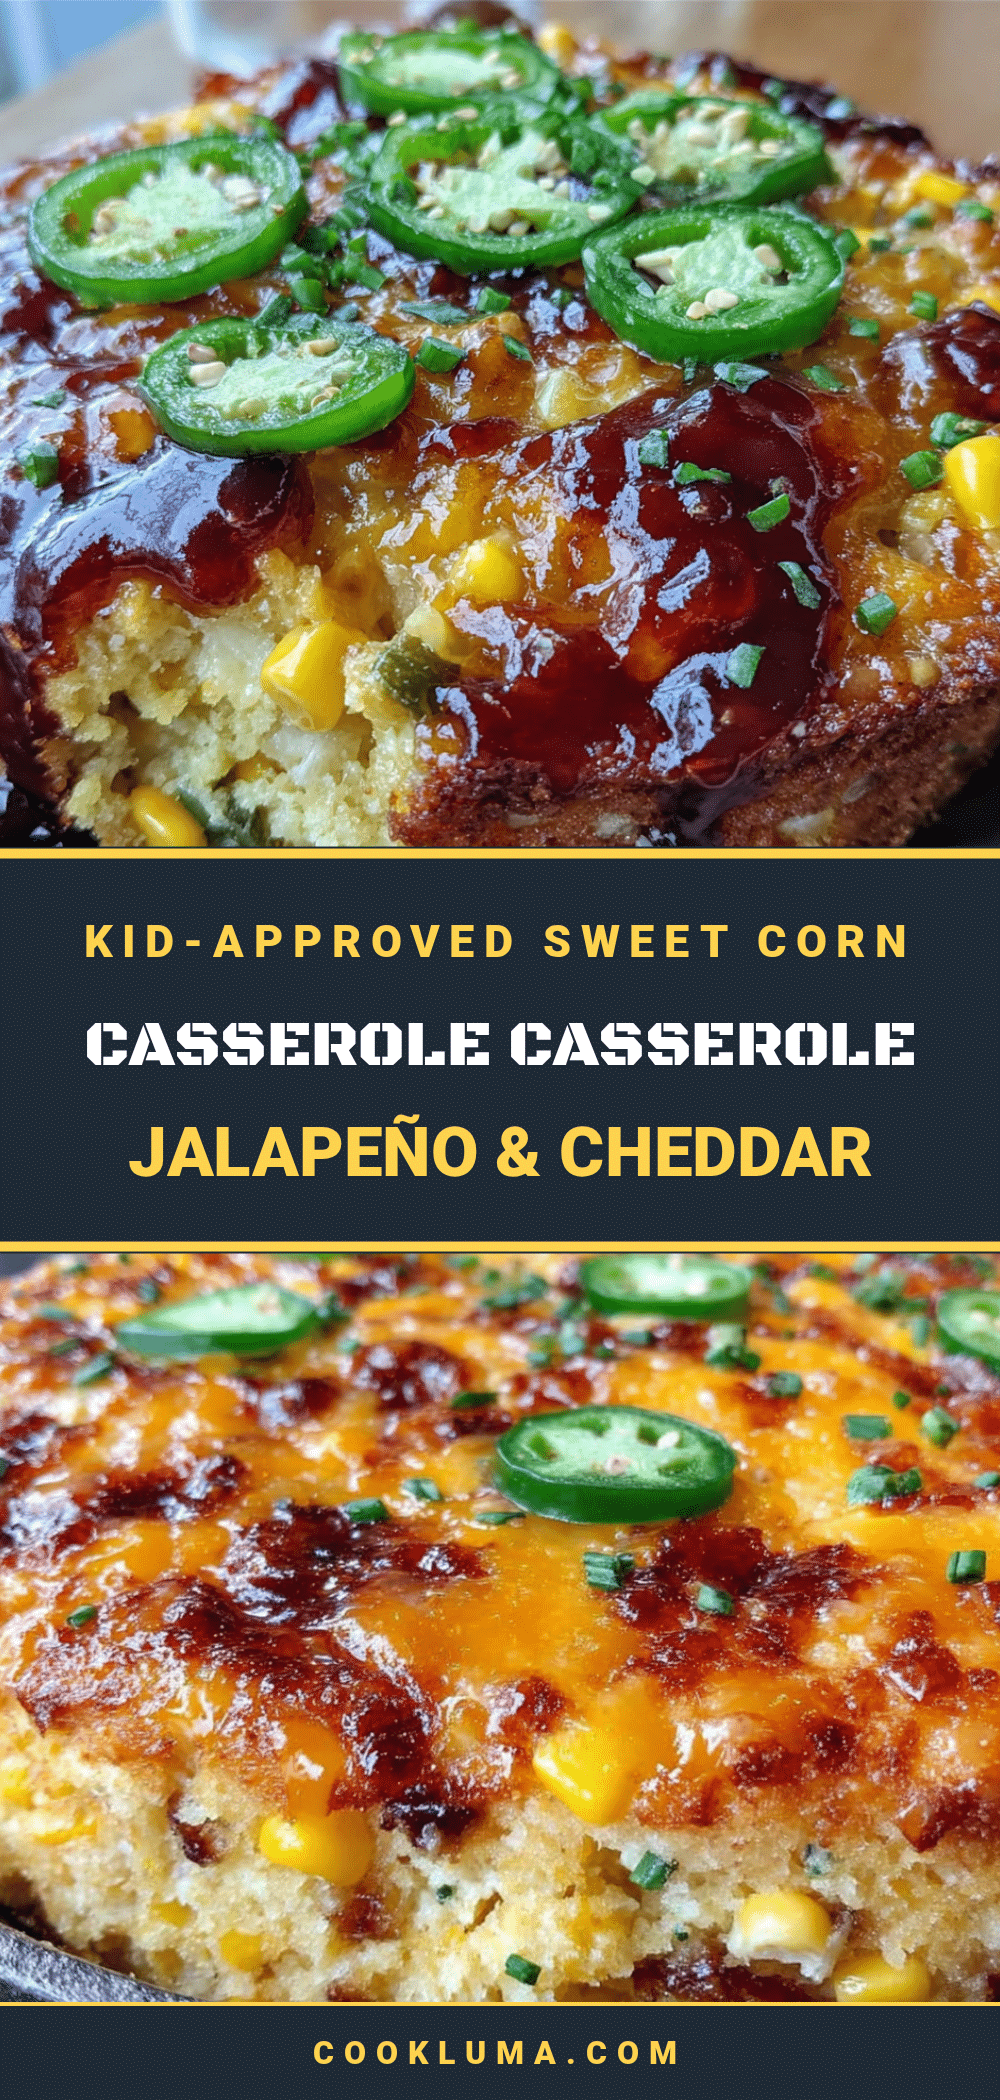
Easy Kid-Approved Corn Casserole with Jalapeño & Cheddar

A creamy, slightly sweet and savory corn casserole with sharp cheddar and a hint of jalapeño heat. This crowd-pleasing side dish is quick to make, uses simple ingredients, and has won over even the pickiest eaters.
- Prep Time: 15 minutes
- Cook Time: 35 minutes
- Total Time: 50 minutes
- Yield: 8 servings 1x
- Category: Side Dish
- Cuisine: American
Ingredients
- 4 tablespoons unsalted butter, melted
- 2 large eggs, at room temperature
- 1 cup sour cream (full-fat recommended)
- ½ cup whole milk
- 1 tablespoon granulated sugar
- ¼ cup all-purpose flour
- ¼ cup yellow cornmeal
- 1 teaspoon baking powder
- 1 teaspoon fine sea salt
- ½ teaspoon freshly ground black pepper
- 3 cups sweet corn kernels (fresh, frozen and thawed, or canned and drained)
- 1½ cups sharp cheddar cheese, shredded (about 6 ounces)
- 1 small jalapeño, seeded and finely diced (about 2 tablespoons)
- ¼ cup extra shredded cheddar (for topping, optional)
- Chopped fresh cilantro or chives (for garnish, optional)
Instructions
- Preheat oven to 350°F (175°C). Grease an 8×8-inch baking dish with butter or non-stick spray.
- In a large mixing bowl, whisk together melted butter, eggs, sour cream, and milk until smooth and pale yellow, about 30 seconds.
- In a separate medium bowl, stir together sugar, flour, cornmeal, baking powder, salt, and pepper until well combined and lumps are broken up.
- Add dry ingredients to wet ingredients. Stir gently with a rubber spatula until just combined (a few small lumps are fine).
- Fold in corn kernels, 1½ cups shredded cheddar, and diced jalapeño until evenly distributed.
- Pour batter into prepared baking dish and spread into an even layer. Tap dish gently on counter to release air bubbles.
- Bake for 35 to 40 minutes. At 30 minutes, check: edges should be golden and set, center slightly jiggly but not liquid. A knife inserted in center should come out mostly clean with a few moist crumbs.
- If using optional cheese topping, sprinkle remaining ¼ cup cheddar over top during last 5 minutes of baking.
- Remove from oven and let cool for 10 minutes to allow casserole to set.
- Garnish with chopped cilantro or chives if desired, and serve warm.
Notes
Don’t skip the cornmeal—it adds essential texture. Shred your own cheese for best melting. Let casserole rest 10 minutes before serving for clean slices. For a milder version, substitute jalapeño with diced green bell pepper. For gluten-free, use a 1:1 gluten-free flour blend and ensure cornmeal is labeled gluten-free. Casserole can be assembled up to 24 hours ahead and refrigerated before baking (add 5-10 minutes to bake time).
Nutrition
- Serving Size: 1 serving (1/8 of re
- Calories: 285
- Sugar: 8
- Sodium: 480
- Fat: 18
- Saturated Fat: 10
- Carbohydrates: 24
- Fiber: 2
- Protein: 10
Keywords: corn casserole, jalapeño cheddar corn casserole, easy corn casserole, kid-friendly corn casserole, Thanksgiving side dish, potluck side dish, creamy corn casserole


