I wasn’t expecting party planning advice from my accountant, but there I was, sorting through a stack of receipts at my kitchen table, listening to him describe exactly how to build the perfect snack board for a crowd. His name is Gary, and for the past fifteen years, he’s been the one who makes sure my tax deductions don’t get me into trouble. But that afternoon, between talking about quarterly estimates and write-offs, he mentioned how his wife puts together these incredible grazing boards for their annual Friendsgiving gathering. I grabbed a sticky note from the pile and started scribbling down his ideas before he could change the subject.
Honestly, I almost missed the good stuff. I was so focused on finding that one receipt I needed for my filing that I nearly tuned him out. But then he said “pumpkin spice” and “snack board” in the same sentence, and my ears perked right up. He told me about using pumpkin seeds as a crunchy topping and mixing warm fall spices into everything from the dips to the nuts. It sounded so simple, yet so completely right for a Friendsgiving celebration. I mean, who wants to spend their whole party stuck in the kitchen?
That conversation led me down a rabbit hole of testing and tasting. I spent three weekends tweaking ratios, swapping ingredients, and yes, making a pretty big mess of my kitchen. The first version was okay. The second was better. But by the third try, I had something that made even my pickiest friend go quiet for a minute — the highest compliment, if you ask me. You know that feeling when a recipe just clicks? This board is that feeling, spread out across a big wooden platter, ready for a crowd to dig into.
So here it is, the Best Pumpkin Spice Friendsgiving Snack Board for a Crowd. It’s the recipe that came from an unlikely source and turned into the centerpiece of my favorite fall gathering. I keep making it because it brings people together without any fuss, and honestly, that’s what Friendsgiving is really about.
Why You’ll Love This Recipe
This isn’t just another snack board thrown together at the last minute. It’s a thoughtfully crafted spread that actually works for a crowd without breaking your budget or your sanity. Here’s why this recipe stands out from the rest.
- Feeds a Crowd Without the Stress : This board serves 8 to 10 people easily, and everything can be prepped ahead of time. No last-minute cooking chaos when your guests are walking through the door.
- Budget-Friendly Ingredients : Every item on this board uses affordable, easy-to-find ingredients. No fancy cheese shops or specialty stores required. Your regular grocery trip covers it all.
- Pumpkin Spice Done Right : Instead of just dumping pumpkin pie spice on everything, this recipe layers those warm flavors through the dips, roasted chickpeas, and spiced nuts. It’s subtle enough for picky eaters but bold enough to feel like fall.
- Leftovers That Actually Reheat Well : Unlike a cheese board that turns sad the next day, the components of this snack board store beautifully. The roasted chickpeas stay crunchy, the dips get even better, and the nuts keep their spice.
- Picky Eater Approved : With so many options — sweet, savory, crunchy, creamy — even the fussiest eaters find something they love. My nephew, who swears he hates pumpkin, devoured the spiced nuts without realizing they had pumpkin pie spice in them.
This board is different because it balances flavor, texture, and visual appeal without requiring you to be a professional food stylist. The pumpkin spice elements tie everything together, but each component stands on its own. It’s the kind of spread that makes people hover around the table, grabbing just one more handful, long after they said they were full.
At its heart, this recipe is about making Friendsgiving feel special without the stress. It’s comfort food reimagined as a shareable experience — faster, simpler, but with the same soul-soothing satisfaction that fall gatherings should bring.
What Ingredients You Will Need
This recipe uses simple, wholesome ingredients to deliver big fall flavor without the fuss. Most of these are pantry staples or easy seasonal finds, making this board perfect for a last-minute gathering.
For the Pumpkin Spice Roasted Chickpeas
- 2 cans (15 ounces each) chickpeas, drained and rinsed
- 2 tablespoons olive oil
- 1 tablespoon pumpkin pie spice
- 1 teaspoon smoked paprika (adds a subtle warmth)
- 1/2 teaspoon salt
- 1/4 teaspoon black pepper
For the Pumpkin Spice Candied Nuts
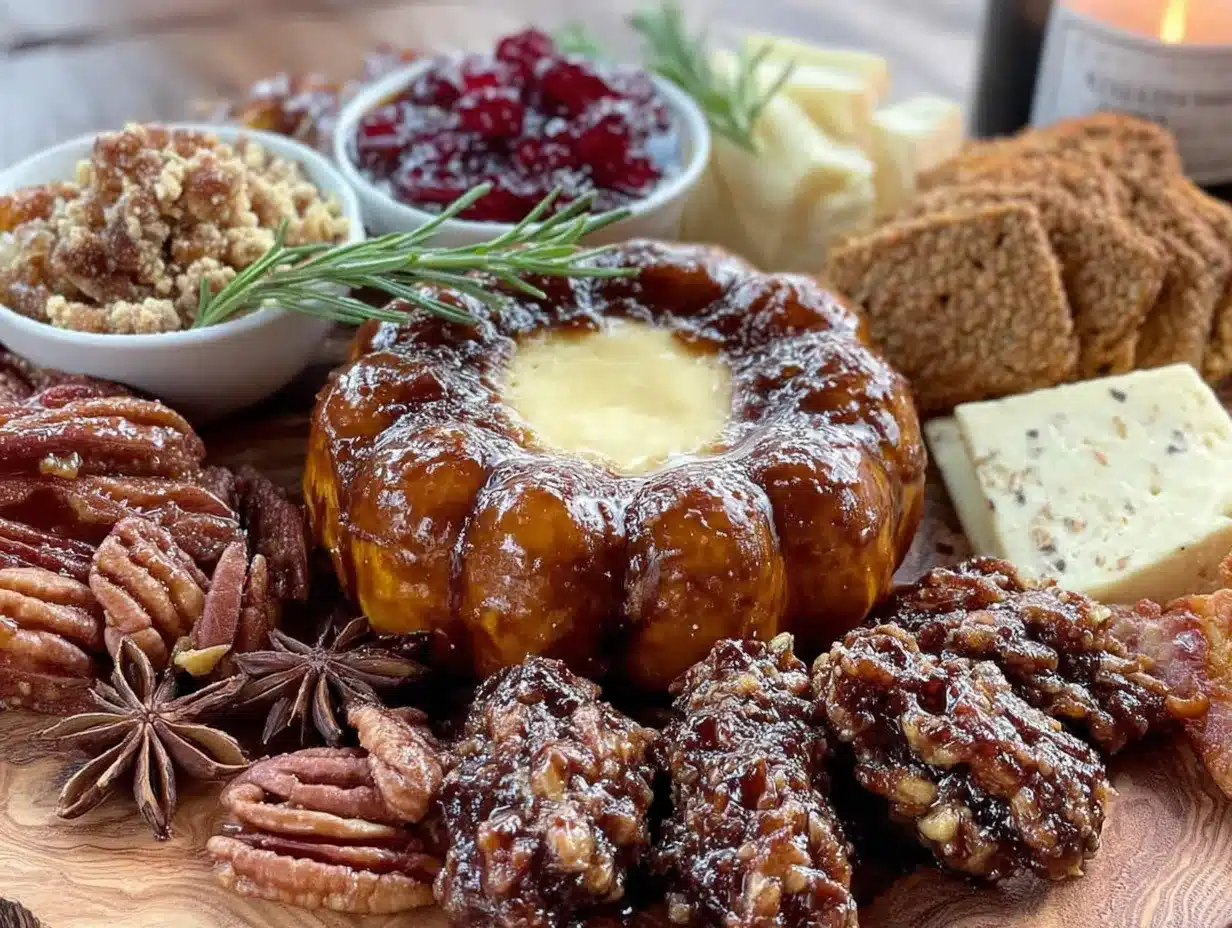
- 2 cups mixed nuts (pecans, almonds, and walnuts work great)
- 1/4 cup maple syrup
- 1 tablespoon pumpkin pie spice
- 1/2 teaspoon cinnamon
- 1/4 teaspoon salt
- 1 tablespoon butter (use coconut oil for dairy-free)
For the Pumpkin Spice Yogurt Dip
- 1 cup plain Greek yogurt (full-fat works best for creaminess)
- 1/4 cup pumpkin puree (not pumpkin pie filling)
- 2 tablespoons maple syrup
- 1 teaspoon pumpkin pie spice
- 1/2 teaspoon vanilla extract
- Pinch of salt
For the Board Assembly
- 8 ounces sharp cheddar cheese, sliced
- 4 ounces goat cheese, softened
- 1 cup dried cranberries
- 1 cup apple slices (toss with lemon juice to prevent browning)
- 1 cup pear slices
- 1 cup seedless grapes
- 1 small baguette, sliced and toasted
- 1 cup pumpkin seeds (pepitas)
- Fresh rosemary sprigs for garnish (optional)
I recommend using Libby’s pumpkin puree for the dip — it’s consistently thick and not watery, which makes a big difference in texture. For the nuts, look for raw unsalted varieties so you can control the seasoning. If you can find fresh pumpkin pie spice from a spice shop, it’s worth the upgrade, but the grocery store blend works perfectly fine.
For substitutions, you can swap the Greek yogurt with a dairy-free coconut yogurt if needed. The chickpeas can be replaced with roasted edamame for a different texture. And if someone in your group doesn’t do nuts, just double up on the roasted chickpeas and add extra cheese.
Equipment Needed
You don’t need fancy equipment to build this board, but a few key tools make the process smoother. Here’s what you’ll need.
- Large baking sheet (for roasting chickpeas and nuts)
- Parchment paper (saves on cleanup big time)
- Large wooden board or serving platter (at least 18 inches long)
- Small mixing bowls (3 to 4 for the dips and components)
- Sharp knife and cutting board
- Measuring spoons
- Small saucepan (for the candied nuts)
- Spatula
If you don’t have a large wooden board, a clean cutting board or even a rimmed baking sheet works perfectly. I’ve used a large ceramic platter before, and it looked just as nice. For the roasting, any rimmed baking sheet will do — just make sure it’s not overcrowded so everything gets crispy.
My favorite trick is using a sheet pan with a wire rack for the chickpeas. It helps air circulate and makes them extra crunchy. But if you don’t have one, no worries — just flip them halfway through roasting and they’ll turn out great.
Preparation Method
Let’s break this down into manageable steps. You can prep most components a day ahead, which makes party day a breeze.
- Preheat your oven to 400°F (200°C). Line a large baking sheet with parchment paper. This makes cleanup so much easier, trust me.
- Make the roasted chickpeas. Pat the rinsed chickpeas dry with a clean kitchen towel. You want them really dry — any moisture left will keep them from getting crispy. Toss them in a bowl with the olive oil, pumpkin pie spice, smoked paprika, salt, and pepper. Spread them in a single layer on the prepared baking sheet. Roast for 25 to 30 minutes, shaking the pan halfway through. They should be golden brown and crunchy on the outside. Let them cool completely on the sheet pan — they’ll crisp up more as they cool.
- While the chickpeas roast, make the candied nuts. In a small saucepan over medium heat, melt the butter. Add the maple syrup, pumpkin pie spice, cinnamon, and salt. Stir until combined. Add the mixed nuts and toss to coat evenly. Spread the nuts on a separate parchment-lined baking sheet. Bake at 350°F (175°C) for 10 to 12 minutes, stirring once halfway through. Watch them closely — nuts can go from perfect to burnt in seconds. Let them cool completely before breaking apart any clusters.
- Prepare the yogurt dip. In a small bowl, whisk together the Greek yogurt, pumpkin puree, maple syrup, pumpkin pie spice, vanilla extract, and a pinch of salt. Taste and adjust sweetness or spice to your liking. Cover and refrigerate until ready to serve. This dip gets better after a few hours in the fridge as the flavors meld together.
- Toast the baguette slices. Arrange the baguette slices on a baking sheet. Brush lightly with olive oil. Toast at 350°F (175°C) for 8 to 10 minutes until golden and crisp. Let them cool completely.
- Prep the fruits and cheese. Slice the apple and pear, and toss them with a little lemon juice to keep them from browning. Slice the cheddar into thin pieces. Let the goat cheese sit at room temperature for about 15 minutes so it softens and spreads easily.
- Assemble the board. Start by placing the bowls of yogurt dip and goat cheese on the board — these act as anchors. Arrange the sliced cheddar in small piles or fans around the board. Add the roasted chickpeas and candied nuts in small clusters. Fill in the gaps with the dried cranberries, pumpkin seeds, and grapes. Tuck the apple and pear slices into the spaces. Add the toasted baguette slices around the edges. Garnish with fresh rosemary sprigs for a pop of green.
A note on timing: The chickpeas and nuts can be made up to three days ahead and stored in airtight containers. The dip keeps for four days in the fridge. I usually prep everything the night before and just assemble the board about 30 minutes before guests arrive. The board should look abundant and colorful — don’t worry about being too perfect. The beauty is in the abundance.
Cooking Tips & Techniques
After testing this board multiple times, I’ve learned a few tricks that make a real difference. Here are the ones worth knowing.
Get the chickpeas really dry. This is the number one mistake people make. Wet chickpeas steam instead of roast, and you end up with sad, soft nuggets instead of crunchy bites. I use a clean dish towel and really pat them dry, letting them sit for a few minutes to air dry even more.
Don’t skip the cooling step. Both the chickpeas and nuts need to cool completely before you store them or add them to the board. They continue to crisp up as they cool. If you pack them away while they’re still warm, the steam will make them soft. I learned this the hard way after a batch of perfectly crispy nuts turned chewy overnight.
Taste as you go. Pumpkin pie spice blends vary in intensity. Some are heavy on the cinnamon, others have more nutmeg. Taste your dip before serving and adjust accordingly. If it needs more warmth, add a pinch of cinnamon. If it’s too sweet, a squeeze of lemon juice balances it out.
Layer your board strategically. Put the dips and soft cheeses in bowls first — they create structure. Then add the larger items like cheese slices and fruit. Fill in the tiny gaps with the small items like pumpkin seeds and dried cranberries. This creates a full, abundant look without needing a ton of food.
Keep the board at room temperature. Take the cheese out of the fridge about 30 minutes before serving. Cold cheese doesn’t have as much flavor. Same goes for the dip — let it sit out for 15 minutes so the spices really shine.
One mistake I made early on was trying to cram everything onto a board that was too small. It looked messy and guests had trouble grabbing things. Give each component a little breathing room. If you have too much food, use a second board or plate nearby.
Variations & Adaptations
This board is endlessly adaptable. Here are some variations I’ve tried and loved.
Dairy-Free Version : Swap the Greek yogurt with a thick coconut yogurt for the dip. Use a vegan cream cheese instead of goat cheese. The candied nuts can be made with coconut oil instead of butter. Everything else is naturally dairy-free.
Gluten-Free Option : Replace the baguette with gluten-free crackers or sliced cucumber rounds. The chickpeas and nuts are already gluten-free, so this is an easy swap.
Savory Twist : Add some roasted Brussels sprouts tossed in balsamic vinegar and pumpkin pie spice. They sound weird but trust me, they’re amazing. Also add some prosciutto or salami rolls for the meat lovers in your group.
Sweet Version : Swap the sharp cheddar for brie and add dark chocolate chunks or squares. Drizzle a little honey over the goat cheese. Add some dried figs instead of cranberries. It’s a dessert board disguised as a snack board.
Seasonal Adaptation : In the summer, swap the pumpkin puree in the dip for roasted peach puree. Use fresh berries instead of apples and pears. The pumpkin pie spice can be reduced or swapped for a lighter blend of cinnamon and ginger.
My personal favorite variation is adding a small bowl of warm caramel sauce for dipping the apple slices. It’s extra, I know, but Friendsgiving is about indulgence. I tried it one year and now it’s non-negotiable in my house.
Serving & Storage Suggestions
This board is best served at room temperature, so pull everything out of the fridge about 30 minutes before your guests arrive. Arrange the board on a large wooden platter or a clean cutting board for that rustic look. I like to place it in the center of the table so people can graze from all sides.
The board pairs beautifully with a warm apple cider or a crisp hard cider for the adults. If you’re serving it as a pre-dinner snack, it goes well with a light fall salad or a bowl of butternut squash soup to follow.
Storage Instructions : Store each component separately in airtight containers. The roasted chickpeas stay crunchy for up to 3 days at room temperature. The candied nuts keep for up to a week. The yogurt dip lasts 4 days in the fridge. Fruits and cheese should be stored separately and consumed within 2 days.
Reheating Tips : If the chickpeas lose their crunch, pop them back in a 350°F oven for 5 minutes. The nuts can be refreshed the same way. The dip is best served cold, so no reheating needed there.
One thing I love about this board is how the flavors develop. The dip actually tastes better the next day. The spices meld together and the pumpkin flavor becomes more pronounced. So if you’re making this ahead, the dip is the one component that benefits from sitting overnight.
Nutritional Information & Benefits
This board is packed with nutrients that make it more than just a pretty spread. Here’s a rough estimate per serving (based on 10 servings).
- Calories: approximately 380
- Protein: 14 grams
- Fat: 22 grams
- Carbohydrates: 35 grams
- Fiber: 6 grams
- Sugar: 18 grams
The chickpeas provide plant-based protein and fiber, which help keep everyone satisfied. The nuts offer healthy fats and vitamin E, great for heart health. Pumpkin puree is loaded with vitamin A and antioxidants. Greek yogurt adds probiotics and calcium. Even the pumpkin pie spice has benefits — cinnamon can help regulate blood sugar, and ginger aids digestion.
For dietary considerations, this board can be made gluten-free and dairy-free with simple swaps. It’s naturally vegetarian. The main allergens are dairy (cheese, yogurt) and nuts. If you have guests with allergies, just set aside a separate small board with safe options.
I love that this board lets people indulge without going overboard. The combination of protein, fiber, and healthy fats means a little goes a long way. Guests feel satisfied, not stuffed, which is perfect when there’s a full Friendsgiving dinner ahead.
Conclusion
This Best Pumpkin Spice Friendsgiving Snack Board for a Crowd is the recipe I keep coming back to year after year. It started with an unlikely conversation with my accountant, and now it’s the star of every fall gathering I host. The combination of crunchy chickpeas, spiced nuts, creamy dip, and fresh fruit creates a board that’s as beautiful as it is delicious.
What I love most is how forgiving this recipe is. You can swap ingredients, adjust the spices, or change up the fruits based on what’s in season. It’s designed to work with what you have, not what some fancy recipe tells you to buy. That’s real cooking, if you ask me.
I’d love to hear how your board turns out. Did you add something unexpected? Did your guests go crazy for the chickpeas? Drop a comment below and let me know. And if you’re looking for more fall entertaining ideas, check out our pumpkin spice dessert recipes for the perfect sweet finish to your Friendsgiving meal.
Now go build that board, call your friends, and enjoy the kind of gathering that reminds you why Friendsgiving is the best holiday tradition. Happy snacking!
Frequently Asked Questions
Can I make this snack board ahead of time?
Absolutely! Most components can be made 1 to 3 days ahead. Store the chickpeas and nuts in separate airtight containers at room temperature. The dip keeps in the fridge for up to 4 days. Assemble the board about 30 minutes before serving for the best presentation.
How do I keep the apple slices from turning brown?
Toss the sliced apples and pears in a little lemon juice or lime juice right after cutting. This stops oxidation and keeps them looking fresh for hours. You can also use a commercial fruit freshener if you prefer.
Can I use canned pumpkin pie filling instead of pumpkin puree?
I wouldn’t recommend it. Pumpkin pie filling has added sugar and spices that will throw off the balance of the dip. Stick with plain pumpkin puree and add your own spices — you’ll have much more control over the flavor.
How many people does this board serve?
This board comfortably serves 8 to 10 people as a pre-dinner snack or light appetizer. If it’s the main event, plan for 6 to 8 people. You can easily double the components for a larger crowd using two boards or a bigger platter.
What if I don’t have pumpkin pie spice?
No problem! Make your own blend by mixing 2 teaspoons cinnamon, 1 teaspoon ground ginger, 1/2 teaspoon nutmeg, 1/2 teaspoon allspice, and 1/4 teaspoon cloves. Store any extra in a small jar for future fall recipes.
Pin This Recipe!
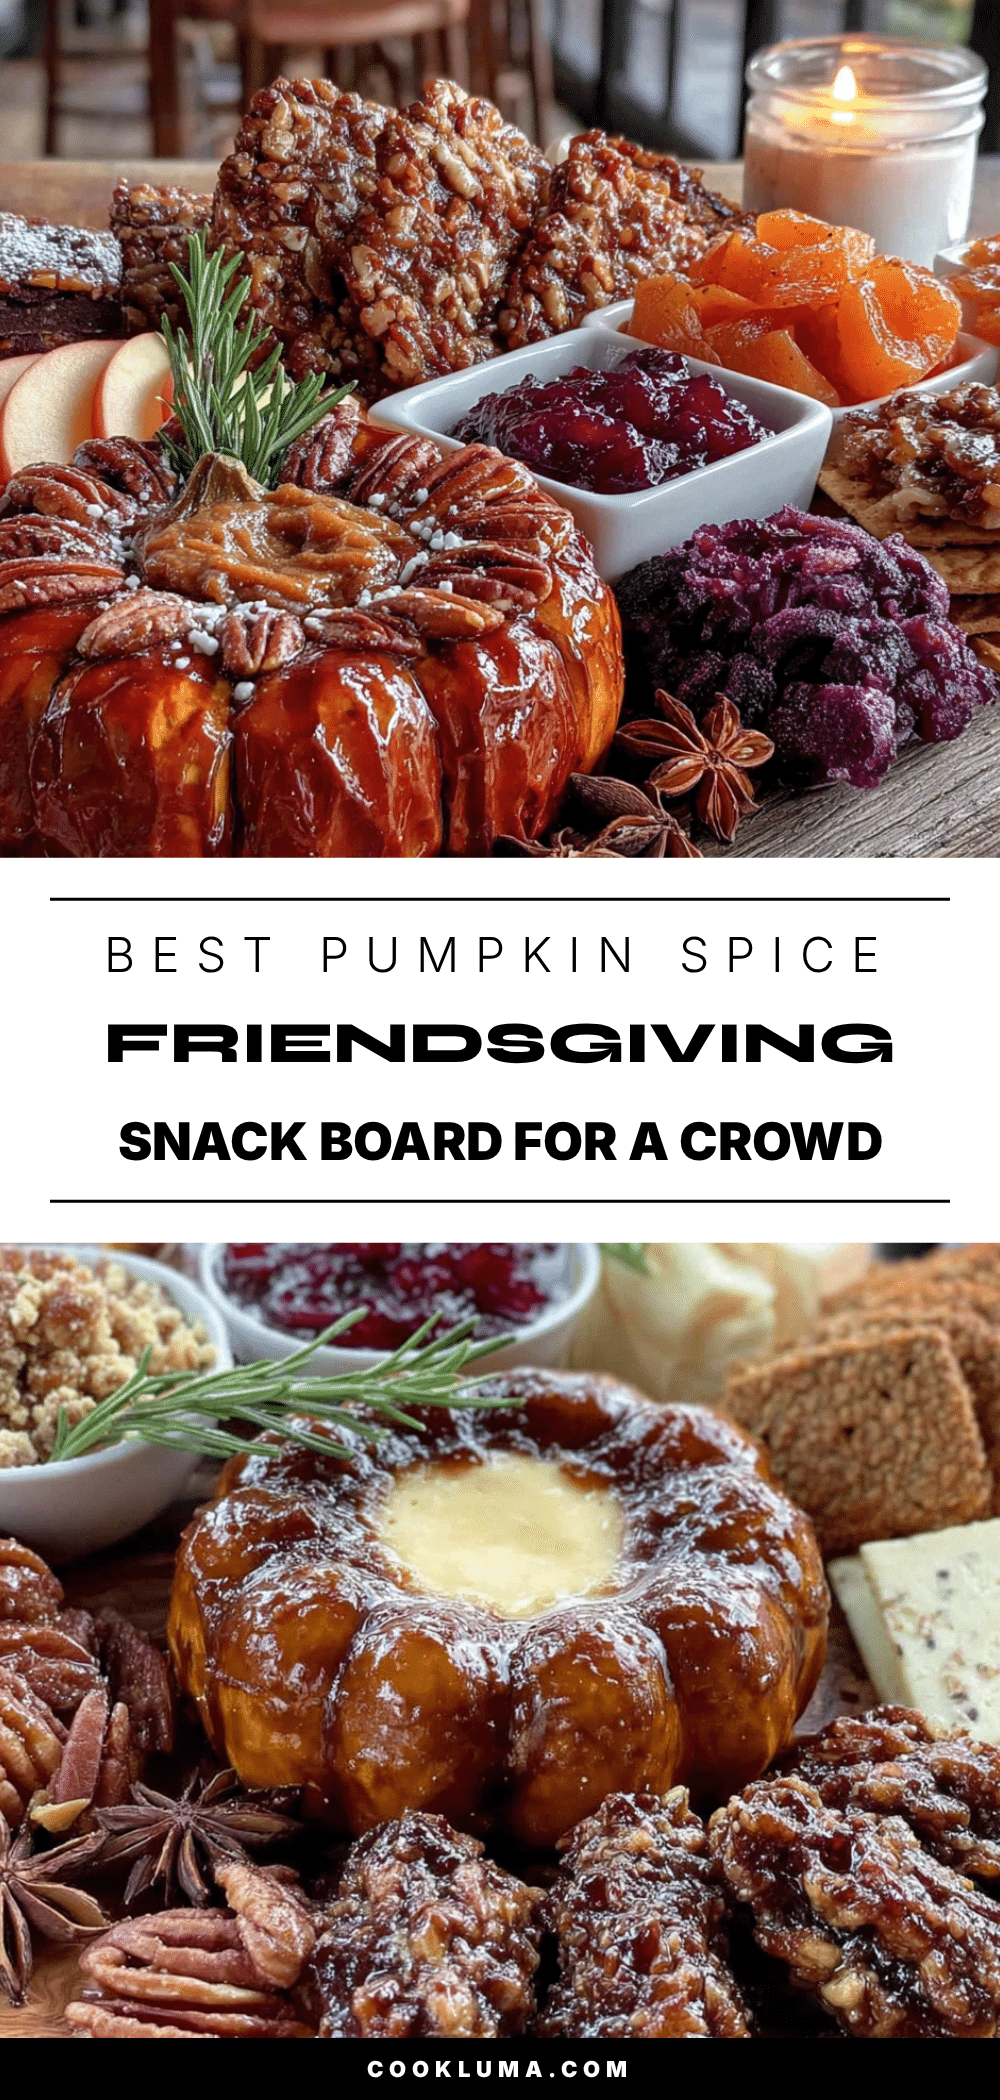
Best Pumpkin Spice Friendsgiving Snack Board for a Crowd
A thoughtfully crafted snack board featuring pumpkin spice roasted chickpeas, candied nuts, and a creamy yogurt dip, perfect for feeding a crowd at Friendsgiving without the stress.
- Prep Time: 30 minutes
- Cook Time: 40 minutes
- Total Time: 1 hour 10 minutes
- Yield: 8 to 10 servings 1x
- Category: Appetizer
- Cuisine: American
Ingredients
- 2 cans (15 ounces each) chickpeas, drained and rinsed
- 2 tablespoons olive oil
- 1 tablespoon pumpkin pie spice
- 1 teaspoon smoked paprika
- 1/2 teaspoon salt
- 1/4 teaspoon black pepper
- 2 cups mixed nuts (pecans, almonds, and walnuts work great)
- 1/4 cup maple syrup
- 1 tablespoon pumpkin pie spice
- 1/2 teaspoon cinnamon
- 1/4 teaspoon salt
- 1 tablespoon butter (use coconut oil for dairy-free)
- 1 cup plain Greek yogurt (full-fat works best for creaminess)
- 1/4 cup pumpkin puree (not pumpkin pie filling)
- 2 tablespoons maple syrup
- 1 teaspoon pumpkin pie spice
- 1/2 teaspoon vanilla extract
- Pinch of salt
- 8 ounces sharp cheddar cheese, sliced
- 4 ounces goat cheese, softened
- 1 cup dried cranberries
- 1 cup apple slices (toss with lemon juice to prevent browning)
- 1 cup pear slices
- 1 cup seedless grapes
- 1 small baguette, sliced and toasted
- 1 cup pumpkin seeds (pepitas)
- Fresh rosemary sprigs for garnish (optional)
Instructions
- Preheat your oven to 400°F (200°C). Line a large baking sheet with parchment paper.
- Make the roasted chickpeas: Pat the rinsed chickpeas dry with a clean kitchen towel. Toss them in a bowl with the olive oil, pumpkin pie spice, smoked paprika, salt, and pepper. Spread them in a single layer on the prepared baking sheet. Roast for 25 to 30 minutes, shaking the pan halfway through. Let them cool completely on the sheet pan.
- While the chickpeas roast, make the candied nuts: In a small saucepan over medium heat, melt the butter. Add the maple syrup, pumpkin pie spice, cinnamon, and salt. Stir until combined. Add the mixed nuts and toss to coat evenly. Spread the nuts on a separate parchment-lined baking sheet. Bake at 350°F (175°C) for 10 to 12 minutes, stirring once halfway through. Let them cool completely before breaking apart any clusters.
- Prepare the yogurt dip: In a small bowl, whisk together the Greek yogurt, pumpkin puree, maple syrup, pumpkin pie spice, vanilla extract, and a pinch of salt. Taste and adjust sweetness or spice to your liking. Cover and refrigerate until ready to serve.
- Toast the baguette slices: Arrange the baguette slices on a baking sheet. Brush lightly with olive oil. Toast at 350°F (175°C) for 8 to 10 minutes until golden and crisp. Let them cool completely.
- Prep the fruits and cheese: Slice the apple and pear, and toss them with a little lemon juice to keep them from browning. Slice the cheddar into thin pieces. Let the goat cheese sit at room temperature for about 15 minutes so it softens.
- Assemble the board: Start by placing the bowls of yogurt dip and goat cheese on the board. Arrange the sliced cheddar in small piles or fans around the board. Add the roasted chickpeas and candied nuts in small clusters. Fill in the gaps with the dried cranberries, pumpkin seeds, and grapes. Tuck the apple and pear slices into the spaces. Add the toasted baguette slices around the edges. Garnish with fresh rosemary sprigs for a pop of green.
Notes
The chickpeas and nuts can be made up to three days ahead and stored in airtight containers. The dip keeps for four days in the fridge. Assemble the board about 30 minutes before guests arrive. For dairy-free, use coconut yogurt and coconut oil instead of butter. For gluten-free, replace baguette with gluten-free crackers or cucumber rounds.
Nutrition
- Serving Size: 1 serving (based on
- Calories: 380
- Sugar: 18
- Sodium: 450
- Fat: 22
- Saturated Fat: 8
- Carbohydrates: 35
- Fiber: 6
- Protein: 14
Keywords: pumpkin spice, Friendsgiving, snack board, appetizer, fall, grazing board, party food


