It was 11:47 PM on a random Tuesday in October, and I had the weirdest craving for something salty, dippable, and just a little bit creepy. I didn’t have the energy for elaborate Halloween baking or those fancy themed charcuterie boards you see all over social media, but I had a bag of frozen pretzels, some cream cheese that needed using up, and a sudden, slightly unhinged vision of turning everything into witch fingers. Honestly, I was tired. The kind of tired where you start giggling at your own ridiculous ideas in an empty kitchen. I mean, who makes a snack board at midnight on a Tuesday? Apparently, I do. Let me tell you, that late-night impulse turned into something I now make every single Halloween, and it’s honestly become my secret weapon for parties.
I grabbed a block of cream cheese, dumped it in a bowl, and started throwing things at it – ranch seasoning, a little hot sauce, some shredded cheddar. I had no plan. I was just chasing a flavor I could taste in my head. The pretzel sticks became the “fingers,” and I realized I had some sliced almonds in the pantry that would make perfect creepy fingernails. It was messy, it was impulsive, and honestly, it was the most fun I’d had in the kitchen all week. There’s something about cooking when no one’s watching, you know? You take risks. You don’t worry about the mess. You just create. And this board? It was born from that exact energy.
That first bite, standing over the counter at midnight, was a revelation. The cold, creamy dip against the salty crunch of the pretzel, with that little almond “nail” adding a weirdly satisfying texture. I knew right then I had stumbled onto something special. It wasn’t just a snack; it was a whole vibe. It’s the kind of thing that makes people stop, laugh, and then go back for thirds. And that’s why I keep making it – because it turns a simple gathering into something memorable without making you stress in the kitchen. Maybe you’ve been there, staring into your fridge at 11 PM with no plan but a whole lot of potential. This is what happens when you lean into that.
Why You’ll Love This Recipe
I’ve tested this board at three different Halloween parties now, and let me tell you, it never fails to get that delighted gasp from guests. It’s the perfect balance of spooky and snackable. Here is why this recipe will become your go-to for any gathering:
- Quick & Easy : This whole board comes together in under 15 minutes. Seriously. No baking, no complicated steps. Just assembly and a little creativity.
- Simple Ingredients : You likely already have most of these items in your fridge and pantry. No special trips to a gourmet store required.
- Perfect for Halloween Parties : It’s the ultimate conversation starter. Guests will laugh, take pictures, and then devour every last pretzel stick.
- Crowd-Pleaser : It appeals to both kids and adults. The dip is creamy and flavorful, and everyone loves a good pretzel.
- Unbelievably Delicious : The combination of the cold, herby cream cheese dip with the salty, crunchy pretzel “fingers” is addictively good. It’s comfort food with a creepy twist.
What makes this different from every other Halloween snack board out there is the attention to detail. It’s not just pretzels and dip. It’s the almond fingernails, the little “knuckle” scores on the pretzels, and the way the dip itself is seasoned to perfection. I spent three versions getting the ranch-to-hot-sauce ratio just right, and I’m telling you, this is the one. It’s savory, it’s slightly tangy, and it has just a tiny kick that keeps you coming back for more.
This isn’t just a snack board. It’s the kind of food that makes people close their eyes after the first bite and then immediately ask for the recipe. It’s Halloween fun reimagined – less sugar, more savory satisfaction. Perfect for impressing guests without spending hours in the kitchen, or turning a simple movie night into something delightfully spooky.
What Ingredients You Will Need
This recipe uses simple, mostly pantry-staple ingredients to deliver big flavor and that perfect creepy aesthetic. The magic is in the assembly and the dip, not in hard-to-find items.
- For the Witches’ Fingers (Pretzels):
- 1 (16-ounce) bag of large, thick pretzel sticks (I prefer the Snyder’s of Hanover brand for their sturdy texture – they don’t break easily when you add the almond “nails”)
- 1/2 cup sliced almonds (look for the “natural” or raw ones, not roasted, as they have a paler, more nail-like color)
- 1 tablespoon cream cheese, softened (this acts as the “glue” for the almond nails)
- For the Creamy Ranch Dip:
- 1 (8-ounce) block full-fat cream cheese, softened to room temperature (this is crucial for a smooth, dippable texture)
- 1/2 cup sour cream (adds tang and lightens the dip)
- 1 packet (1 ounce) dry ranch dressing mix (I use Hidden Valley – it’s the classic for a reason)
- 1/2 cup finely shredded sharp cheddar cheese (adds color and savory depth)
- 1-2 tablespoons milk, as needed (to adjust consistency)
- 1/4 teaspoon garlic powder (a little extra punch)
- 1/4 teaspoon smoked paprika (for a subtle warmth and a little color)
- Optional: A few dashes of hot sauce (like Frank’s RedHot) for a tiny kick
- For the Board & Garnishes (to create the “hand” shape):
- 1 small round or oval wooden serving board (about 12-14 inches wide)
- Fresh parsley or dill, chopped (for a little green “grass” or “moss” effect around the base)
- Optional: A few whole black olives or cherry tomatoes to fill in gaps (adds a pop of color)
- Optional: A small bowl for the dip (a ramekin works perfectly)
Ingredient Selection Tips: For the best texture, make sure your cream cheese is truly softened. If you’re in a rush, cut it into small cubes and let it sit on the counter for 15 minutes. Do not microwave it – it can get grainy. For the pretzels, the thicker sticks are non-negotiable. The thin, crunchy ones will snap when you try to attach the almond. If you can’t find thick pretzel sticks, you can use soft pretzel rods, but you’ll need to toast them in the oven at 350°F for about 5 minutes to dry them out slightly so the cream cheese glue sticks.
Substitution Guidance: For a gluten-free version, use gluten-free pretzel sticks (many brands make them, though they are a bit more fragile). For the dip, you can substitute the sour cream with plain Greek yogurt for a tangier, slightly healthier option. If you want a dairy-free dip, use a vegan cream cheese and vegan sour cream – just be aware the flavor profile will be slightly different. The ranch seasoning mix is the key flavor driver here.
Equipment Needed
You don’t need any fancy gadgets for this board. A few basic kitchen tools and you’re good to go. Here is what you will need:
- A Mixing Bowl: A medium-sized bowl for combining the dip ingredients. I use a glass bowl – it’s easy to see when everything is fully incorporated.
- A Hand Mixer or a Sturdy Fork: For softening and blending the cream cheese with the other dip ingredients. A hand mixer makes it effortless, but a good fork and some elbow grease works just fine. I’ve done it both ways.
- A Small Spatula or Butter Knife: For spreading the cream cheese “glue” onto the pretzels and for scraping the dip into the serving bowl.
- A Small Ramekin or Serving Bowl: To hold the dip in the center of your board. A 4-ounce ramekin is the perfect size.
- A Serving Board or Platter: A wooden board, a slate tile, or even a large dinner plate will work. The key is to have a flat surface where you can arrange the pretzel “fingers” in a fan shape.
- A Small Knife: For scoring the “knuckles” on the pretzels. A paring knife is ideal.
I’ve made this board on a cheap cutting board from the dollar store before, and it looked just as impressive as when I use my fancy acacia wood board. Don’t stress about the board. The presentation is all about the arrangement. For budget-friendly options, check your local thrift store for interesting platters or small cutting boards – they often have unique shapes that are perfect for this.
Preparation Method
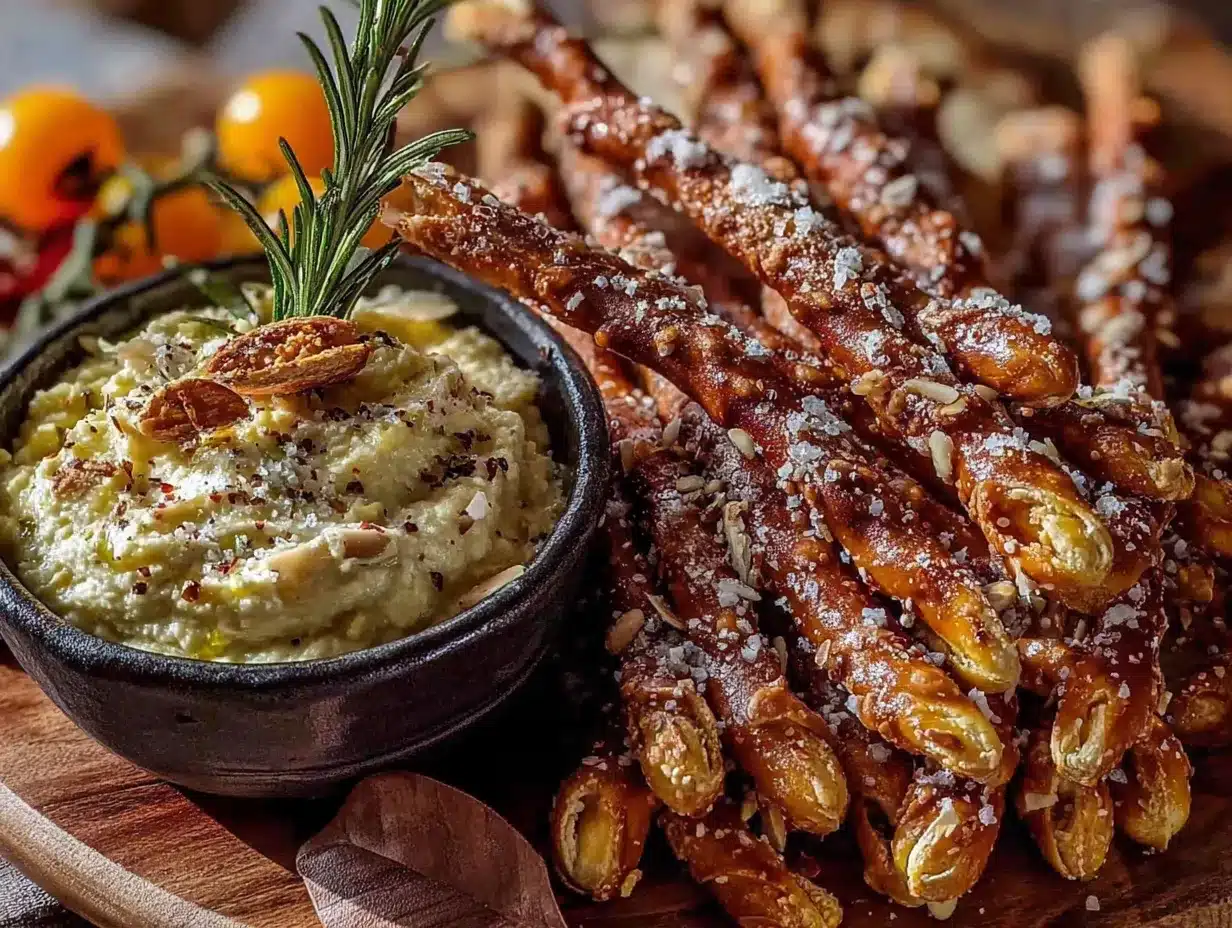
Follow these steps to create your spooky, crowd-pleasing board. It’s easier than you think.
- Prepare the Dip (5 minutes): In your medium mixing bowl, combine the softened 8-ounce block of cream cheese and the 1/2 cup of sour cream. Use your hand mixer (or a sturdy fork) to beat them together until completely smooth and fluffy, about 1 minute. Scrape down the sides of the bowl with your spatula.
- Season the Dip (2 minutes): Add the entire packet of dry ranch dressing mix, the 1/2 cup of shredded cheddar cheese, the 1/4 teaspoon of garlic powder, and the 1/4 teaspoon of smoked paprika. If you want a little heat, add a few dashes of hot sauce now. Mix everything together until the seasonings are fully incorporated and the dip is a uniform pale orange color. If the dip seems too thick, add 1 tablespoon of milk and mix again. It should be thick but scoopable – like a very thick yogurt. Taste it. Adjust the salt or hot sauce to your liking.
- Assemble the Witches’ Fingers (10 minutes): This is the fun part. Take your thick pretzel sticks and look at them. They are your “finger bones.” Using the small knife, gently score 2-3 small, shallow lines across the top half of each pretzel stick to look like knuckles. Don’t cut all the way through – just a light score. Then, take a tiny dab of the softened 1 tablespoon of cream cheese (the “glue”) and press it onto the tip of the pretzel. Immediately press a sliced almond onto the cream cheese to form a “fingernail.” The pointed end of the almond should face outward. Press gently to adhere. Repeat this for all the pretzel sticks you plan to use (about 15-20 for a standard board).
- Chill the Fingers (Optional but Recommended, 10 minutes): Place the assembled pretzel fingers on a plate or baking sheet and pop them in the refrigerator for about 10 minutes. This helps the cream cheese “glue” set and makes the almonds less likely to fall off when you arrange the board. This is a step I learned after my first batch lost a few nails in transit!
- Assemble the Board (5 minutes): Take your serving board. Place the small ramekin filled with the creamy ranch dip in the center, slightly toward the bottom. Now, fan out the pretzel “fingers” around the bowl, with the almond “nails” pointing outward, away from the dip. Arrange them in a semi-circle, like a hand reaching out. You can have some overlapping slightly. Don’t worry about perfection – a little chaos looks more organic and spooky.
- Add the Finishing Touches (2 minutes): Sprinkle the chopped fresh parsley or dill around the base of the pretzels to look like moss or grass growing from the “grave.” Fill in any empty gaps on the board with a few whole black olives or cherry tomatoes for color contrast. Give the whole board a final look. Step back. Admire your creepy creation.
Sensory Cues: Your dip should be smooth, creamy, and a beautiful pale orange with tiny specks of green from the herbs. When you press the almond onto the pretzel, you should feel the cream cheese give slightly and adhere. The finished board should look like a hand is clawing its way out of the dip bowl, with the green herbs looking like mossy earth.
Cooking Tips & Techniques
I’ve made this board about a dozen times now, and I’ve learned a few things the hard way so you don’t have to. Here are my best tips:
The Almond Nail Dilemma: My first attempt was a disaster. The almonds kept falling off. The trick is to use just a tiny, tiny dab of cream cheese. Too much, and it’s slippery and the almond slides off. Too little, and it doesn’t stick. Think of it like using glue – a little goes a long way. Also, chilling the assembled fingers for 10 minutes is a game-changer. It sets the cream cheese and makes them much more stable for transport.
Scoring the Knuckles: Don’t overthink the knuckle scores. They don’t need to be perfect. In fact, a slightly uneven, creepy-looking score is more realistic. I use the tip of a paring knife and just make two or three quick, light scratches. If you press too hard, the pretzel can snap. I’ve lost a few good fingers that way.
Dip Consistency is King: The dip should be thick enough to stay on the pretzel when you dip, but not so thick it’s a solid block. The milk is your friend here. Start with 1 tablespoon, mix, and see how it looks. You want it to hold its shape in the bowl but be easily scoopable. If you accidentally make it too thin, you can try adding a little more cream cheese, but it’s easier to just start over with the milk addition slowly.
Multitasking Strategy: While your cream cheese is softening on the counter (which you should do first!), you can score the pretzels and arrange your board. This makes the whole process take less than 15 minutes. I usually get the dip made, then assemble the fingers while the dip chills in the fridge for a minute.
Making it Ahead: You can assemble the entire board (except the fresh herb garnish) up to 4 hours in advance. Just cover it loosely with plastic wrap and keep it in the fridge. Add the fresh herbs right before serving so they don’t wilt. This makes it perfect for party prep!
Variations & Adaptations
This board is incredibly versatile. Here are a few ways I’ve adapted it for different crowds and cravings.
- The “Bloody” Version: For a gorier look, swap the ranch dip for a warm, red marinara sauce or a spicy sriracha ketchup. Arrange the pretzel “fingers” as if they are dipping into a pool of “blood.” I tried this for a friend’s horror movie marathon, and it was a huge hit. Just make sure the sauce is in a small, deep bowl.
- The Sweet Witch Version: Who says witches can’t have a sweet tooth? Replace the savory ranch dip with a cream cheese-based fruit dip (mix 8 oz cream cheese with 1/2 cup powdered sugar and 1 tsp vanilla extract). Use chocolate-covered pretzel sticks for the fingers and attach a white chocolate chip as the “nail” instead of an almond. This is a huge hit with kids.
- The Spicy Southwest Version: For a dip with a kick, add 1/2 cup of drained canned corn, 1/4 cup of chopped pickled jalapeños, and 1/2 teaspoon of cumin to the base ranch dip. Use pretzel rods (the soft, thick kind) for a more substantial finger. This version is great for a Halloween game day party.
- Dairy-Free Adaptation: Use a high-quality vegan cream cheese and vegan sour cream for the dip base. The flavor will be slightly tangier and less rich, but it still works beautifully. Ensure your pretzels are also dairy-free (most are).
- Gluten-Free Adaptation: As mentioned, use gluten-free pretzel sticks. They are a bit more fragile, so be extra gentle when scoring the knuckles and attaching the almond nails. The dip is naturally gluten-free.
Serving & Storage Suggestions
This board is best served cold or at room temperature, making it perfect for parties where food sits out for a while.
Serving Temperature: I recommend serving the board immediately after assembling it. The dip should be cold and creamy, and the pretzels should be crunchy. If you’ve made it ahead, take it out of the fridge about 15 minutes before serving to take the chill off the cream cheese, which makes it easier to scoop.
What to Serve Alongside: This board is a star on its own, but it pairs beautifully with other Halloween-themed snacks. I love serving it next to a bowl of spicy pumpkin seeds for a crunchy contrast. For a heartier spread, add a platter of mummy hot dogs or some ghost-shaped pita chips for extra dipping. A pitcher of blood orange margaritas would be the perfect adult beverage pairing.
Storage Instructions: This board does not store well once assembled, as the pretzels will get soggy from the dip. If you have leftovers, separate the pretzels from the dip. Place the pretzels in an airtight container at room temperature for up to 2 days. Store the dip in a separate airtight container in the refrigerator for up to 5 days. The dip is actually better the next day as the flavors meld together.
Reheating: You don’t need to reheat anything here. The dip is served cold. If your pretzels have gone a little soft, you can crisp them up on a baking sheet in a 300°F oven for about 3-4 minutes. Let them cool completely before re-assembling.
Nutritional Information & Benefits
While this is a treat for Halloween, it’s good to know what you’re working with. The nutritional values are estimates for one serving (about 4-5 pretzel fingers with 2 tablespoons of dip).
| Nutrient | Amount (per serving) |
|---|---|
| Calories | ~280 |
| Total Fat | 18g |
| Saturated Fat | 10g |
| Cholesterol | 45mg |
| Sodium | 520mg |
| Total Carbohydrates | 22g |
| Dietary Fiber | 1g |
| Sugars | 3g |
| Protein | 7g |
Health Benefits of Key Ingredients: The almonds provide healthy monounsaturated fats and a little bit of vitamin E. The cream cheese and sour cream offer calcium and protein, though they are higher in saturated fat, so moderation is key. The fresh herbs like parsley are a good source of vitamin K and antioxidants. This is a fun, indulgent snack, not a health food, but it’s made with real ingredients you can feel good about.
Dietary Considerations: This recipe contains dairy (cream cheese, sour cream, cheddar) and gluten (pretzels). It also contains tree nuts (almonds). For a nut-free version, you can use a sliver of a baby carrot or a blanched peanut for the fingernail. Always check labels if you are serving someone with severe allergies.
Conclusion
This Crowd-Pleasing Witches’ Finger Pretzel Dip Board is more than just a snack. It’s a little piece of Halloween theater that you can put together in under 20 minutes. It’s the kind of recipe that makes people stop, laugh, and say, “Wait, you made this?” The best part is that it tastes every bit as good as it looks. The creamy, tangy, slightly spicy dip is the perfect companion to the salty, crunchy pretzel “fingers.”
I love this recipe because it captures the spirit of Halloween without the stress. It’s playful, it’s a little bit gross in the best way, and it’s absolutely delicious. You can customize it endlessly to fit your own taste or the theme of your party. Don’t be afraid to get creative with the arrangement or the dip flavors.
I want to see your spooky creations! Snap a picture of your Witches’ Finger Board and share it in the comments below. Tell me what variations you tried or what other spooky snacks you served alongside it. Your feedback and ideas are what make this community so much fun. Until next time, happy haunting and happy snacking!
Frequently Asked Questions
Can I use soft pretzel rods instead of hard pretzel sticks?
Absolutely! Soft pretzel rods will give you a thicker, chewier “finger.” You will need to toast them in the oven at 350°F for about 5 minutes to dry the surface slightly so the cream cheese “glue” adheres better. They will also be a bit more fragile when scoring the knuckles.
How far in advance can I make the dip?
The dip can be made up to 3 days in advance. Store it in an airtight container in the refrigerator. In fact, the flavors meld and deepen overnight, making it even better. Just give it a good stir before spooning it into the serving bowl.
My almond nails keep falling off. What am I doing wrong?
This is the most common issue! The trick is to use a very small amount of cream cheese – about the size of a pea. Press the almond onto the pretzel and hold it for 5 seconds. Then, place the assembled fingers in the fridge for at least 10 minutes to let the cream cheese harden. This acts like a glue setting.
Can I make this board for a non-Halloween party?
Yes! Just skip the knuckle scores and almond nails. You’ll have a fantastic and easy pretzel and dip board that’s perfect for game day, potlucks, or movie nights. You can also change the dip to a queso or a beer cheese for a different vibe.
How many people does this board serve?
This recipe, as written, serves about 8-10 people as a party snack or appetizer. If you are serving it as a main snack for a smaller gathering, you can easily halve the dip recipe and use fewer pretzel sticks. It’s very scalable.
Pin This Recipe!
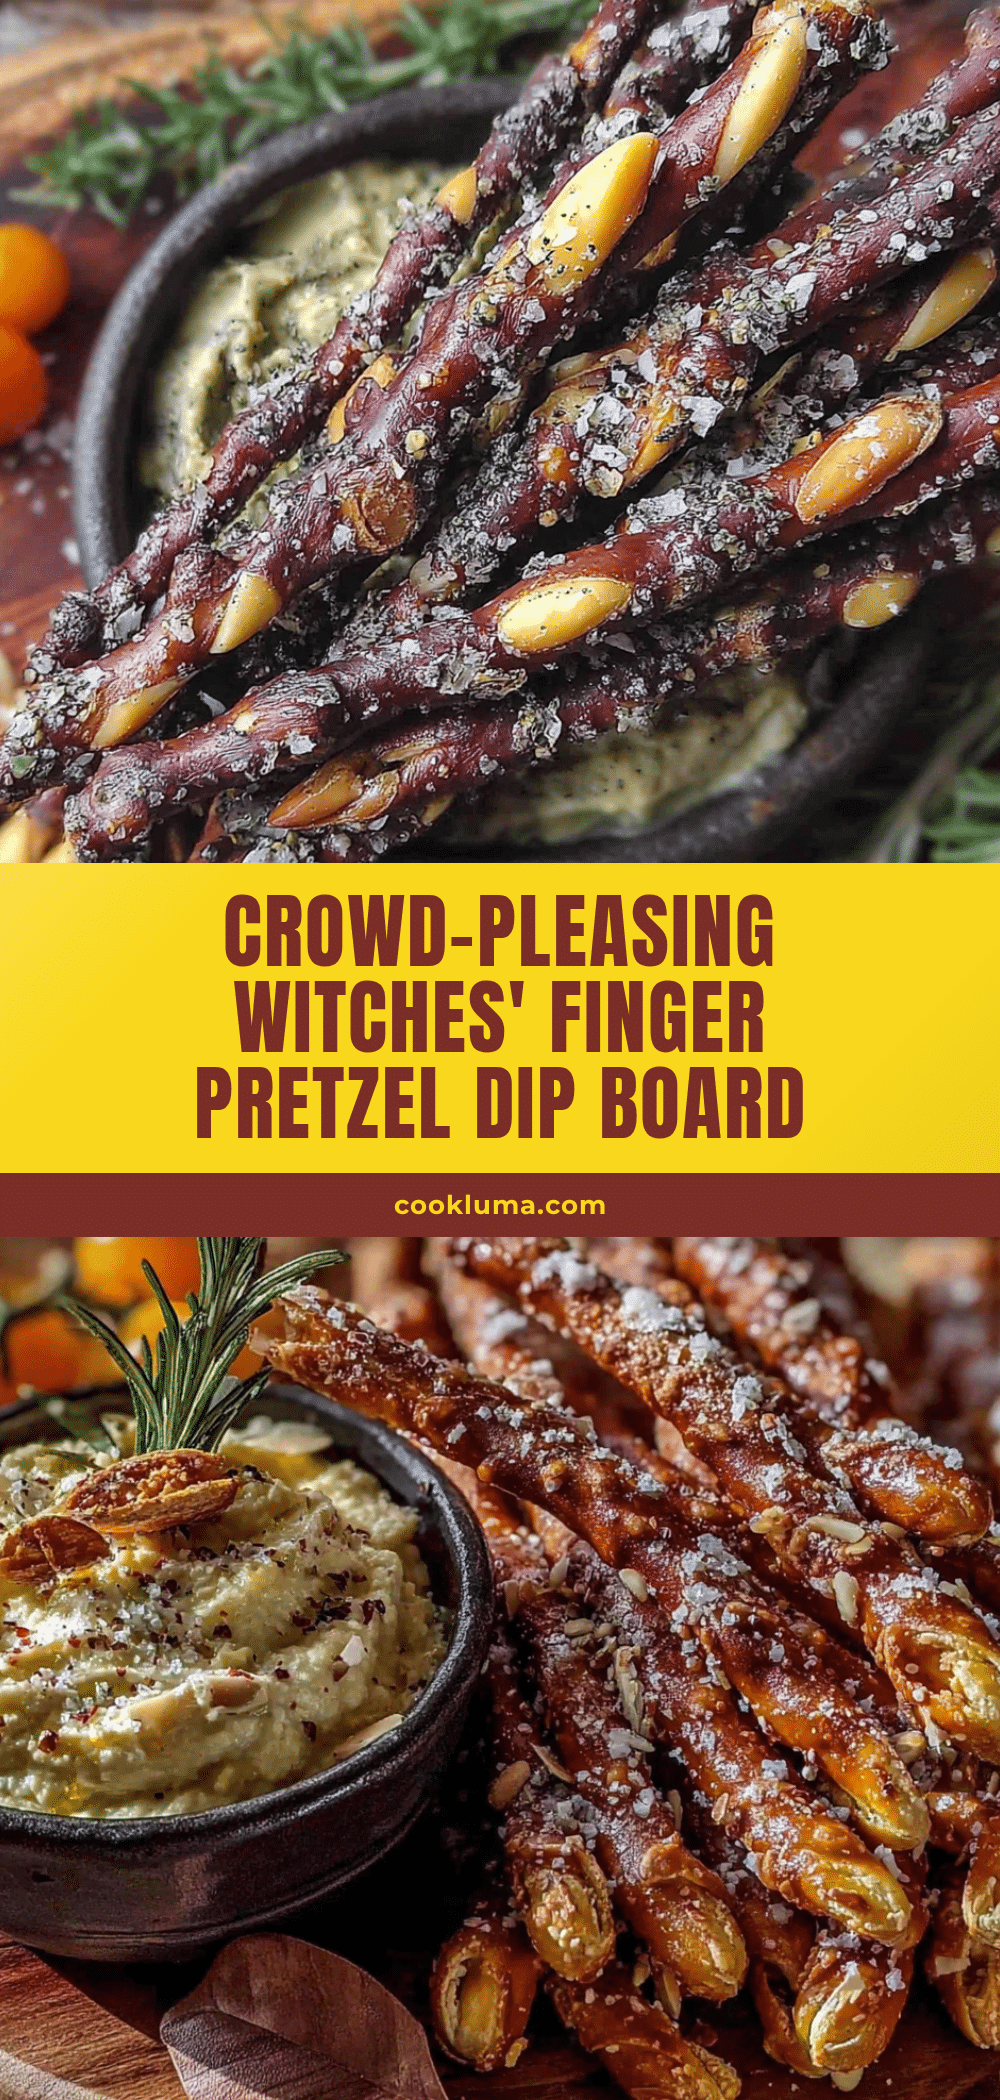
Crowd-Pleasing Witches Finger Pretzel Dip Board
A spooky, savory Halloween snack board featuring pretzel sticks transformed into witch fingers with almond nails, served with a creamy ranch dip. Ready in under 15 minutes, it’s the perfect conversation starter for any Halloween party.
- Prep Time: 15 minutes
- Cook Time: 0 minutes
- Total Time: 15 minutes
- Yield: 8-10 servings 1x
- Category: Appetizer
- Cuisine: American
Ingredients
- 1 (16-ounce) bag large, thick pretzel sticks (e.g., Snyder’s of Hanover)
- 1/2 cup sliced almonds (natural or raw, pale color)
- 1 tablespoon cream cheese, softened (for almond glue)
- 1 (8-ounce) block full-fat cream cheese, softened
- 1/2 cup sour cream
- 1 packet (1 ounce) dry ranch dressing mix (e.g., Hidden Valley)
- 1/2 cup finely shredded sharp cheddar cheese
- 1–2 tablespoons milk, as needed
- 1/4 teaspoon garlic powder
- 1/4 teaspoon smoked paprika
- Optional: a few dashes hot sauce (e.g., Frank’s RedHot)
- Fresh parsley or dill, chopped (for garnish)
- Optional: whole black olives or cherry tomatoes (for filling gaps)
Instructions
- Prepare the dip: In a medium mixing bowl, beat together the softened 8-ounce cream cheese and sour cream with a hand mixer or sturdy fork until smooth and fluffy, about 1 minute.
- Season the dip: Add the ranch dressing mix, shredded cheddar, garlic powder, smoked paprika, and optional hot sauce. Mix until fully incorporated and uniform pale orange. If too thick, add 1 tablespoon of milk and mix again. Adjust seasoning to taste.
- Assemble the witches’ fingers: Using a small knife, gently score 2-3 shallow lines across the top half of each pretzel stick to resemble knuckles. Dab a tiny amount of the 1 tablespoon softened cream cheese onto the tip of each pretzel, then press a sliced almond onto the cream cheese to form a fingernail (pointed end outward). Press gently to adhere.
- Chill the fingers (optional but recommended): Place assembled pretzel fingers on a plate and refrigerate for 10 minutes to set the cream cheese glue.
- Assemble the board: Place a small ramekin filled with the ranch dip in the center of a serving board. Fan out the pretzel fingers around the bowl with almond nails pointing outward, forming a semi-circle like a hand.
- Add finishing touches: Sprinkle chopped fresh parsley or dill around the base of the pretzels for a mossy effect. Fill any gaps with olives or cherry tomatoes. Serve immediately or refrigerate until ready.
Notes
For best results, ensure cream cheese is truly softened (cut into cubes and let sit for 15 minutes; do not microwave). Use thick pretzel sticks to prevent breaking. Chill assembled fingers for 10 minutes to secure almond nails. Dip can be made up to 3 days ahead; flavors meld overnight. Board can be assembled up to 4 hours ahead (add fresh herbs just before serving). For gluten-free, use gluten-free pretzel sticks. For dairy-free, use vegan cream cheese and sour cream. For nut-free, use a sliver of baby carrot or blanched peanut for fingernails.
Nutrition
- Serving Size: 4-5 pretzel fingers
- Calories: 280
- Sugar: 3
- Sodium: 520
- Fat: 18
- Saturated Fat: 10
- Carbohydrates: 22
- Fiber: 1
- Protein: 7
Keywords: Halloween snack, witch fingers, pretzel dip board, spooky appetizer, party snack, cream cheese dip, ranch dip, easy Halloween recipe


