She watched me fumbling with a double boiler, trying not to scorch the white chocolate. My neighbor, Mrs. Gable, didn’t say anything at first. Then she just shook her head with this knowing smile and reached into her cupboard for a bag of marshmallows. “You’re making this harder than it needs to be,” she said, setting the bag on my counter like it was a secret weapon. I’d been trying to perfect a no-bake cookie for a potluck the next day, and honestly, I was this close to giving up and buying something from the store.
Mrs. Gable is in her seventies, and she’s been baking since before I was born. She doesn’t measure things—she just knows. That afternoon, she showed me how to melt white chocolate in the microwave without burning it (a trick I still use), and then she tossed in a handful of mini marshmallows and crispy rice cereal like it was the most natural thing in the world. “These are avalanche cookies,” she said. “My granddaughter calls them snow day cookies.” I watched her mix everything together, and I remember thinking, this is too simple to be this good. But then she dropped spoonfuls onto wax paper, and I knew I was wrong.
The first bite was ridiculous. The white chocolate was creamy, the marshmallows were soft and chewy, and the crispy rice gave it this perfect little crunch. I mean, I actually closed my eyes. Maybe you’ve been there—that moment when a cookie makes you forget everything else for a second. I brought them to the potluck the next day, and they disappeared in about ten minutes. Someone asked for the recipe, and I laughed because it wasn’t really mine to give. But Mrs. Gable just waved her hand and said, “Share it. That’s what recipes are for.” So here I am, sharing it with you. These no-bake avalanche cookies have become my go-to for lazy Sundays, bad days, and any time I need a little sweetness without turning on the oven.
Why You’ll Love This Recipe
Let me tell you why these avalanche cookies are different from every other no-bake recipe you’ve tried. I’ve tested this about a dozen times—yes, a dozen—to get the texture just right. Too much white chocolate, and they’re clumpy. Too little, and they fall apart. But this version? It’s the sweet spot.
- No Oven Required: Seriously, you don’t even have to preheat anything. These come together in about 15 minutes, which is perfect for those days when you want cookies but don’t want to deal with a hot kitchen.
- Simple Ingredients: White chocolate chips, marshmallows, crispy rice cereal, and a little butter. That’s it. You probably have most of this in your pantry right now.
- Perfect for Cozy Evenings: These cookies are basically a hug in food form. They’re great for movie nights, cold weather, or any time you need a little comfort.
- Crowd-Pleaser: I’ve brought these to family gatherings, work parties, and casual get-togethers. Kids love them. Adults love them. Even my picky uncle asked for seconds.
- Unbelievably Delicious: The combination of creamy white chocolate, soft marshmallows, and crunchy cereal is next-level comfort food. It’s like a rice krispie treat and a white chocolate bark had a baby.
What makes these different from other avalanche cookie recipes is the ratio. I spent three batches getting the marshmallow-to-chocolate balance right. Most recipes end up too sweet or too dry, but this one is perfectly balanced. Plus, I add a tiny pinch of salt to cut through the sweetness—it’s a trick I learned from Mrs. Gable, and it makes all the difference.
These cookies are the kind that make you close your eyes after the first bite. They’re comfort food reimagined—faster, easier, but with the same soul-soothing satisfaction. Perfect for impressing guests without stress, or turning a simple Tuesday into something memorable.
What Ingredients You Will Need
This recipe uses simple, wholesome ingredients to deliver bold flavor and satisfying texture without the fuss. Most of these are pantry staples, which is exactly why I love making these on a whim.
For the Cookies
- White chocolate chips (12 ounces or 340 grams) – I prefer Ghirardelli or Guittard for the smoothest melt. Avoid white chocolate morsels that are labeled “white baking chips”—they don’t melt as well and can leave a waxy texture.
- Mini marshmallows (3 cups or about 150 grams) – Regular size works too, but you’ll want to roughly chop them. The mini ones distribute more evenly and give that perfect soft bite.
- Crispy rice cereal (2 cups or about 60 grams) – Classic Rice Krispies are great, but any generic brand works. For a gluten-free option, use certified gluten-free crispy rice cereal.
- Unsalted butter (2 tablespoons or 28 grams) – Salted butter works in a pinch, but then skip the added salt later. I use unsalted to control the sodium level.
- Vanilla extract (1 teaspoon) – Pure vanilla extract adds warmth. Imitation vanilla is fine, but the real stuff makes these taste bakery-quality.
- Pinch of salt (about 1/8 teaspoon) – This is non-negotiable. It balances the sweetness and makes the white chocolate taste more complex.
Optional Add-Ins
- Chopped nuts (1/2 cup, optional) – Toasted almonds or pecans add a lovely crunch. I sometimes add them when I want a little more texture.
- Dried cranberries (1/2 cup, optional) – The tartness cuts through the sweetness beautifully. Try it for a holiday variation.
- Coconut flakes (1/4 cup, optional) – Toasted coconut adds a tropical vibe. I’ve made these with coconut and they’re dangerously good.
Ingredient Selection Tips: Look for white chocolate chips that list cocoa butter as an ingredient—not just palm oil or vegetable fats. The quality of your white chocolate directly affects how creamy your cookies turn out. For the marshmallows, fresh ones work best. Stale marshmallows can be harder to mix in and might not soften as nicely.
Substitution Guidance: If you’re dairy-free, use vegan white chocolate chips and a plant-based butter. The texture will be slightly different, but still delicious. For a lower-sugar version, try sugar-free white chocolate chips—though I’ll warn you, the texture isn’t quite as creamy.
Equipment Needed
You don’t need much for these avalanche cookies, which is part of their charm. Here’s what you’ll want to have on hand:
- Large microwave-safe bowl – I use a glass mixing bowl. Pyrex works great because it heats evenly and doesn’t get too hot to handle.
- Rubber spatula – This is your best friend for folding everything together without crushing the cereal.
- Baking sheet – To hold your cookies while they set. Any standard half-sheet pan works.
- Parchment paper or wax paper – Line your baking sheet so the cookies don’t stick. Parchment paper is reusable a few times.
- Cookie scoop or two spoons – A 1.5-tablespoon cookie scoop makes uniform cookies, but two spoons work perfectly fine.
- Measuring cups and spoons – For accuracy, especially with the cereal and marshmallows.
Budget-Friendly Options: No cookie scoop? No problem. Just use two spoons to drop the mixture onto the parchment. No microwave? You can melt the white chocolate and butter in a heatproof bowl set over a pot of simmering water (double boiler method). Just be careful not to let any water get into the chocolate—it’ll seize up and turn grainy.
Personal Experience: I once tried making these with a cheap plastic spatula, and it melted slightly from the heat of the chocolate. Learn from my mistake—use a silicone or rubber spatula that’s heat-safe. Also, don’t skip the parchment paper. I tried using a greased baking sheet once, and let me tell you, scraping stuck cookies off metal is not a fun way to spend an evening.
Preparation Method
These avalanche cookies come together in about 15 minutes, plus chilling time. Here’s how to make them perfectly every time.
- Line your baking sheet with parchment paper. Set it aside. You’ll need it ready because the mixture sets quickly once it’s combined.
- Melt the white chocolate and butter together. Place the white chocolate chips and butter in a large microwave-safe bowl. Microwave in 30-second intervals, stirring well after each interval. This usually takes about 1.5 to 2 minutes total. The chocolate should be mostly melted with just a few small lumps—stir until smooth. Warning: White chocolate burns easily, so don’t walk away. If it looks grainy or separates, you’ve overheated it. Start over if that happens.
- Stir in the vanilla and salt. Add the vanilla extract and pinch of salt to the melted chocolate mixture. Stir until fully combined. The salt might seem like a small addition, but trust me—it makes the white chocolate taste richer.
- Let the mixture cool slightly. Wait about 2-3 minutes. If you add the marshmallows and cereal while the chocolate is too hot, the marshmallows will melt into a puddle, and the cereal will get soggy. The mixture should be warm but not hot to the touch.
- Fold in the marshmallows. Add 2 cups of mini marshmallows (reserve the remaining 1 cup for later). Gently fold them into the white chocolate mixture using your rubber spatula. Don’t overmix—you want some marshmallow chunks to remain visible.
- Fold in the crispy rice cereal. Add the cereal to the bowl. Fold gently until the cereal is evenly coated. The mixture will look a bit messy at this point, and that’s okay. You want every piece of cereal to have a little chocolate on it.
- Fold in the remaining marshmallows. Add the reserved 1 cup of mini marshmallows. Fold just 2-3 times—you want these to stay mostly intact so you get those beautiful white marshmallow patches in your cookies.
- Scoop the cookies. Use your cookie scoop or two spoons to drop rounded tablespoons of the mixture onto the prepared baking sheet. Space them about 2 inches apart—they don’t spread, but you want room to work. If the mixture starts to get too stiff as it cools, pop it in the microwave for 10 seconds to soften it.
- Shape the cookies (optional but nice). If you want perfectly round cookies, lightly wet your hands and gently press each scoop into a round shape. The moisture prevents sticking. Don’t press too hard—you want them to stay light and craggy.
- Chill until set. Place the baking sheet in the refrigerator for at least 30 minutes. The cookies need this time to firm up. If you’re in a hurry, 20 minutes in the freezer works too.
- Serve and enjoy. Once set, transfer the cookies to a plate or storage container. They should hold their shape but still be soft and chewy on the inside.
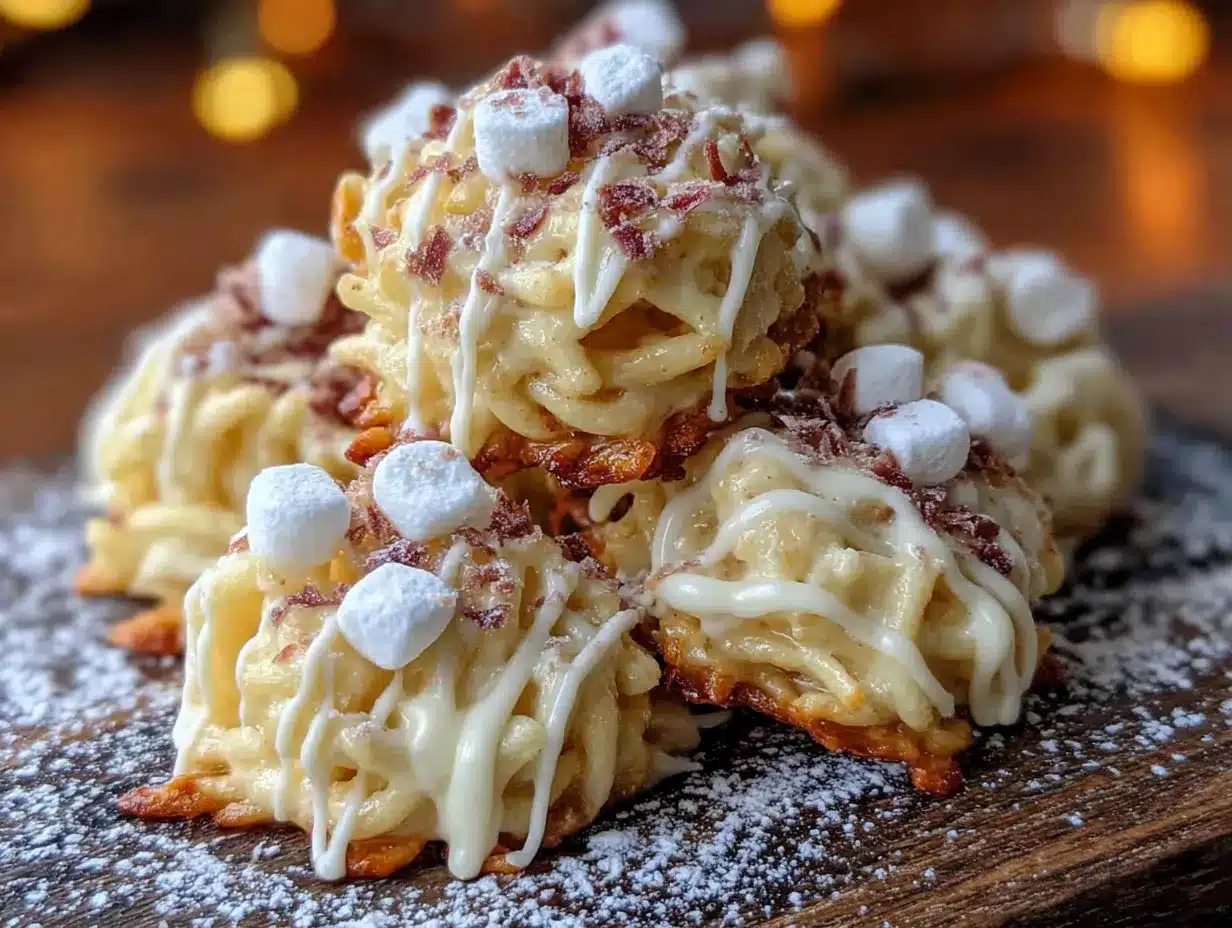
Sensory Cues: When you fold the cereal in, listen for that gentle crackling sound—it means the cereal is staying crisp. The mixture should look speckled with white marshmallow bits and golden cereal. When you bite into a finished cookie, you should feel three textures: creamy chocolate, soft marshmallow, and crunchy cereal.
Cooking Tips & Techniques
I’ve made these avalanche cookies more times than I can count, and I’ve learned a few things the hard way. Here are my best tips for getting them right every time.
Don’t Overheat the White Chocolate. This is the number one mistake people make. White chocolate has a lower melting point than dark or milk chocolate, and it seizes up if it gets too hot. Always melt it in short bursts and stir between each one. If it starts to look thick and grainy, you’ve gone too far. I learned this the hard way when I tried to melt a whole bag at full power for a minute—it turned into a clumpy mess.
Work Quickly but Gently. Once you add the cereal, the mixture starts to set. Have your baking sheet ready before you start mixing. But don’t rush so much that you crush the cereal—gentle folding is key. Think of it like folding whipped cream into batter.
Use Room Temperature Marshmallows. Cold marshmallows are harder to fold in and don’t soften as nicely. If your marshmallows have been in the pantry for a while, they’re perfect. Fresh, soft marshmallows work best.
Watch the Humidity. These cookies are sensitive to moisture. On humid days, the white chocolate can take longer to set, and the cereal might lose its crunch faster. If you’re making these in summer, pop them in the fridge for an extra 10 minutes.
Double the Batch. Seriously, these disappear fast. I always double the recipe now because a single batch barely lasts a day in my house. The mixture doubles easily, and you can use the same bowl—just wipe it out between batches.
My Biggest Failure: I once tried to make these with white chocolate that was past its expiration date. It wouldn’t melt properly and ended up clumpy and weird. Always check your chocolate’s freshness before you start. Stale white chocolate doesn’t melt smoothly.
Variations & Adaptations
One of the best things about these avalanche cookies is how adaptable they are. Here are some of my favorite variations.
Chocolate Avalanche Cookies
Swap the white chocolate for milk or dark chocolate chips. Use the same method, but reduce the butter to 1 tablespoon since dark chocolate has more cocoa butter. These taste like a chocolate-covered marshmallow treat. My kids actually prefer this version.
Peppermint Holiday Cookies
Add 1/2 teaspoon of peppermint extract along with the vanilla. Crush a few candy canes and sprinkle them on top of the cookies before they set. The red and white look so festive, and the mint pairs beautifully with the white chocolate. I make these every December.
Gluten-Free Version
Use certified gluten-free crispy rice cereal. Most major brands offer a gluten-free option now. The rest of the ingredients are naturally gluten-free, so this is an easy swap. I’ve served these to gluten-sensitive friends and they couldn’t tell the difference.
Vegan Version
Use vegan white chocolate chips and a plant-based butter. I’ve tested this with several brands, and the texture is slightly softer but still delicious. Add an extra tablespoon of coconut oil to help the vegan chocolate melt more smoothly.
Nutty Crunch Version
Fold in 1/2 cup of toasted chopped almonds or pecans along with the cereal. The nuts add a savory crunch that balances the sweetness. I made this version for a holiday party and someone asked me to cater their next event—true story.
Low-Sugar Version
Use sugar-free white chocolate chips and reduce the marshmallows to 2 cups total. The cookies won’t be as sweet, but they’ll still satisfy that craving. I’ve made these for my dad, who’s watching his sugar intake, and he gave them a thumbs up.
Serving & Storage Suggestions
These avalanche cookies are best served chilled or at room temperature, depending on your preference. Here’s how to make the most of them.
Serving Temperature: I personally love them straight from the fridge—the white chocolate is firm and the marshmallows are chewy. But my husband prefers them at room temperature, where they’re a bit softer. Try both and see which you like. For a special treat, serve them alongside a cup of hot cocoa or a warm latte.
Presentation Ideas: Arrange them on a white platter to show off the marshmallow and cereal bits. For gifts, layer them in a clear cellophane bag tied with a ribbon. They make excellent holiday gifts or hostess presents. I once brought a tin of these to a friend’s housewarming, and she texted me the next day asking for the recipe.
Complementary Dishes: These cookies pair beautifully with coffee, tea, or a glass of cold milk. For a dessert board, arrange them alongside fresh berries, dark chocolate squares, and a cheese like brie. The sweetness of the cookies contrasts nicely with tangy fruit or sharp cheese.
Storage Instructions: Store the cookies in an airtight container in the refrigerator for up to 1 week. If you stack them, place a sheet of parchment paper between layers to prevent sticking. They also freeze beautifully—place them in a freezer-safe container with parchment between layers, and they’ll keep for up to 3 months.
Reheating Tips: These are best enjoyed cold or at room temperature, so no reheating needed. If they’ve been in the fridge for a few days and seem a bit firm, let them sit at room temperature for 5-10 minutes before serving. They’ll soften up nicely.
Flavor Development: Honestly, these cookies taste even better the next day. The flavors meld together overnight, and the texture becomes perfectly balanced. If you can resist eating them all on day one, you’ll be rewarded on day two.
Nutritional Information & Benefits
Let’s be real—these are a treat, not a health food. But here’s the nutritional breakdown so you know what you’re getting.
Estimated Nutrition Per Cookie (based on 24 cookies):
- Calories: 145
- Fat: 7g
- Saturated Fat: 4g
- Carbohydrates: 20g
- Sugar: 15g
- Protein: 2g
- Sodium: 45mg
Health Benefits of Key Ingredients: White chocolate contains cocoa butter, which has antioxidants called flavonoids (though less than dark chocolate). The crispy rice cereal provides a little iron and B vitamins. And the marshmallows? Well, they make you smile, and that counts for something.
Dietary Considerations: These cookies are not vegan, gluten-free (unless you use certified GF cereal), or low-sugar in their standard form. But as I mentioned in the variations section, all of those adaptations are possible. They are nut-free in the basic version, making them safe for school lunches.
Allergen Information: Contains dairy (white chocolate and butter). May contain traces of soy depending on the chocolate brand. Always check labels if you’re serving someone with allergies.
Personal Wellness Perspective: I believe in balance. These cookies are a celebration food—something you make when you want to treat yourself or someone you love. They’re not an everyday snack, but they’re perfect for special occasions, bad days, or any time you need a little sweetness. And honestly, a cookie made with real ingredients and shared with people you care about? That has its own kind of nutritional value.
Conclusion
These no-bake avalanche cookies have become a staple in my kitchen for one simple reason: they’re easy, they’re delicious, and they make people happy. Every time I make them, I think of Mrs. Gable standing in my kitchen, showing me that cooking doesn’t have to be complicated to be good. Sometimes the simplest recipes are the ones that stick with you.
I hope you give these a try. Customize them however you like—add nuts, swap the chocolate, throw in some dried fruit. Make them your own. That’s what cooking is all about, right? Taking something someone shared with you and adding your own little twist.
If you make these avalanche cookies, I’d love to hear about it. Leave a comment below and tell me how they turned out. Did you add anything? Change something? Did they disappear as fast at your house as they do at mine? Share your photos on Pinterest and tag me—I love seeing your creations. Until next time, happy baking (or in this case, happy no-baking)!
Frequently Asked Questions
Can I use milk chocolate instead of white chocolate?
Absolutely! Just reduce the butter to 1 tablespoon since milk chocolate has more cocoa butter than white chocolate. The cookies will be richer and less sweet.
Why did my white chocolate seize up?
This usually happens when the chocolate gets too hot or comes in contact with water. Always melt it in short microwave bursts, and make sure your bowl and spatula are completely dry. If it seizes, you can try adding a teaspoon of vegetable oil and stirring vigorously, but sometimes it’s better to start over.
Can I make these without a microwave?
Yes! Use a double boiler: place a heatproof bowl over a pot of simmering water (make sure the bottom of the bowl doesn’t touch the water). Stir the white chocolate and butter until melted, then proceed with the recipe. It takes a few minutes longer but works perfectly.
How long do these cookies last?
Stored in an airtight container in the refrigerator, they’ll stay fresh for up to 1 week. You can also freeze them for up to 3 months. Just thaw them in the fridge overnight before serving.
Can I use large marshmallows instead of mini ones?
You can, but you’ll want to roughly chop them first. Mini marshmallows distribute more evenly and give a better texture. If you use large ones, cut each marshmallow into 6-8 pieces with kitchen scissors (spray the scissors with non-stick spray first to prevent sticking).
Pin This Recipe!

Easy No-Bake Avalanche Cookies with White Chocolate

These no-bake avalanche cookies combine creamy white chocolate, soft marshmallows, and crispy rice cereal for a quick and delicious treat. Perfect for lazy Sundays, bad days, or any time you need a little sweetness without turning on the oven.
- Prep Time: 15 minutes
- Cook Time: 0 minutes
- Total Time: 45 minutes (including chilling)
- Yield: 24 cookies 1x
- Category: Dessert
- Cuisine: American
Ingredients
- 12 ounces (340 grams) white chocolate chips
- 3 cups (about 150 grams) mini marshmallows, divided
- 2 cups (about 60 grams) crispy rice cereal
- 2 tablespoons (28 grams) unsalted butter
- 1 teaspoon vanilla extract
- 1/8 teaspoon salt
- 1/2 cup chopped nuts (optional)
- 1/2 cup dried cranberries (optional)
- 1/4 cup coconut flakes (optional)
Instructions
- Line a baking sheet with parchment paper or wax paper.
- In a large microwave-safe bowl, combine white chocolate chips and butter. Microwave in 30-second intervals, stirring well after each, until melted and smooth (about 1.5 to 2 minutes total).
- Stir in vanilla extract and salt until fully combined.
- Let the mixture cool for 2-3 minutes until warm but not hot.
- Fold in 2 cups of mini marshmallows gently, leaving some chunks visible.
- Fold in crispy rice cereal until evenly coated.
- Fold in the remaining 1 cup of mini marshmallows, folding just 2-3 times to keep them intact.
- Using a cookie scoop or two spoons, drop rounded tablespoons of the mixture onto the prepared baking sheet, spacing them about 2 inches apart.
- Optionally, lightly wet your hands and gently shape each scoop into a round cookie.
- Refrigerate for at least 30 minutes (or 20 minutes in the freezer) until set.
- Serve chilled or at room temperature.
Notes
White chocolate burns easily; melt in short bursts. Use room temperature marshmallows for best results. On humid days, chill cookies longer. For best texture, let cookies sit at room temperature for 5-10 minutes after refrigeration.
Nutrition
- Serving Size: 1 cookie
- Calories: 145
- Sugar: 15
- Sodium: 45
- Fat: 7
- Saturated Fat: 4
- Carbohydrates: 20
- Protein: 2
Keywords: no-bake cookies, avalanche cookies, white chocolate cookies, marshmallow cookies, easy dessert, no-bake dessert, quick cookies


