I wasn’t expecting baking advice from my accountant, but there I was, sorting through a pile of receipts at his cluttered desk, listening to him describe exactly how to make these peppermint mocha cheesecake bars. It was tax season—the absolute last place I expected to find dessert inspiration. He saw me eyeing the coffee-stained napkin tucked into his calculator case and just started talking. “My grandmother made these every Christmas,” he said, not even looking up from his spreadsheets. “She’d crush candy canes with a hammer on the back porch so the kids wouldn’t hear.” That image stuck with me—a tiny woman in an apron, sneaking peppermint chaos while the grandkids watched cartoons inside.
Honestly, I almost forgot to ask for the recipe. I was too busy imagining that scene. But he scribbled it down on a sticky note—”equal parts cream cheese and stubbornness,” he wrote in the margin. Let me tell you, I made a mess of it the first time. Forgot to soften the cream cheese, used dark chocolate chips instead of semi-sweet, and the crust came out looking like a crime scene. But even that sad version got devoured by my kids in about twelve minutes flat. That’s when I knew this recipe was something special.
I’ve tweaked it over the years—added a mocha layer, swapped in a buttery Oreo crust, and figured out how to get that clean slice without the cheesecake cracking. Maybe you’ve been there, staring at a dessert that looks bakery-perfect but tastes like cardboard? These bars are the opposite. They’re the kind of treat that makes your kids fight over the last piece, and honestly, that’s the highest compliment a home cook can get.
These kid-approved peppermint mocha cheesecake bars have become my go-to for holiday parties, school bake sales, and those random Tuesday nights when everyone needs a little sweetness. They’re rich, creamy, and have just enough coffee flavor to make the adults happy without keeping the kids bouncing off the walls. And that peppermint crunch on top? Pure magic.
Why You’ll Love This Recipe
Let me tell you why these bars have earned a permanent spot in my recipe box. I’ve tested this recipe at least a dozen times—through burnt crusts, lumpy fillings, and one memorable incident involving a runaway springform pan. Every single version got eaten. That’s the kind of track record you can trust.
- Kid-Approved and Parent-Friendly: The peppermint flavor is subtle enough for little taste buds but bold enough to satisfy grown-up cravings. My kids call them “Christmas brownies,” and that’s good enough for me.
- Simple Ingredients: You probably have most of these in your kitchen right now. No fancy extracts or imported chocolate—just cream cheese, Oreos, chocolate chips, and candy canes. Your grocery bill will thank you.
- Budget-Friendly Indulgence: These bars cost a fraction of what you’d pay at a coffee shop. One batch makes 16 generous servings, perfect for family movie night or a holiday potluck without breaking the bank.
- Make-Ahead Magic: They actually taste better after a day in the fridge. The flavors meld together, and the texture gets perfectly creamy. You can prep these on a Sunday and have dessert ready all week.
- Crowd-Pleasing Versatility: I’ve brought these to office parties, church potlucks, and playground meetups. They disappear faster than anything else on the table. Even people who “don’t like cheesecake” go back for seconds.
What makes these different from every other peppermint dessert out there? It’s the mocha layer. Most recipes just throw chocolate and peppermint together and call it a day. But that coffee undertone? It deepens the chocolate flavor without screaming “I’m a latte.” It’s subtle, sophisticated, and completely kid-friendly. I’ve had parents ask me if there’s actually coffee in it, and when I say yes, they just smile and grab another piece.
This recipe is the kind that makes you close your eyes after the first bite. It’s comfort food reimagined—richer than a brownie, creamier than a cookie, and way more satisfying than anything from a box. Perfect for impressing guests without stress, or turning a simple Tuesday into something memorable.
What Ingredients You Will Need
This recipe uses simple, wholesome ingredients to deliver bold flavor and satisfying texture without the fuss. Most of these are pantry staples, and the ones that aren’t are easy to find at any grocery store.
For the Oreo Crust
- 24 Oreo cookies (regular, not double-stuffed) — You’ll crush these into fine crumbs. I recommend using the whole cookie, filling and all. The cream helps bind the crust.
- 5 tablespoons unsalted butter, melted — Use real butter here, not margarine. It makes a huge difference in flavor and texture.
- Pinch of salt — Just a tiny one. It balances the sweetness of the Oreos.
For the Cheesecake Filling
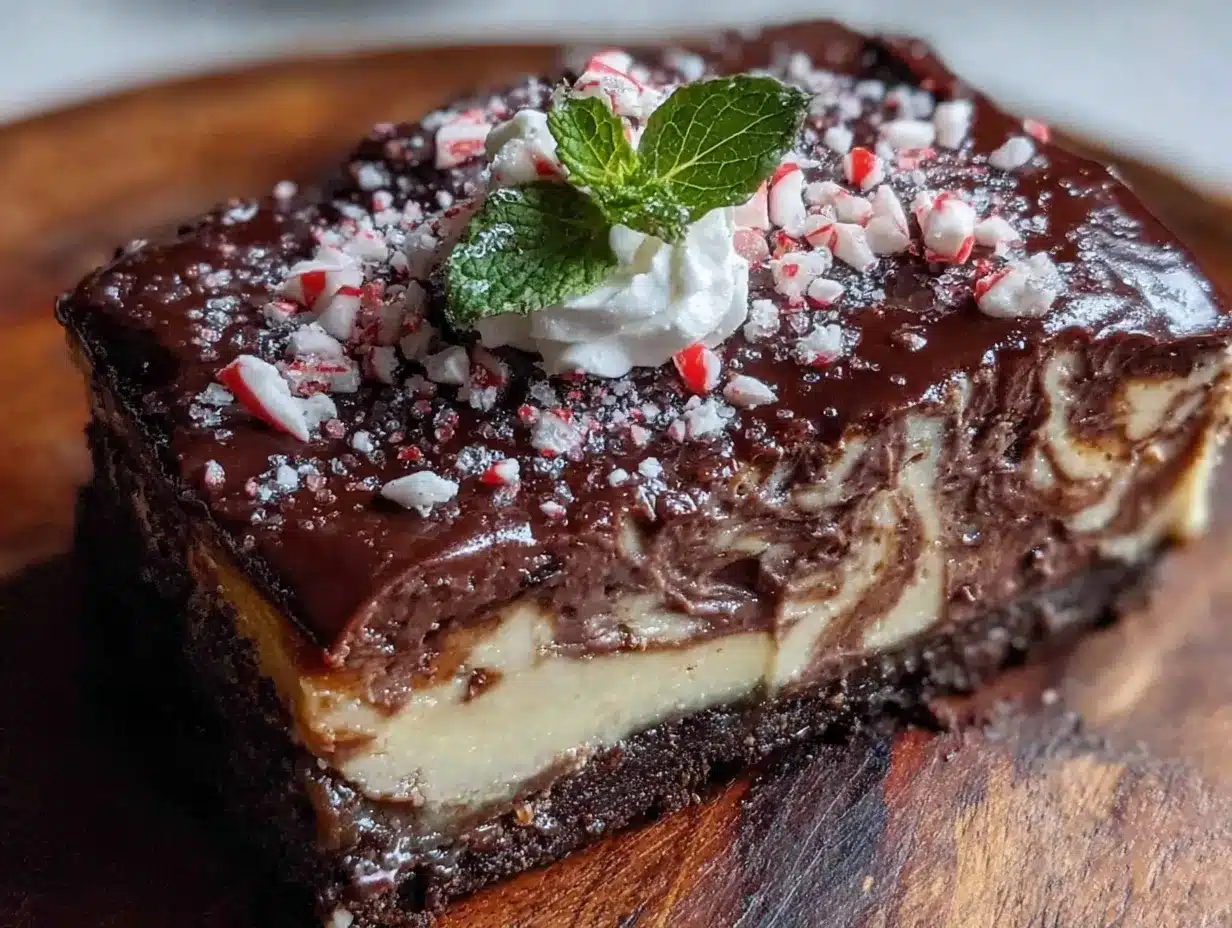
- 24 ounces cream cheese, softened — Three standard blocks. Make sure they’re at room temperature, or you’ll end up with lumpy filling. I set mine out on the counter for about an hour before starting.
- 1 cup granulated sugar — Regular white sugar works perfectly here. No need for anything fancy.
- 3 large eggs, room temperature — Cold eggs can seize the batter. If you forgot to take them out early, place them in a bowl of warm water for 5 minutes.
- 1 teaspoon vanilla extract — Pure vanilla is best, but imitation works fine in a pinch.
- 1/2 cup sour cream — This adds tanginess and makes the cheesecake extra creamy. Full-fat is ideal, but low-fat works too.
- 1/4 cup all-purpose flour — Just enough to stabilize the filling without making it cakey.
For the Mocha Layer
- 1/2 cup semi-sweet chocolate chips — I prefer Ghirardelli or Guittard for reliable melting. Avoid chocolate chunks, as they don’t melt as evenly.
- 2 tablespoons strong brewed coffee, cooled — Leftover morning coffee works great. Instant espresso powder dissolved in water is even better if you have it.
- 1 tablespoon unsalted butter — This helps the chocolate stay smooth when swirled into the cheesecake.
For the Peppermint Topping
- 1/2 cup crushed candy canes or peppermint candies — About 6-8 standard candy canes. Crush them in a zip-top bag with a rolling pin. Your kids will love helping with this part.
- 1/4 cup white chocolate chips, melted — For drizzling. You can skip this if you’re short on time, but it makes the bars look bakery-worthy.
- 1 teaspoon coconut oil or shortening — Mixed into the white chocolate for smooth drizzling.
Substitution Guidance
- Use gluten-free chocolate sandwich cookies for a gluten-free crust. The filling works the same way.
- Swap the sour cream with full-fat Greek yogurt if that’s what you have on hand. The texture will be slightly tangier but still delicious.
- For a caffeine-free version, use decaf coffee or simply increase the vanilla extract to 1 1/2 teaspoons.
- Dairy-free cream cheese and butter alternatives work, but the texture will be slightly less creamy. I’ve tried Kite Hill and Miyoko’s with decent results.
Equipment Needed
You don’t need a professional bakery setup for these bars, but a few specific tools make the process much smoother.
- 9×13-inch baking pan — Glass or metal both work. I prefer metal because it heats more evenly, but glass lets you see the crust browning.
- Parchment paper — Absolutely essential for easy removal. Leave overhang on two opposite sides to create “handles.”
- Electric hand mixer or stand mixer — You can mix by hand, but your arm will get tired. A hand mixer is perfect for this recipe.
- Food processor or zip-top bag and rolling pin — For crushing Oreos and candy canes. The food processor is faster, but the bag method is more fun with kids.
- Mixing bowls — At least two medium bowls and one small bowl for melting chocolate.
- Rubber spatula — For scraping every last bit of cheesecake filling into the pan. Trust me, you don’t want to waste any.
- Measuring cups and spoons — Standard set for dry and liquid ingredients.
- Small saucepan or microwave-safe bowl — For melting chocolate and butter.
If you don’t have a food processor, no worries. Place the Oreos in a sturdy zip-top bag, seal it, and go to town with a rolling pin. It’s a great stress reliever, honestly. Same goes for the candy canes—just make sure the bag isn’t too full, or you’ll end up with peppermint dust everywhere.
Preparation Method
Let’s walk through this step by step. I’ll include all the little details I wish someone had told me the first time.
Step 1: Prepare the Crust (10 minutes active + 10 minutes baking)
Preheat your oven to 350°F (175°C). Line your 9×13-inch pan with parchment paper, leaving overhang on the long sides. This is your lifeline for getting the bars out cleanly later.
Place the 24 Oreo cookies in your food processor and pulse until they become fine crumbs. You should have about 2 1/2 cups of crumbs. If using the bag method, crush them thoroughly—no big chunks allowed. Pour the crumbs into a medium bowl, add the melted butter and pinch of salt, and stir until everything looks like wet sand.
Press this mixture firmly into the bottom of your prepared pan. I use the bottom of a measuring cup to really pack it down. Bake for 10 minutes, then set aside to cool while you make the filling. Your kitchen will smell like a chocolate factory.
Step 2: Make the Cheesecake Filling (15 minutes)
In a large mixing bowl, beat the softened cream cheese with an electric mixer on medium speed until smooth and creamy—about 2 minutes. Scrape down the sides and bottom of the bowl with your spatula. Add the sugar and beat for another 2 minutes until light and fluffy.
Add the eggs one at a time, beating on low speed after each addition just until combined. Overmixing at this stage adds too much air, which can cause cracks. Add the vanilla extract, sour cream, and flour, and mix on low until just combined. The batter should be smooth and thick, like a very luxurious pudding.
Step 3: Prepare the Mocha Swirl (5 minutes)
In a small microwave-safe bowl, combine the semi-sweet chocolate chips, cooled coffee, and 1 tablespoon butter. Microwave in 30-second intervals, stirring between each, until completely smooth. This usually takes about 60-90 seconds total. Let it cool for 2-3 minutes—you don’t want hot chocolate cooking your cheesecake batter.
Step 4: Assemble the Bars (10 minutes)
Pour about two-thirds of the cheesecake filling over the cooled crust and spread it evenly. Drop spoonfuls of the mocha mixture over the surface, then pour the remaining cheesecake filling on top. Use a knife or skewer to gently swirl the mocha through the filling. Don’t over-swirl, or you’ll lose the marbled effect. A few figure-eight motions are plenty.
Step 5: Bake and Cool (45 minutes baking + 2 hours cooling)
Place the pan in the preheated oven and bake for 40-45 minutes. The edges should be set and slightly puffed, but the center should still jiggle slightly when you gently shake the pan. That little jiggle is your friend—it means the cheesecake will be creamy, not dry.
Turn off the oven, crack the door open, and let the cheesecake cool inside for 1 hour. This gradual cooling prevents cracking. Then transfer to a wire rack to cool completely, about another hour. Finally, cover with plastic wrap and refrigerate for at least 4 hours, but overnight is better. I know the wait is torture, but it’s worth it.
Step 6: Add the Topping (10 minutes)
Once the cheesecake is fully chilled and set, lift it out of the pan using the parchment handles. Melt the white chocolate chips with the coconut oil in a microwave-safe bowl, stirring every 20 seconds until smooth. Drizzle over the top using a fork or a small piping bag. Sprinkle the crushed candy canes evenly over the melted white chocolate before it sets. Press them in gently so they stick.
Return to the refrigerator for 15-20 minutes to let the topping firm up. Then slice into 16 even bars using a sharp knife. Wipe the knife clean between cuts for the prettiest presentation.
Cooking Tips & Techniques
I’ve made every mistake in the book so you don’t have to. Here’s what I’ve learned the hard way.
Room temperature ingredients are non-negotiable. Cold cream cheese creates lumps that no amount of mixing can fix. I learned this when I tried to rush the process and ended up with grainy cheesecake. Set your cream cheese, eggs, and sour cream out on the counter for at least an hour before starting. If you’re in a hurry, cut the cream cheese into cubes and microwave on low power for 10-15 seconds.
Don’t overmix the batter. I know it’s tempting to keep beating until everything is perfectly smooth, but too much air creates bubbles that cause cracks. Mix just until each ingredient is incorporated, then stop. Your cheesecake will be denser and creamier for it.
The water bath myth. Most cheesecake recipes insist on a water bath, but I’ve found it’s unnecessary for these bars. The shallow pan and the cooling method I described work perfectly. I tried a water bath once and ended up with a soggy crust. Never again.
Timing is everything. Bake these on a day when you’ll be home. The cooling process takes several hours, and you don’t want to rush it. I usually make them on a Saturday afternoon and serve them on Sunday. The overnight chill makes them taste even better.
Clean cuts every time. Run your knife under hot water, dry it off, then slice. Wipe the blade clean between each cut. This gives you those beautiful, Instagram-worthy bars with clean edges and no smeared filling.
Variations & Adaptations
One of the best things about this recipe is how adaptable it is. Here are some variations I’ve tried and loved.
Mint Chocolate Chip Version
Skip the mocha layer and fold 1/2 cup mini chocolate chips and 1/2 teaspoon peppermint extract into the cheesecake filling. Top with the crushed candy canes as usual. This version is even more kid-friendly since there’s no coffee flavor at all.
White Chocolate Peppermint
Replace the semi-sweet chocolate in the mocha layer with white chocolate chips. Use only 1 tablespoon of coffee (or skip it entirely) and add 1/4 teaspoon peppermint extract instead. The white chocolate swirl looks beautiful against the creamy cheesecake.
Gluten-Free Adaptation
Use gluten-free chocolate sandwich cookies for the crust. Everything else in the recipe is naturally gluten-free, so you just need to swap that one ingredient. I’ve tested this with several brands, and they all work well.
Dairy-Free Option
Use dairy-free cream cheese (I like Kite Hill or Violife), coconut oil instead of butter in the crust, and dairy-free chocolate chips. The texture will be slightly less creamy, but the flavor is still fantastic. My dairy-free friend couldn’t tell the difference.
Extra Chocolatey
Add 1/4 cup cocoa powder to the cheesecake filling along with the flour. Use dark chocolate chips in the mocha layer instead of semi-sweet. This version is for serious chocolate lovers only—it’s intense and absolutely divine.
Serving & Storage Suggestions
These bars are incredibly versatile when it comes to serving. Here’s how I handle them.
Serving Temperature: I prefer these bars straight from the refrigerator. They slice cleaner when cold, and the creamy texture is perfectly firm. If you prefer a softer texture, let them sit at room temperature for 10-15 minutes before serving. Some people love them slightly softened, but my family fights over the cold ones.
Presentation Tips: Arrange the bars on a platter and garnish with a few whole candy canes or fresh mint leaves for a festive touch. A dusting of powdered sugar just before serving adds a snowy effect that looks beautiful on a holiday dessert table. For a coffee shop vibe, serve each bar on a small plate with a dollop of whipped cream and a drizzle of chocolate syrup.
Complementary Dishes: These bars pair beautifully with hot chocolate, coffee, or a cold glass of milk. For a dessert spread, serve alongside sugar cookies, chocolate truffles, or a simple fruit salad to balance the richness. They also work great as part of a Christmas cookie exchange—just pack them in a decorative tin with parchment between layers.
Storage Instructions: Store leftover bars in an airtight container in the refrigerator for up to 5 days. The flavor actually improves after a day or two as the peppermint and mocha meld together. For longer storage, wrap individual bars tightly in plastic wrap, then place them in a freezer-safe bag or container. They’ll keep in the freezer for up to 3 months.
Reheating Tips: These bars are best enjoyed cold, but if you want a warm dessert, microwave a single bar for 10-15 seconds. The cheesecake will soften slightly, and the chocolate will become gooey. Top with vanilla ice cream for an indulgent treat that rivals any restaurant dessert.
Nutritional Information & Benefits
Let’s be real—these are a treat, not a health food. But that doesn’t mean they’re without any redeeming qualities.
Estimated Nutritional Values (per bar, based on 16 servings):
- Calories: 385
- Total Fat: 24g
- Saturated Fat: 14g
- Cholesterol: 95mg
- Sodium: 290mg
- Total Carbohydrates: 38g
- Dietary Fiber: 1g
- Sugars: 28g
- Protein: 6g
Health Benefits: The cream cheese provides a decent amount of calcium and protein, which helps keep you full. Dark chocolate contains antioxidants called flavonoids, which support heart health. Peppermint has been shown to aid digestion—though I’m not sure it cancels out all that sugar. The coffee in the mocha layer provides a small amount of caffeine, which can boost alertness and mood.
Dietary Considerations: This recipe contains dairy, gluten, and eggs. For gluten-free and dairy-free adaptations, see the variations section above. The bars are not suitable for vegan diets as written, but dairy-free alternatives can make them plant-based friendly.
My Perspective: I believe in balance. These bars are a celebration, not an everyday snack. They’re perfect for holidays, birthdays, and those moments when you need something special. Enjoy them mindfully, share them generously, and don’t stress about the numbers. Food is about joy, connection, and creating memories—and these bars deliver on all three fronts.
Conclusion
These kid-approved peppermint mocha cheesecake bars are everything I want in a dessert—rich, creamy, festive, and completely irresistible. They came from an unexpected source, but they’ve become a beloved tradition in my kitchen. Every time I make them, I think of that accountant and his grandmother crushing candy canes on the back porch.
What I love most about this recipe is how it brings people together. My kids fight over the last piece. My husband requests them for every holiday gathering. Friends ask for the recipe after every party. It’s the kind of dessert that creates moments—laughter around the table, sticky fingers, and happy sighs after the last bite.
I encourage you to make these your own. Adjust the peppermint to your taste, experiment with different chocolates, or try one of the variations I shared. The beauty of home cooking is that you’re in control. Trust your instincts, have fun with it, and don’t be afraid to make a mess.
I’d love to hear how yours turn out! Drop a comment below and let me know if your family loved them as much as mine does. Share your photos, your tweaks, and your stories. And if you’re looking for more holiday treats, check out my Christmas dessert recipes for more inspiration. Happy baking, friends!
Frequently Asked Questions
Can I make these peppermint mocha cheesecake bars ahead of time?
Absolutely! In fact, they taste better after a day in the fridge. Make them up to 2 days ahead and store them covered in the refrigerator. Add the topping just before serving for the prettiest presentation.
Can I freeze these cheesecake bars?
Yes, they freeze beautifully. Wrap individual bars tightly in plastic wrap, then place them in a freezer-safe bag. They’ll keep for up to 3 months. Thaw in the refrigerator overnight before serving.
My cheesecake cracked. What went wrong?
Don’t worry, it happens to everyone! Cracks usually come from overmixing the batter, baking too long, or cooling too quickly. The gradual cooling method I described helps prevent this. If it does crack, just cover it with the white chocolate drizzle and crushed candy canes—nobody will ever know.
Can I use store-bought chocolate sauce instead of making the mocha layer?
You can, but the results won’t be quite the same. Homemade mocha sauce has a deeper, more complex flavor. If you’re in a pinch, use a high-quality chocolate syrup mixed with a teaspoon of instant coffee powder.
How do I crush candy canes without making a huge mess?
Place them in a sturdy zip-top bag, remove as much air as possible, and seal it tight. Place the bag on a cutting board and use a rolling pin or heavy skillet to crush them. For finer pieces, use a food processor with quick pulses. Always crush over a bowl or the sink to catch any rogue pieces.
Pin This Recipe!
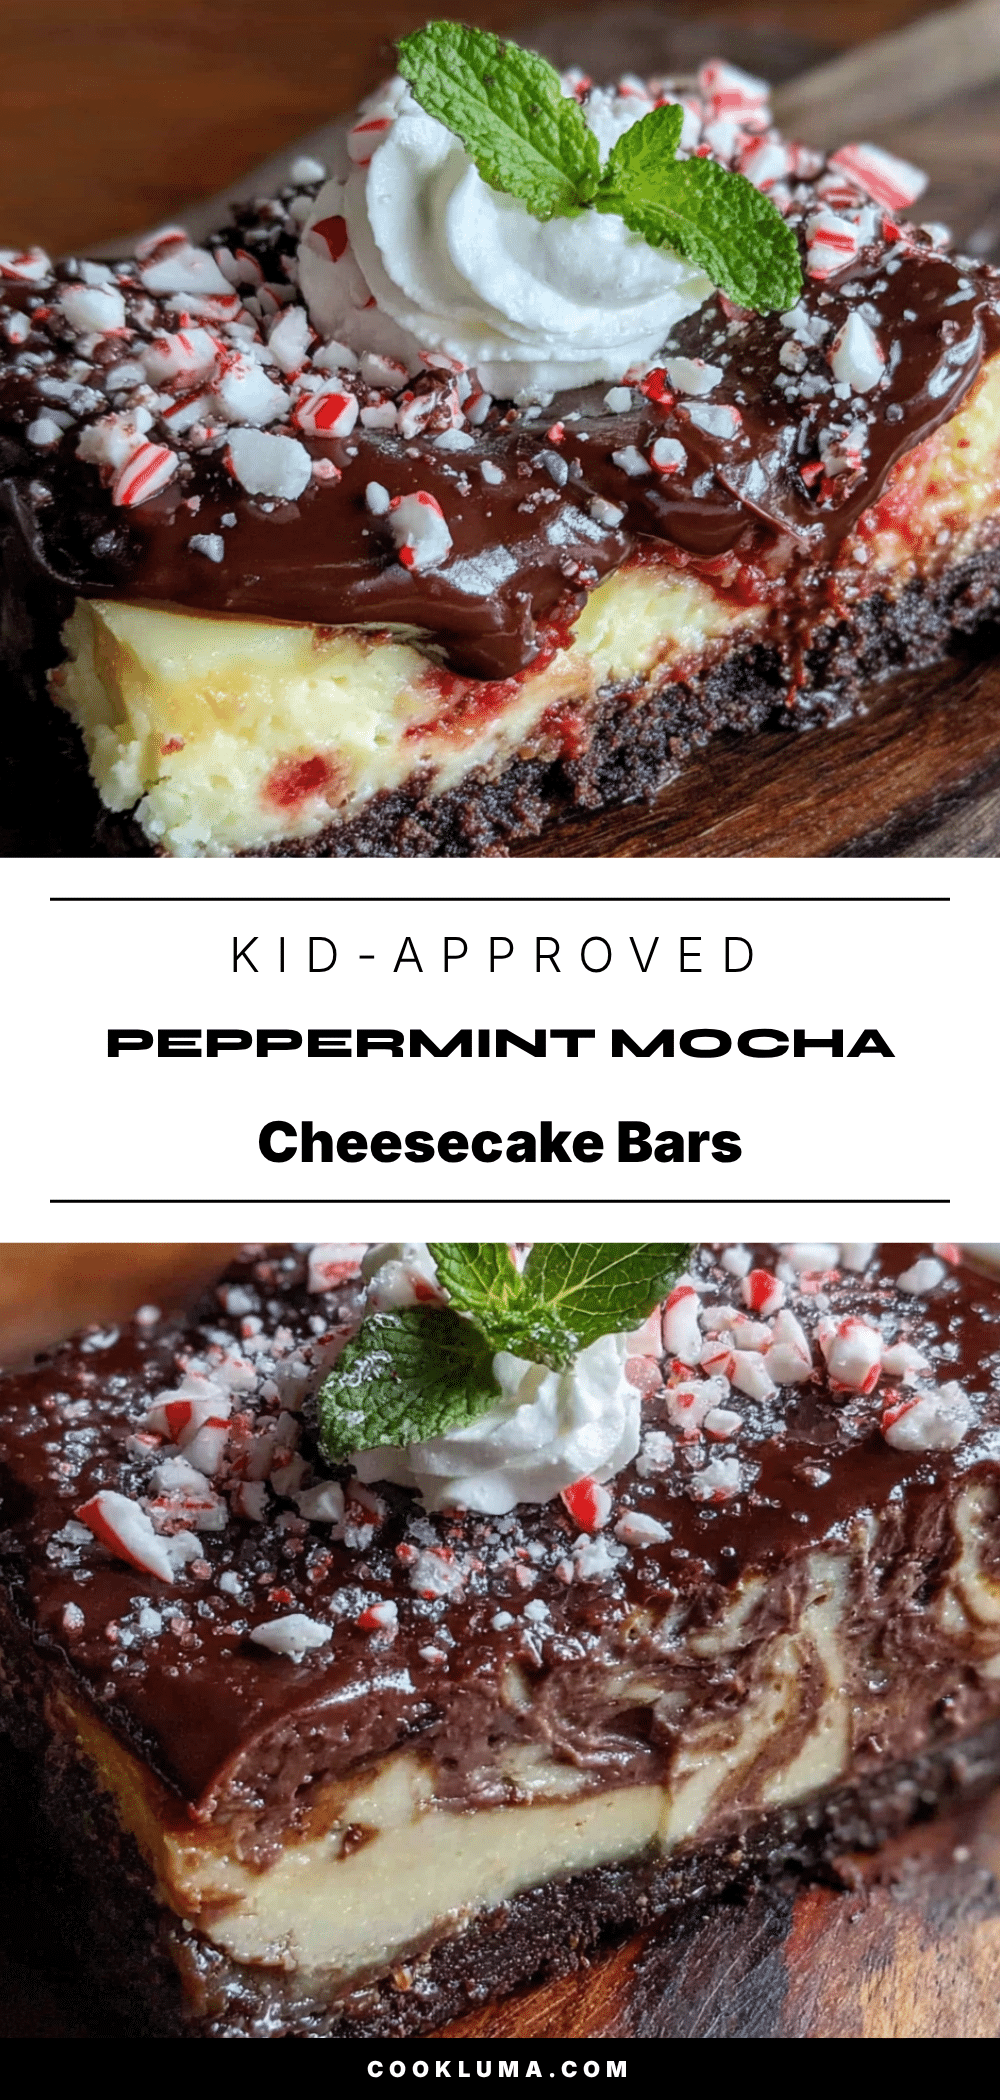
Kid-Approved Peppermint Mocha Cheesecake Bars
Rich, creamy cheesecake bars with a buttery Oreo crust, a mocha swirl, and a festive peppermint topping. These kid-approved treats are perfect for holiday parties, bake sales, or any time you need a little sweetness.
- Prep Time: 30 minutes
- Cook Time: 45 minutes
- Total Time: 5 hours 15 minutes (includes cooling and chilling)
- Yield: 16 servings 1x
- Category: Dessert
- Cuisine: American
Ingredients
- 24 Oreo cookies (regular, not double-stuffed)
- 5 tablespoons unsalted butter, melted
- Pinch of salt
- 24 ounces cream cheese, softened
- 1 cup granulated sugar
- 3 large eggs, room temperature
- 1 teaspoon vanilla extract
- 1/2 cup sour cream
- 1/4 cup all-purpose flour
- 1/2 cup semi-sweet chocolate chips
- 2 tablespoons strong brewed coffee, cooled
- 1 tablespoon unsalted butter
- 1/2 cup crushed candy canes or peppermint candies (about 6–8 standard candy canes)
- 1/4 cup white chocolate chips, melted
- 1 teaspoon coconut oil or shortening
Instructions
- Preheat oven to 350°F (175°C). Line a 9×13-inch baking pan with parchment paper, leaving overhang on the long sides.
- Prepare the crust: Crush 24 Oreo cookies into fine crumbs (about 2 1/2 cups). In a medium bowl, combine crumbs with 5 tablespoons melted butter and a pinch of salt. Press firmly into the bottom of the prepared pan. Bake for 10 minutes, then set aside to cool.
- Make the cheesecake filling: In a large bowl, beat 24 ounces softened cream cheese with an electric mixer on medium speed until smooth (about 2 minutes). Add 1 cup sugar and beat for another 2 minutes until light and fluffy. Add 3 eggs one at a time, beating on low after each addition. Mix in 1 teaspoon vanilla extract, 1/2 cup sour cream, and 1/4 cup flour until just combined.
- Prepare the mocha swirl: In a small microwave-safe bowl, combine 1/2 cup semi-sweet chocolate chips, 2 tablespoons cooled coffee, and 1 tablespoon butter. Microwave in 30-second intervals, stirring between each, until smooth (about 60-90 seconds). Let cool for 2-3 minutes.
- Assemble the bars: Pour about two-thirds of the cheesecake filling over the cooled crust. Drop spoonfuls of the mocha mixture over the surface, then pour the remaining cheesecake filling on top. Gently swirl with a knife or skewer.
- Bake for 40-45 minutes until edges are set but center jiggles slightly. Turn off oven, crack door open, and let cheesecake cool inside for 1 hour. Transfer to a wire rack to cool completely (about 1 hour). Cover with plastic wrap and refrigerate for at least 4 hours, preferably overnight.
- Add the topping: Once chilled, lift cheesecake out of pan using parchment handles. Melt 1/4 cup white chocolate chips with 1 teaspoon coconut oil in a microwave-safe bowl, stirring every 20 seconds until smooth. Drizzle over the top. Sprinkle 1/2 cup crushed candy canes evenly over the melted white chocolate. Refrigerate for 15-20 minutes to set.
- Slice into 16 even bars using a sharp knife, wiping the blade clean between cuts.
Notes
Room temperature ingredients are essential for a smooth filling. Don’t overmix the batter to avoid cracks. The gradual cooling method prevents cracking. For clean cuts, run your knife under hot water and wipe between slices. These bars taste even better after a day in the fridge.
Nutrition
- Serving Size: 1 bar
- Calories: 385
- Sugar: 28
- Sodium: 290
- Fat: 24
- Saturated Fat: 14
- Carbohydrates: 38
- Fiber: 1
- Protein: 6
Keywords: peppermint mocha cheesecake bars, cheesecake bars, peppermint dessert, holiday dessert, Oreo crust, mocha cheesecake, kid-friendly dessert


