My nephew Leo asked why I couldn’t just skip the chilling step. I was mid-lecture about gluten development and dough structure—the whole science-y spiel I’d perfected over years of holiday baking. He was eight and wanted cookies now, not in two hours when the dough was “ready.” I started to explain why that wouldn’t work—then stopped. Honestly, I was exhausted from wrapping presents and the kitchen looked like a flour bomb went off. I figured, what’s the worst that could happen? Flat, spread-out cookies? We’d eat them anyway.
So I scooped the soft, spiced dough straight onto the parchment-lined tray and popped it in the oven. I braced for disaster. But ten minutes later, the kitchen smelled like December had walked in the door, hugged me, and decided to stay. The cookies came out puffy, tender, and absolutely perfect—no chilling required. I stood there with my spatula mid-air, genuinely stunned. Leo just shrugged and said, “Told you.”
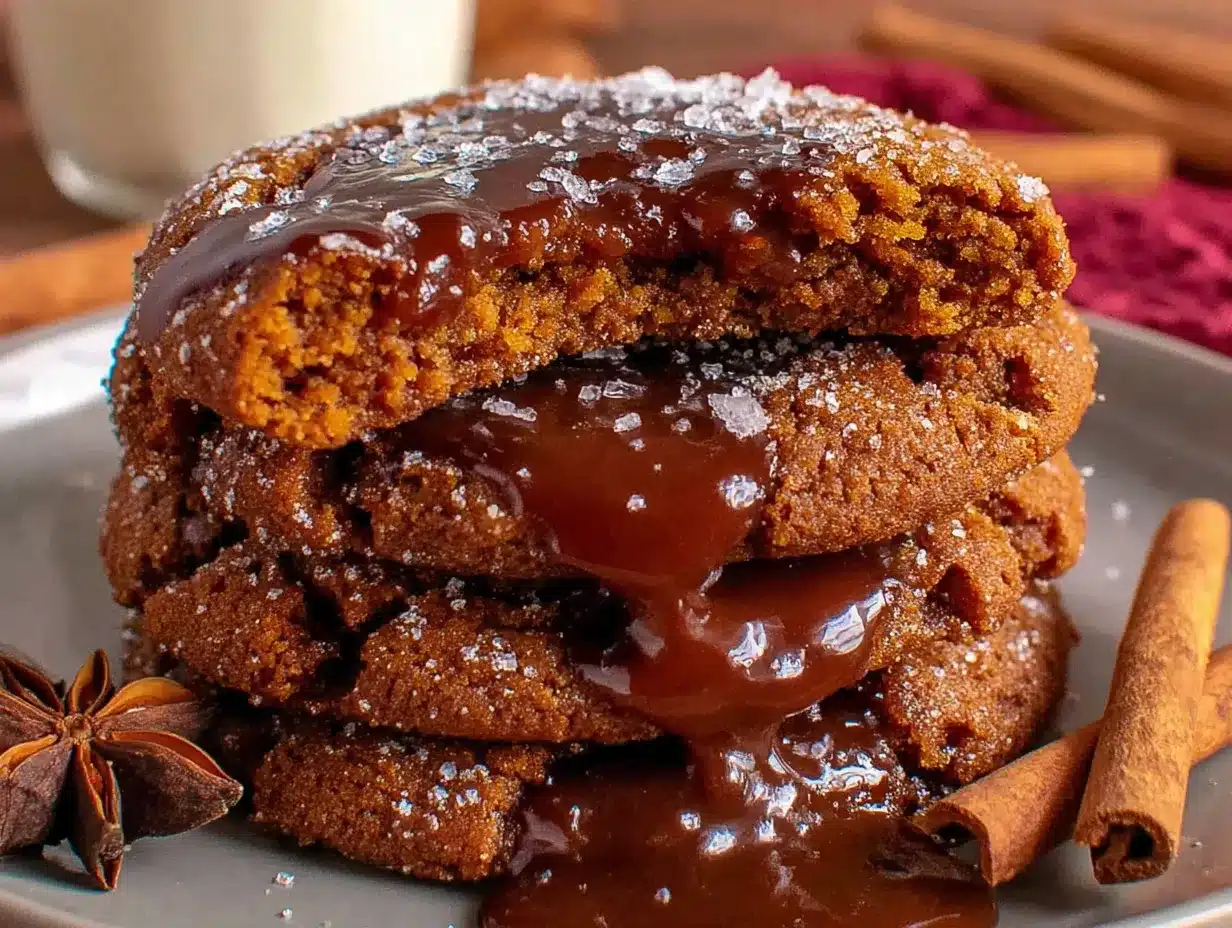
That moment changed how I make gingerbread forever. These cozy soft gingerbread cookies with molasses icing are proof that sometimes the best recipes come from letting go of the rules. Maybe you’ve been there—staring at a recipe that insists on a step you just don’t have time for, wondering if it really matters. I’m here to tell you: sometimes it doesn’t. These cookies are everything you want from gingerbread—deeply spiced, pillowy soft, and topped with a glossy molasses icing that sinks into every crack. They’re the kind of cookie that makes you close your eyes after the first bite. And they come together without the fuss. That’s why this recipe stayed with me—because it proved that good baking isn’t about rigid rules. It’s about trusting your gut, and sometimes, trusting an eight-year-old.
Why You’ll Love This Recipe
Let me tell you why these cookies have become my absolute go-to for the holiday season and beyond. I’ve tested this recipe at least a dozen times—with different flours, different molasses brands, even different ovens at my sister’s house. Every single time, they come out soft, spiced, and completely irresistible. Here’s what makes them stand out:
- No Chilling Required : Mix, scoop, bake. That’s it. The dough goes straight from bowl to oven, saving you at least an hour of fridge time. Perfect for when the craving hits hard.
- Simple Pantry Ingredients : You likely have everything already—flour, butter, sugar, molasses, and a handful of spices. No fancy grocery trips needed.
- Perfect for Holiday Baking : These cookies are ideal for cookie swaps, gift boxes, or just keeping on the counter for unexpected visitors. They stay soft for days.
- Crowd-Pleaser : I’ve brought these to potlucks, family dinners, and office parties. They disappear fast. Kids love the icing, adults love the spice depth.
- Unbelievably Soft Texture : The molasses and brown sugar combo creates a cookie that’s tender and cake-like, not crunchy or dry. It’s next-level comfort food.
What makes this recipe different from the rest? It’s the technique—or rather, the lack of one. Most gingerbread recipes insist on chilling to prevent spreading. But by using the right ratio of butter to flour and a touch of baking soda, these cookies hold their shape beautifully without any fridge time. The molasses icing is the real star here—it’s not just a drizzle. It’s a thick, glossy glaze made with confectioners’ sugar and a splash of molasses that adds another layer of deep, caramelized flavor. This isn’t just another gingerbread cookie recipe. It’s the one you’ll reach for every single time.
Honestly, this recipe is the kind that makes you close your eyes after the first bite. It’s comfort food reimagined—faster, easier, but with the same soul-soothing satisfaction. Perfect for impressing guests without stress, or turning a simple Tuesday afternoon into something memorable.
What Ingredients You Will Need
This recipe uses simple, wholesome ingredients to deliver bold flavor and satisfying texture without the fuss. Most of these are pantry staples, which means you can whip up a batch anytime the mood strikes.
For the Cookies
- 2 ¼ cups (280g) all-purpose flour — Spoon and level for accuracy. I prefer Gold Medal for consistent results.
- 1 teaspoon baking soda — This gives the cookies their soft, puffy lift. Make sure it’s fresh.
- ½ teaspoon salt — Balances the sweetness and enhances the spices.
- 2 teaspoons ground ginger — The star spice here. Use a fresh jar for maximum warmth.
- 1 teaspoon ground cinnamon — Adds that classic holiday warmth.
- ½ teaspoon ground cloves — A little goes a long way. It adds depth without overpowering.
- ¼ teaspoon ground nutmeg — Freshly grated if you have it, but pre-ground works fine.
- ½ cup (113g) unsalted butter, softened to room temperature — I use Land O’Lakes. Let it sit out for about 30 minutes.
- ½ cup (100g) packed light brown sugar — Adds moisture and a subtle caramel note.
- ¼ cup (50g) granulated sugar — For sweetness and slight crispness on the edges.
- 1 large egg, room temperature — Helps bind everything together.
- ½ cup (170g) unsulphured molasses — Do not use blackstrap molasses here; it’s too bitter. Grandma’s or Brer Rabbit original works perfectly.
- 1 teaspoon vanilla extract — Pure, not imitation, for the best flavor.
For the Molasses Icing
- 1 ½ cups (180g) confectioners’ sugar, sifted — Sifting prevents lumps in the glaze.
- 2 tablespoons unsulphured molasses — Same brand as above for consistency.
- 2-3 tablespoons milk or water — Start with 2 tablespoons and add more for desired consistency. Whole milk adds richness.
- ¼ teaspoon vanilla extract — Optional, but adds a lovely undertone.
Ingredient Tips: For the best texture, make sure your butter is truly softened—not melted, not hard. If you forget to take it out, cut it into small cubes and let it sit for 15 minutes. For the molasses, unsulphured is key. Sulphured molasses has a harsh, chemical taste that will ruin the cookies. I learned that the hard way. Also, if you want a gluten-free option, swap the all-purpose flour with a 1:1 gluten-free baking blend. It works beautifully.
Equipment Needed
You don’t need a professional bakery setup for these cookies. Here’s what you’ll need:
- Large mixing bowl — Any bowl works, but a wide one makes mixing easier.
- Electric hand mixer or stand mixer — You can cream the butter and sugar by hand, but a mixer makes it faster and fluffier. I use my KitchenAid for this.
- Measuring cups and spoons — Accurate measurements matter here, especially for the flour and molasses.
- Baking sheets — I recommend light-colored, non-stick sheets for even browning. Dark sheets can cause the bottoms to burn.
- Parchment paper or silicone baking mat — Non-negotiable for easy cleanup and preventing sticking.
- Cookie scoop (about 1.5 tablespoons) — Ensures uniform cookies that bake evenly. A regular spoon works too, but the scoop is worth it.
- Cooling rack — Lets air circulate so the cookies cool properly before icing.
- Small whisk or fork — For mixing the icing until smooth.
- Spatula — For scraping the bowl clean.
Budget-Friendly Tip: If you don’t have a cookie scoop, use two spoons to drop the dough. The cookies won’t be perfectly round, but they’ll taste just as good. And if you don’t have parchment paper, lightly grease the baking sheet with butter or cooking spray.
Preparation Method
Let’s get baking! Follow these steps carefully, and you’ll have soft, spiced cookies in no time.
- Preheat your oven to 350°F (175°C). Line two baking sheets with parchment paper or silicone mats. This ensures the cookies don’t stick and the bottoms don’t over-brown.
- Whisk the dry ingredients together. In a medium bowl, combine the flour, baking soda, salt, ginger, cinnamon, cloves, and nutmeg. Whisk until evenly blended. Set aside.
- Cream the butter and sugars. In a large mixing bowl, beat the softened butter, brown sugar, and granulated sugar together on medium speed until light and fluffy—about 2 to 3 minutes. The mixture should look pale and slightly increased in volume. Sensory cue: you’ll see the color lighten and the texture become airy.
- Add the wet ingredients. Beat in the egg, molasses, and vanilla extract until fully combined. The mixture might look a little separated at this point—that’s normal. Don’t panic. Tip: Scrape down the sides of the bowl with a spatula to ensure everything is incorporated.
- Add the dry ingredients gradually. With the mixer on low speed, add the flour mixture in two additions, mixing just until no streaks of flour remain. Overmixing will make the cookies tough. The dough will be soft, slightly sticky, and very fragrant. Personal note: I always stop the mixer and finish folding by hand to avoid overworking the dough.
- Scoop the dough. Using a 1.5-tablespoon cookie scoop, drop rounded balls of dough onto the prepared baking sheets, spacing them about 2 inches apart. They don’t spread much, so you can fit about 12 per sheet. Warm tip: If the dough feels too sticky to scoop, lightly wet your hands or the scoop with water.
- Bake immediately. Place the baking sheets in the preheated oven and bake for 10 to 12 minutes. The cookies should be puffed, set around the edges, and still slightly soft in the center. The tops might look a little crackly—that’s the molasses doing its magic. Sensory cue: your kitchen will smell like a holiday candle. The cookies are done when the edges are just firm to the touch.
- Cool on the baking sheet. Let the cookies rest on the hot baking sheet for 5 minutes. This allows them to set without breaking. Then transfer them to a wire rack to cool completely before icing. Warning: Don’t skip this step! Moving them too early will cause them to crumble.
- Make the molasses icing. While the cookies cool, whisk together the sifted confectioners’ sugar, molasses, 2 tablespoons of milk, and vanilla extract in a small bowl. Whisk until smooth and glossy. If the icing is too thick, add the remaining tablespoon of milk, one teaspoon at a time, until it reaches a drizzling consistency. Tip: The icing should be thick enough to hold its shape on the cookie but thin enough to drizzle off a spoon.
- Ice the cookies. Once the cookies are completely cool, drizzle the icing over the tops using a spoon or a piping bag with a small tip. Let the icing set for about 30 minutes before stacking or storing. Personal trick: I use a squeeze bottle for a cleaner drizzle—less mess, more control.
This recipe yields about 24 cookies, depending on scoop size. The whole process, from mixing to icing, takes about 45 minutes. Perfect for a spontaneous baking session.
Cooking Tips & Techniques
After making these cookies more times than I can count, I’ve picked up a few tricks that make all the difference. Here’s what I’ve learned—sometimes the hard way.
Don’t overmix the dough. This is probably the most common mistake. Once you add the flour, mix just until it disappears. Overmixing develops the gluten, which leads to tough, dense cookies instead of soft, tender ones. I speak from experience—I ruined a batch by getting distracted and letting the mixer run too long. They came out like hockey pucks.
Use a cookie scoop for uniform size. Uneven cookies bake unevenly. Some will be overdone while others are underbaked. A scoop ensures every cookie is the same size and bakes at the same rate. If you don’t have one, aim for balls of dough about the size of a walnut.
Rotate your baking sheets halfway through. Most ovens have hot spots. Halfway through the baking time, swap the top sheet to the bottom rack and vice versa, and rotate them front to back. This ensures even browning. I forgot to do this once and ended up with half a batch of burnt bottoms.
Check for doneness early. Ovens vary wildly. Start checking at 9 minutes. The cookies are done when the edges are set and the centers look slightly underdone. They’ll continue to cook on the hot baking sheet as they cool. Overbaking is the fastest way to dry them out.
Let the icing set completely. I know it’s tempting to stack them right away, but the icing needs time to firm up. If you stack them too soon, the icing will smear and the cookies might stick together. Give them at least 30 minutes on the cooling rack. Patience pays off.
Timing strategy: Make the dough and bake the cookies one day, then ice them the next. The un-iced cookies stay fresh in an airtight container for up to three days. Icing them fresh before serving gives you that perfect glossy finish.
Variations & Adaptations
One of the best things about this recipe is how adaptable it is. Here are some variations I’ve tried and loved.
Gluten-Free Version: Substitute the all-purpose flour with a 1:1 gluten-free baking blend that contains xanthan gum. I’ve tested this with Bob’s Red Mill and King Arthur Flour blends, and both work perfectly. The texture is slightly more tender, but the flavor is identical. No one at my Christmas party even noticed the difference.
Vegan Adaptation: Replace the butter with vegan butter (I like Miyoko’s or Earth Balance) and use a flax egg (1 tablespoon ground flaxseed mixed with 3 tablespoons water, let sit for 5 minutes). For the icing, use plant-based milk. The cookies might spread a tiny bit more, so leave extra space between scoops.
Spice It Up: Add ¼ teaspoon of black pepper or a pinch of cayenne pepper to the dry ingredients. It sounds strange, but the heat plays beautifully with the molasses and ginger. I tried this on a whim after reading about peppery gingerbread in an old cookbook, and it’s become a secret weapon in my holiday baking.
Citrus Twist: Add 1 tablespoon of finely grated orange zest to the wet ingredients. The bright citrus cuts through the deep molasses flavor and adds a fresh note. I made these for a friend’s cookie exchange, and they were the first to disappear.
Chocolate Lover’s Version: Fold in ½ cup of dark chocolate chips or chopped bittersweet chocolate after mixing the dough. The chocolate melts into little pockets of richness. This is my nephew Leo’s favorite variation—he insists it’s “the best thing ever.”
No-Icing Option: If you want to skip the icing, roll the dough balls in granulated sugar before baking. The sugar creates a sparkly, slightly crackly top that’s beautiful and delicious. I do this when I’m short on time or want a less sweet cookie.
Serving & Storage Suggestions
These cookies are incredibly versatile when it comes to serving and storing. Here’s how to make the most of them.
Serving Temperature: Serve at room temperature. The cookies are soft and the icing is set, making them perfect for snacking. If you want to elevate the experience, warm them slightly in the microwave for 10 seconds—the icing gets a little gooey, and the spices become more aromatic.
Presentation Ideas: Arrange the cookies on a festive platter or in a decorative tin lined with parchment paper. For gift-giving, stack them in a clear cellophane bag tied with a ribbon. They also look beautiful on a dessert board alongside fresh cranberries, cinnamon sticks, and star anise.
Complementary Dishes: Pair these cookies with a hot cup of spiced chai, mulled cider, or a classic cup of coffee. They’re also wonderful with a scoop of vanilla ice cream or a dollop of whipped cream for a simple dessert. For a holiday spread, serve them alongside peppermint bark and shortbread cookies.
Storage Instructions: Store the cookies in an airtight container at room temperature for up to 5 days. Place a slice of bread in the container to keep them extra soft—the bread absorbs excess air and releases moisture. Replace the bread slice every other day.
Freezer Instructions: These cookies freeze beautifully. Freeze the un-iced cookies in a single layer on a baking sheet, then transfer them to a freezer-safe bag or container. They’ll keep for up to 3 months. When ready to serve, thaw at room temperature, then ice them fresh. The icing doesn’t freeze well, so always add it after thawing.
Flavor Development: The spices actually deepen and meld together after a day or two. I often find these cookies taste even better on day two or three. The molasses becomes more pronounced, and the texture stays perfectly soft. It’s a great excuse to bake ahead.
Nutritional Information & Benefits
While these are definitely a treat, there are a few nutritional bright spots worth noting. Here’s an estimated breakdown per cookie (based on 24 cookies):
- Calories: Approximately 145
- Total Fat: 5g
- Saturated Fat: 3g
- Carbohydrates: 24g
- Sugar: 16g
- Protein: 2g
- Fiber: 0.5g
- Sodium: 95mg
Health Benefits: Molasses is a surprisingly good source of iron, calcium, and potassium. It’s also lower on the glycemic index than refined sugar, meaning it causes a slower rise in blood sugar. The ginger in these cookies is known for its anti-inflammatory properties and can help with digestion. Cinnamon is packed with antioxidants and may help regulate blood sugar. So while these are still a sweet indulgence, they offer a little more than empty calories.
Dietary Considerations: This recipe contains gluten, dairy, and eggs. For gluten-free and vegan options, see the variations section above. The cookies are nut-free as written, making them safe for school and office gatherings.
Personal Perspective: I believe in balance. These cookies are a celebration—a way to mark a season, share joy, and create memories. They’re not an everyday food, but they’re absolutely worth every bite. I never feel guilty enjoying one (or two) with a cup of tea.
Conclusion
These cozy soft gingerbread cookies with molasses icing have become a staple in my kitchen for a reason. They’re quick, forgiving, and absolutely delicious. The fact that they don’t require chilling means I can satisfy a craving in under an hour. The molasses icing takes them from simple to spectacular with almost no extra effort.
I hope you give this recipe a try—and I hope you make it your own. Maybe add a pinch of black pepper for heat, or swap in orange zest for brightness. Maybe skip the icing and roll them in sugar instead. The beauty of this recipe is that it works as written, but it also welcomes your personal touch.
I’d love to hear how yours turn out. Did you try a variation? Did your family love them? Drop a comment below and let me know. And if you share them on social media, tag me—I want to see your beautiful cookies. Happy baking, friends. May your kitchen smell like gingerbread and your heart feel full.
Frequently Asked Questions
Can I use blackstrap molasses instead of unsulphured?
I wouldn’t recommend it. Blackstrap molasses is much darker, thicker, and more bitter. It will overpower the spices and make the cookies taste harsh. Stick with unsulphured molasses for the best flavor and texture.
Why are my cookies spreading too much?
If your cookies are spreading into flat discs, your butter was probably too soft or melted. Make sure your butter is softened to room temperature—it should still hold its shape but be easy to press. Also, check that your baking soda is fresh. Old baking soda loses its leavening power.
Can I make the dough ahead of time?
Absolutely. You can scoop the dough into balls and refrigerate them in an airtight container for up to 3 days. You can also freeze the scooped dough balls on a baking sheet, then transfer them to a freezer bag for up to 3 months. Bake from frozen, adding 1-2 minutes to the baking time.
How do I get the icing to set faster?
If you’re in a hurry, pop the iced cookies in the refrigerator for 15 minutes. The cold will help the icing firm up quickly. Just make sure the cookies are completely cool before you ice them, or the icing will melt and slide off.
Can I double this recipe?
Yes, this recipe doubles beautifully. Just make sure you have enough baking sheets and space in your oven. You can also bake in batches—the dough holds up well at room temperature for up to an hour while you wait for the first batch to finish.
Pin This Recipe!
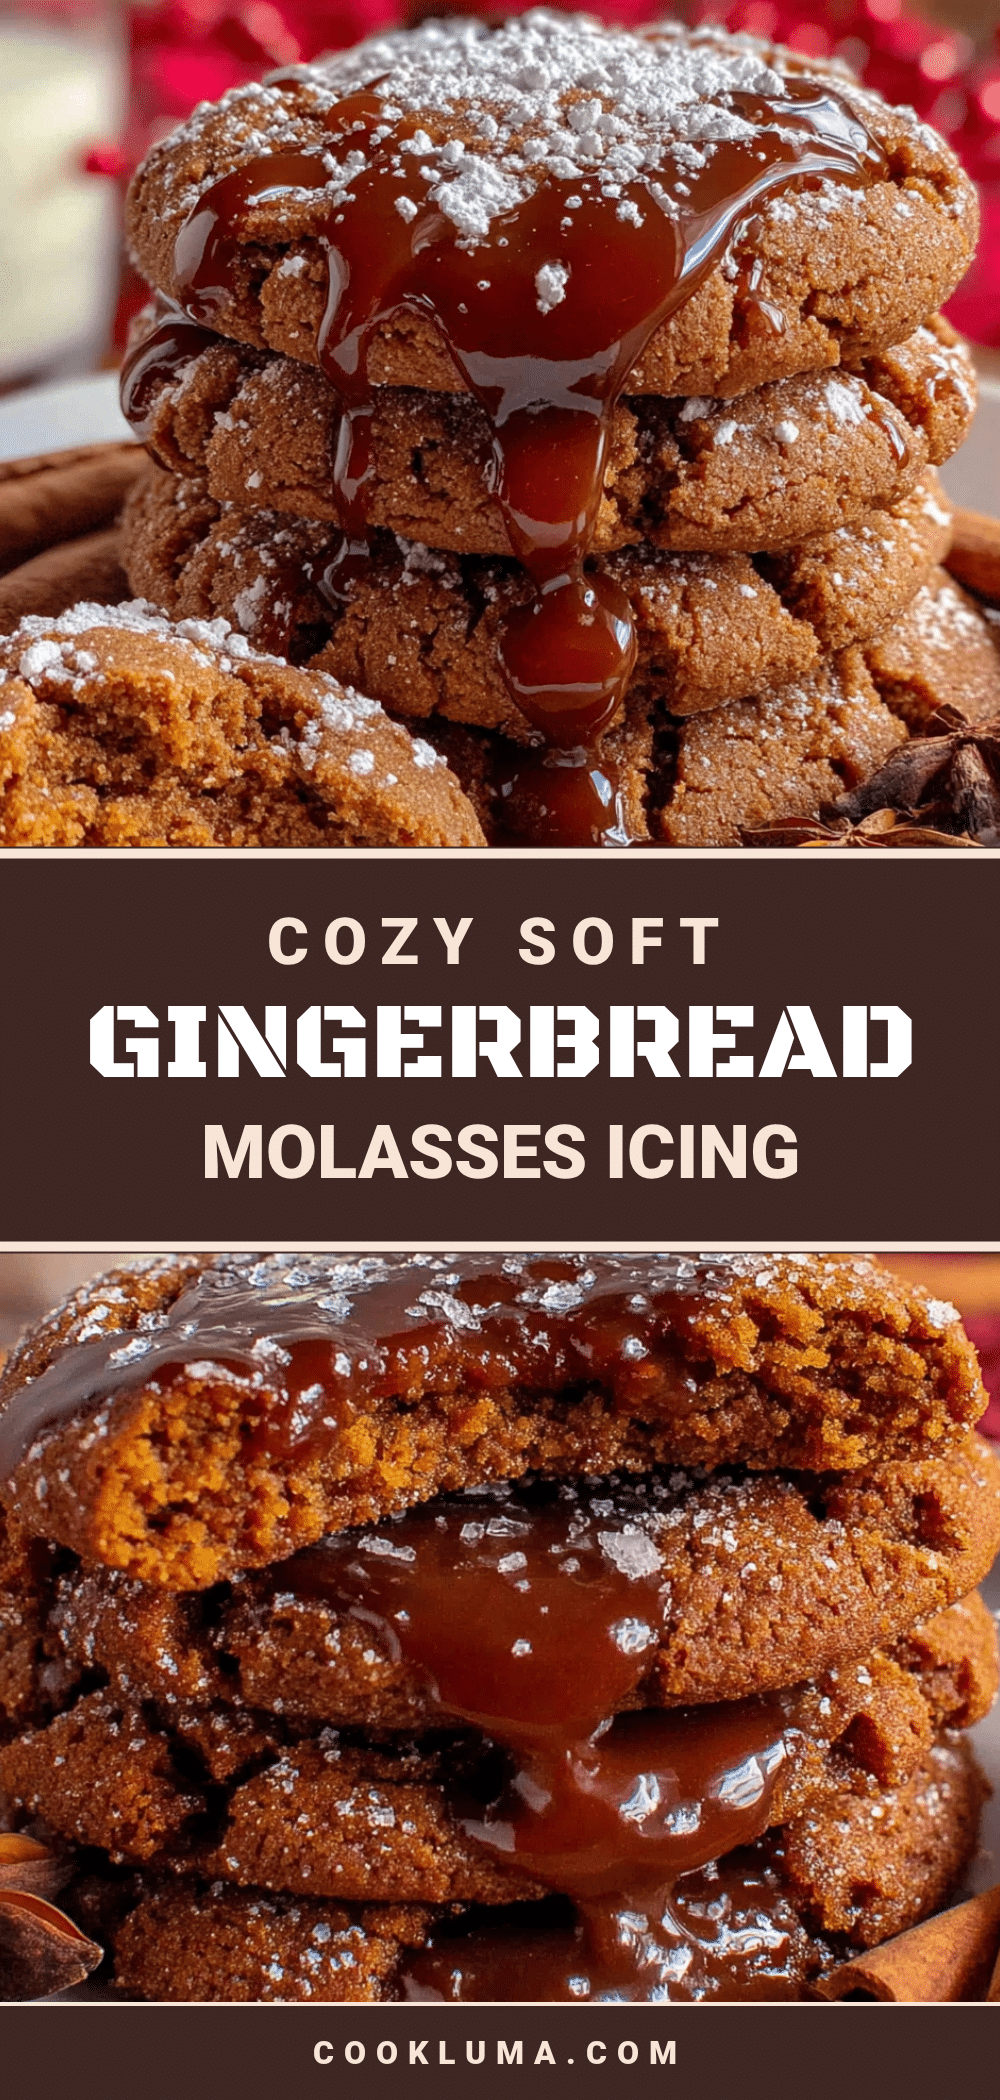
Cozy Soft Gingerbread Cookies with Molasses Icing

These cozy soft gingerbread cookies with molasses icing are proof that sometimes the best recipes come from letting go of the rules. Deeply spiced, pillowy soft, and topped with a glossy molasses icing that sinks into every crack, they come together without the fuss of chilling.
- Prep Time: 15 minutes
- Cook Time: 12 minutes
- Total Time: 45 minutes
- Yield: 24 cookies 1x
- Category: Dessert
- Cuisine: American
Ingredients
- 2 ¼ cups (280g) all-purpose flour
- 1 teaspoon baking soda
- ½ teaspoon salt
- 2 teaspoons ground ginger
- 1 teaspoon ground cinnamon
- ½ teaspoon ground cloves
- ¼ teaspoon ground nutmeg
- ½ cup (113g) unsalted butter, softened to room temperature
- ½ cup (100g) packed light brown sugar
- ¼ cup (50g) granulated sugar
- 1 large egg, room temperature
- ½ cup (170g) unsulphured molasses
- 1 teaspoon vanilla extract
- 1 ½ cups (180g) confectioners’ sugar, sifted
- 2 tablespoons unsulphured molasses
- 2–3 tablespoons milk or water
- ¼ teaspoon vanilla extract (optional)
Instructions
- Preheat your oven to 350°F (175°C). Line two baking sheets with parchment paper or silicone mats.
- Whisk the dry ingredients together: In a medium bowl, combine the flour, baking soda, salt, ginger, cinnamon, cloves, and nutmeg. Whisk until evenly blended. Set aside.
- Cream the butter and sugars: In a large mixing bowl, beat the softened butter, brown sugar, and granulated sugar together on medium speed until light and fluffy—about 2 to 3 minutes.
- Add the wet ingredients: Beat in the egg, molasses, and vanilla extract until fully combined. Scrape down the sides of the bowl with a spatula.
- Add the dry ingredients gradually: With the mixer on low speed, add the flour mixture in two additions, mixing just until no streaks of flour remain. The dough will be soft, slightly sticky, and very fragrant.
- Scoop the dough: Using a 1.5-tablespoon cookie scoop, drop rounded balls of dough onto the prepared baking sheets, spacing them about 2 inches apart.
- Bake immediately: Place the baking sheets in the preheated oven and bake for 10 to 12 minutes. The cookies should be puffed, set around the edges, and still slightly soft in the center.
- Cool on the baking sheet: Let the cookies rest on the hot baking sheet for 5 minutes. Then transfer them to a wire rack to cool completely before icing.
- Make the molasses icing: While the cookies cool, whisk together the sifted confectioners’ sugar, molasses, 2 tablespoons of milk, and vanilla extract in a small bowl. Whisk until smooth and glossy. If the icing is too thick, add the remaining tablespoon of milk, one teaspoon at a time, until it reaches a drizzling consistency.
- Ice the cookies: Once the cookies are completely cool, drizzle the icing over the tops using a spoon or a piping bag with a small tip. Let the icing set for about 30 minutes before stacking or storing.
Notes
Don’t overmix the dough. Use a cookie scoop for uniform size. Rotate your baking sheets halfway through. Check for doneness early. Let the icing set completely. For gluten-free, use a 1:1 gluten-free baking blend. For vegan, use vegan butter and a flax egg. Store in an airtight container at room temperature for up to 5 days. Freeze un-iced cookies for up to 3 months.
Nutrition
- Serving Size: 1 cookie
- Calories: 145
- Sugar: 16
- Sodium: 95
- Fat: 5
- Saturated Fat: 3
- Carbohydrates: 24
- Fiber: 0.5
- Protein: 2
Keywords: gingerbread cookies, soft gingerbread, molasses icing, no chill cookies, holiday cookies, Christmas cookies, easy gingerbread


