I was standing in the cookie aisle at Target last October, trying to decide between sprinkles, when a kid zoomed past me clutching a package of those mass-produced, frosted turkey cookies. The crinkle of the plastic wrapper hit me, and suddenly I was seven years old at my Aunt Carol’s kitchen table in Wichita, Kansas. She had this cracked ceramic rooster on her counter that held her icing tips, and I can still feel the way my fingers stuck to the buttercream as I tried to pipe feathers onto a sugar cookie shaped like a turkey. She passed away five years ago, and nobody in my family makes those cookies anymore. Honestly, I think I blocked out how much I missed them until that random Tuesday in the baking aisle.
I grabbed a bag of powdered sugar on impulse and figured I’d figure the rest out at home. Let me tell you, the first batch was a disaster—the icing was too runny, the cookies spread into blobs, and I ended up with what looked like abstract turkeys. But I kept at it, tweaking the dough, adjusting the icing consistency, and testing different piping techniques. Maybe you’ve been there, trying to recreate a taste from your past and coming up short the first few times. It’s frustrating, but it’s also kind of beautiful, you know? The trying part.
Now, after about eight test batches and a lot of shared sugar highs with my neighbors, I’ve got a recipe that would make Aunt Carol proud. These iced turkey sugar cookies are the perfect Thanksgiving treat—fun to decorate, sturdy enough for little hands, and soft-baked with a hint of almond that makes them taste like something special. They’re not just cookies; they’re little edible memories waiting to happen. And that’s why I keep making them, year after year, for every Thanksgiving table I’m invited to.
Why You’ll Love This Recipe
These aren’t your average sugar cookies. I’ve tested this recipe more times than I care to admit, and here’s what makes them stand out from the cookie cutter crowd.
- Foolproof Dough : This dough doesn’t spread. You can cut intricate shapes, and they’ll hold their form in the oven. No more blob turkeys.
- Simple Ingredients : You probably have everything in your pantry right now. No weird extracts or hard-to-find specialty flours.
- Perfect for Thanksgiving : These are the star of any kids’ table, and adults sneak them too. I’ve seen it happen.
- Crowd-Pleaser : The almond-vanilla combo is subtle but addictive. People always ask for the recipe.
- Freezer-Friendly : Bake the cookies ahead and decorate when you have time. Thanksgiving stress? What stress.
What makes this recipe different from the dozens of others out there? It’s the icing, honestly. I spent weeks perfecting a royal icing that dries hard enough to stack but softens slightly when you bite into it. It’s not that chalky, teeth-cracking stuff. It’s silky and smooth, with just the right amount of sweetness to complement the buttery cookie base.
This is the kind of recipe that makes you slow down. There’s something meditative about piping those little turkey feathers, one by one. It’s comfort food reimagined—a little bit nostalgic, a little bit new, and completely worth the effort. Perfect for impressing your in-laws without actually having to cook a turkey, or turning a simple afternoon into a memory your kids will carry with them.
What Ingredients You Will Need
This recipe uses simple, wholesome ingredients to deliver that classic sugar cookie taste and texture. Most of these are pantry staples, so you’re probably already halfway there.
For the Cookies:
- 3 cups all-purpose flour (I use King Arthur for consistent results)
- 1 teaspoon baking powder
- ½ teaspoon salt
- 1 cup unsalted butter, softened (European-style butter like Kerrygold adds extra richness)
- 1 cup granulated sugar
- 1 large egg, room temperature
- 1 teaspoon vanilla extract
- ½ teaspoon almond extract (trust me on this one—it’s the secret weapon)
For the Royal Icing:
- 4 cups powdered sugar, sifted
- 3 tablespoons meringue powder (I recommend Wilton brand for stability)
- 5-6 tablespoons warm water
- ½ teaspoon vanilla extract
- Gel food coloring (brown, orange, red, yellow, and green for turkey feathers—avoid liquid coloring as it thins the icing)
For Decorating:
- Edible candy eyes (optional, but adorable)
- Orange and red sprinkles for the wattle and beak (or pipe with icing)
- Piping bags or zip-top bags with the corner snipped off
A quick note on ingredients: meringue powder is non-negotiable here. It gives the icing that perfect hard-dry finish without using raw egg whites, so it’s safe for kids to help decorate. If you can’t find it, you can substitute with pasteurized egg whites, but the texture won’t be quite as stable. For a dairy-free version, use plant-based butter that’s at least 80% fat content—I’ve had good luck with Miyoko’s. And if you’re gluten-sensitive, swap the all-purpose flour for a 1:1 gluten-free baking blend. The cookies will be slightly more delicate, so handle them gently.
Equipment Needed
You don’t need a professional bakery setup for these cookies, but a few key tools make the process much smoother.
- Turkey cookie cutter (obviously! I found mine on Amazon for $8, but any 3-4 inch shape works)
- Stand mixer or hand mixer (I prefer my KitchenAid for the icing, but hand mixing works fine)
- Rolling pin with thickness rings (these are a game-changer for even cookies)
- Parchment paper or silicone baking mats (Silicone mats prevent spreading better)
- Piping bags with small round tips (Wilton #2 or #3 for detail work)
- Offset spatula (for flooding the cookies with icing)
- Cooling racks (you need air circulation underneath for even cooling)
If you don’t have a turkey cutter, you can use a round cutter and freehand the feathers with icing—it’s actually a fun challenge. And if you’re on a budget, those disposable piping bags from the grocery store work just fine. Just don’t use wax paper instead of parchment; I learned that the hard way when my cookies fused to the paper and I had to peel them apart like a sad, crumbly puzzle.
Preparation Method

Let’s get to the fun part. I’ve broken this down into stages so you don’t feel overwhelmed. Trust the process, and don’t skip the chilling steps—they’re crucial.
Step 1: Make the Cookie Dough (15 minutes + 1 hour chill time)
In a medium bowl, whisk together the flour, baking powder, and salt. Set aside. In the bowl of your stand mixer, beat the softened butter and sugar on medium speed until light and fluffy—about 3 minutes. You want it to look pale and almost creamy. Scrape down the sides, then add the egg, vanilla extract, and almond extract. Beat until combined, about 30 seconds. With the mixer on low, gradually add the dry ingredients. Mix just until the dough comes together. It should look shaggy but hold together when you pinch it. Turn it out onto a lightly floured surface, divide it in half, flatten each half into a disc, wrap in plastic wrap, and refrigerate for at least 1 hour. Overnight is even better.
Step 2: Roll and Cut (20 minutes + 30 minutes chill time)
Preheat your oven to 350°F (175°C). Line two baking sheets with parchment paper. Take one disc of dough out of the fridge and let it sit for 5 minutes—it’ll crack if you try to roll it rock hard. On a lightly floured surface, roll the dough to about ¼-inch thickness. I use rolling pin rings for consistency, but if you’re eyeballing it, aim for the thickness of two stacked quarters. Cut out your turkey shapes and transfer them to the prepared baking sheets, spacing them about 2 inches apart. Here’s the trick: after you cut them, pop the baking sheet in the fridge for 15-20 minutes before baking. This prevents spreading and keeps those turkey silhouettes sharp. Repeat with the second disc of dough, re-rolling scraps as needed.
Step 3: Bake (10-12 minutes)
Bake the chilled cookies for 10-12 minutes, rotating the pan halfway through. You want the edges to be just barely golden—the centers should look set but not brown. They’ll continue to firm up as they cool. Let them sit on the baking sheet for 5 minutes, then transfer to a wire rack to cool completely. Do not even think about icing them while they’re warm. The icing will melt into a puddle, and you’ll have abstract modern art instead of turkeys.
Step 4: Make the Royal Icing (10 minutes)
In the bowl of your stand mixer (or a large bowl with a hand mixer), combine the sifted powdered sugar and meringue powder. Add 5 tablespoons of warm water and the vanilla extract. Beat on low speed until combined, then increase to medium-high and beat for 5-7 minutes. The icing should be thick and glossy, with stiff peaks that hold their shape. To test: lift the beater—the icing should form a ribbon that slowly sinks back into the bowl. If it’s too thick, add water one teaspoon at a time. If it’s too thin, add more powdered sugar. Divide the icing into small bowls and color each one with gel food coloring. For the feathers, you’ll need brown, orange, red, yellow, and green. For the turkey body, leave some white or tint it light brown.
Step 5: Decorate (Time varies—give yourself an hour)
This is where the magic happens. Fill your piping bags with the different colored icings. Start by outlining the turkey body with the brown or white icing using a #2 tip. Let that dry for 5 minutes. Then, thin out some of the icing with a few drops of water to make “flood” consistency—it should flow like honey. Fill in the body with the thinned icing and use a toothpick to spread it into the corners. For the feathers, pipe small arcs or teardrop shapes in alternating colors. I like to do a row of red, then orange, then yellow, then green. Add candy eyes while the icing is still wet, and pipe a small orange triangle for the beak and a red squiggle for the wattle. Let the cookies dry completely—at least 4 hours, or overnight. Patience, my friend.
Cooking Tips & Techniques
I’ve made every mistake in the book so you don’t have to. Here’s what I’ve learned the hard way.
Don’t overwork the dough. The more you handle it, the tougher the cookies get. Mix just until the flour disappears, and stop. If the dough feels sticky, dust your hands with flour rather than adding more to the bowl.
Chill, chill, chill. I cannot stress this enough. Warm dough spreads. If your kitchen is hot, pop the cut cookies in the freezer for 10 minutes instead of the fridge. I once skipped the chilling step because I was in a hurry, and my turkeys came out looking like mutant blobs with no discernible features. My nephew called them “turkey monsters,” which was cute, but not what I was going for.
Icing consistency is everything. For outlining, you want stiff peaks that hold their shape. For flooding, you want it to flow like thick cream. The perfect test: drag a knife through the icing—the line should disappear in about 10 seconds. If it disappears immediately, it’s too thin. If it stays visible, it’s too thick.
Work in an assembly line. Outline all the cookies first, then flood them all. By the time you finish flooding the last one, the first one’s outline will be dry enough to add details. It’s more efficient than doing one cookie at a time.
Use a damp paper towel. Keep a damp paper towel over the bowls of icing you’re not actively using. Royal icing dries out fast, and crusty icing is useless icing.
Variations & Adaptations
This recipe is endlessly customizable. Here are a few ways I’ve played with it over the years.
Dietary Variations:
- Gluten-Free : Substitute the all-purpose flour with a 1:1 gluten-free baking blend. Add an extra tablespoon of butter to compensate for the dryness of gluten-free flours.
- Dairy-Free : Use plant-based butter and ensure your meringue powder is dairy-free (most are). The texture will be slightly less tender, but still delicious.
- Vegan : Replace the egg with a flax egg (1 tablespoon ground flaxseed + 3 tablespoons water) and use vegan butter. The cookies will be a bit more crumbly, so handle with care.
Flavor Twists:
- Lemon Sugar Cookies : Add 1 tablespoon of lemon zest and replace the vanilla with lemon extract. The citrus pairs beautifully with the sweet icing.
- Spiced Turkey Cookies : Add 1 teaspoon of cinnamon, ½ teaspoon of nutmeg, and ¼ teaspoon of cloves to the flour mixture. These taste like a warm hug.
- Chocolate Base : Replace ¼ cup of flour with cocoa powder. Pipe white or orange feathers for a striking contrast.
Decorating Alternatives:
- Skip the royal icing and use store-bought frosting in a pinch. It won’t dry hard, so stack them carefully.
- Use candy corn for the feathers—press them into the icing while it’s wet for a 3D effect.
- Make mini turkeys using a small round cutter and piping tiny feathers. Perfect for party favors.
I once made a batch with chai spices for a fall baking swap, and they disappeared faster than the traditional ones. Don’t be afraid to experiment—that’s half the fun.
Serving & Storage Suggestions
These cookies are best served at room temperature, ideally within 24 hours of decorating. The icing needs that full drying time to set properly, so plan accordingly.
Presentation Ideas:
- Arrange them on a wooden platter with mini pumpkins and autumn leaves for a Thanksgiving centerpiece.
- Place each cookie in a clear cellophane bag tied with orange twine for party favors.
- Stack them in a mason jar for a casual, rustic look.
Storage:
- Room Temperature : Store in an airtight container at room temperature for up to 1 week. Layer them between sheets of parchment paper to prevent the icing from sticking.
- Freezer : Freeze the undecorated baked cookies for up to 3 months. Thaw at room temperature, then decorate. Do not freeze decorated cookies—the icing can crack or become sticky when thawed.
- Iced Cookies : If you must store decorated cookies, place them in a single layer in an airtight container. Do not stack them, even with parchment, until the icing has cured for at least 24 hours.
A little secret: the flavors actually meld together after a day or two. The almond extract settles into the butter, and the cookies become even more tender. So if you can wait, they’re even better on day two.
Nutritional Information & Benefits
Let’s be real—these are cookies, not health food. But knowledge is power, right? Here’s the approximate breakdown per cookie (based on a 3-inch turkey shape with icing):
- Calories : 180-220
- Fat : 8g
- Carbohydrates : 28g
- Protein : 2g
- Sugar : 18g
Health Highlights:
- Butter provides vitamin A and healthy fats for brain function.
- Making them from scratch means no preservatives or artificial additives.
li>Almond extract adds flavor without extra calories or sugar.
Dietary Considerations:
- Contains gluten, dairy, and eggs (see variations for alternatives)
- Not suitable for low-carb or keto diets due to sugar content
- Can be made nut-free by omitting the almond extract and using extra vanilla
I personally believe in balance—enjoy these treats in moderation, savor every bite, and don’t stress about the numbers. Thanksgiving is about gratitude, not guilt.
Conclusion
These iced turkey sugar cookies are more than just a cute Thanksgiving treat. They’re a way to slow down, connect with your family, and create a tradition that’ll stick with your kids long after they’ve grown up. I think about Aunt Carol every time I pipe those little feathers, and I hope these cookies bring you that same sense of warmth and nostalgia.
Don’t be afraid to make them your own. Use different colors, try different flavor extracts, or let the kids go wild with the sprinkles. The beauty of homemade is that there are no rules—just delicious results.
I’d love to hear how yours turn out! Drop a comment below with your decorating creations, tag me in your photos on Pinterest, or share your own Thanksgiving cookie traditions. And if you try the gluten-free version, let me know how it goes. Happy baking, and happy Thanksgiving!
Frequently Asked Questions
Can I make the dough ahead of time?
Absolutely. The dough can be refrigerated for up to 3 days or frozen for up to 3 months. Just wrap it tightly in plastic wrap and then in foil. Thaw overnight in the fridge before rolling.
Why did my cookies spread in the oven?
Most likely, the dough wasn’t chilled enough. Make sure your butter is softened but not melted, and always chill the cut cookies for at least 15 minutes before baking. Also, check that your baking powder is fresh—old leavening agents can cause spreading.
Can I use liquid food coloring instead of gel?
I wouldn’t recommend it. Liquid food coloring adds extra moisture to the royal icing, which can thin it out and make it runny. Gel colors give you vibrant shades without affecting the consistency.
How do I get the icing to dry faster?
Set up a fan on low speed pointed at the cookies, or place them in a dry, warm spot in your kitchen. Avoid the refrigerator, as condensation can make the icing sticky. Patience is your best tool, though—4 hours minimum is non-negotiable.
Can I use this recipe for other shapes?
Definitely! This dough is versatile enough for any cookie cutter. Just adjust the baking time based on the size of your cookies—smaller shapes may need only 8-9 minutes, while larger ones might need up to 14 minutes. Keep an eye on the edges for that golden-brown cue.
Pin This Recipe!
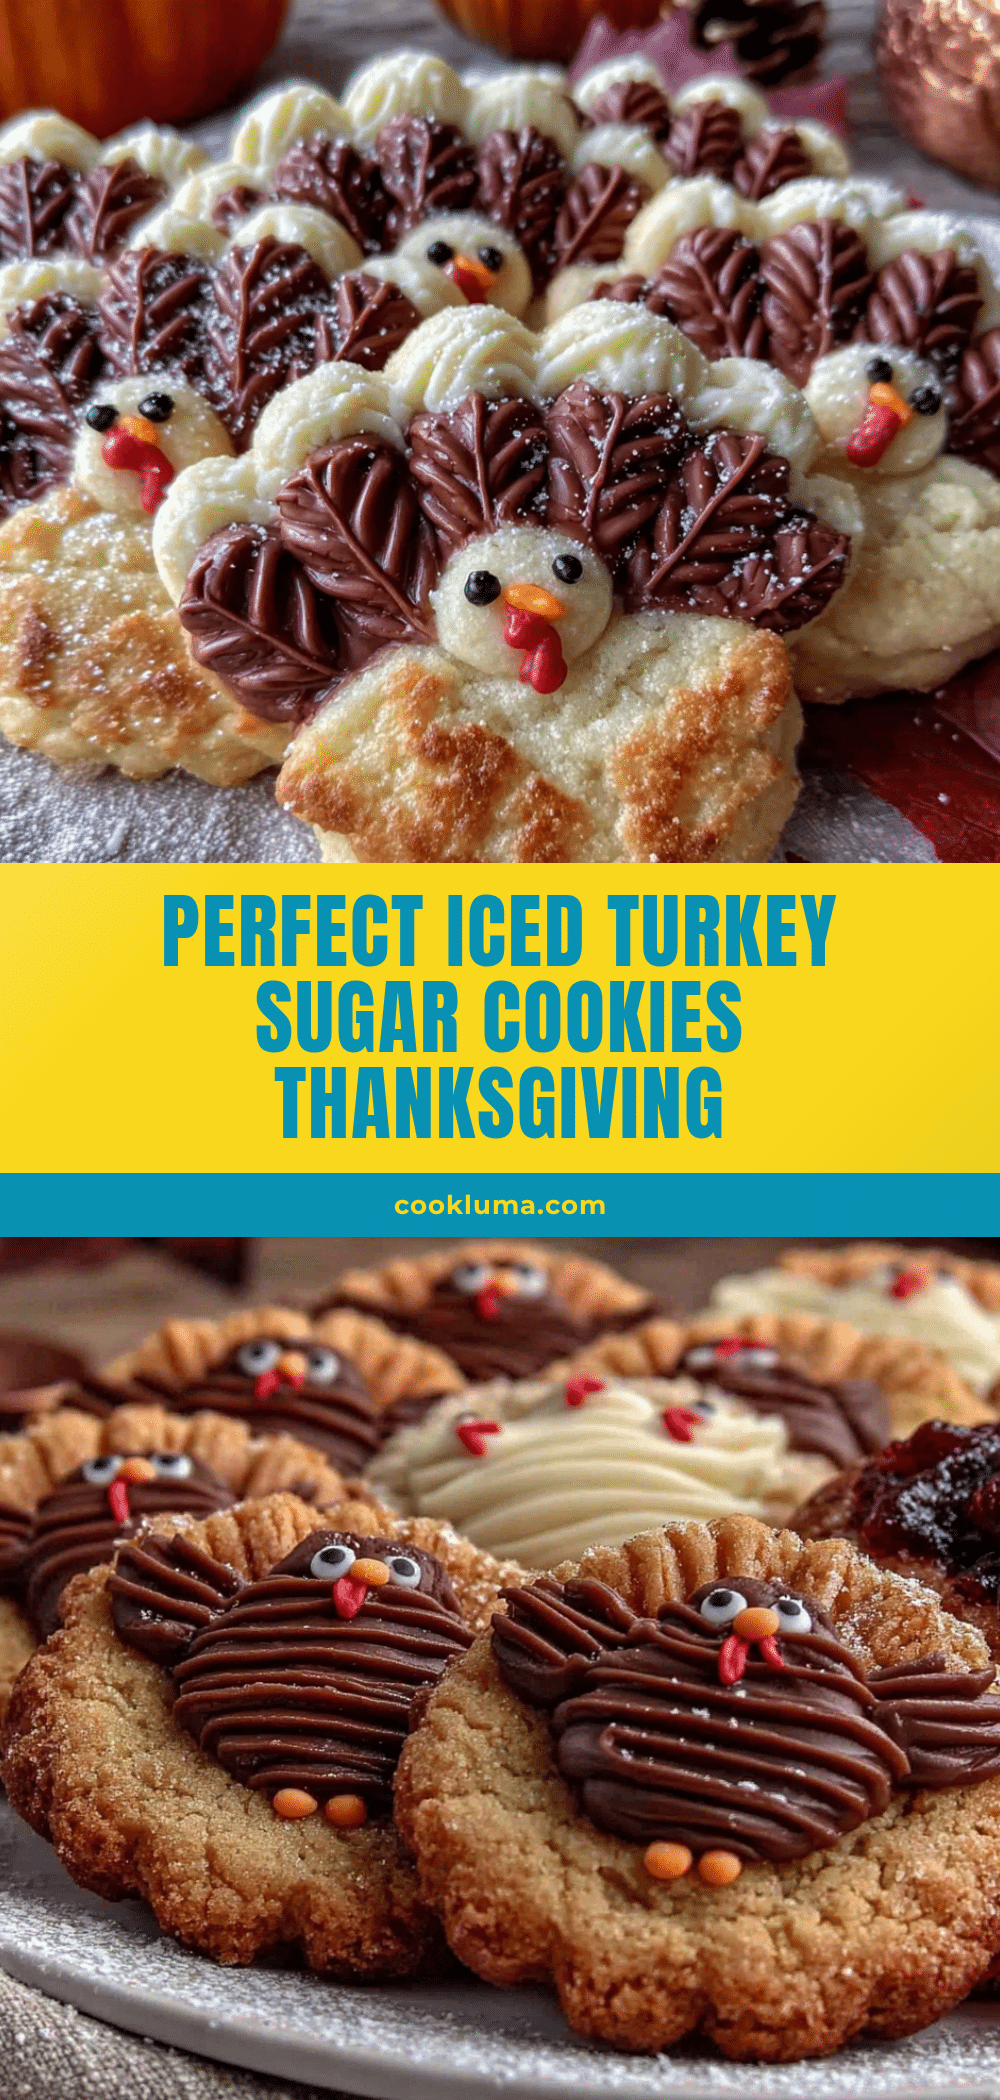
Perfect Iced Turkey Sugar Cookies: Easy Thanksgiving Treats

These iced turkey sugar cookies are the perfect Thanksgiving treat—fun to decorate, sturdy enough for little hands, and soft-baked with a hint of almond that makes them taste like something special. They’re not just cookies; they’re little edible memories waiting to happen.
- Prep Time: 1 hour 35 minutes
- Cook Time: 12 minutes
- Total Time: 1 hour 47 minutes (plus 4 hours drying time)
- Yield: 24 servings 1x
- Category: Dessert
- Cuisine: American
Ingredients
- 3 cups all-purpose flour
- 1 teaspoon baking powder
- ½ teaspoon salt
- 1 cup unsalted butter, softened
- 1 cup granulated sugar
- 1 large egg, room temperature
- 1 teaspoon vanilla extract
- ½ teaspoon almond extract
- 4 cups powdered sugar, sifted
- 3 tablespoons meringue powder
- 5–6 tablespoons warm water
- ½ teaspoon vanilla extract
- Gel food coloring (brown, orange, red, yellow, green)
- Edible candy eyes (optional)
- Orange and red sprinkles (optional)
Instructions
- Make the Cookie Dough: In a medium bowl, whisk together flour, baking powder, and salt. Set aside. In a stand mixer, beat softened butter and sugar on medium speed until light and fluffy (about 3 minutes). Scrape down sides, then add egg, vanilla extract, and almond extract. Beat until combined (about 30 seconds). With mixer on low, gradually add dry ingredients. Mix just until dough comes together. Turn out onto a lightly floured surface, divide in half, flatten each half into a disc, wrap in p…
- Roll and Cut: Preheat oven to 350°F (175°C). Line two baking sheets with parchment paper. Take one disc of dough out of fridge and let sit for 5 minutes. On a lightly floured surface, roll dough to about ¼-inch thickness. Cut out turkey shapes and transfer to prepared baking sheets, spacing about 2 inches apart. Chill the baking sheet in the fridge for 15-20 minutes before baking.
- Bake: Bake chilled cookies for 10-12 minutes, rotating pan halfway through. Edges should be just barely golden. Let sit on baking sheet for 5 minutes, then transfer to a wire rack to cool completely.
- Make the Royal Icing: In a stand mixer bowl, combine sifted powdered sugar and meringue powder. Add 5 tablespoons warm water and vanilla extract. Beat on low until combined, then increase to medium-high and beat for 5-7 minutes until thick and glossy with stiff peaks. Divide icing into small bowls and color each with gel food coloring.
- Decorate: Fill piping bags with colored icings. Outline turkey body with brown or white icing using a #2 tip. Let dry for 5 minutes. Thin some icing with water to ‘flood’ consistency (flows like honey). Fill in body with thinned icing, using a toothpick to spread into corners. For feathers, pipe small arcs or teardrop shapes in alternating colors. Add candy eyes while icing is wet, pipe orange triangle for beak and red squiggle for wattle. Let cookies dry completely (at least 4 hours or overnigh…
Notes
Don’t overwork the dough. Chill the cut cookies before baking to prevent spreading. For icing consistency: outline icing should have stiff peaks, flood icing should flow like thick cream (drag a knife through—line should disappear in about 10 seconds). Keep a damp paper towel over bowls of icing not in use to prevent drying. Cookies are best within 24 hours of decorating. Store in airtight container at room temperature for up to 1 week. Freeze undecorated baked cookies for up to 3 months.
Nutrition
- Serving Size: 1 cookie
- Calories: 200
- Sugar: 18
- Sodium: 95
- Fat: 8
- Saturated Fat: 5
- Carbohydrates: 28
- Protein: 2
Keywords: turkey cookies, sugar cookies, Thanksgiving cookies, iced cookies, royal icing cookies, holiday baking, easy Thanksgiving treats


