My neighbor Karen wasn’t trying to impress anyone. I’d stopped by to borrow a ladder—our gutters were overflowing with leaves—and the smell hit me before I even got to her front door. Cinnamon, butter, something sweet and almost caramelized, drifting out through the crack in her kitchen window like it had been waiting for me. She answered with flour on her cheek and a wooden spoon in her hand, completely unfazed by the fact that she was creating what I would later argue is the single greatest fall dessert on the planet.
“Oh, it’s just my apple pie,” she said when I asked what on earth that incredible smell was. Just. Her apple pie. Like it was nothing. Like she hadn’t just stopped me mid-sentence with the aroma of cinnamon and baked apples wafting through a chilly October afternoon. I stood there holding the ladder while she went back to rolling out dough, and honestly, I almost forgot why I’d come over in the first place. The kitchen was warm and cluttered—a stack of mail on the counter, a dog bowl by the fridge, a pie dish with crimped edges waiting for its filling. It was so ordinary. And yet that pie was anything but.
She let me watch her work, which is the highest compliment a home cook can give you, you know? She didn’t use any fancy gadgets or complicated techniques. She just knew. The way she pinched the dough, the way she tossed the apple slices with cinnamon and sugar like she’d done it a thousand times—because she had. That’s the thing about recipes like this. They don’t come from cookbooks or cooking shows. They come from years of making something over and over until it becomes part of you. And let me tell you, that first bite of her cinnamon apple pie with its buttery lattice crust was the kind of moment you don’t forget. Maybe you’ve been there—that feeling when something so simple hits you right in the chest and you think, I need to learn how to make this.
So I did. I went home that night, ladder forgotten in her garage, and I started testing. I made pies with too much cinnamon and not enough sugar. I made crusts that crumbled, fillings that ran, and lattice tops that looked like a toddler’s art project. But eventually, after more apples than I care to admit, I landed on this version. It’s the one I keep coming back to every fall, the one that makes my own kitchen smell like Karen’s did that afternoon. And now I’m sharing it with you, because some recipes are too good to keep to yourself.
Why You’ll Love This Recipe
This isn’t just another apple pie recipe. After dozens of test batches and more than a few kitchen disasters, I can say with confidence that this is the one you’ll reach for every apple season. Here’s what makes it special:
- Perfectly Spiced: The cinnamon is front and center, but there’s a subtle warmth from nutmeg and allspice that makes every bite taste like fall in a dish. I tested the spice ratio six times to get it just right—not too bold, never boring.
- That Lattice Crust: I know it looks intimidating, but I promise you can do it. My first lattice was a mess, and I mean a real disaster—strips breaking, gaps everywhere. But once you get the hang of it, it’s actually kind of fun. And the visual payoff? Totally worth it.
- Never Soggy: Nobody wants a pie with a sad, wet bottom crust. I use a trick—pre-cooking the apples just a bit and letting them cool before baking—that keeps the crust crisp and flaky every single time. This was the game-changer for me.
- Simple, Real Ingredients: No boxed mixes, no shortening, no weird additives. Butter, flour, apples, sugar, and cinnamon. That’s the whole story. You probably have most of this in your kitchen right now.
- The Ultimate Fall Dessert: This pie was made for cozy evenings, Thanksgiving tables, and Saturday afternoons when the air turns crisp and you just want to bake something that makes your whole house smell incredible. It’s comfort food in its purest form.
I’ve made this pie for potlucks, holiday dinners, and random Tuesday nights when I needed a little warmth. It never lasts long. There’s something about the combination of tender cinnamon-spiced apples and that buttery, flaky crust that just hits different when the leaves start changing. And honestly? It makes you look like you know what you’re doing in the kitchen, even if you’re still figuring it out. That’s the kind of recipe worth holding onto.
What Ingredients You Will Need
This recipe uses simple, honest ingredients that work together to create something truly special. Most of these are pantry staples, especially during apple season, and I’ve included a few notes on what to look for so you get the best results.
For the Pie Crust
- 2 ½ cups all-purpose flour (315 grams) — I prefer King Arthur Flour for consistent results, but any unbleached flour works well. Spoon and level your flour for the most accurate measurement.
- 1 cup cold unsalted butter (2 sticks, 226 grams) — Cut into small cubes and keep it cold. Like, really cold. Warm butter is the enemy of flaky crust. I sometimes pop my cubed butter in the freezer for 10 minutes before starting.
- 1 teaspoon salt — Fine sea salt dissolves better than coarse salt in dough.
- 1 tablespoon granulated sugar — Just a touch for the crust. It adds a hint of sweetness without making it dessert-like on its own.
- 6 to 8 tablespoons ice water — You might not use all of it, and that’s okay. Start with 6 tablespoons and add more only if the dough feels too dry.
For the Cinnamon Apple Filling
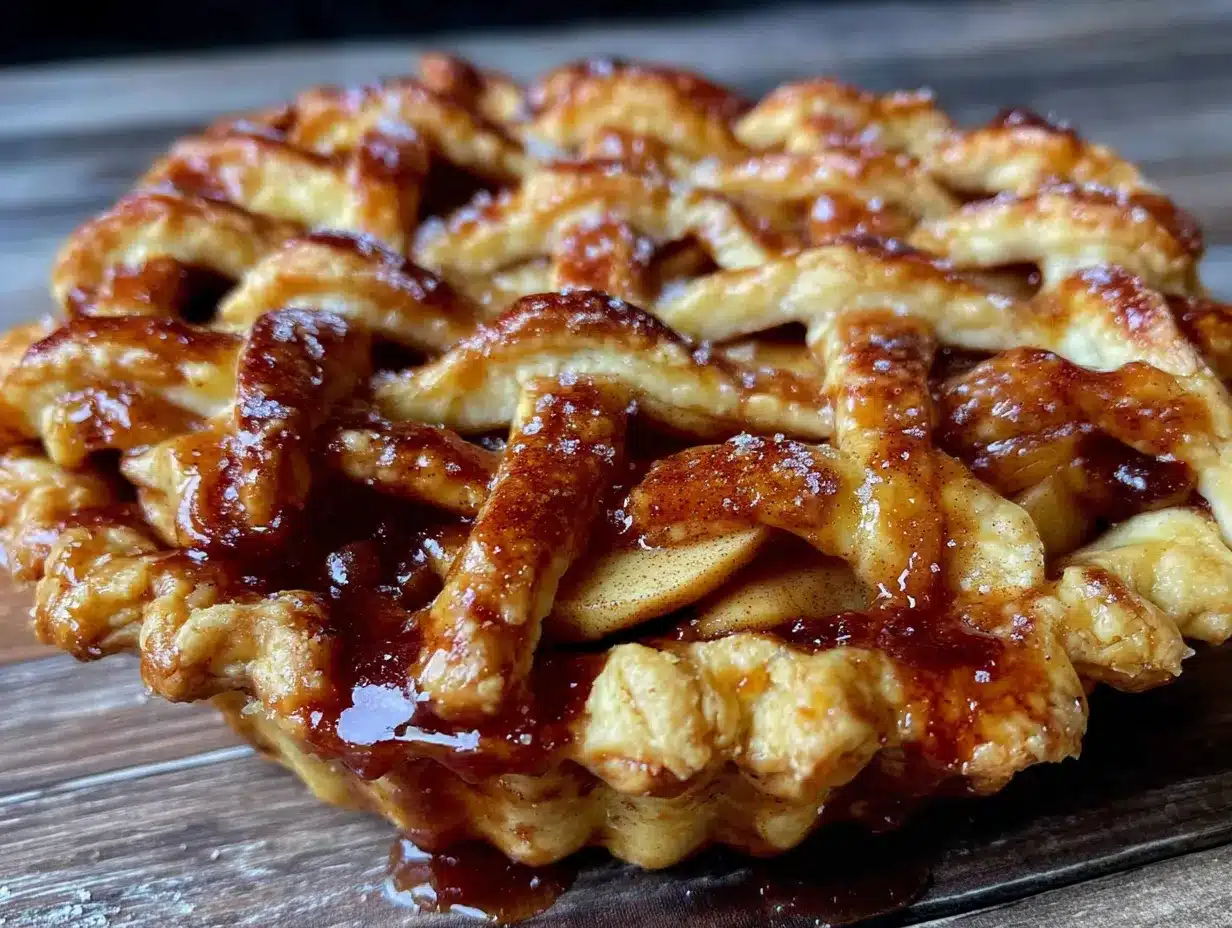
- 6 to 7 medium apples (about 3 pounds or 1.4 kg) — I use a mix of Granny Smith and Honeycrisp. The Granny Smith holds its shape and adds tartness, while the Honeycrisp brings natural sweetness and a tender texture. If you can only find one variety, go with Honeycrisp.
- ¾ cup granulated sugar (150 grams) — Adjust based on how sweet your apples are. If your apples are very sweet, you can reduce this to ½ cup.
- ¼ cup packed light brown sugar (50 grams) — Adds depth and a subtle molasses note that pairs beautifully with cinnamon.
- 2 tablespoons all-purpose flour — This helps thicken the filling so it’s not runny. I’ve tried cornstarch and instant tapioca, but flour gives the best texture for this particular pie.
- 2 teaspoons ground cinnamon — The star of the show. Use fresh cinnamon if you can—it makes a real difference. I like Vietnamese cinnamon for its bold, warm flavor.
- ¼ teaspoon ground nutmeg — Freshly grated if you have it. The pre-ground stuff works fine, but fresh adds a little something extra.
- ¼ teaspoon ground allspice — Just a pinch. It adds a warmth that you can’t quite name but would miss if it weren’t there.
- 1 tablespoon lemon juice — Fresh squeezed, please. It brightens the filling and keeps the apples from browning while you work.
- 2 tablespoons cold unsalted butter — Cut into small pieces and dotted over the filling before you add the top crust. This melts into the apples as they bake and adds richness.
For the Egg Wash and Topping
- 1 large egg — Beaten with 1 tablespoon of water for the wash. This gives the crust that beautiful golden sheen.
- 1 tablespoon coarse sugar (like turbinado or demerara) — Optional, but highly recommended. That little crunch on top of the crust is pure magic.
One thing I’ve learned over the years is that ingredient quality really matters here. Use the best butter you can afford—it’s the backbone of your crust. And don’t skip the lemon juice, even if it seems like a small detail. It balances the sweetness and keeps the apples looking fresh. If you’re dairy-free, you can substitute the butter with a high-quality vegan butter, but I won’t pretend the texture is exactly the same. It’s close, though, especially if you chill it well.
Equipment Needed
You don’t need a professional pastry kitchen to make a beautiful lattice crust pie. Here’s what I use, along with a few alternatives if you’re working with what you’ve got.
- 9-inch pie dish — Glass or ceramic works best. I use a deep-dish glass pie plate because I can see how the bottom crust is browning. If you only have a metal pan, that’s fine—just keep an eye on the baking time.
- Rolling pin — A standard rolling pin is ideal, but a wine bottle works in a pinch. I’ve done it. It’s not pretty, but it gets the job done. Just chill your dough well first.
- Pastry cutter or food processor — For cutting butter into flour. I actually prefer using my hands—the warmth helps me feel when the butter is the right size—but a pastry cutter is faster and less messy. A food processor works too, but pulse carefully so you don’t overmix.
- Sharp knife or pizza cutter — For cutting lattice strips. A pizza cutter makes straight lines much easier. I learned this after a few wobbly attempts with a knife.
- Pastry brush — For the egg wash. A silicone brush works well and doesn’t shed bristles. If you don’t have one, you can use a paper towel, but be gentle so you don’t disturb the lattice.
- Baking sheet — Place it under the pie dish in the oven to catch any drips. Trust me on this one. I’ve cleaned burnt sugar off my oven floor more times than I’d like to admit.
- Parchment paper or silicone mat — For rolling out the dough. It prevents sticking and makes cleanup a breeze.
If you’re new to pie-making, don’t stress about the equipment. The most important tools are patience and a willingness to get your hands a little floury. Everything else is just a bonus.
Preparation Method
Take your time with this one. There’s no rush, and the pie will reward you for every careful step. I’ve broken it down into manageable stages so you can work through it without feeling overwhelmed.
Step 1: Make the Pie Dough
In a large bowl, whisk together the flour, salt, and sugar. Add the cold butter cubes and toss them in the flour to coat. Using a pastry cutter or your fingertips, work the butter into the flour until the mixture looks like coarse meal with some pea-sized butter pieces remaining. Don’t overdo it—those little butter chunks are what create flaky layers. Drizzle 6 tablespoons of ice water over the mixture and stir with a fork until the dough starts to come together. If it feels too dry, add the remaining water, one tablespoon at a time. The dough should hold together when you squeeze a handful. Divide it in half, flatten each half into a disk, wrap in plastic wrap, and refrigerate for at least 1 hour. Overnight is even better.
Step 2: Prepare the Apple Filling
While the dough chills, peel, core, and slice your apples into ¼-inch thick slices. I like them thin enough to layer nicely but thick enough that they don’t turn to mush. In a large bowl, toss the apple slices with the lemon juice to prevent browning. In a separate small bowl, whisk together the granulated sugar, brown sugar, flour, cinnamon, nutmeg, and allspice. Pour the sugar mixture over the apples and toss until every slice is coated. Let this sit for 15 to 20 minutes. You’ll notice the apples release some liquid—that’s good. It means the filling won’t be watery in the oven.
Step 3: Roll Out the Bottom Crust
On a lightly floured surface, roll out one disk of dough into a 12-inch circle, about ⅛-inch thick. Carefully transfer it to your pie dish, gently pressing it into the bottom and up the sides. Leave about ½ inch of overhang. Pop it in the refrigerator while you work on the lattice strips. Keeping the dough cold is the secret to a flaky crust, so don’t skip this step.
Step 4: Roll Out the Top Dough and Cut Strips
Roll out the second disk of dough into another 12-inch circle. Using a sharp knife or pizza cutter, cut it into 10 to 12 strips, each about ¾ inch wide. Don’t worry if they’re not perfectly even—rustic is charming. Place the strips on a parchment-lined baking sheet and refrigerate them for 15 minutes. Cold strips are much easier to weave.
Step 5: Assemble the Pie
Preheat your oven to 400°F (200°C). Remove the pie dish from the refrigerator. Spoon the apple filling into the crust, mounding it slightly in the center. Dot the filling with the small pieces of cold butter. Now for the lattice: Lay 5 to 6 strips across the pie in one direction, spacing them about ¾ inch apart. Fold back every other strip, lay a strip perpendicular across the center, and unfold the folded strips over it. Repeat this process, alternating which strips you fold back, until the entire pie is woven into a beautiful lattice pattern. Trim the excess strip ends, leaving about ½ inch overhang. Fold the bottom crust over the lattice strips and crimp the edges however you like—I use a simple fork press or my fingers for a ruffled edge.
Step 6: Egg Wash and Bake
Brush the entire crust with the beaten egg wash, being careful not to let it pool in the lattice gaps. Sprinkle the coarse sugar over the top. Place the pie on a baking sheet and bake at 400°F for 20 minutes. Then reduce the oven temperature to 375°F (190°C) and bake for another 40 to 50 minutes, until the crust is deep golden brown and the filling is bubbling through the lattice. If the edges start browning too quickly, tent them loosely with foil about halfway through. Let the pie cool on a wire rack for at least 3 hours before slicing. This is the hardest part, I know, but the filling needs time to set. Cutting too early will give you a runny mess.
Cooking Tips & Techniques
I’ve made this pie more times than I can count, and I’ve picked up a few tricks along the way that make a real difference. Here’s what I wish someone had told me when I started.
Keep everything cold. I cannot say this enough. Cold butter, cold water, cold dough. If your kitchen is warm, pop your pie dish with the bottom crust in the fridge while you roll out the top. I’ve had crusts shrink in the oven because I got lazy about chilling, and it’s heartbreaking. Also, if your dough gets sticky while rolling, don’t add more flour—just chill it for 10 minutes and try again.
Don’t skip the maceration step. Letting the apples sit with the sugar and spices draws out excess liquid, which means your filling will be concentrated and flavorful instead of watery. I learned this after a pie that looked beautiful but had a sad, soupy filling. The 20-minute wait is worth it.
Use a mix of apple varieties. I mentioned Granny Smith and Honeycrisp, but you can also use Fuji, Braeburn, or Pink Lady. The key is combining a firm, tart apple with a sweeter, softer one. All Granny Smith can be too tart and firm; all Honeycrisp can get mushy. The mix gives you the best of both worlds.
Watch your oven like a hawk. Every oven runs a little differently. My old oven ran hot, and I burned the edges of my first few pies before I learned to tent them with foil. Check the pie around the 30-minute mark and adjust as needed. If the lattice is browning unevenly, rotate the baking sheet.
Let it cool completely. I know, I know—the smell is torture. But a warm pie will collapse into a puddle when you cut it. I once served a pie after just an hour of cooling, and it was more like apple soup with crust islands. Not my finest moment. Give it the full 3 hours on a wire rack. Your patience will be rewarded.
Variations & Adaptations
This recipe is wonderful as written, but it’s also flexible enough to adapt to different tastes and dietary needs. Here are a few variations I’ve tried and loved.
Gluten-Free Version: Substitute the all-purpose flour with a good gluten-free flour blend that includes xanthan gum. I’ve had the best luck with Cup4Cup or Bob’s Red Mill 1-to-1. The dough will be a bit more delicate, so handle it gently and chill it well. The filling stays the same—just make sure your flour thickener is gluten-free.
Vegan Option: Use cold vegan butter in the crust and skip the egg wash (brush with a little plant-based milk and sprinkle sugar instead). The texture won’t be quite as flaky, but it’s still delicious. I’ve tested this with Miyoko’s butter and been happy with the results.
Spiced Variation: If you love warm spices, add ¼ teaspoon of ground ginger and a pinch of cloves to the filling. It gives the pie a chai-like warmth that’s perfect for holiday gatherings. I made this version for a Friendsgiving once, and it disappeared before the turkey came out.
Caramel Apple Twist: Drizzle ¼ cup of salted caramel sauce over the apples before adding the lattice top. It adds a rich, buttery sweetness that takes the pie to another level. Just be careful not to add too much liquid, or the filling might get runny.
Mini Pies: Use the same recipe to make 4 to 6 mini pies in ramekins or a muffin tin. Adjust the baking time to about 25 to 30 minutes at 375°F. They’re perfect for parties or when you want individual portions.
Serving & Storage Suggestions
This pie is best served at room temperature after it’s fully cooled. If you want to warm it up, pop individual slices in a 300°F oven for 10 minutes—not the microwave, which will make the crust soggy. I serve mine with a scoop of vanilla bean ice cream or a dollop of lightly sweetened whipped cream. The cold creaminess against the warm spiced apples is pure heaven.
For a cozy fall presentation, dust the top with a little extra cinnamon before serving. I sometimes add a few fresh apple slices or a cinnamon stick as a garnish if I’m feeling fancy. It pairs beautifully with a cup of hot apple cider or a spiced chai latte.
Storing Leftovers: Cover the pie loosely with foil or plastic wrap and store at room temperature for up to 2 days. After that, transfer it to the refrigerator for up to 4 more days. The crust will soften a bit in the fridge, but the flavor actually deepens overnight. I’ve been known to eat a slice cold for breakfast the next morning—don’t judge me.
Freezing: You can freeze the unbaked pie for up to 3 months. Assemble it completely, wrap it tightly in plastic wrap and then foil, and freeze. When you’re ready to bake, pop it straight from the freezer into the oven—no need to thaw. Add about 15 to 20 minutes to the baking time. Baked pies also freeze well; just cool completely, wrap, and freeze. Thaw overnight in the refrigerator and reheat gently in the oven.
Flavor Development: Here’s a little secret—this pie actually tastes better the next day. The spices settle, the apples absorb more of the syrup, and the crust softens just enough to make every bite perfect. So if you’re making it for a holiday dinner, bake it the day before. Your future self will thank you.
Nutritional Information & Benefits
Let’s be real—this is a dessert, not a health food. But that doesn’t mean it can’t have some redeeming qualities. Here’s a rough breakdown per slice (based on 8 servings):
- Calories: Approximately 420-460 per slice
- Fat: 18-22g (mostly from butter, which is real food)
- Carbohydrates: 62-68g
- Fiber: 4-5g (thanks to the apples)
- Sugar: 35-40g (naturally occurring plus added)
- Protein: 4-5g
Apples are a good source of fiber and vitamin C, and cinnamon has anti-inflammatory properties. So there’s that. The butter provides fat-soluble vitamins A, D, E, and K, especially if you use grass-fed butter. Honestly, I think the biggest benefit is the joy it brings. There’s something deeply satisfying about making a pie from scratch, sharing it with people you love, and watching the smiles spread around the table. That counts for something, right?
If you’re watching your sugar intake, you can reduce the sugar to ½ cup total, but the texture and sweetness will be different. For a lower-carb option, this isn’t the recipe for you—maybe try a crustless apple crisp instead.
Conclusion
This cinnamon apple pie with its beautiful lattice crust is more than just a dessert. It’s a way to capture the essence of fall—the crisp air, the changing leaves, the warmth of a kitchen filled with the smell of cinnamon and butter. It’s the recipe I turn to when I want to slow down and create something with my hands, something that takes time and care and a little bit of love.
I’ve shared this recipe with friends, family, and now with you, and it never gets old. Every time I pull that golden pie out of the oven, I think of Karen and her flour-dusted cheek, and I smile. That’s the power of a good recipe—it connects us, it comforts us, and it reminds us that the simplest things are often the best.
So go ahead. Grab some apples, dust off your rolling pin, and give this pie a try. Make it your own—add extra cinnamon if that’s your thing, or swap in your favorite apple variety. And when you take that first bite, let me know how it turns out. Leave a comment below, share a photo, or tell me about your own pie-making adventures. I’d love to hear from you. Happy baking, friends!
Frequently Asked Questions
Can I use pre-made pie crust instead of making my own?
Absolutely, and no judgment here. If you’re short on time, a good quality refrigerated pie crust works fine. Just know that the texture won’t be as flaky, and you won’t get that rich buttery flavor that makes homemade crust so special. If you go the store-bought route, look for one that uses butter rather than shortening.
Why did my lattice crust fall apart?
This usually happens when the dough is too warm or too dry. Make sure your dough is well-chilled before cutting the strips, and handle them gently. If a strip breaks, just press it back together—it doesn’t have to be perfect. The egg wash will help seal any cracks during baking.
Can I make this pie ahead of time?
Yes! You have a few options. You can make the dough up to 3 days ahead and keep it refrigerated. You can also assemble the entire pie (unbaked) and refrigerate it for up to 24 hours before baking. Or bake it fully, cool it completely, and store it at room temperature for up to 2 days. The flavor actually improves after a day.
How do I prevent a soggy bottom crust?
That’s the million-dollar question. First, don’t skip the maceration step—letting the apples release their liquid before baking is key. Second, bake the pie on a preheated baking sheet to help the bottom crust cook faster. Third, make sure your oven is fully preheated. A hot oven sets the crust before the filling has a chance to soak in.
What’s the best way to reheat leftover pie?
The oven is your best friend here. Preheat to 300°F, place a slice on a baking sheet, and warm for 10 to 12 minutes. The microwave will make the crust soft and sad. If you’re in a hurry, you can use a toaster oven at the same temperature. And honestly, cold pie is pretty amazing too—don’t overlook it.
Pin This Recipe!
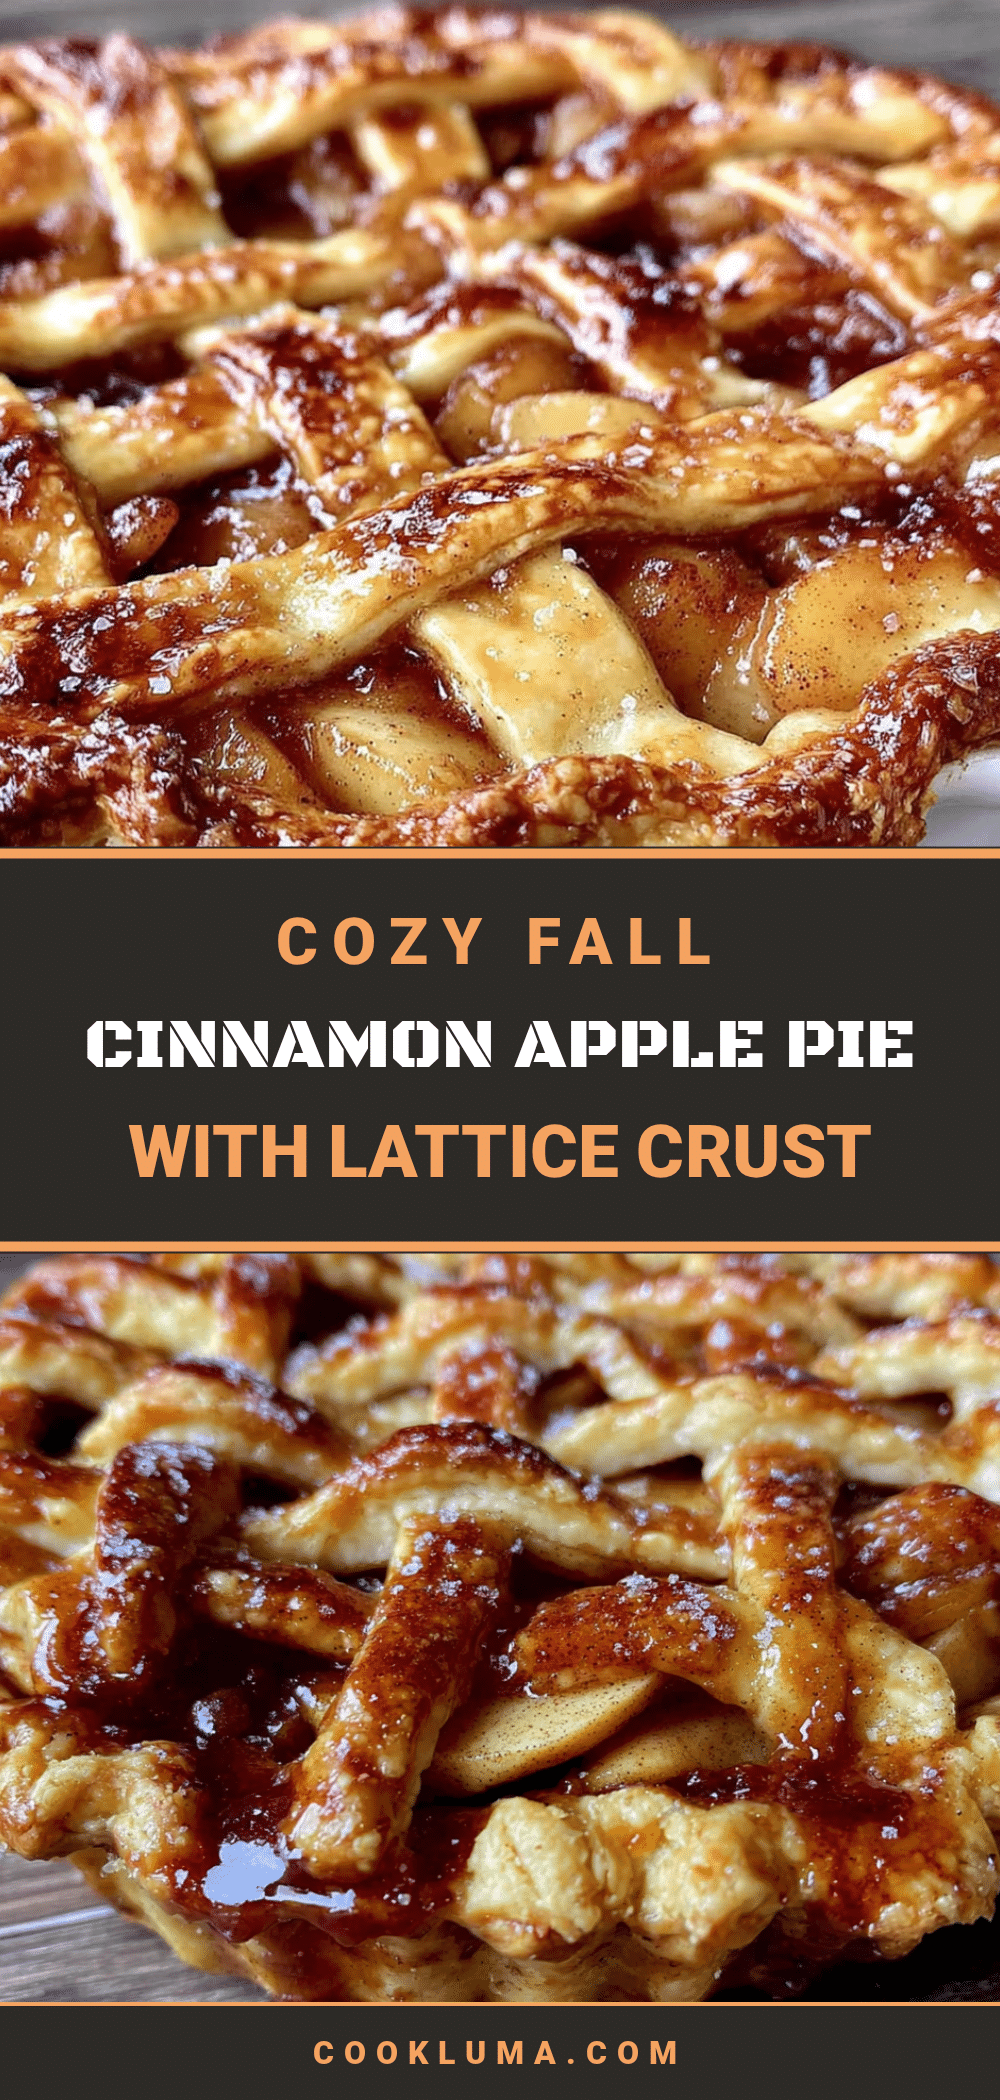
Best Homemade Cinnamon Apple Pie with Perfect Lattice Crust
This is the ultimate fall dessert—a perfectly spiced cinnamon apple pie with a buttery, flaky lattice crust. Made with simple, real ingredients and a never-soggy filling, this recipe is the one you’ll reach for every apple season.
- Prep Time: 1 hour 30 minutes
- Cook Time: 1 hour to 1 hour 10 minutes
- Total Time: 2 hours 40 minutes to 2 hours 50 minutes (plus 3 hours cooling)
- Yield: 8 servings 1x
- Category: Dessert
- Cuisine: American
Ingredients
- 2 ½ cups all-purpose flour (315 grams)
- 1 cup cold unsalted butter (2 sticks, 226 grams), cut into small cubes
- 1 teaspoon fine sea salt
- 1 tablespoon granulated sugar
- 6 to 8 tablespoons ice water
- 6 to 7 medium apples (about 3 pounds or 1.4 kg), a mix of Granny Smith and Honeycrisp
- ¾ cup granulated sugar (150 grams)
- ¼ cup packed light brown sugar (50 grams)
- 2 tablespoons all-purpose flour
- 2 teaspoons ground cinnamon
- ¼ teaspoon ground nutmeg
- ¼ teaspoon ground allspice
- 1 tablespoon fresh lemon juice
- 2 tablespoons cold unsalted butter, cut into small pieces
- 1 large egg, beaten with 1 tablespoon water (for egg wash)
- 1 tablespoon coarse sugar (like turbinado or demerara, optional)
Instructions
- Make the pie dough: In a large bowl, whisk together flour, salt, and sugar. Add cold butter cubes and toss to coat. Using a pastry cutter or fingertips, work butter into flour until mixture resembles coarse meal with some pea-sized butter pieces. Drizzle 6 tablespoons ice water over mixture and stir with a fork until dough starts to come together. If too dry, add remaining water 1 tablespoon at a time. Divide dough in half, flatten into disks, wrap in plastic wrap, and refrigerate for at least 1…
- Prepare the apple filling: While dough chills, peel, core, and slice apples into ¼-inch thick slices. Toss with lemon juice. In a small bowl, whisk together granulated sugar, brown sugar, flour, cinnamon, nutmeg, and allspice. Pour over apples and toss to coat. Let sit for 15-20 minutes.
- Roll out the bottom crust: On a lightly floured surface, roll one dough disk into a 12-inch circle, about ⅛-inch thick. Transfer to a 9-inch pie dish, pressing into bottom and up sides. Leave about ½ inch overhang. Refrigerate.
- Roll out the top dough and cut strips: Roll out second dough disk into a 12-inch circle. Cut into 10-12 strips, each about ¾ inch wide. Place strips on a parchment-lined baking sheet and refrigerate for 15 minutes.
- Assemble the pie: Preheat oven to 400°F (200°C). Remove pie dish from refrigerator. Spoon apple filling into crust, mounding slightly in center. Dot with small pieces of cold butter. Create lattice: Lay 5-6 strips across pie in one direction, spacing about ¾ inch apart. Fold back every other strip, lay a strip perpendicular across center, and unfold folded strips over it. Repeat, alternating which strips are folded, until entire pie is woven. Trim excess strip ends, leaving ½ inch overhang. Fold…
- Egg wash and bake: Brush entire crust with beaten egg wash. Sprinkle coarse sugar on top. Place pie on a baking sheet. Bake at 400°F for 20 minutes. Reduce oven temperature to 375°F (190°C) and bake for another 40-50 minutes, until crust is deep golden brown and filling is bubbling. If edges brown too quickly, tent with foil halfway through. Let cool on a wire rack for at least 3 hours before slicing.
Notes
Keep all ingredients cold for a flaky crust. Don’t skip the maceration step (letting apples sit with sugar and spices) to prevent a watery filling. Use a mix of apple varieties (like Granny Smith and Honeycrisp) for best texture and flavor. Let the pie cool completely (at least 3 hours) before slicing to allow the filling to set. The pie tastes even better the next day as flavors meld.
Nutrition
- Serving Size: 1 slice (1/8 of pie)
- Calories: 420460
- Sugar: 3540
- Sodium: 300350
- Fat: 1822
- Saturated Fat: 1114
- Carbohydrates: 6268
- Fiber: 45
- Protein: 45
Keywords: apple pie, cinnamon apple pie, lattice crust pie, homemade apple pie, fall dessert, Thanksgiving pie, apple pie recipe


