This was supposed to be a full-blown, deep-dish bourbon pecan pie. I had the pie plate buttered, the crust chilling in the fridge, and I was feeling pretty smug about tackling a classic on a Tuesday night. Then my phone rang—my sister needed me to pick up her kid from soccer practice in twenty minutes. I slammed the phone down, grabbed the wrong bag of sugar (confectioners’ instead of granulated, if you must know), and in my haste, dumped the filling into a lined square pan instead of the pie dish. I didn’t even realize my mistake until the bars were in the oven and I saw the empty pie plate sitting on the counter. I almost cried. Honestly, I was already mentally ordering pizza.
But let me tell you, when I pulled those bars out of the oven, the smell hit me first—warm brown sugar, toasted pecans, and that unmistakable kick of bourbon. It was better than any pie I’d ever made. The crust was perfectly buttery and firm, not soggy like pie crusts can get. The filling set up into this chewy, caramel-like layer that didn’t weep or run. And the best part? I could cut them into neat little squares and serve them on a plate without a single messy slice. No pie server wrestling, no crust crumbling into the filling. Just pure, portable perfection. I stood there in my messy kitchen, eating a warm bar off a paper towel, and thought, I can’t believe I almost gave up.
That’s the thing about this recipe—it came from a place of chaos and a wrong turn, and honestly, it’s better for it. Maybe you’ve been there, staring at a half-made dessert and a clock that’s ticking too fast. These Quick Bourbon Pecan Pie Bars are the answer. They give you all the deep, nutty, boozy flavor of a classic pie in a fraction of the time and with zero of the fuss. No rolling out dough, no blind baking, no worrying about a cracked filling. Just press, pour, bake, and slice. I’ve made these bars for Thanksgiving, for last-minute dinner parties, and for a quiet Tuesday when I needed a little sweetness. Every single time, someone asks for the recipe. And I always smile and say, “Well, it started with a mistake.”
Why You’ll Love This Recipe
Let me be straight with you—this isn’t just another pecan bar recipe. I’ve tested this thing six times to get the balance right. The first batch was too sweet. The second had a soggy crust (I learned to par-bake it). The third? That was the magic one. Here’s why these bars deserve a permanent spot in your dessert rotation:
- Quick & Easy: From start to finish, you’re looking at about 45 minutes. No chilling the dough, no rolling out a finicky crust. Just press it in, pour the filling, and bake. Perfect for a weeknight craving.
- Simple Ingredients: You probably have everything except maybe the pecans and bourbon. Butter, brown sugar, flour, eggs, vanilla—all pantry staples. No trips to a specialty store.
- Perfect for Entertaining: These bars are a lifesaver for potlucks, holiday parties, or any gathering where you don’t want to deal with slicing a pie. They stack beautifully on a platter and don’t need refrigeration.
- Crowd-Pleaser: I’ve served these to kids (skip the bourbon for them), to bourbon enthusiasts, and to people who “don’t like nuts.” The pecan pie skeptics always come back for seconds.
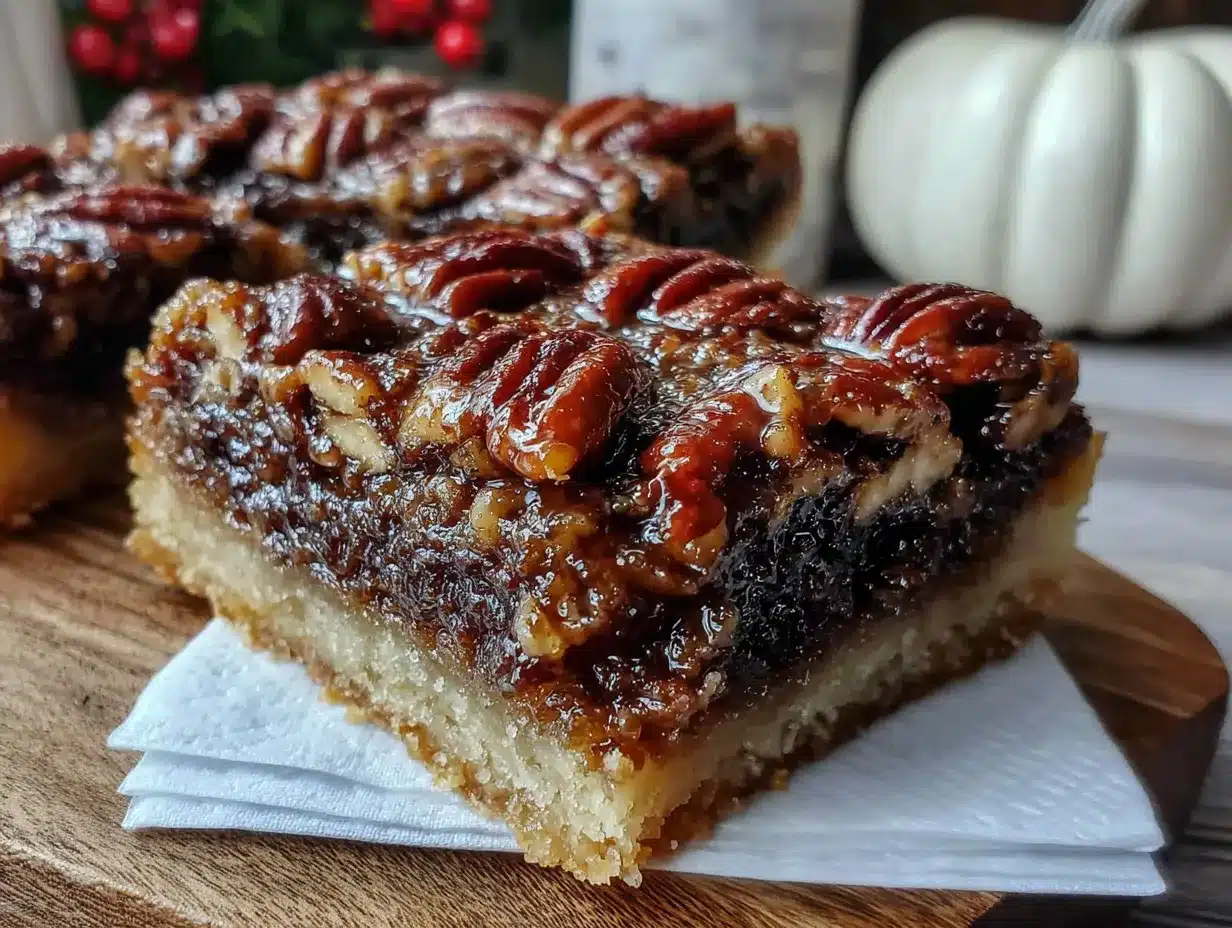
- Unbelievably Delicious: The texture is what gets everyone. The crust is shortbread-like and sturdy. The filling is chewy, almost like a caramel, with a deep toasted flavor from the pecans and a warm, smoky note from the bourbon. It’s next-level comfort food.
What makes this recipe different from the rest? It’s the technique. Most bar recipes just dump everything together and hope for the best. I par-bake the crust to keep it from getting soggy. I toast the pecans to bring out their natural oils and deepen the flavor. And I use a specific ratio of brown sugar to corn syrup that gives you that perfect chewy-but-not-sticky texture. This isn’t just another version—it’s the best version. The kind that makes you close your eyes after the first bite.
What Ingredients You Will Need
This recipe uses simple, honest ingredients to deliver that classic pecan pie flavor in bar form. No weird additives or hard-to-find items. Here’s what you need and why each one matters:
For the Crust
- 1 ½ cups all-purpose flour — Spoon and level it for accuracy. Too much flour makes the crust tough.
- ½ cup unsalted butter, cold and cubed — Cold butter is key for a flaky, tender crust. I prefer Kerrygold for its rich flavor.
- ¼ cup granulated sugar — Adds just a touch of sweetness to balance the buttery crust.
- ¼ teaspoon salt — Enhances the flavor of the butter and balances the sweet filling.
For the Filling
- ¾ cup packed light brown sugar — Light brown sugar gives a milder molasses flavor than dark. If you only have dark, use it—the flavor will be deeper.
- ½ cup light corn syrup — Don’t skip this. Corn syrup prevents crystallization and gives that signature chewy texture. (No, honey doesn’t work the same way here.)
- 2 large eggs, room temperature — Room-temperature eggs incorporate more evenly into the filling. If you’re in a hurry, place them in a bowl of warm water for 5 minutes.
- 3 tablespoons unsalted butter, melted — Adds richness and helps the filling set up properly.
- 2 tablespoons bourbon — Use a decent one, not the expensive stuff. I like Bulleit or Maker’s Mark for their smooth, slightly sweet profile. The alcohol mostly cooks off, leaving behind a warm, woody flavor.
- 1 teaspoon vanilla extract — Pure vanilla, not imitation. It rounds out the bourbon and brown sugar.
- 1 ½ cups pecan halves or chopped pecans — I prefer halves for a prettier presentation, but chopped works fine. Toast them first in a dry skillet over medium heat for 3-4 minutes until fragrant. This step is non-negotiable—it changes everything.
Ingredient Tips: For the bourbon, if you’re serving kids or someone who avoids alcohol, you can substitute with 2 tablespoons of apple cider or a splash of vanilla extract mixed with water. The flavor won’t be the same, but it’ll still be delicious. For the pecans, buy them raw and toast them yourself. Pre-toasted pecans can be stale or unevenly roasted. Trust me on this one.
Equipment Needed
You don’t need a fancy kitchen to make these bars. Here’s what you’ll need:
- 8×8-inch square baking pan — Glass or metal works fine. If using glass, reduce the oven temperature by 25°F to prevent over-browning.
- Parchment paper — Lining the pan is essential for easy removal. Leave overhang on two sides to create “handles.”
- Mixing bowls — One large, one medium.
- Electric mixer or pastry cutter — For the crust. You can also use a fork or your fingers, but a mixer is faster.
- Measuring cups and spoons — Accurate measurements matter here, especially for the flour.
- Spatula — For spreading the crust evenly.
- Sharp knife — For clean slices. A chef’s knife works better than a serrated one.
Personal Note: I used a cheap metal pan for years and always had trouble with uneven baking. I finally switched to a heavy-duty aluminum pan (the kind with straight sides) and it made a huge difference. If you bake bars often, it’s worth the investment. Also, don’t skip the parchment paper—I learned that the hard way when I had to chisel a batch out of the pan.
Preparation Method
- Preheat and Prep (5 minutes): Preheat your oven to 350°F (175°C). Line your 8×8-inch pan with parchment paper, leaving overhang on two opposite sides. This will let you lift the bars out cleanly later.
- Make the Crust (10 minutes): In a large bowl, combine the flour, sugar, and salt. Add the cold, cubed butter. Use a pastry cutter or your fingertips to work the butter into the flour until the mixture looks like coarse meal with some pea-sized butter pieces remaining. Don’t overwork it—you want those little butter pockets to create a flaky texture. Press the mixture evenly into the bottom of the prepared pan. Use the bottom of a measuring cup to compact it firmly. Bake for 15 minutes, until the edges are just starting to turn golden. Remove from the oven and set aside. Pro tip: If the crust puffs up during baking, gently press it down with the back of a spoon while it’s still hot.
- Toast the Pecans (3 minutes): While the crust bakes, toast the pecans in a dry skillet over medium heat. Stir constantly for 3-4 minutes until they’re fragrant and slightly darkened. Don’t walk away—they burn fast. Set aside to cool slightly.
- Make the Filling (5 minutes): In a medium bowl, whisk together the brown sugar and corn syrup until smooth. Add the eggs, one at a time, whisking after each. Stir in the melted butter, bourbon, and vanilla. Mix until everything is combined. Don’t over-whisk—you don’t want to incorporate too much air.
- Assemble and Bake (25-30 minutes): Sprinkle the toasted pecans evenly over the warm crust. Pour the filling over the pecans. It will look like a lot of liquid, but it will set as it bakes. Bake for 25-30 minutes, until the edges are set and the center is just slightly jiggly when you gently shake the pan. A toothpick inserted near the center should come out with a few moist crumbs, not wet batter. Warning: Over-baking will make the bars dry and crumbly. Pull them out when the center still has a little give.
- Cool and Slice (30 minutes): Place the pan on a wire rack and let it cool completely—at least 30 minutes. Don’t rush this. If you try to slice them while they’re warm, the filling will ooze everywhere. Once cool, use the parchment overhang to lift the bars out onto a cutting board. Use a sharp knife to cut into 16 squares. Wipe the knife clean between cuts for neat edges.
Sensory Cue: When the bars are done, the kitchen will smell like a warm bakery crossed with a cozy whiskey bar. The filling will be bubbling gently around the edges, and the pecans will have risen to the top, creating a beautiful, glossy surface. You’ll see a deep amber color, like caramelized sugar. That’s the sign of a perfect bake.
Cooking Tips & Techniques
I’ve made this recipe enough times to know where things can go wrong. Here are the lessons I learned the hard way so you don’t have to:
- Don’t skip par-baking the crust. I tried skipping this once to save time, and the bottom crust came out soggy and raw. The filling seeps into the dough if it’s not partially baked first. That extra 15 minutes is non-negotiable.
- Use room-temperature eggs. Cold eggs can seize the butter in the filling, making it lumpy. If you forget to take them out ahead of time, place them in a bowl of warm water for 5 minutes. Problem solved.
- Measure your flour correctly. Scooping directly from the bag compacts the flour and gives you too much. Spoon it into the measuring cup, then level it off with a knife. This one trick will save your crust from being dry and crumbly.
- Watch the bake time. Ovens vary wildly. My old oven took exactly 27 minutes. My new one takes 30. Start checking at 25 minutes. The center should be set but still have a slight wobble—like Jell-O, not like pudding.
- Let them cool completely. I know it’s hard to wait, but I promise you, warm bars are a mess. The filling needs time to firm up so you get clean, sharp slices. If you’re in a rush, pop the pan in the fridge for 15 minutes after the initial 30-minute cool-down.
Multitasking Strategy: While the crust bakes, toast the pecans and measure out the filling ingredients. By the time the crust is done, you can have the filling ready to pour. This cuts your active kitchen time to about 15 minutes.
Variations & Adaptations
One of the best things about this recipe is how easy it is to tweak. Here are some variations I’ve tried and loved:
- Bourbon-Free Version: Swap the bourbon for 2 tablespoons of apple cider or strong brewed coffee. The flavor shifts a bit, but you get a nice depth without the alcohol. My sister-in-law loves this version.
- Chocolate Bourbon Pecan Bars: Sprinkle ½ cup of dark chocolate chips over the warm crust before adding the pecans. The chocolate melts into the filling and creates these gooey pockets of richness. Dangerous, in the best way.
- Maple Pecan Bars: Replace the corn syrup with pure maple syrup and reduce the brown sugar to ½ cup. The maple flavor is more delicate, so don’t over-bake it. This is my go-to for fall gatherings.
- Gluten-Free Option: Use a 1:1 gluten-free flour blend (like Bob’s Red Mill) in the crust. The texture will be slightly more crumbly, but it still holds together well. I’ve tested this, and it works.
- Spiced Pecan Bars: Add ½ teaspoon of cinnamon and ¼ teaspoon of nutmeg to the filling. It gives the bars a warm, holiday-like flavor that pairs beautifully with the bourbon.
Personal Favorite: I once made a batch with candied pecans (the kind you buy in the snack aisle) instead of toasted plain pecans. It was almost too sweet, but for a special occasion? Absolutely worth it. Just reduce the brown sugar by 2 tablespoons to balance it out.
Serving & Storage Suggestions
These bars are incredibly versatile when it comes to serving. Here’s how to make the most of them:
- Serving Temperature: They’re best at room temperature. The filling is perfectly chewy, and the crust stays firm. If you refrigerate them, let them sit out for 10 minutes before serving to soften slightly.
- Presentation: Dust the tops with a little flaky sea salt right before serving. It sounds fancy, but it takes two seconds and really highlights the sweetness. For an extra touch, drizzle with melted dark chocolate or a simple bourbon glaze (powdered sugar + a splash of bourbon).
- Pairings: Serve with a scoop of vanilla ice cream or a dollop of lightly sweetened whipped cream. The cold creaminess balances the rich, nutty bars. For a drink pairing, a cup of black coffee or a glass of bourbon (neat) is perfection.
- Storage: Store in an airtight container at room temperature for up to 4 days. If you stack them, place a sheet of parchment paper between layers to prevent sticking. Do not refrigerate—the fridge dries them out and makes the crust hard.
- Freezing: These freeze beautifully. Wrap individual bars in plastic wrap, then place them in a freezer-safe bag. They’ll keep for up to 3 months. Thaw at room temperature for 30 minutes before serving. I always keep a stash in the freezer for unexpected guests.
Flavor Development: Honestly, these bars taste even better the next day. The flavors meld together overnight, and the texture becomes more uniform. If you can resist eating them all the first day, you’re in for a treat.
Nutritional Information & Benefits
Let’s be real—these are a treat, not a health food. But here’s what you should know:
| Nutrient | Per Bar (1/16 of recipe) |
|---|---|
| Calories | 285 |
| Total Fat | 17g |
| Saturated Fat | 7g |
| Carbohydrates | 31g |
| Sugar | 22g |
| Protein | 4g |
| Fiber | 2g |
| Sodium | 95mg |
Health Highlights: Pecans are a good source of healthy monounsaturated fats, fiber, and magnesium. They also contain antioxidants that support heart health. The brown sugar and corn syrup are the main sources of sugar, so if you’re watching your intake, cut the bars smaller. One bar is plenty satisfying—the richness means you won’t crave a second one.
Dietary Notes: This recipe contains gluten (from the flour), dairy (from the butter), and eggs. For a dairy-free version, use a plant-based butter substitute (like Earth Balance) in both the crust and the filling. The texture will be slightly different, but it still works. For a nut-free version, swap the pecans with sunflower seeds or pumpkin seeds—though the flavor will be completely different.
Conclusion
Look, I know there are a million pecan pie recipes out there. But these Quick Bourbon Pecan Pie Bars are different. They came from a mistake, sure, but they’ve become my go-to for a reason. They’re faster than a pie, easier to serve, and honestly, I think they taste better. The crust stays crisp, the filling is perfectly chewy, and that bourbon kick adds a warmth you just don’t get from a traditional recipe.
I want you to make these your own. Swap the bourbon for something else if you want. Add chocolate or skip the nuts. The beauty of this recipe is that it’s forgiving—it started as a disaster, after all. So don’t stress about perfection. Just press that crust, pour that filling, and let the oven do the work. You’ll have a dessert that looks like you spent hours on it, when really, you just got lucky with a happy accident.
I’d love to hear how yours turn out. Drop a comment below and let me know if you tried a variation, if your family loved them, or if you made your own happy accident in the kitchen. And if you’re looking for another quick dessert, you might like these no-bake chocolate oat bars for those days when you can’t even turn on the oven. Happy baking, friends!
Frequently Asked Questions
Can I use dark corn syrup instead of light?
Yes, you can. Dark corn syrup has a stronger molasses flavor that will make the bars taste deeper and slightly more caramel-like. Just be aware that the final color will be darker. It’s a great swap if you want a more robust flavor.
Do I have to use bourbon? What can I substitute?
No, you don’t have to. Bourbon adds a warm, smoky flavor, but you can substitute it with 2 tablespoons of apple cider, strong brewed coffee, or even a splash of vanilla extract mixed with water. The flavor will change, but the bars will still be delicious.
Why did my bars turn out too hard?
You likely over-baked them. The filling should still have a slight jiggle in the center when you pull them out. Over-baking evaporates too much moisture, leaving you with a hard, brittle texture. Next time, start checking at 25 minutes and pull them when the center is just set.
Can I make these bars ahead of time for a party?
Absolutely. In fact, they taste better the next day. Bake them a day ahead, let them cool completely, and store them in an airtight container at room temperature. Slice them just before serving for the cleanest edges.
How do I get clean, neat slices?
Patience is key. Let the bars cool completely before slicing—at least 30 minutes. Use a sharp chef’s knife and wipe it clean with a damp paper towel between each cut. For extra clean slices, chill the bars in the fridge for 15 minutes before cutting.
Pin This Recipe!
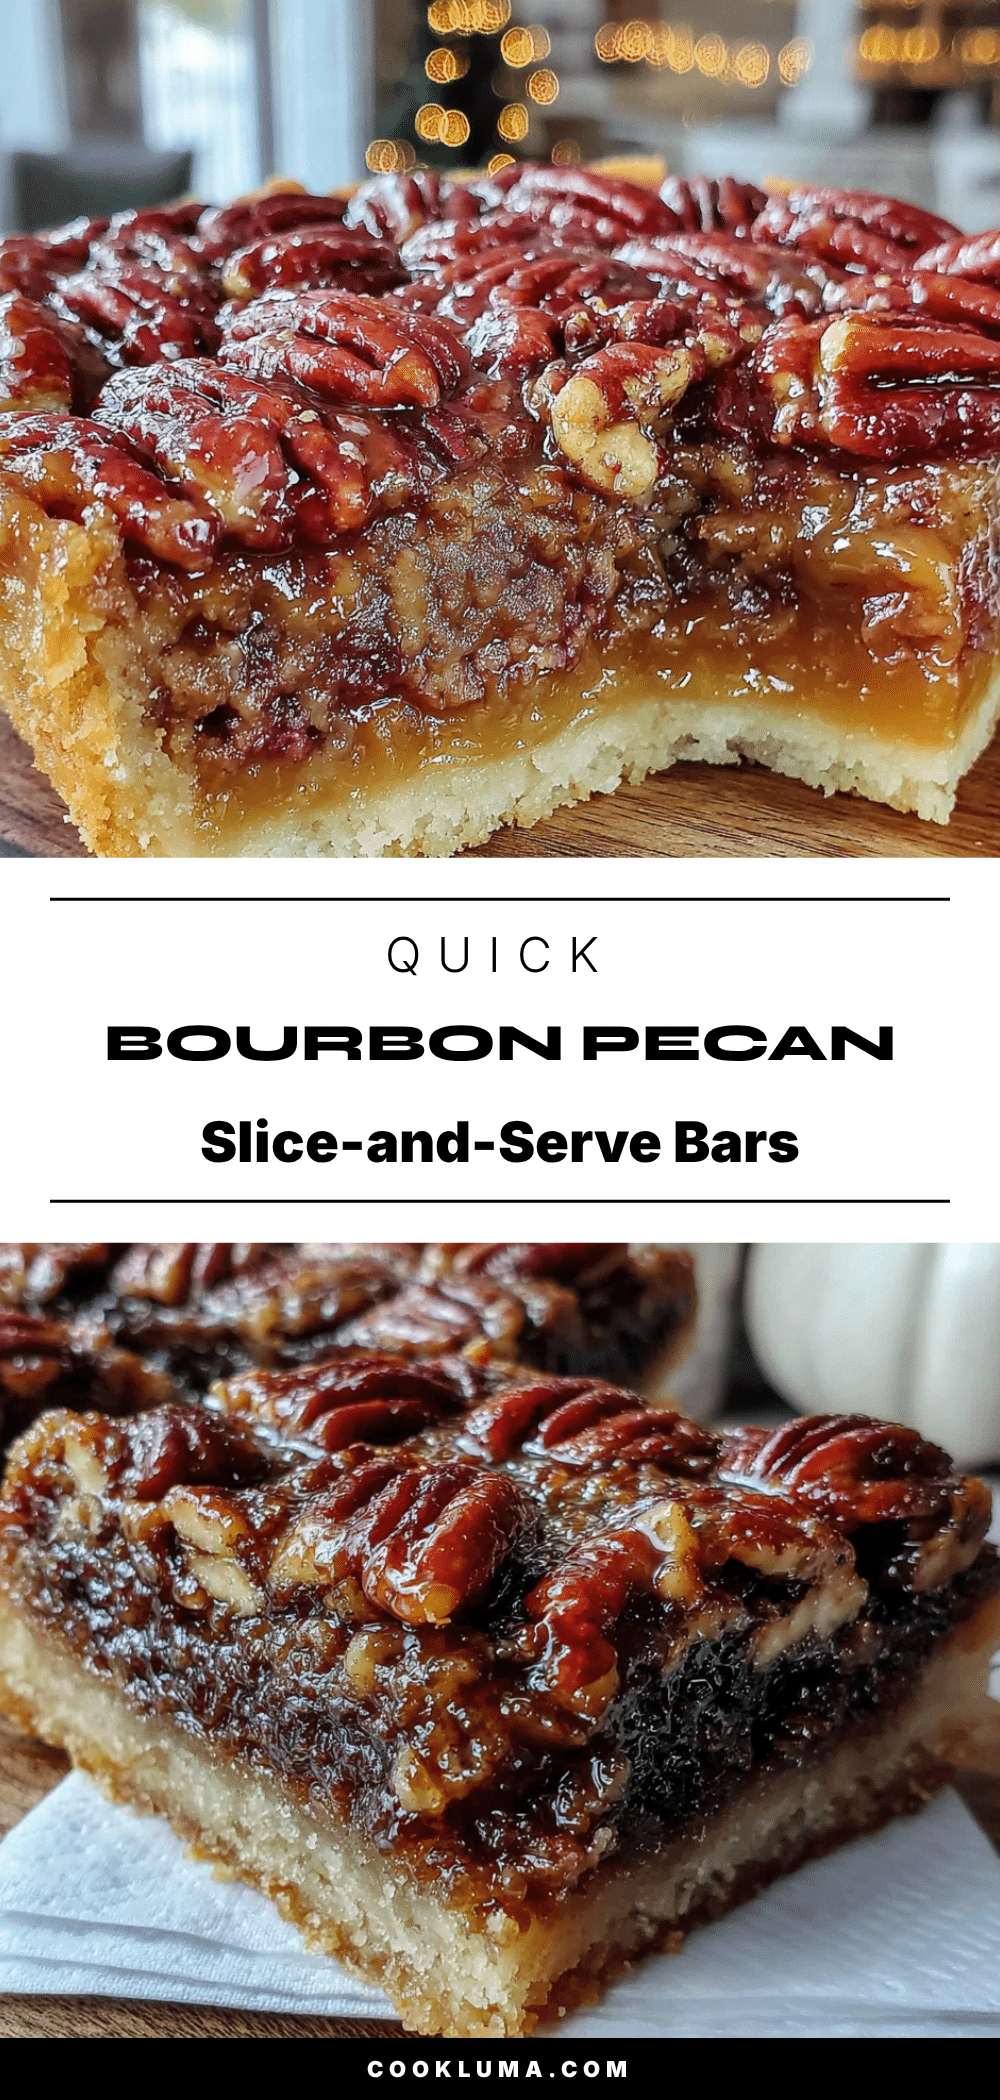
Quick Bourbon Pecan Pie Bars: Easy Slice-and-Serve Dessert
These Quick Bourbon Pecan Pie Bars deliver all the deep, nutty, boozy flavor of a classic pecan pie in a fraction of the time and with zero fuss. No rolling out dough, no blind baking, no worrying about a cracked filling—just press, pour, bake, and slice for a perfect, portable dessert.
- Prep Time: 15 minutes
- Cook Time: 30 minutes
- Total Time: 45 minutes
- Yield: 16 bars 1x
- Category: Dessert
- Cuisine: American
Ingredients
- 1 ½ cups all-purpose flour
- ½ cup unsalted butter, cold and cubed
- ¼ cup granulated sugar
- ¼ teaspoon salt
- ¾ cup packed light brown sugar
- ½ cup light corn syrup
- 2 large eggs, room temperature
- 3 tablespoons unsalted butter, melted
- 2 tablespoons bourbon
- 1 teaspoon vanilla extract
- 1 ½ cups pecan halves or chopped pecans
Instructions
- Preheat your oven to 350°F (175°C). Line an 8×8-inch baking pan with parchment paper, leaving overhang on two opposite sides.
- Make the crust: In a large bowl, combine flour, granulated sugar, and salt. Add cold, cubed butter. Use a pastry cutter or your fingertips to work the butter into the flour until the mixture looks like coarse meal with some pea-sized butter pieces remaining. Press the mixture evenly into the bottom of the prepared pan. Bake for 15 minutes, until the edges are just starting to turn golden. Remove from the oven and set aside.
- Toast the pecans: While the crust bakes, toast the pecans in a dry skillet over medium heat, stirring constantly for 3-4 minutes until fragrant and slightly darkened. Set aside to cool slightly.
- Make the filling: In a medium bowl, whisk together brown sugar and corn syrup until smooth. Add eggs one at a time, whisking after each. Stir in melted butter, bourbon, and vanilla until combined. Do not over-whisk.
- Assemble and bake: Sprinkle the toasted pecans evenly over the warm crust. Pour the filling over the pecans. Bake for 25-30 minutes, until the edges are set and the center is just slightly jiggly when gently shaken. A toothpick inserted near the center should come out with a few moist crumbs.
- Cool and slice: Place the pan on a wire rack and let it cool completely—at least 30 minutes. Once cool, use the parchment overhang to lift the bars out onto a cutting board. Use a sharp knife to cut into 16 squares, wiping the knife clean between cuts.
Notes
Don’t skip par-baking the crust—it prevents sogginess. Use room-temperature eggs for a smooth filling. Measure flour correctly by spooning and leveling. Start checking for doneness at 25 minutes; the center should have a slight jiggle. Let bars cool completely before slicing for clean edges. For best flavor, make a day ahead—bars taste even better the next day. Store in an airtight container at room temperature for up to 4 days, or freeze for up to 3 months.
Nutrition
- Serving Size: 1 bar (1/16 of recip
- Calories: 285
- Sugar: 22
- Sodium: 95
- Fat: 17
- Saturated Fat: 7
- Carbohydrates: 31
- Fiber: 2
- Protein: 4
Keywords: bourbon pecan pie bars, pecan pie bars, quick pecan bars, bourbon dessert, easy pecan pie, slice-and-serve dessert, Thanksgiving dessert, holiday bars


