There used to be a tiny, wood-paneled diner off Route 9 in Massachusetts that made the best green bean casserole I have ever had. When they closed their doors in 2018 to make way for a parking lot expansion, I kid you not, I actually mourned it. That soggy, can-soup version from the holidays? This was nothing like that. It was creamy, but somehow light, with a cheesy tang that lingered, and the onions were so crispy they shattered when you bit into them. After at least six tries—one where I used way too much flour and ended up with green bean paste, honestly, a real low point—I finally got it. This lighter cheesy green bean casserole with crispy fried onions is the exact recreation of that memory.
I remember the last time I sat in that diner booth. The vinyl was cracked, and the coffee was always a little burnt. But that casserole? It was perfect. I kept asking the waitress what was in it, and she just shrugged and said, “the usual stuff, honey.” It became a bit of an obsession. I started taking notes every time I ordered it, trying to reverse-engineer the texture. The secret, I learned, was not in the cream of mushroom soup, but in a simple homemade béchamel that lets the green beans and cheese actually shine. You know that feeling when you taste something and you just know you have to figure it out? That was this dish for me. Maybe you have been there with a recipe from a place that just disappeared.
This version skips the heavy canned stuff and uses a few clever swaps to keep it rich and satisfying without weighing you down. It is the kind of side dish that steals the show at Thanksgiving, but honestly, I make it for regular Tuesday dinners now. It is that good. The green beans stay crisp-tender, the sauce is velvety and cheesy without being gluey, and the onions stay crunchy for days. It is comfort food, reimagined—healthier, faster, but with the same soul-soothing satisfaction that made me hunt down that diner waitress for weeks trying to get her secrets.
Why You’ll Love This Recipe
Let me tell you, this is not your grandma’s green bean casserole—unless your grandma was a culinary genius who figured out how to make it lighter without losing any of the cozy, indulgent feel. I have tested this recipe more times than I care to admit, tweaking the cheese ratio and the cooking time until it was just right. Here is why this version is going to become your new go-to:
- Quick & Easy : Comes together in under 45 minutes, perfect for busy weeknights or last-minute holiday prep. No complicated techniques here!
- Simple Ingredients : No fancy grocery trips needed; you likely already have everything in your kitchen. Fresh green beans, milk, cheese, and onions—that is it.
- Perfect for Holidays and Weeknights : Great for Thanksgiving, Christmas, Easter, or just a cozy Sunday dinner. It fits right in anywhere.
- Crowd-Pleaser : Always gets rave reviews from kids and adults alike. I have seen people go back for thirds.
- Unbelievably Delicious : The texture and flavor combo is next-level comfort food. The creamy, cheesy sauce clings to every green bean, and the crispy onions add that perfect crunch.
What makes this recipe different from the rest is the technique. Instead of a heavy cream sauce, I use a light roux with low-fat milk and a blend of sharp cheddar and Parmesan. This gives you all the creamy, cheesy goodness without the gut-bomb feeling. It is not just another version—it is my best version, born from a diner obsession and perfected in my own kitchen. This recipe is the kind that makes you close your eyes after the first bite. It is comfort food reimagined—healthier, faster, but with the same soul-soothing satisfaction. Perfect for impressing guests without stress, or turning a simple meal into something memorable.
What Ingredients You Will Need
This recipe uses simple, wholesome ingredients to deliver bold flavor and satisfying texture without the fuss. Most of these are pantry staples, but a few key choices make all the difference. Let us break it down so you know exactly what to grab.
For the Green Bean Casserole Base
- Fresh green beans, trimmed and halved (1 ½ pounds / 680 grams): Fresh is non-negotiable here. Canned green beans turn mushy. Look for bright, firm beans without any brown spots. I prefer haricots verts for their slender shape, but standard green beans work great too.
- Unsalted butter (2 tablespoons / 28 grams): This forms the base of our roux. I use unsalted so I can control the salt level. Kerrygold is my go-to for its rich flavor.
- All-purpose flour (3 tablespoons / 24 grams): This thickens the sauce without making it pasty. Spoon and level your flour—do not scoop directly from the bag or you will end up with too much.
- Low-fat milk (2 cups / 480 ml): Whole milk works, but low-fat keeps it lighter. Do not use skim—the sauce will be watery. I like using organic milk for a cleaner taste.
- Low-sodium chicken or vegetable broth (½ cup / 120 ml): This adds depth without extra salt. I use Swanson low-sodium chicken broth for a savory note, or Imagine vegetable broth for a vegetarian version.
- Sharp cheddar cheese, shredded (1 ½ cups / 170 grams): Sharp cheddar gives you maximum flavor with less cheese. Shred it yourself from a block—pre-shredded cheese has anti-caking agents that prevent smooth melting. Cabot or Tillamook are excellent choices.
- Parmesan cheese, grated (½ cup / 50 grams): This adds a nutty, salty kick that takes the sauce to another level. I use Parmigiano-Reggiano for the best texture.
- Garlic powder (1 teaspoon): A subtle savory boost. Fresh garlic can be used, but it may overpower the delicate cheese flavor.
- Onion powder (½ teaspoon): This reinforces the onion flavor from the crispy topping without adding extra moisture.
- Salt and black pepper to taste: Go easy on the salt since the cheeses add plenty. Freshly cracked black pepper is a must.
For the Crispy Fried Onions
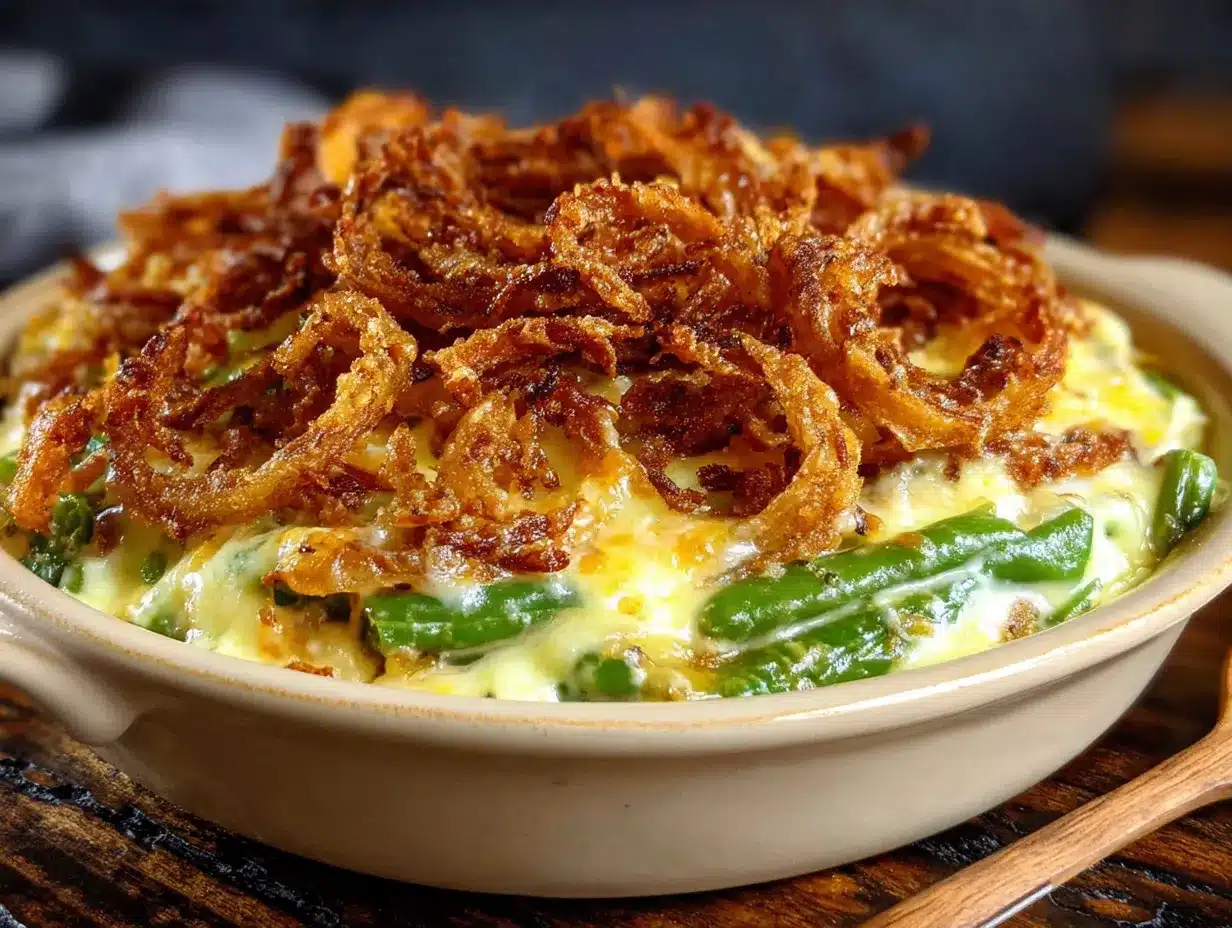
- Large yellow onions (2, thinly sliced into rings): Yellow onions get sweet and caramelized when fried. Sweet onions like Vidalia work too, but yellow gives the best savory crunch. (I recommend using a mandoline for even slices.)
- Buttermilk (1 cup / 240 ml): This tenderizes the onions and helps the coating stick. No buttermilk? Add a tablespoon of lemon juice or vinegar to regular milk and let it sit for 5 minutes.
- All-purpose flour (1 cup / 120 grams): For the coating. You can use a gluten-free blend if needed, but the texture will be slightly different.
- Panko breadcrumbs (½ cup / 60 grams): These add extra crunch. Regular breadcrumbs work, but panko gives that light, airy crispiness.
- Smoked paprika (1 teaspoon): A subtle smoky flavor that pairs beautifully with the cheese sauce.
- Garlic salt (1 teaspoon): For seasoning the coating. Adjust based on your salt preference.
- Vegetable or canola oil for frying (about 2 cups / 480 ml): Use a neutral oil with a high smoke point. I use avocado oil for a cleaner taste.
Equipment Needed
You do not need a fancy kitchen to pull this off, but a few specific tools will make the process smoother. Here is what I use:
- Large pot or Dutch oven: For blanching the green beans. A 6-quart pot works perfectly. I use my Le Creuset Dutch oven, but any heavy-bottomed pot will do.
- Colander: For draining the beans. A large mesh colander is ideal so the water drains quickly.
- Large skillet: For making the cheese sauce. A 12-inch non-stick or stainless steel skillet works best. I prefer stainless steel for better browning.
- Whisk: Essential for a smooth, lump-free roux. A balloon whisk is my favorite.
- Baking dish: A 9×13-inch (3-quart) dish is perfect for this recipe. Glass or ceramic works well. I use a Pyrex dish for even heat distribution.
- Deep-fry thermometer: For checking oil temperature. This is crucial for crispy onions. A clip-on thermometer is easy to use and affordable.
- Slotted spoon or spider: For removing the fried onions from the oil. A spider is best for letting excess oil drip off.
- Paper towels: For draining the onions. Line a plate with a few layers.
- Sharp knife and cutting board: For trimming the green beans and slicing the onions. A good chef’s knife makes quick work of this.
- Measuring cups and spoons: For accuracy. I use metal measuring cups for dry ingredients and glass for liquids.
If you do not have a deep-fry thermometer, you can test the oil by dropping a small piece of onion in—if it sizzles immediately, it is ready. And if you are short on time, you can use store-bought crispy fried onions, but honestly, homemade are worth the extra 10 minutes. They stay crunchy even the next day.
Preparation Method
Alright, let us get cooking! This recipe comes together in a few simple stages. Take your time with each step, and you will be rewarded with a casserole that tastes like it came from that little diner.
Step 1: Blanch the Green Beans
Bring a large pot of salted water to a rolling boil. While that heats up, trim the ends off your green beans and cut them in half crosswise. Once the water is boiling, drop in the beans and cook for exactly 3 minutes. You want them crisp-tender, not soft. Immediately drain them in a colander and run cold water over them to stop the cooking. This step is key—overcooked green beans turn into a sad, mushy mess. Set them aside to drain completely while you work on the sauce.
Step 2: Make the Cheese Sauce
In a large skillet over medium heat, melt the butter. Once it is bubbling, whisk in the flour and cook for 1 minute, stirring constantly. This is your roux, and it should smell nutty and look like wet sand. Slowly pour in the low-fat milk and broth, whisking constantly to prevent lumps. I like to add the liquid in three additions, whisking until smooth between each one. Bring the mixture to a gentle simmer—it will thicken after about 3 to 4 minutes. You will know it is ready when it coats the back of a spoon.
Reduce the heat to low and stir in the shredded cheddar and grated Parmesan. Keep stirring until the cheese is fully melted and the sauce is smooth and glossy. Season with garlic powder, onion powder, and a pinch of salt and pepper. Taste it—yes, right now. It should be rich and cheesy, but not too salty. If it seems thick, add a splash more milk. If it is too thin, let it simmer another minute.
Step 3: Prepare the Crispy Fried Onions
While the sauce is cooling slightly, get your onions ready. Separate the sliced onion rings into individual pieces and place them in a bowl with the buttermilk. Let them soak for about 10 minutes—this helps the coating stick and makes them extra tender.
In a separate shallow bowl, whisk together the flour, panko breadcrumbs, smoked paprika, and garlic salt. Heat about 2 inches of oil in a deep skillet or small pot to 350°F (175°C). Working in batches, lift the onion rings out of the buttermilk, letting the excess drip off, and dredge them in the flour mixture. Shake off any excess coating.
Carefully add the coated onions to the hot oil, a few at a time, without crowding the pan. Fry for 2 to 3 minutes, turning once, until golden brown and crispy. Use a slotted spoon to transfer them to a paper towel-lined plate. Sprinkle with a tiny pinch of salt while they are still hot. Repeat with the remaining onions. Trust me, the smell in your kitchen right now is incredible.
Step 4: Assemble and Bake
Preheat your oven to 375°F (190°C). In a large bowl, combine the blanched green beans with the cheese sauce, tossing gently until every bean is coated. Pour the mixture into your greased 9×13-inch baking dish and spread it into an even layer.
Bake for 20 minutes, until the sauce is bubbly around the edges. Remove the dish from the oven and top with the crispy fried onions—do not stir them in, just scatter them over the top. Return the casserole to the oven for another 5 to 7 minutes, just until the onions are heated through and extra crispy. Let it rest for 5 minutes before serving. This is the hardest part, I know, but it lets the sauce set up perfectly.
Cooking Tips & Techniques
I have made this casserole more times than I can count, and I have learned a few things the hard way. Here are my best tips to make sure yours turns out perfect every time.
Do not skip the blanching step. I know it is tempting to just toss the green beans in raw, but blanching softens them slightly and sets their bright green color. If you skip it, the beans will be crunchy and the sauce will not cling as well. Also, make sure to dry the beans well after blanching—excess water will thin out your sauce.
Watch your roux carefully. When you are making the white sauce, keep whisking. If you stop, the flour will burn on the bottom of the pan, and you will have to start over. The roux should be a pale golden color, not brown. I learned this lesson when I walked away to answer my phone and came back to a burnt mess. Not my finest moment.
Shred your own cheese. I cannot stress this enough. Pre-shredded cheese is coated with cellulose, which prevents it from melting smoothly. Your sauce will be grainy instead of silky. A block of sharp cheddar takes 2 minutes to shred, and the difference is night and day.
Fry the onions in batches. If you crowd the pan, the oil temperature drops, and your onions will be greasy instead of crispy. Use a thermometer to keep the oil at a steady 350°F (175°C). And do not walk away—they go from golden to burnt in seconds.
Make ahead tip: You can assemble the casserole (without the onions) up to 24 hours in advance. Just cover it and refrigerate. When you are ready to bake, add about 10 minutes to the baking time since it is starting cold. Fry the onions fresh right before serving for maximum crunch.
Variations & Adaptations
One of the best things about this casserole is how adaptable it is. Here are a few ways to make it your own.
Gluten-Free Version: Swap the all-purpose flour in the roux for a gluten-free blend (I like Bob’s Red Mill 1-to-1). For the onion coating, use gluten-free panko or crushed rice crackers. The texture will be slightly different, but still delicious.
Dairy-Free Version: Use unsalted vegan butter and your favorite unsweetened almond or oat milk. For the cheese, I have had good luck with Violife cheddar shreds and Follow Your Heart Parmesan. The sauce will be thinner, so add an extra tablespoon of flour to compensate.
Add Some Protein: Turn this into a main dish by adding shredded rotisserie chicken or cooked crumbled turkey sausage. Stir it in with the green beans before baking. It makes a fantastic weeknight dinner.
Spice It Up: Add a pinch of cayenne pepper or red pepper flakes to the cheese sauce for a little heat. I tried this once on a whim, and now I cannot stop doing it. The warmth pairs beautifully with the creamy cheese.
Mushroom Lover’s Version: Sauté 8 ounces of sliced cremini mushrooms in a little butter until golden, then stir them into the sauce. It adds an earthy depth that feels very traditional but with better texture.
Serving & Storage Suggestions
This casserole is best served hot, straight out of the oven, when the sauce is bubbly and the onions are at their crispiest. I like to let it rest for 5 minutes after baking so it sets up nicely—this makes it easier to serve without it turning into a soupy mess.
What to Serve With It: This is a natural side dish for roasted turkey, baked ham, or a simple roast chicken. It also pairs beautifully with mashed potatoes and cranberry sauce for a classic holiday plate. For a lighter meal, serve it alongside a simple green salad with a tangy vinaigrette to cut through the richness.
Storage: Leftovers keep well in an airtight container in the refrigerator for up to 4 days. The onions will lose some of their crunch, but the flavor is still fantastic. I actually love the leftovers cold, straight from the fridge—the flavors meld together even more.
Reheating: The best way to reheat is in the oven at 350°F (175°C) for about 15 minutes, covered with foil to prevent the top from burning. If you are in a hurry, the microwave works, but the sauce may separate slightly. To revive the crispy onions, you can sprinkle a few fresh fried onions on top after reheating.
Freezing: You can freeze the unbaked casserole (without the onions) for up to 3 months. Thaw it in the refrigerator overnight, then bake as directed, adding 10 to 15 minutes to the cooking time. Fry the onions fresh when you are ready to serve. The texture of the green beans will be slightly softer after freezing, but it is still very good.
Nutritional Information & Benefits
I am not a nutritionist, but I do pay attention to what goes into my food. This lighter version cuts down on heavy cream and butter without sacrificing flavor. Here is the approximate breakdown per serving (based on 8 servings):
- Calories: 285
- Fat: 14g (7g saturated)
- Carbohydrates: 28g
- Fiber: 4g
- Protein: 12g
- Sodium: 480mg
Health Benefits: Green beans are packed with vitamin K, vitamin C, and fiber, which supports gut health and keeps you full. The low-fat milk and reduced cheese still provide plenty of calcium for strong bones. By making the sauce from scratch, you avoid the preservatives and high sodium found in canned cream soups. This is comfort food you can feel good about eating regularly.
Dietary Considerations: This recipe is vegetarian if you use vegetable broth. It can be made gluten-free and dairy-free with the substitutions listed above. It is not suitable for a keto diet due to the flour and onions, but it is lower in carbs than many traditional casseroles.
Allergen Note: Contains dairy and gluten. The fried onions are cooked in oil, so check your oil for potential cross-contamination if you have allergies.
Conclusion
This lighter cheesy green bean casserole with crispy fried onions is the recipe I have been chasing for years. It brings back that diner memory every single time I make it, but honestly, it has become something even better—a dish that my family now requests for every gathering. The creamy, cheesy sauce, the crisp-tender green beans, and those impossibly crunchy onions come together in a way that feels both nostalgic and fresh.
I hope you give this a try, whether it is for a holiday feast or a regular Tuesday night. Do not be afraid to tweak it to your liking—add more cheese, swap in different spices, or pile on extra onions. Cooking is about making a recipe your own. And if you do make it, I would love to hear how it turned out. Leave a comment below or tag me in your photos—it honestly makes my day to see these dishes come to life in other kitchens. Now go make some memories with this casserole. You have got this!
Frequently Asked Questions
Can I use frozen green beans instead of fresh?
Yes, you can, but I recommend thawing them first and patting them very dry with paper towels. Frozen beans release a lot of water as they cook, which can make your sauce watery. If you are in a pinch, use frozen, but fresh really does give the best texture and flavor.
Why did my cheese sauce turn out grainy?
This usually happens when the cheese is added to too-hot liquid or when pre-shredded cheese is used. Make sure your sauce is at a gentle simmer, not a boil, when you add the cheese. And always shred your own cheese from a block—the anti-caking agents in pre-shredded cheese prevent smooth melting.
Can I make the crispy onions in an air fryer?
Absolutely! To make air fryer crispy onions, toss the coated onion rings with a tablespoon of oil and arrange them in a single layer in the air fryer basket. Cook at 375°F (190°C) for 8 to 10 minutes, shaking the basket halfway through, until golden and crispy. They may not be quite as crunchy as deep-fried, but they are still delicious and much lighter.
How do I keep the onions crispy after baking?
The key is to add the onions only during the last 5 to 7 minutes of baking. If you add them at the beginning, they will absorb moisture from the sauce and become soggy. Also, let the casserole rest for a few minutes before serving so the steam can escape, which helps the onions stay crisp.
Can I prepare this casserole a day ahead?
Yes! Assemble the casserole completely (without the onions), cover it, and refrigerate for up to 24 hours. When you are ready to bake, add about 10 extra minutes to the cooking time since it is starting cold. Fry the onions fresh right before serving for the best crunch.
Pin This Recipe!
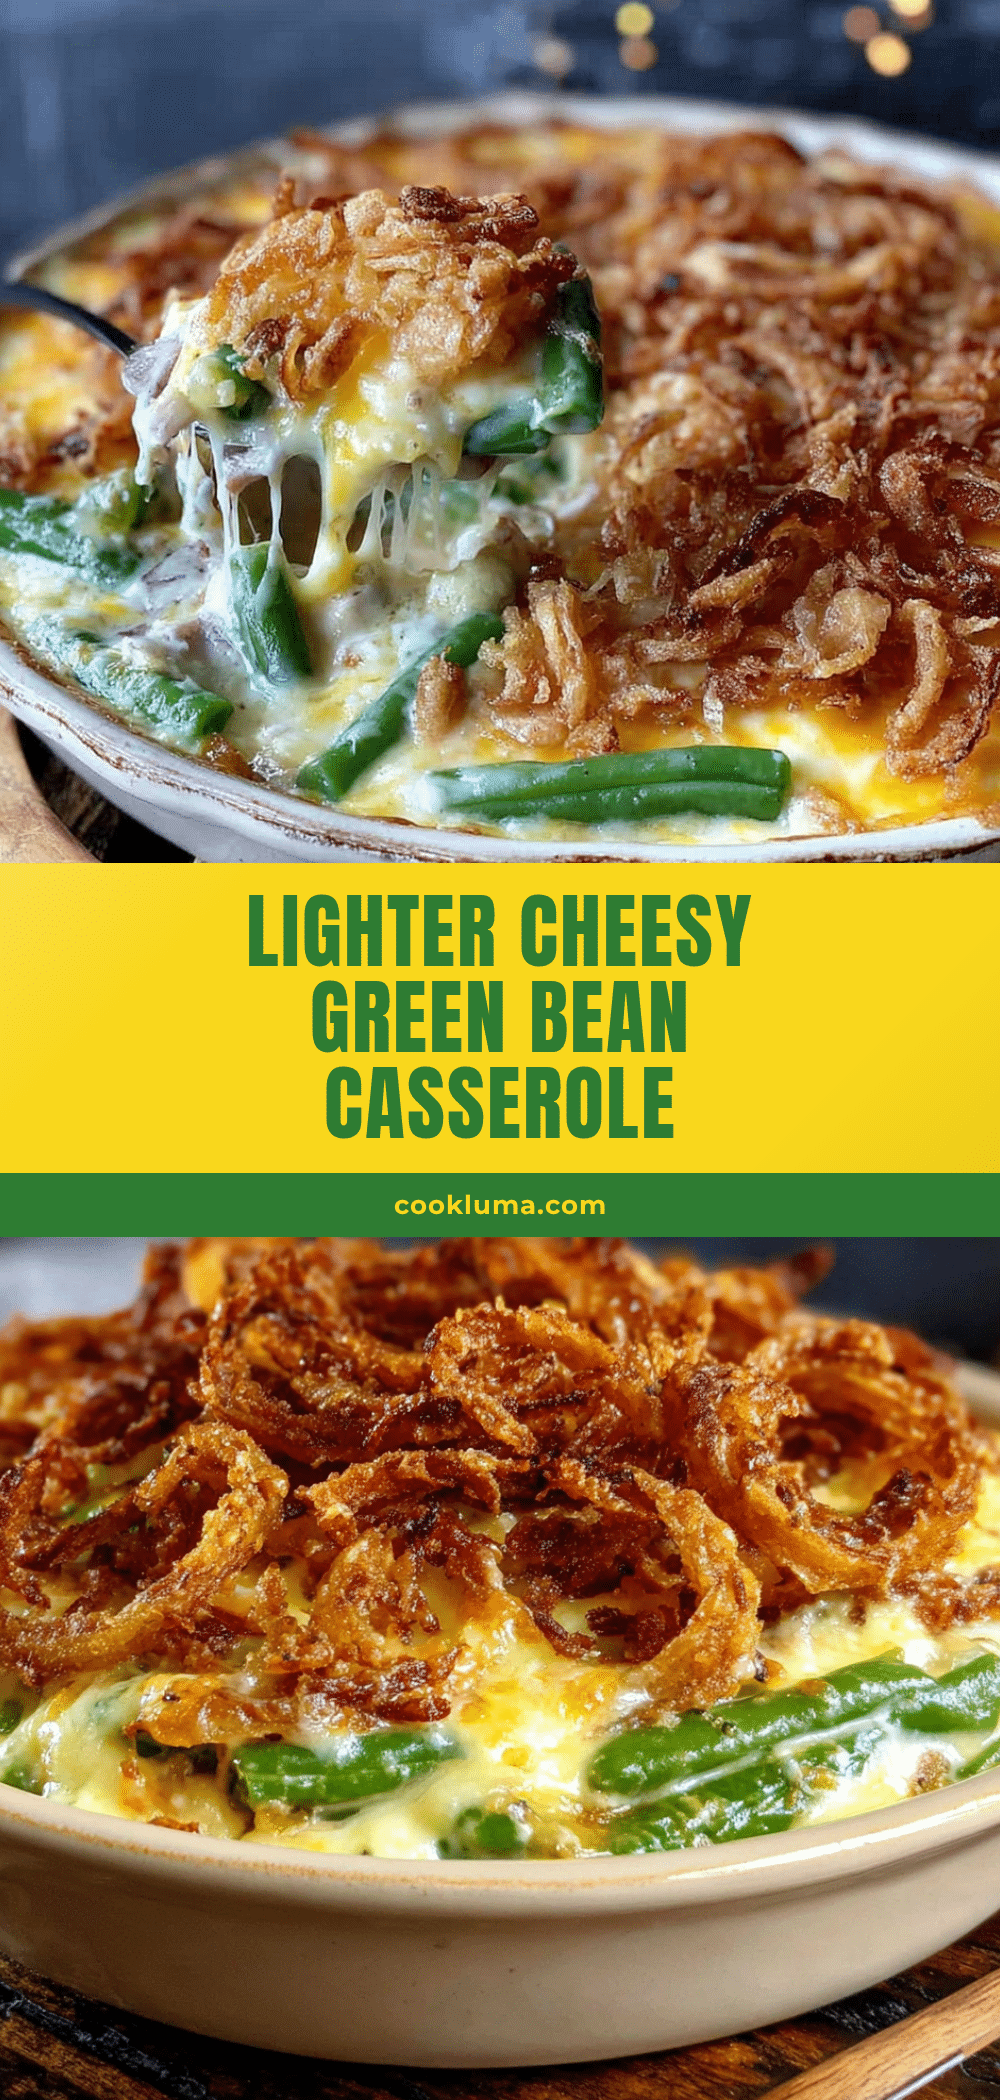
Easy Lighter Cheesy Green Bean Casserole with Crispy Onions

A lighter, homemade version of the classic green bean casserole, featuring a creamy cheese sauce and crispy fried onions. This recipe skips the canned soup for a fresh, flavorful side dish perfect for holidays or weeknight dinners.
- Prep Time: 15 minutes
- Cook Time: 30 minutes
- Total Time: 45 minutes
- Yield: 8 servings 1x
- Category: Side Dish
- Cuisine: American
Ingredients
- 1 ½ pounds (680 grams) fresh green beans, trimmed and halved
- 2 tablespoons (28 grams) unsalted butter
- 3 tablespoons (24 grams) all-purpose flour
- 2 cups (480 ml) low-fat milk
- ½ cup (120 ml) low-sodium chicken or vegetable broth
- 1 ½ cups (170 grams) sharp cheddar cheese, shredded
- ½ cup (50 grams) Parmesan cheese, grated
- 1 teaspoon garlic powder
- ½ teaspoon onion powder
- Salt and black pepper to taste
- 2 large yellow onions, thinly sliced into rings
- 1 cup (240 ml) buttermilk
- 1 cup (120 grams) all-purpose flour (for coating)
- ½ cup (60 grams) panko breadcrumbs
- 1 teaspoon smoked paprika
- 1 teaspoon garlic salt
- Vegetable or canola oil for frying (about 2 cups / 480 ml)
Instructions
- Bring a large pot of salted water to a boil. Trim and halve the green beans, then blanch for exactly 3 minutes. Drain and rinse with cold water to stop cooking. Set aside.
- In a large skillet over medium heat, melt the butter. Whisk in the flour and cook for 1 minute until nutty. Slowly whisk in the milk and broth in three additions, whisking constantly. Simmer for 3-4 minutes until thickened.
- Reduce heat to low and stir in the cheddar and Parmesan until melted and smooth. Season with garlic powder, onion powder, salt, and pepper. Set aside.
- Separate onion rings and soak in buttermilk for 10 minutes. In a shallow bowl, mix flour, panko, smoked paprika, and garlic salt.
- Heat oil in a deep skillet to 350°F (175°C). Working in batches, dredge onion rings in the flour mixture and fry for 2-3 minutes until golden. Drain on paper towels and sprinkle with salt.
- Preheat oven to 375°F (190°C). In a large bowl, toss blanched green beans with cheese sauce. Transfer to a greased 9×13-inch baking dish.
- Bake for 20 minutes until bubbly. Top with crispy onions and bake for another 5-7 minutes. Let rest 5 minutes before serving.
Notes
For best results, shred your own cheese from a block to avoid grainy sauce. Add the crispy onions only during the last 5-7 minutes of baking to keep them crunchy. The casserole can be assembled (without onions) up to 24 hours in advance; add 10 minutes to baking time if starting cold.
Nutrition
- Serving Size: 1 serving
- Calories: 285
- Sodium: 480
- Fat: 14
- Saturated Fat: 7
- Carbohydrates: 28
- Fiber: 4
- Protein: 12
Keywords: green bean casserole, cheesy green bean casserole, lighter green bean casserole, crispy onions, Thanksgiving side dish, holiday side dish, easy green bean casserole


