This was supposed to be chili mac. I had the ground beef browning, the elbow macaroni ready to boil, and my three-year-old was happily “helping” by dumping the shredded cheese onto the counter instead of into the bowl. It was one of those weeknights where the clock was ticking louder than usual, and I was already running on fumes. I grabbed the wrong can from the pantry—chili instead of tomato sauce—and by the time I realized it, the meat was simmering in a thick, spicy red mess. The macaroni? Still in the box. The kid? Now eating cheese directly off the counter. I stood there, honestly ready to call for takeout. But I had hot dogs in the fridge, a bag of shredded cheddar, and no backup plan. So I chopped the dogs, tossed them in, dumped it all into a baking dish, and covered it with cheese. What came out of the oven was nothing like the plan—and better. My kid ate two helpings without a single complaint, and my husband asked if this could be “a regular thing.” That night, I learned that sometimes the best recipes are the ones you stumble into when everything goes wrong. Maybe you’ve been there—standing in your kitchen, wondering how dinner got so sideways. Let me tell you, this casserole is the happy ending you didn’t know you needed.
Why You’ll Love This Recipe
This Kid-Approved One-Pan Chili Cheese Dog Casserole is the kind of meal that saves your sanity on a busy Tuesday. It’s not fancy, and it doesn’t pretend to be. But it delivers where it counts: flavor, speed, and happy kids.
- Quick & Easy: From start to finish, you’re looking at 30 minutes. No complicated steps, no waiting around. Just brown, mix, bake, and eat.
- Simple Ingredients: Everything on the list is either in your pantry or easy to grab at the store. Canned chili, hot dogs, cheese, and a few basics—that’s it.
- Perfect for Family Weeknights: This isn’t a “company’s coming” recipe. It’s a “I have 20 minutes and everyone needs to eat” recipe. And it works every time.
- Crowd-Pleaser: I’ve served this to picky eaters, hungry teenagers, and adults who “don’t do casseroles.” Every single plate came back clean.
- Unbelievably Delicious: The combination of smoky hot dogs, hearty chili, and melted cheese on top is pure comfort food magic. It’s messy, cheesy, and exactly what a good weeknight dinner should be.
What makes this recipe different from the dozens of other chili dog casseroles out there? It’s the one-pan method. No boiling pasta, no pre-cooking the hot dogs separately, no extra dishes. You brown the beef in the same skillet you’ll bake in, and everything comes together in one place. Less cleanup, more time at the table.
This isn’t just good—it’s the kind of meal that makes you close your eyes after the first bite and think, “Why haven’t I been making this forever?” It’s comfort food stripped down to its essentials: fast, affordable, and guaranteed to please everyone at your table.
What Ingredients You Will Need
This recipe uses simple, budget-friendly ingredients that come together to create something way bigger than the sum of its parts. Most of these are pantry staples, and the ones that aren’t are easy to find at any grocery store.
- 1 tablespoon olive oil (or any neutral cooking oil; adds richness to the beef)
- 1 pound ground beef (I prefer 80/20 for flavor, but lean works too—just add a splash of water if it seems dry)
- 1 small yellow onion, diced (about 1 cup; adds sweetness and texture; you can skip it if your kids are onion-averse)
- 2 cloves garlic, minced (fresh is best, but 1/2 teaspoon garlic powder works in a pinch)
- 1 can (15 ounces) chili with beans (I use Wolf Brand or Hormel; no beans works too if that’s your preference)
- 1 can (8 ounces) tomato sauce (adds a little extra body and acidity to balance the richness)
- 1 tablespoon chili powder (adjust based on your family’s heat tolerance; start with less if you’re feeding very young kids)
- 1/2 teaspoon cumin (adds warmth; optional but recommended)
- 1/2 teaspoon salt (or to taste; the canned chili already has some salt)
- 1/4 teaspoon black pepper
- 6 hot dogs, sliced into rounds (beef or chicken; I’ve used both and they work great; Oscar Mayer is my go-to)
- 2 cups shredded cheddar cheese (sharp cheddar melts beautifully; you can also use a Mexican blend or Colby Jack)
- Optional toppings: sliced green onions, diced jalapeños, sour cream, or crushed tortilla chips for crunch
Ingredient Tips & Substitutions: If you want to make this gluten-free, check your canned chili label—most are naturally gluten-free, but some brands add flour as a thickener. Use gluten-free hot dogs as well (most are, but it’s worth a quick look). For a lower-sodium version, look for reduced-sodium chili and tomato sauce. If you’re feeding a crowd, double everything and use a 9×13-inch baking dish instead of a 10-inch skillet. And if you’re out of hot dogs? Smoked sausage or kielbasa sliced into rounds works beautifully—just keep an eye on the cooking time since they’re thicker.
Equipment Needed
One of the best things about this recipe is how little equipment it requires. Here’s what you’ll need:
- 10-inch oven-safe skillet (cast iron or stainless steel works best; if you don’t have one, use a regular skillet and transfer the mixture to a baking dish)
- Cutting board and sharp knife (for dicing the onion and slicing the hot dogs)
- Wooden spoon or spatula (for breaking up the ground beef)
- Measuring spoons
- Cheese grater (pre-shredded cheese works, but freshly grated melts smoother and has better flavor)
If you don’t own an oven-safe skillet, don’t worry. Just brown the beef and mix everything in a regular skillet, then transfer it to a greased 8×8-inch or 9×9-inch baking dish before adding the cheese and baking. The cleanup is still minimal, and the result is exactly the same. I’ve done it both ways, and honestly, the extra 30 seconds of transferring is worth it if it means using what you already have.
Preparation Method
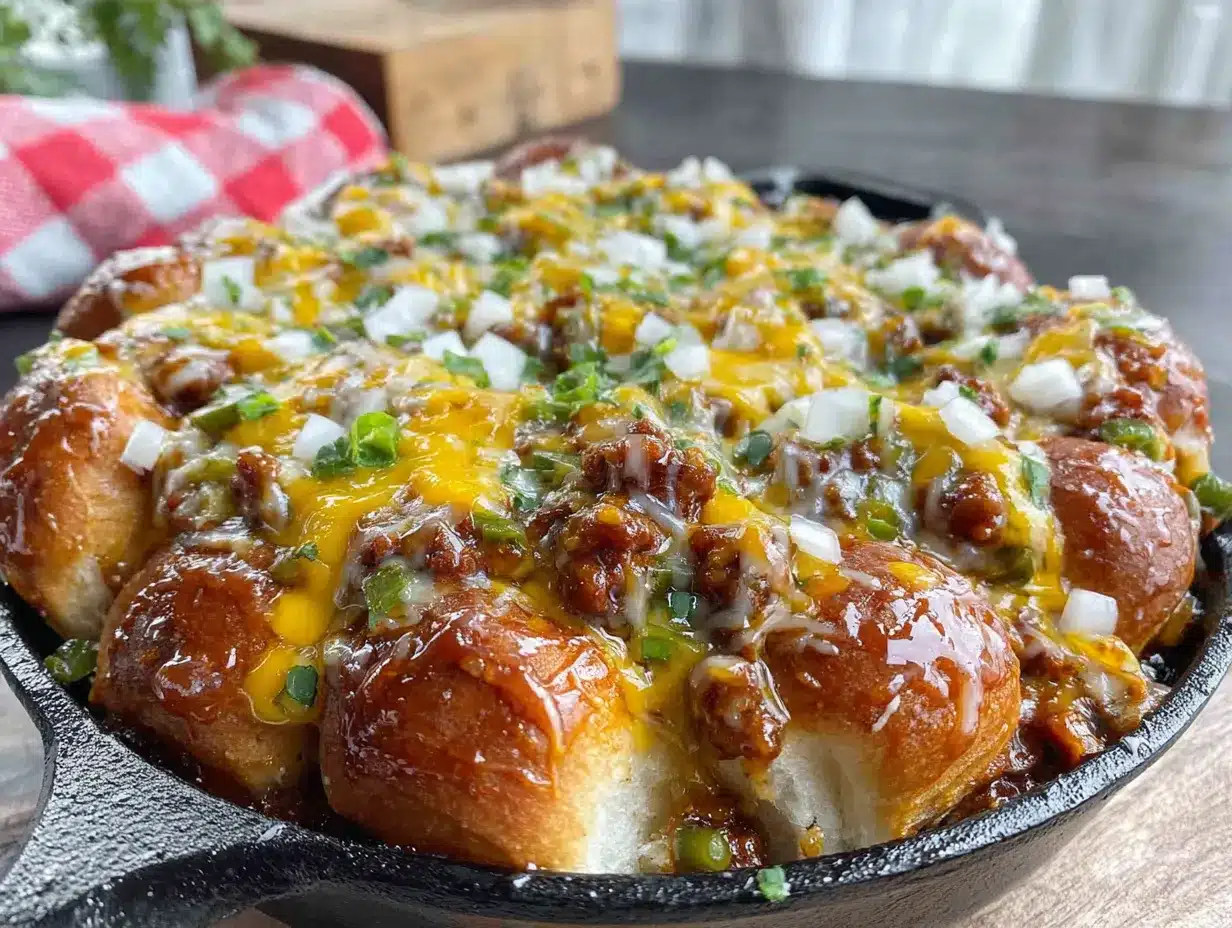
Let’s walk through this step by step. I promise, each stage is simple, and I’ve included little notes from my own kitchen to help you avoid the mistakes I made the first time.
- Preheat your oven to 375°F (190°C). This gives it time to come to temperature while you work on the stovetop. If you forget to preheat (I have, more than once), just add a few extra minutes to the baking time.
- Heat the olive oil in your 10-inch oven-safe skillet over medium-high heat. Swirl the pan to coat the bottom. The oil should shimmer but not smoke—that’s your cue that it’s ready.
- Add the diced onion and cook for 2-3 minutes, until it starts to soften. Stir occasionally so it doesn’t burn. If your kids are sensitive to onion texture, you can grate the onion instead of dicing it—it melts right into the meat.
- Add the ground beef and break it apart with your spoon. Cook for 5-6 minutes, stirring occasionally, until the beef is browned and no longer pink. Don’t drain the fat unless there’s more than a tablespoon or two—it adds flavor to the chili mixture.
- Stir in the minced garlic and cook for 30 seconds until fragrant. Garlic burns fast, so keep stirring and don’t walk away.
- Add the canned chili, tomato sauce, chili powder, cumin, salt, and pepper. Stir everything together until well combined. The mixture should look thick and slightly saucy—if it seems too thick, add a splash of water or beef broth.
- Fold in the sliced hot dogs. Stir gently so the rounds stay mostly intact. You want them evenly distributed throughout the chili mixture.
- Sprinkle the shredded cheese evenly over the top. Don’t stir it in—you want that beautiful melted cheese blanket on top. If you’re feeling generous, add a little extra cheese around the edges where it gets nice and crispy.
- Transfer the skillet to the preheated oven and bake for 15-18 minutes, until the cheese is melted, bubbly, and starting to brown in spots. If you want a deeper golden crust, switch to broil for the last 1-2 minutes—but watch it closely, because it can go from perfect to burned in seconds.
- Remove from the oven and let it rest for 5 minutes. This is crucial—the casserole needs a few minutes to set so it doesn’t turn into a soupy mess when you scoop it. I know it’s hard to wait, but trust me on this one.
- Scoop into bowls and serve with your favorite toppings. A dollop of sour cream, a sprinkle of green onions, or a handful of crushed tortilla chips on top takes this from “good” to “I can’t stop eating this.”
Sensory Cues: When the beef is browning, you should hear a steady sizzle—if it’s silent, the pan isn’t hot enough. The chili mixture should look thick and hearty, like a really good chili, not watery. When the cheese melts, you’ll see it bubble around the edges first, then spread across the center. The smell when it comes out of the oven? Pure comfort—smoky, cheesy, and slightly spicy.
Cooking Tips & Techniques
I’ve made this casserole more times than I can count, and I’ve learned a few things along the way. Here are the tips that make a real difference:
Don’t skip browning the beef properly. I know it’s tempting to rush through this step, but taking the time to get a good sear on the meat adds depth of flavor that you can’t get any other way. Let the beef sit in the pan for a minute before you start breaking it apart—that’s where the brown crust forms.
Watch your cheese. Pre-shredded cheese is convenient, but it has anti-caking agents that can make it melt less smoothly. If you have the time, grate your own cheese from a block. It melts into a gooey, stretchy blanket that’s hard to beat. I learned this the hard way when my first batch came out with a grainy, greasy top.
Toast your spices. This is a little trick I picked up from a chef friend: after you add the chili powder and cumin to the beef, let them cook for about 30 seconds before adding the liquids. It wakes up the flavors and makes the whole dish taste more complex. Just be careful not to burn them—stir constantly.
Multitask like a pro. While the beef is browning, slice your hot dogs and grate your cheese. By the time the meat is done, everything else is ready to go. This cuts your total time down to about 25 minutes, including baking.
One mistake I’ll never make again: The first time I made this, I added the cheese and put it straight into the oven without letting it rest on the counter for a minute. The cheese slid right off the top when I scooped it. Now I always let it sit for those 5 minutes after baking, and it holds together beautifully.
Variations & Adaptations
This recipe is incredibly forgiving, and I’ve tried several variations over the years. Here are some of my favorites:
Loaded Baked Potato Style: Swap the hot dogs for cooked, crumbled bacon and add a layer of frozen tater tots on top before the cheese. Bake until the tots are crispy, then add the cheese and finish baking. It’s ridiculous and amazing.
Tex-Mex Twist: Use a can of chili with black beans instead of regular chili, add a can of drained corn, and top with a mix of cheddar and pepper jack cheese. Serve with a squeeze of lime and some fresh cilantro. This version is my go-to when I’m craving something a little brighter.
Low-Carb Version: Skip the hot dogs and use ground turkey or chicken instead of beef. Load up on extra veggies like diced bell peppers and zucchini. The chili and cheese keep it satisfying without the carbs. My husband actually prefers this version now.
Picky Eater Adaptation: If your kids are suspicious of “mixed” foods, you can serve the chili meat mixture, hot dogs, and cheese separately and let everyone build their own bowl. It’s a little more work, but it keeps the peace at the table. I’ve done this on nights when my youngest is in a “no touching” phase.
Spicy Upgrade: Add a diced jalapeño with the onion, use hot chili instead of regular, and stir in a teaspoon of chipotle powder. Top with pickled jalapeños before serving. This one’s for the adults only, but it’s worth making a separate batch.
Serving & Storage Suggestions
This casserole is best served hot, straight from the oven, with the cheese still stretchy and the chili bubbling around the edges. Scoop it into bowls and let everyone add their own toppings—sour cream, green onions, diced tomatoes, crushed chips, or even a drizzle of hot sauce. It’s a fun, interactive dinner that kids love to customize.
Storage: Leftovers keep well in an airtight container in the refrigerator for up to 4 days. The flavors actually meld together overnight, so day-two casserole is even better than day-one. Just be aware that the hot dogs can soften a bit as they sit.
Reheating: The best way to reheat is in a skillet over medium heat, stirring occasionally, until warmed through. Add a splash of water or beef broth if it seems dry. You can also microwave individual portions for 1-2 minutes, but the cheese won’t be as melty. For a quick fix, I microwave mine and then add a fresh sprinkle of cheese on top.
Freezer: This casserole freezes beautifully. Let it cool completely, then transfer to a freezer-safe container or zip-top bag. It will keep for up to 3 months. To reheat, thaw overnight in the refrigerator and then warm in a skillet or microwave. I’ve made double batches and frozen one for busy nights—it’s a lifesaver.
One note: the cheese texture changes slightly after freezing and reheating. It’s still delicious, but it won’t be quite as gooey as fresh. If that bothers you, add a fresh layer of cheese when you reheat.
Nutritional Information & Benefits
Here’s an approximate nutritional breakdown per serving (based on 6 servings, without optional toppings):
| Nutrient | Amount per Serving |
|---|---|
| Calories | 420 |
| Protein | 28g |
| Fat | 28g |
| Carbohydrates | 14g |
| Fiber | 3g |
| Sodium | 980mg |
This casserole is a good source of protein from the beef and hot dogs, and the cheese adds calcium. The chili provides a decent amount of fiber, especially if you use a brand with beans. If you’re watching your sodium, opt for reduced-sodium chili and tomato sauce, and limit the added salt.
For a lighter option, use ground turkey or chicken, low-fat cheese, and turkey hot dogs. You’ll cut the fat and calories significantly without losing much flavor. I’ve made it this way for myself on nights when I want the comfort without the guilt.
Potential allergens: dairy (cheese), gluten (check chili and hot dog labels), and soy (some hot dogs contain soy protein). Always check labels if you’re cooking for someone with allergies.
Conclusion
This Kid-Approved One-Pan Chili Cheese Dog Casserole is proof that dinner doesn’t have to be complicated to be amazing. It’s fast, affordable, and almost guaranteed to make everyone at your table happy—even the pickiest eaters. I’ve made it on frantic weeknights, lazy Sundays, and everything in between, and it never lets me down.
What I love most about this recipe is how adaptable it is. You can swap ingredients, adjust the spice level, or load it up with toppings, and it still works. It’s the kind of recipe that becomes a family staple because it’s forgiving and flexible. Plus, the one-pan cleanup means more time with your family and less time at the sink.
I’d love to hear how this turns out for you! Did your kids ask for seconds? Did you try a variation that blew your mind? Drop a comment below and share your version. And if you snap a photo, tag me—I love seeing your kitchen wins. Happy cooking, friend. You’ve got this.
Frequently Asked Questions
Can I make this casserole ahead of time?
Yes! Assemble the casserole completely (without baking), cover it, and refrigerate for up to 24 hours. When you’re ready to eat, bake it at 375°F for 20-25 minutes, or until bubbly and hot. You may need to add a few extra minutes since it’s starting from cold.
Can I use ground turkey instead of beef?
Absolutely. Ground turkey works great, though it’s leaner so you might want to add a tablespoon of oil when browning. The flavor is slightly milder, but the chili and spices carry it beautifully. I’ve made this swap many times and my family never noticed.
What if I don’t have an oven-safe skillet?
No problem! Brown the beef and mix everything in a regular skillet, then transfer the mixture to a greased 8×8-inch or 9×9-inch baking dish. Top with cheese and bake as directed. The only extra step is transferring, and it takes about 30 seconds.
Can I freeze leftovers?
Yes, this casserole freezes wonderfully. Let it cool completely, then portion into freezer-safe containers. It will keep for up to 3 months. Thaw overnight in the fridge and reheat in a skillet or microwave. The texture of the hot dogs softens slightly, but the flavor is still excellent.
How do I make this spicier for adults?
Easy! Use hot chili instead of regular, add a diced jalapeño with the onion, and stir in 1/2 teaspoon of cayenne or chipotle powder. Top with pickled jalapeños and a drizzle of hot sauce before serving. For a kid-friendly version, keep the base mild and let adults add their own heat at the table.
Pin This Recipe!
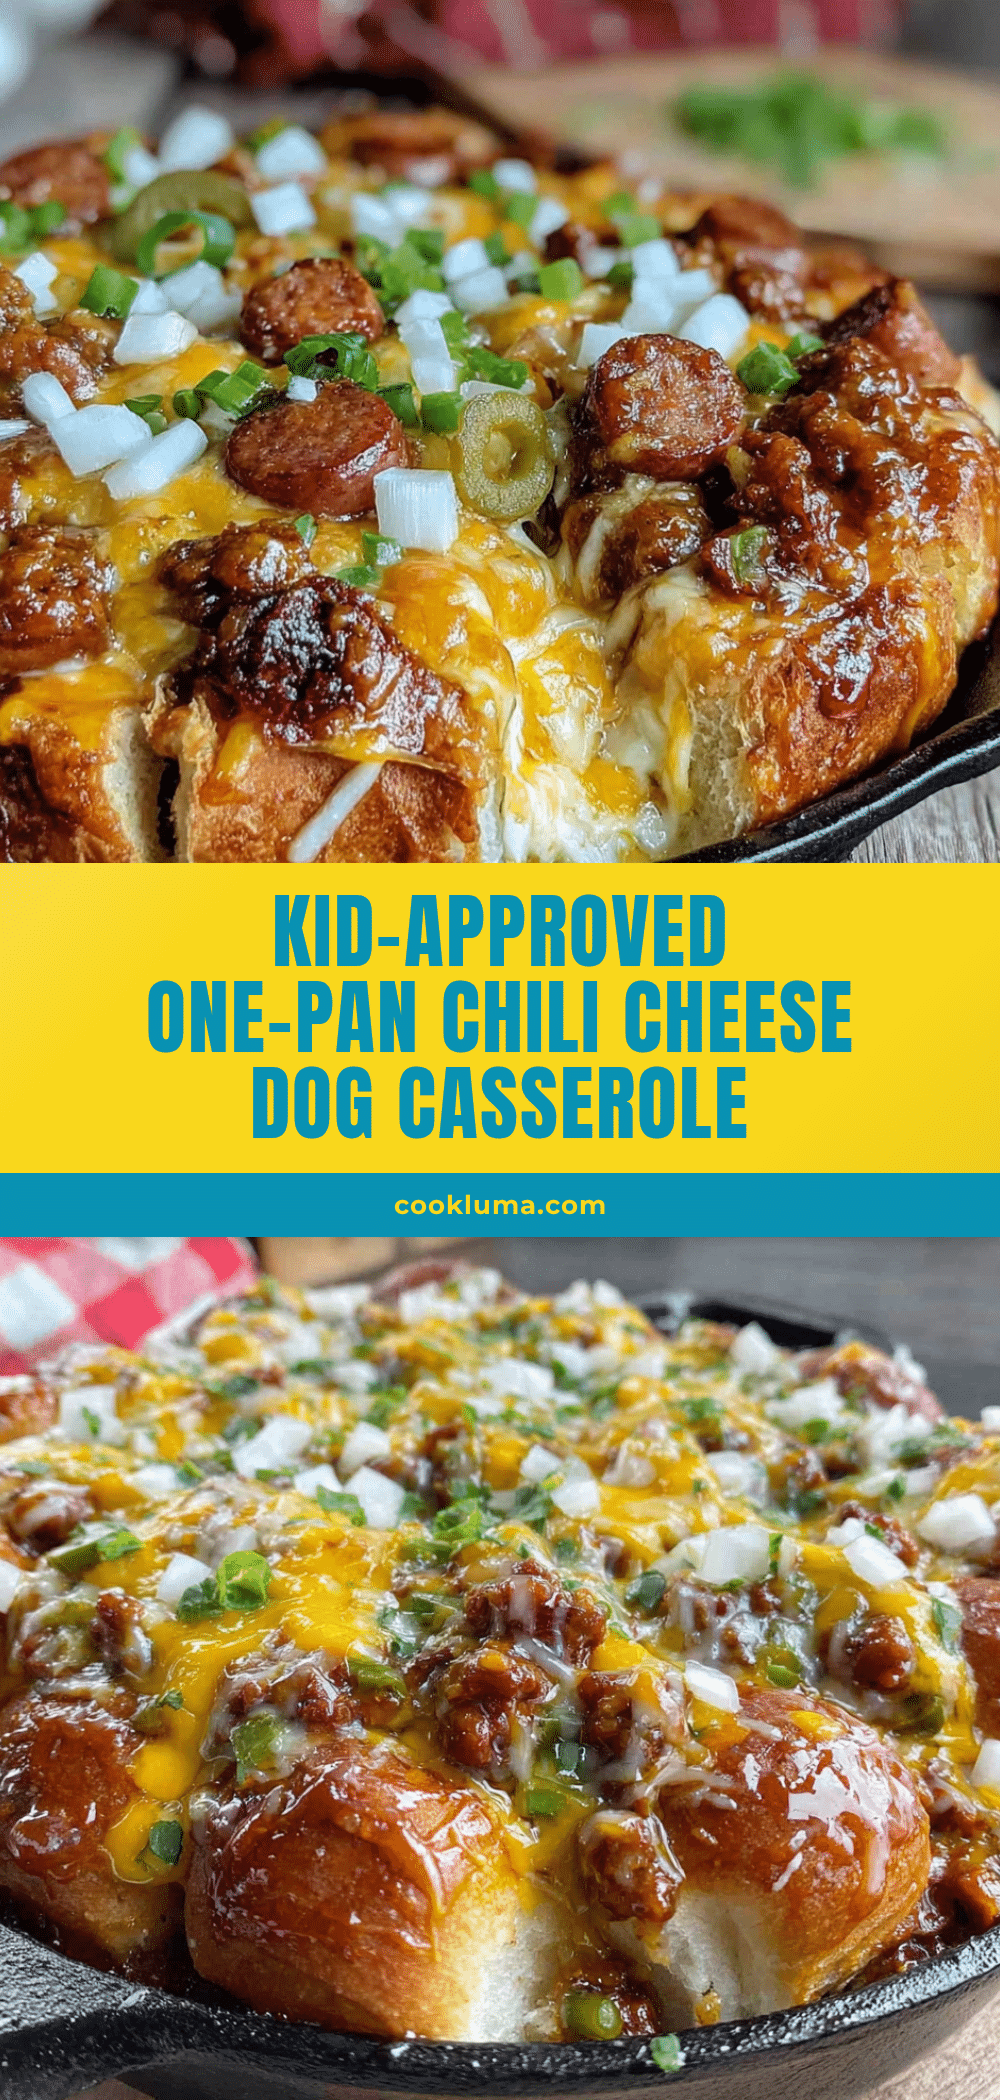
Kid-Approved One-Pan Chili Cheese Dog Casserole

A quick and easy 30-minute dinner featuring smoky hot dogs, hearty chili, and melted cheese, all baked in one pan for minimal cleanup. Perfect for busy weeknights and guaranteed to please even the pickiest eaters.
- Prep Time: 10 minutes
- Cook Time: 20 minutes
- Total Time: 30 minutes
- Yield: 6 servings 1x
- Category: Main Course
- Cuisine: American
Ingredients
- 1 tablespoon olive oil
- 1 pound ground beef (80/20 preferred)
- 1 small yellow onion, diced (about 1 cup)
- 2 cloves garlic, minced
- 1 can (15 ounces) chili with beans
- 1 can (8 ounces) tomato sauce
- 1 tablespoon chili powder
- 1/2 teaspoon cumin
- 1/2 teaspoon salt
- 1/4 teaspoon black pepper
- 6 hot dogs, sliced into rounds
- 2 cups shredded cheddar cheese
- Optional toppings: sliced green onions, diced jalapeños, sour cream, crushed tortilla chips
Instructions
- Preheat your oven to 375°F (190°C).
- Heat the olive oil in a 10-inch oven-safe skillet over medium-high heat until shimmering.
- Add the diced onion and cook for 2-3 minutes until softened.
- Add the ground beef and cook for 5-6 minutes, breaking it apart, until browned and no longer pink.
- Stir in the minced garlic and cook for 30 seconds until fragrant.
- Add the canned chili, tomato sauce, chili powder, cumin, salt, and pepper. Stir until well combined.
- Fold in the sliced hot dogs, distributing evenly.
- Sprinkle the shredded cheese evenly over the top without stirring.
- Transfer the skillet to the preheated oven and bake for 15-18 minutes until the cheese is melted, bubbly, and starting to brown.
- Remove from the oven and let it rest for 5 minutes before serving.
- Scoop into bowls and serve with optional toppings.
Notes
Let the casserole rest for 5 minutes after baking to set. For a deeper golden crust, broil for the last 1-2 minutes. Pre-shredded cheese works but freshly grated melts smoother. Toast spices for 30 seconds before adding liquids for more flavor.
Nutrition
- Serving Size: 1 serving (about 1/6
- Calories: 420
- Sugar: 4
- Sodium: 980
- Fat: 28
- Saturated Fat: 12
- Carbohydrates: 14
- Fiber: 3
- Protein: 28
Keywords: chili cheese dog casserole, one-pan dinner, easy weeknight meal, kid-friendly, comfort food, 30-minute recipe


