I was standing at the checkout counter of a hardware store—of all places—last October, holding a new light fixture I definitely didn’t need, when the cashier, a woman named Dottie with bright purple glasses and a name tag that said “Ask me about my cats,” started telling me about her Halloween cookies.
“You want something that looks like it’s floating,” she said, scanning my light fixture. “That’s the trick. They need to look like they’re about to drift right off the tray.” I blinked at her. I hadn’t mentioned baking. I hadn’t mentioned Halloween. But Dottie had already decided I needed her ghost meringue recipe, and honestly, she was right.
She scribbled it on the back of a receipt—temperatures, timing, a little note about how her grandmother used to pipe these for church potlucks in the 1950s, long before anyone called them “spooky.” The original name, apparently, was just “the floating ones.” I love that. There’s something so charming about a recipe that doesn’t try too hard to be clever.
I made my first batch that weekend, and let me tell you, my kitchen looked like a tiny ghost convention. They were uneven, a little lopsided, and one of them had what I can only describe as a very concerned expression. But they were delicious. Light, airy, crispy on the outside with that tiny chewy center. I’ve been making them every October since. Maybe you’ve been there—standing in a totally unexpected place when a recipe finds you. That’s how these ghost meringue cookies came into my life, and I’m so glad they did.
Why You’ll Love This Recipe
These ghost meringue cookies are the kind of Halloween treat that makes people stop and smile. They’re not just cute—they’re genuinely good, and they come together with ingredients you probably already have in your pantry right now.
- Quick & Easy : From start to finish, you’re looking at about 2 hours total, but most of that is hands-off baking time. The actual prep takes maybe 15 minutes.
- Simple Ingredients : You need exactly four things—egg whites, sugar, cream of tartar, and vanilla extract. That’s it. No fancy grocery trips required.
- Perfect for Halloween : These little ghosts are the star of any Halloween party, classroom treat, or spooky movie night. They look impressive but they’re secretly the easiest thing you’ll make all season.
- Crowd-Pleaser : Kids love the shape, adults love the lightness, and everyone loves that they’re naturally gluten-free and low in fat.
- Unbelievably Delicious : The texture is what gets me every time—crisp and delicate on the outside, with a soft, marshmallow-like center that melts on your tongue.
What makes these ghost meringue cookies different from other recipes is the technique I picked up from Dottie’s scribbled notes. She insisted on using superfine sugar and adding it one spoonful at a time. I know, it sounds fussy, but it makes a real difference in the texture. No graininess, just smooth, glossy meringue that pipes like a dream.
This recipe isn’t just good—it’s the kind that makes you close your eyes after the first bite. It’s comfort food reimagined for the spooky season, with the same soul-soothing satisfaction of a homemade treat but none of the heaviness.
What Ingredients You Will Need
This recipe uses simple, wholesome ingredients to deliver that perfect light-as-air texture and subtle sweetness. Most of these are pantry staples, which is exactly what you want when Halloween sneaks up on you.
- Egg whites (4 large, room temperature) — The foundation of your meringue. Room temperature eggs whip up higher and more stable than cold ones. I separate my eggs when they’re cold, then let the whites sit on the counter for about 30 minutes before I start.
- Superfine sugar (1 cup, 200g) — Also called caster sugar. It dissolves faster than regular granulated sugar, which means a smoother meringue. If you can’t find it, just pulse regular sugar in a food processor for 30 seconds. I’ve done this plenty of times and it works perfectly.
- Cream of tartar (½ teaspoon) — This is your insurance policy. It stabilizes the egg whites and helps them hold their shape. Don’t skip it if you can help it, but in a pinch, you can use 1 teaspoon of lemon juice or white vinegar instead.
- Vanilla extract (1 teaspoon) — Pure vanilla gives the best flavor, but imitation works fine too. You can also swap in almond extract or peppermint for a different twist. I’ve made these with peppermint extract for Christmas and they were a hit.
- Black gel food coloring (optional, for faces) — For piping the ghost faces. I prefer gel coloring because it doesn’t thin out the meringue like liquid food coloring would. Wilton brand is my go-to.
Ingredient Selection Tips: Look for eggs that are at least a week old. Fresh eggs have tighter whites that don’t whip up as well. Older eggs have thinner whites that incorporate more air and give you a taller, fluffier meringue. I know it sounds backwards, but it works.
Substitution Guidance: For a vegan version, you can use aquafaba—the liquid from a can of chickpeas—instead of egg whites. Use 3 tablespoons of aquafaba per egg white. It whips up just like egg whites and creates a very similar texture. I tested this last year for a friend with egg allergies and was honestly shocked at how well it worked.
Equipment Needed
You don’t need much fancy equipment for these ghost meringue cookies, which is part of their charm.
- Electric stand mixer or hand mixer — You can whip meringue by hand with a whisk, but your arm will hate you. A mixer makes it easy and consistent. I use my KitchenAid stand mixer with the whisk attachment.
- Large mixing bowl — Make sure it’s completely clean and dry. Any grease or moisture will prevent your egg whites from whipping properly. I wipe mine down with a little lemon juice and a paper towel before I start.
- Piping bag with a round tip — A #12 or #1A round tip works great for ghost shapes. If you don’t have a piping bag, a zip-top bag with the corner snipped off works just fine. I’ve done it both ways and honestly, the zip-top bag is easier to clean.
- Baking sheets lined with parchment paper — Parchment is non-negotiable here. Wax paper will stick and foil will conduct too much heat. Parchment gives you that perfect non-stick surface.
- Fine-mesh sieve — For sifting the superfine sugar if it’s clumpy. This isn’t always necessary, but if your sugar has been sitting in the pantry for a while, a quick sift saves you from lumpy meringue.
Budget-Friendly Options: Skip the fancy piping tips and use a zip-top bag. Skip the stand mixer and use a hand mixer. The cookies will turn out exactly the same. I’ve made these in a tiny apartment kitchen with a $15 hand mixer and they were perfect.
Preparation Method
- Preheat your oven to 200°F (95°C). Yes, this is very low. We’re not baking the meringue—we’re drying it out slowly. Line two baking sheets with parchment paper and set them aside.
- Separate your eggs carefully. Crack each egg and separate the white from the yolk, making sure no yolk gets into the whites. Even a tiny bit of yolk will prevent the whites from whipping properly. I separate each egg into a small bowl first, then transfer the white to my mixing bowl. That way, if one yolk breaks, I don’t ruin the whole batch.
- Start whipping the egg whites on medium speed until they become frothy and bubbly, about 1-2 minutes. You’ll see lots of small bubbles forming, and the mixture will look like a foamy bath. This is when you add the cream of tartar.
- Increase the speed to medium-high and start adding the superfine sugar, one tablespoon at a time. I know this feels tedious, but trust me—adding it slowly allows each spoonful to dissolve before the next one goes in. If you dump it all at once, your meringue will be grainy. This takes about 5-7 minutes total.
- Add the vanilla extract once all the sugar is incorporated. Continue whipping on high speed until the meringue is thick, glossy, and holds stiff peaks. You’ll know it’s ready when you lift the whisk and the meringue stands up straight without drooping. Another test: rub a tiny bit between your fingers—if it feels smooth and not gritty, the sugar has dissolved completely.
- Transfer the meringue to a piping bag fitted with a round tip. If you’re using a zip-top bag, snip about ½ inch off one corner. Twist the top of the bag to push the meringue down toward the tip.
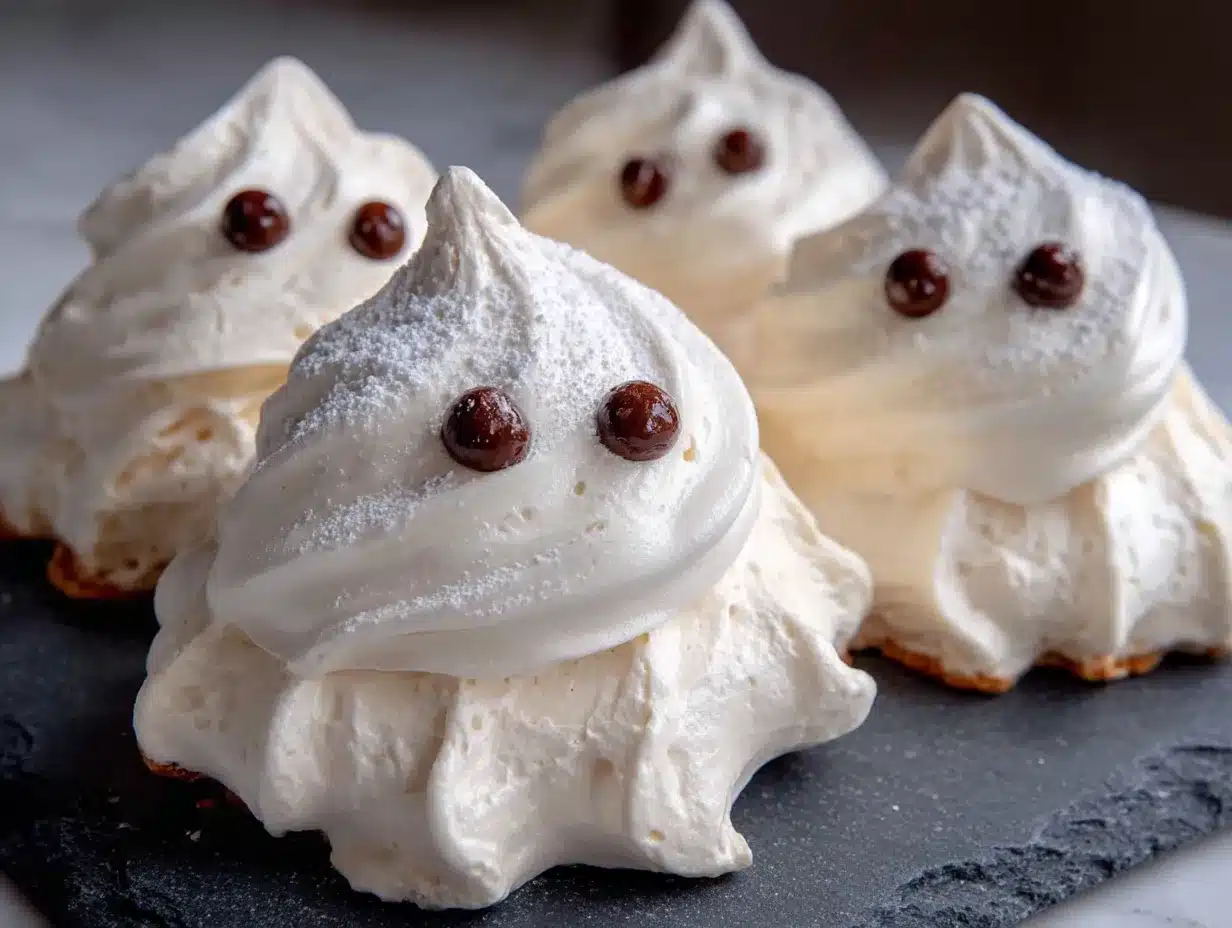
- Pipe the ghost shapes onto your prepared baking sheets. Hold the bag straight up and down, about ½ inch above the parchment. Squeeze gently to create a round blob about 1½ inches wide, then lift straight up while continuing to squeeze, creating a little peak on top. Release pressure and pull away quickly. This creates the classic ghost shape—round body with a wispy top. Space them about 1 inch apart; they don’t spread much.
- Bake for 60-75 minutes at 200°F (95°C). The meringues are done when they’re dry to the touch and can be lifted easily off the parchment. They should be pale and matte, not sticky. If they’re still soft in the center, give them another 10 minutes.
- Turn off the oven and leave the meringues inside to cool completely with the door slightly ajar. This takes about 1-2 hours. Don’t rush this step—the gradual cooling prevents cracking and ensures that perfect crisp texture.
- Pipe the ghost faces using a tiny bit of leftover meringue mixed with black gel food coloring. You can also use melted dark chocolate for the faces if you prefer. I use a toothpick dipped in the black meringue to dot on two eyes and a little open mouth. Keep it simple—ghosts don’t need detailed expressions.
Sensory Cues: At step 5, your meringue should look like marshmallow fluff—thick, white, and glossy. When you lift the whisk, the peak should stand tall and not flop over. At step 8, the meringues should feel dry and firm, not sticky or tacky. They’ll sound hollow if you tap one gently against the counter.
Troubleshooting: If your meringue looks grainy, the sugar didn’t dissolve fully. Next time, add it more slowly. If your ghosts spread out flat instead of holding their shape, your egg whites were over-whipped or the oven was too hot. If they’re sticky after baking, they need more time in the oven.
Cooking Tips & Techniques
I learned most of these tips the hard way—by making mistakes. The first time I made these ghost meringue cookies, I forgot the cream of tartar entirely. The meringue whipped up fine, but the ghosts deflated in the oven and looked more like sad pancakes than floating spirits. Not my finest baking moment.
Humidity is your enemy. Meringue hates moisture. Don’t make these on a rainy or humid day if you can help it. The sugar in the meringue absorbs moisture from the air, which makes the cookies sticky and soft instead of crisp. If you absolutely have to bake on a humid day, add an extra 10-15 minutes to the baking time and let them cool in the oven longer.
Room temperature eggs are crucial. I know it’s tempting to use cold eggs straight from the fridge, but cold egg whites don’t whip up as well. They’re tighter and don’t incorporate as much air. Set your eggs out on the counter for 30 minutes before you start. If you’re in a hurry, place the eggs in a bowl of warm water for 5 minutes.
Don’t over-whip. There’s a fine line between stiff peaks and over-whipped meringue. If you whip too long, the meringue will start to look grainy and separate. You’ll see little beads of liquid forming—that’s the egg whites breaking down. Stop as soon as the peaks are stiff and glossy.
Multitasking strategy: While your meringue is baking, clean up your kitchen and prep the black gel coloring for the faces. You can also make the faces while the ghosts are cooling in the oven. Just don’t open the oven door during baking—the temperature fluctuation can cause cracking.
Variations & Adaptations
One of the best things about these ghost meringue cookies is how easy they are to customize. I’ve tried quite a few variations over the years, and here are my favorites.
Chocolate Ghosts: Sift 2 tablespoons of unsweetened cocoa powder into the sugar before adding it to the egg whites. You’ll get a pale brown meringue that looks like chocolate ghosts. The flavor is subtle but delicious, and it pairs beautifully with the vanilla. I made these for a friend’s Halloween party and they disappeared first.
Peppermint Spirits: Swap the vanilla extract for ½ teaspoon of peppermint extract. The result is a refreshing, cool flavor that’s perfect for the spooky season. You can also crush a candy cane and sprinkle the pieces on top of the ghosts before baking for a little crunch.
Vegan Aquafaba Ghosts: Replace each egg white with 3 tablespoons of aquafaba (the liquid from a can of chickpeas). Whip it just like egg whites, adding cream of tartar and sugar the same way. The texture is slightly different—a little chewier—but the shape and taste are remarkably similar. I was skeptical the first time I tried this, but honestly, I couldn’t tell the difference in a blind taste test.
Pumpkin Spice Ghosts: Add 1 teaspoon of pumpkin pie spice to the sugar before whipping. The warm spice flavor gives these ghosts a cozy fall twist that’s perfect for Halloween parties or Thanksgiving dessert tables.
Serving & Storage Suggestions
These ghost meringue cookies are best served at room temperature, straight from the cooling rack. They’re delicate and crisp, with that soft marshmallow center that makes them so addictive.
Presentation Ideas: Arrange them on a black platter for maximum spooky effect. You can also stand them upright in a jar or vase for a fun centerpiece. I like to scatter a few on a cake stand surrounded by candy corn and chocolate spiders. For Halloween parties, I’ve even hung them from strings using a tiny loop of royal icing—they really do look like floating ghosts.
Storage Instructions: Store these in an airtight container at room temperature for up to 2 weeks. Do not refrigerate them—the moisture in the fridge will make them sticky. If you live in a humid climate, add a silica gel packet or a piece of dry bread to the container to absorb excess moisture.
Freezer Instructions: You can freeze these for up to 3 months. Place them in a single layer in a freezer-safe container, with parchment paper between layers. Thaw at room temperature for about 30 minutes before serving. The texture holds up surprisingly well.
Flavor Development: These actually taste better the next day. The flavors mellow and meld together, and the texture becomes perfectly crisp. I usually make mine a day or two before Halloween so they’re at their peak.
Nutritional Information & Benefits
Per serving (1 ghost meringue cookie):
| Nutrient | Amount |
|---|---|
| Calories | 25 |
| Total Fat | 0g |
| Sodium | 15mg |
| Total Carbohydrates | 6g |
| Sugars | 6g |
| Protein | 1g |
These ghost meringue cookies are naturally gluten-free, low in fat, and contain no dairy. They’re a lighter alternative to traditional Halloween treats like cookies or brownies. The egg whites provide a small amount of protein, and since they’re mostly air and sugar, a single cookie is only about 25 calories. That means you can eat a handful without guilt—and honestly, you probably will.
Dietary Considerations: This recipe is naturally gluten-free and dairy-free. For a vegan version, use aquafaba as mentioned above. The only potential allergen is eggs, so if you’re serving these at a party, make sure to label them clearly.
My Personal Wellness Perspective: I love that these cookies satisfy my sweet tooth without leaving me feeling heavy or sluggish. They’re light, airy, and just sweet enough. Plus, they’re so fun to make that the process itself feels like a treat.
Conclusion
These ghost meringue cookies are the Halloween treat you didn’t know you needed. They’re simple enough for a weeknight baking session, impressive enough for a party, and delicious enough to become a yearly tradition. I’ve been making them every October since that day at the hardware store, and I still get excited every time I pull a tray of perfect little ghosts out of the oven.
I hope you’ll give them a try. Customize them however you like—change the flavor, experiment with the faces, make them your own. That’s the beauty of a simple recipe like this. It’s a blank canvas for your creativity.
I’d love to hear how yours turn out! Drop a comment below and tell me about your ghost meringue adventures. Did you try a variation? Did your kids help pipe the faces? Share a photo on Pinterest and tag me—I love seeing your spooky creations. Happy Halloween, and happy baking!
FAQs
Can I make these ghost meringue cookies without a piping bag?
Absolutely. Use a zip-top plastic bag with one corner snipped off. It works just as well and is easier to clean. You can also use a spoon to drop dollops of meringue onto the baking sheet, though they won’t have the classic ghost shape.
Why did my meringue turn out sticky?
Sticky meringue usually means it wasn’t baked long enough or the humidity was too high. Make sure your oven is at the right temperature (200°F/95°C) and bake until the meringues are completely dry to the touch. If it’s a rainy day, add extra baking time.
Can I use liquid food coloring for the ghost faces?
Liquid food coloring will thin out the meringue and make it runny. Stick with gel food coloring or use melted dark chocolate instead. Both give you clean, sharp lines that hold their shape.
How do I know when the meringue is whipped enough?
Lift the whisk attachment straight up. The meringue should form a stiff peak that stands up straight without drooping. You can also rub a tiny bit between your fingers—it should feel smooth, not gritty. If it’s gritty, keep whipping until the sugar dissolves.
Can I double this recipe?
Yes, but you’ll need to bake in batches or use multiple oven racks. Meringue doesn’t hold well once whipped, so work quickly and bake immediately. If you’re using two racks, rotate the pans halfway through baking for even drying.
Pin This Recipe!
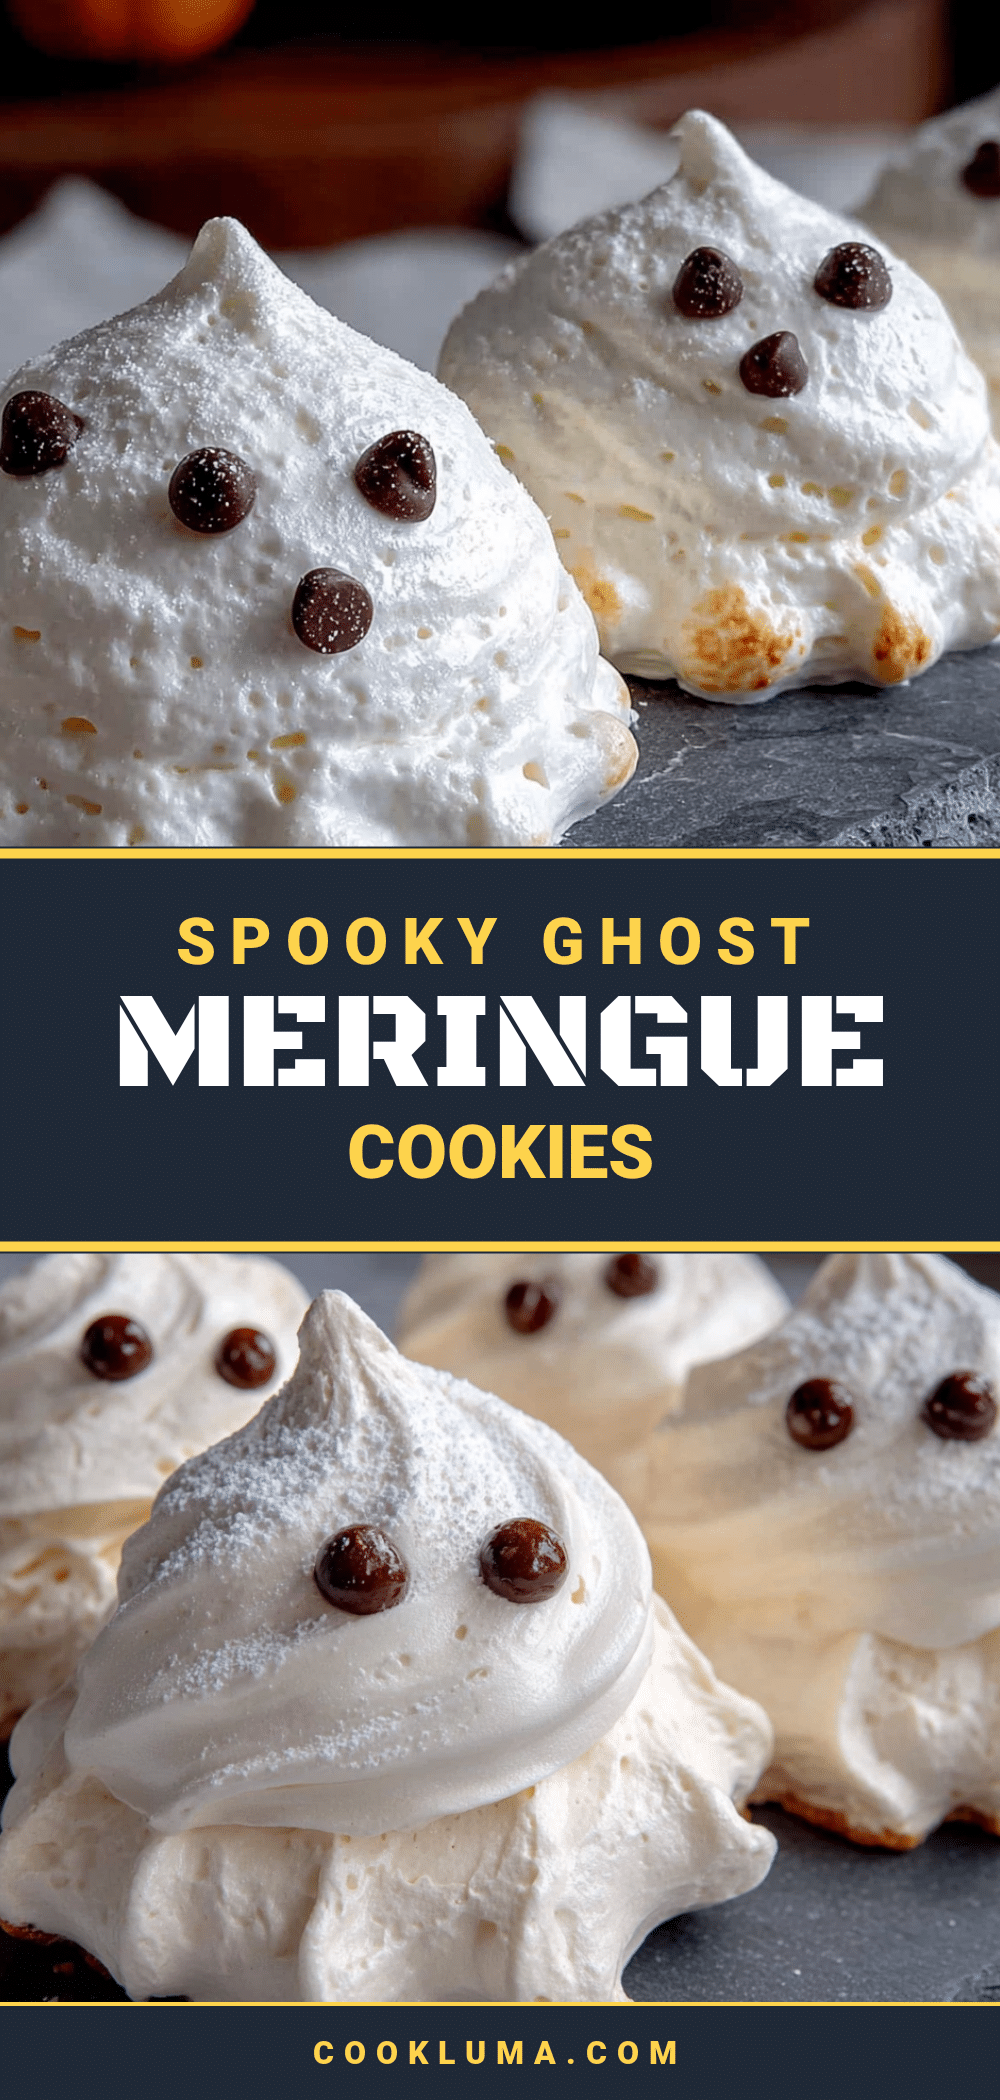
Easy Ghost Meringue Cookies: Best Halloween Treat
These ghost meringue cookies are light, airy, and crispy on the outside with a tiny chewy center. Made with just four simple ingredients, they’re the perfect Halloween treat that looks impressive but is secretly easy to make.
- Prep Time: 15 minutes
- Cook Time: 60-75 minutes
- Total Time: 2 hours (including cooling)
- Yield: 24 servings 1x
- Category: Dessert
- Cuisine: American
Ingredients
- 4 large egg whites, room temperature
- 1 cup (200g) superfine sugar
- ½ teaspoon cream of tartar
- 1 teaspoon vanilla extract
- Black gel food coloring (optional, for faces)
Instructions
- Preheat your oven to 200°F (95°C). Line two baking sheets with parchment paper and set them aside.
- Separate your eggs carefully, making sure no yolk gets into the whites. Transfer the whites to a mixing bowl.
- Start whipping the egg whites on medium speed until frothy and bubbly, about 1-2 minutes. Add the cream of tartar.
- Increase the speed to medium-high and add the superfine sugar, one tablespoon at a time, allowing each spoonful to dissolve before adding the next. This takes about 5-7 minutes.
- Add the vanilla extract once all the sugar is incorporated. Continue whipping on high speed until the meringue is thick, glossy, and holds stiff peaks.
- Transfer the meringue to a piping bag fitted with a round tip. If using a zip-top bag, snip about ½ inch off one corner.
- Pipe the ghost shapes onto the prepared baking sheets. Hold the bag straight up and down, about ½ inch above the parchment. Squeeze gently to create a round blob about 1½ inches wide, then lift straight up while continuing to squeeze, creating a little peak on top. Space them about 1 inch apart.
- Bake for 60-75 minutes at 200°F (95°C). The meringues are done when they’re dry to the touch and can be lifted easily off the parchment.
- Turn off the oven and leave the meringues inside to cool completely with the door slightly ajar, about 1-2 hours.
- Pipe the ghost faces using a tiny bit of leftover meringue mixed with black gel food coloring. Use a toothpick to dot on two eyes and a little open mouth.
Notes
Humidity is your enemy—avoid making these on rainy or humid days. Room temperature eggs are crucial for proper whipping. Don’t over-whip the meringue; stop as soon as stiff peaks form. For vegan version, use 3 tablespoons aquafaba per egg white. Store in an airtight container at room temperature for up to 2 weeks. Do not refrigerate.
Nutrition
- Serving Size: 1 ghost meringue coo
- Calories: 25
- Sugar: 6
- Sodium: 15
- Carbohydrates: 6
- Protein: 1
Keywords: ghost meringue cookies, Halloween cookies, meringue cookies, easy Halloween treat, gluten-free cookies, low-fat cookies, spooky cookies


