My neighbor, Mrs. Gable, watched me struggle with a bag of groceries on a Tuesday afternoon. I was trying to unlock my front door while balancing a bag that was, let me tell you, seconds away from splitting open. She didn’t say anything at first. Then she just appeared beside me, took the bag, and said, “You look like you need a recipe that fights back.” I laughed, thinking she meant something spicy. She meant these mummy stuffed peppers.
She had a way of making everything sound like a secret. She told me she made them every year for her grandson’s Halloween party, but honestly, I’ve been making them for every dinner party since. The first time I tried them, I was skeptical. Stuffed peppers are usually a Tuesday night thing, not a showstopper. But the way the cheese pulls apart when you cut into them? That’s pure magic. I mean, it’s the kind of dish that makes people stop mid-conversation and just stare at the table.
I tweaked her original recipe a bit. She used a mix of ground beef and pork, but I found that a blend of ground turkey and Italian sausage gives you that perfect balance of lean and juicy. And the cheese? She used cheddar. I switched to a mix of mozzarella and provolone for that gooey, stretchy effect that makes everyone at the table say “wow.” You know that feeling when you’re hosting and you want something that looks like you spent all day on it, but really it came together in under an hour? That’s this recipe. It’s the kind of dish that makes you look like a hero without breaking a sweat.
The mummy wrapping is the fun part. It’s just crescent roll dough, sliced into strips, wrapped around the pepper like bandages. It’s ridiculous and playful, and it always gets a laugh. But the real star is the filling. It’s savory, cheesy, and just a little bit spicy. I keep making these because they remind me that the best recipes come from unexpected moments—like a neighbor who sees you struggling and decides to share her secret weapon.
Why You’ll Love This Recipe
Let me be honest with you. I’ve tested this recipe about a dozen times, tweaking the filling, adjusting the bake time, and trying different cheeses. I wanted it to be foolproof for when you’re hosting. You don’t want to be fussing with complicated steps when your guests are about to arrive. This recipe is designed to be stress-free and impressive at the same time.
- Quick & Easy: Comes together in under 45 minutes, including prep and baking. Perfect for a weeknight dinner party or a last-minute gathering.
- Simple Ingredients: You likely have most of these in your kitchen already. No fancy grocery trips needed.
- Perfect for Hosting: These mummy peppers are a conversation starter. They look festive and fun, but they’re seriously delicious.
- Crowd-Pleaser: I’ve served these to kids, adults, picky eaters, and foodies. Everyone loves them. The gooey cheese is a universal language.
- Unbelievably Delicious: The combination of savory meat, sweet bell peppers, and stretchy cheese is next-level comfort food. It’s the kind of dish that makes you close your eyes after the first bite.
What makes this recipe different from all the other stuffed pepper recipes out there? It’s the presentation, sure, but it’s also the technique. I blend cottage cheese into the meat mixture. I know it sounds weird, but trust me on this. It keeps the filling incredibly moist and adds a subtle creaminess that you don’t get with just shredded cheese. It’s a little trick I learned from a chef friend, and it makes all the difference. This isn’t just another version of stuffed peppers. It’s the one you’ll come back to every time you need to impress.
What Ingredients You Will Need
This recipe uses simple, wholesome ingredients to deliver bold flavor and satisfying texture without the fuss. Most of these are pantry staples, and the few that aren’t are easy to find at any grocery store.
For the Filling
- 1 lb ground turkey (or ground beef, if you prefer a richer flavor)
- 1/2 lb Italian sausage, casings removed (adds incredible flavor and juiciness)
- 1 cup cottage cheese, small curd (this is my secret ingredient for moisture)
- 1 cup shredded mozzarella cheese (for that gooey, stretchy texture)
- 1/2 cup shredded provolone cheese (adds a slightly nutty flavor that pairs well with the peppers)
- 1/2 cup cooked rice (white or brown, to absorb the juices and add body)
- 1 small onion, finely diced
- 3 cloves garlic, minced
- 1 teaspoon dried oregano
- 1/2 teaspoon red pepper flakes (optional, for a little heat)
- Salt and black pepper, to taste
For the Peppers and Wrapping
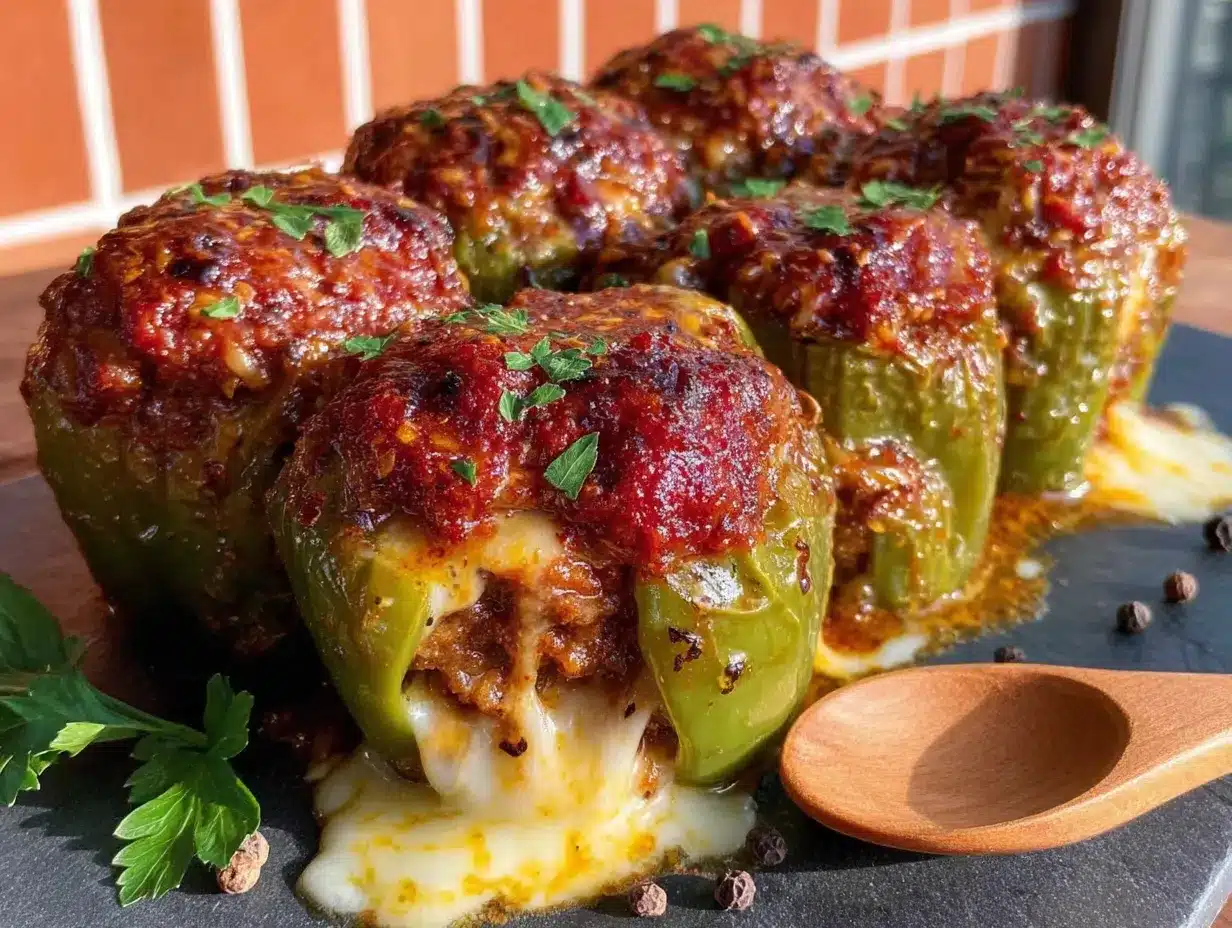
- 6 large bell peppers, any color (red, yellow, and orange are sweeter; green is more savory)
- 1 can (8 oz) refrigerated crescent roll dough (I recommend Pillsbury for consistent results)
- 1 egg, beaten (for egg wash to give the dough a golden finish)
- Optional: black olive slices or small dots of black food coloring (for making “eyes” on the mummies)
For the Topping (Optional but Recommended)
- 1/2 cup marinara sauce (for serving on the side, or you can drizzle it over the top)
- Fresh parsley, chopped (for garnish)
When selecting your bell peppers, look for ones that are squat and wide rather than tall and narrow. They’ll stand up better on the plate and hold more filling. I personally prefer red and yellow peppers because they’re sweeter, but green peppers give a more traditional stuffed pepper flavor. Use what you like or what’s on sale.
For the cottage cheese, I use the small-curd variety. The large curds can be a bit too chunky in the filling. If you’re dairy-free, you can substitute with a dairy-free cream cheese alternative, but the texture will be slightly different.
Equipment Needed
You don’t need a lot of fancy equipment for this recipe, which is part of its charm. Here’s what you’ll need:
- Large skillet (for browning the meat and sautéing the onion and garlic)
- Mixing bowl (for combining the filling ingredients)
- Baking dish (a 9×13-inch dish works perfectly)
- Sharp knife (for cutting the bell peppers and slicing the dough)
- Cutting board
- Pastry brush (for applying the egg wash, optional but helpful)
- Aluminum foil (for tenting the peppers if the dough browns too quickly)
If you don’t have a pastry brush, you can use a clean finger or a spoon to apply the egg wash. I’ve done it both ways, and it works fine. A good quality, sharp knife makes cutting the bell peppers much easier and safer. If you’re using a dull knife, you risk crushing the pepper instead of slicing it cleanly.
Preparation Method
Let’s get cooking. This recipe moves quickly, so I suggest reading through all the steps before you start. Trust me, it’ll save you from that moment of panic when you realize you forgot to preheat the oven.
- Preheat your oven to 375°F (190°C). While it’s heating, bring a large pot of water to a boil. You’ll use this to blanch the peppers, which softens them just enough so they cook evenly in the oven.
- Prepare the bell peppers. Cut the tops off the peppers and remove the seeds and membranes. If you want them to stand up straight, trim a thin slice off the bottom so they sit flat. Be careful not to cut a hole in the bottom, or the filling will leak out. I learned this the hard way on my second try.
- Blanch the peppers. Carefully place the peppers in the boiling water for 3 minutes. This softens them without making them mushy. Remove them with tongs and let them drain upside down on a paper towel. This step is important—if the peppers are too firm, they won’t cook through in the oven. Too soft, and they’ll collapse.
- Cook the meat mixture. In a large skillet over medium heat, cook the ground turkey and Italian sausage, breaking it up with a spoon, until it’s browned and cooked through. This should take about 6-8 minutes. Add the diced onion and minced garlic and cook for another 2 minutes until the onion is translucent. Drain any excess fat, but leave a little for flavor.
- Combine the filling. In a large mixing bowl, combine the cooked meat mixture, cottage cheese, shredded mozzarella, shredded provolone, cooked rice, dried oregano, red pepper flakes (if using), and salt and pepper to taste. Mix well. Taste it. I always do. Adjust the seasoning if needed. The filling should be savory and slightly creamy from the cottage cheese.
- Stuff the peppers. Spoon the filling into each pepper, packing it gently but firmly. Don’t overstuff, or the filling will spill out during baking. You want the filling to be level with the top of the pepper.
- Wrap the mummies. Unroll the crescent roll dough. You’ll have a sheet with perforations. Press the seams together to create a solid sheet of dough. Using a sharp knife or a pizza cutter, cut the dough into 1/2-inch wide strips. Starting at the top of the pepper, wrap the strips around the pepper, overlapping slightly, like you’re wrapping a mummy. Leave a small gap near the top for the “eyes.” If the dough breaks, just press it back together. It’s very forgiving.
- Add the eyes. If you’re using olive slices, press two small slices into the gap at the top of the pepper. Alternatively, you can use a toothpick dipped in black food coloring to make dots. I’ve done both, and the olive slices are easier and more fun.
- Apply the egg wash. Brush the dough strips with the beaten egg. This gives them a beautiful golden brown color as they bake.
- Bake. Place the wrapped peppers in your baking dish. Bake for 20-25 minutes, or until the dough is golden brown and the filling is heated through. If the dough starts to brown too quickly, tent the dish loosely with aluminum foil for the last 5-10 minutes.
- Rest and serve. Let the peppers rest for 5 minutes after you take them out of the oven. This helps the cheese set slightly so it doesn’t all run out when you cut into them. Serve with warm marinara sauce on the side and a sprinkle of fresh parsley.
Cooking Tips & Techniques
I’ve made these mummy peppers enough times to have a few tricks up my sleeve. Here are the things I wish someone had told me the first time.
Don’t skip the blanching step. I know it feels like an extra step, but it’s crucial. If you put raw peppers in the oven, they’ll still be crunchy when the dough is perfectly golden. The blanching gives them a head start so everything finishes at the same time. I once forgot to blanch them, and I ended up with perfectly cooked dough and crunchy peppers. Not ideal.
Use a mix of cheeses. Mozzarella gives you the stretch, but provolone adds a deeper flavor. If you only have mozzarella, it will still be delicious, but the flavor won’t be as complex. I’ve also tried it with Monterey Jack, and it works great. The key is to use a cheese that melts well.
Handle the dough gently. Crescent roll dough is delicate. If it tears, just press it back together. It’s very forgiving. I’ve had strips break in half, and I just overlapped them on the pepper. You can’t even tell once it’s baked.
Make the filling ahead of time. You can prepare the filling up to two days in advance and keep it in the fridge. This makes the day-of assembly much faster. Just let the filling come to room temperature before stuffing the peppers, or add a few extra minutes to the bake time.
Watch the dough. Ovens vary, so start checking the peppers at the 18-minute mark. You want the dough to be a deep golden brown. If it’s browning unevenly, rotate the dish halfway through.
Variations & Adaptations
One of the best things about this recipe is how adaptable it is. You can change almost everything and still end up with something amazing.
Vegetarian Version: Skip the meat and use a mix of black beans, corn, and quinoa. Add an extra 1/2 cup of cheese to keep it moist. I’ve made this for a vegetarian friend, and she said it was the best stuffed pepper she’d ever had. The cottage cheese still works its magic here.
Spicy Version: Add a diced jalapeño to the meat mixture, or use spicy Italian sausage instead of sweet. You can also mix in some chopped chipotle peppers in adobo sauce for a smoky heat. I made this version for a Super Bowl party, and it was a hit.
Low-Carb Version: Skip the rice and use cauliflower rice instead. You’ll need to squeeze the excess moisture out of the cauliflower rice before adding it to the filling. Also, use a low-carb dough alternative, or simply skip the dough wrapping and serve the peppers as a keto-friendly option.
Different Cheese Combinations: Try using pepper jack for a spicy kick, or gouda for a smoky flavor. I once used a mix of cheddar and cream cheese, and it was incredibly rich and decadent. The possibilities are endless.
Make It a Meal: Serve these peppers with a side of roasted vegetables or a simple green salad. They’re hearty enough to stand on their own, but a side dish rounds out the meal nicely.
Serving & Storage Suggestions
These mummy peppers are best served warm, straight from the oven. The cheese is at its gooiest, and the dough is perfectly crisp. Let them rest for 5 minutes before serving, but don’t wait much longer or the cheese will start to set.
For a dinner party, I like to arrange them on a large platter with a bowl of warm marinara sauce in the center. The contrast of the golden dough against the red sauce is visually stunning. You can also drizzle a little sauce over the top for a more dramatic presentation.
What to serve alongside: A simple arugula salad with lemon vinaigrette cuts through the richness of the cheese and meat. Roasted broccoli or asparagus also works well. If you’re serving these as an appetizer, consider making them smaller by using mini bell peppers.
Storage: Leftover stuffed peppers can be stored in an airtight container in the refrigerator for up to 3 days. The dough will soften slightly, but the flavor will still be excellent. To reheat, place them in a 350°F (175°C) oven for 10-15 minutes, or until heated through. You can also microwave them, but the dough won’t be as crisp.
Freezing: You can freeze the unbaked stuffed peppers for up to 2 months. Assemble them completely, but don’t apply the egg wash. Wrap each pepper individually in plastic wrap, then place them in a freezer bag. When you’re ready to bake, thaw them in the refrigerator overnight, apply the egg wash, and bake as directed. The texture will be slightly different, but they’ll still be delicious.
The flavors actually meld together beautifully overnight. I’ve found that the peppers taste even better the next day, if you can manage to have leftovers. The cheese and meat settle into a perfect harmony.
Nutritional Information & Benefits
Here’s a rough estimate of the nutritional information per serving (one stuffed pepper). Please note that this will vary based on the specific ingredients you use.
| Nutrient | Amount per Serving |
|---|---|
| Calories | 420 |
| Total Fat | 22g |
| Saturated Fat | 10g |
| Cholesterol | 85mg |
| Sodium | 780mg |
| Total Carbohydrates | 28g |
| Dietary Fiber | 4g |
| Sugars | 8g |
| Protein | 32g |
Bell peppers are an excellent source of vitamin C—one pepper provides more than 100% of your daily needs. They’re also rich in vitamin A and antioxidants. The cottage cheese adds a good amount of protein and calcium without a lot of fat. The turkey and sausage provide high-quality protein to keep you feeling full and satisfied.
This recipe is naturally gluten-free if you omit the crescent roll dough and use a gluten-free alternative. It’s also relatively low in carbs compared to other comfort food dishes. If you’re watching your sodium intake, use low-sodium broth and reduce the added salt.
Conclusion
These crowd-pleasing mummy stuffed peppers with gooey cheese are the kind of recipe that becomes a tradition. They’re fun, festive, and genuinely delicious. I love that they make people smile when they see them, and then they take a bite and realize there’s serious flavor behind the playful presentation.
I encourage you to make these your own. Swap in your favorite cheese, add more spice, or go vegetarian. The base recipe is solid, but it’s meant to be played with. Don’t be afraid to experiment. That’s how you discover your family’s version of this dish.
I’d love to hear how yours turn out. Did you use a different filling? Did you make them for a Halloween party or a casual dinner? Drop a comment below and let me know. Share a photo if you’re feeling brave. And if you have a friend who loves hosting but needs a showstopper recipe, send this their way. Trust me, they’ll thank you.
Happy cooking, and remember—the best recipes come from the moments when we least expect them. Mrs. Gable taught me that.
Frequently Asked Questions
Can I make these mummy stuffed peppers ahead of time?
Absolutely. You can assemble the peppers completely, including the dough wrapping, up to 24 hours in advance. Keep them covered in the refrigerator. When you’re ready to bake, apply the egg wash and add a few extra minutes to the bake time since they’ll be starting from cold.
Can I use a different type of dough?
Yes, you can use puff pastry or homemade pizza dough. Puff pastry will be flakier and richer, while pizza dough will be chewier. Crescent roll dough is the easiest and most forgiving option, but feel free to experiment.
How do I prevent the dough from getting soggy?
Make sure to drain the meat mixture well after cooking. Excess moisture from the meat can seep into the dough. Also, don’t overstuff the peppers. Leave a little room at the top so the filling doesn’t push against the dough. The egg wash also helps create a barrier that keeps the dough crisp.
Can I grill these instead of baking them?
You can, but it’s tricky. The dough needs even heat to cook through, and grills can have hot spots. If you want to try it, use indirect heat and keep the grill at around 375°F (190°C). You’ll need to rotate the peppers frequently to ensure even cooking. I’ve done it once, and while the flavor was great, the presentation wasn’t as neat.
What if I don’t have cottage cheese?
You can substitute with ricotta cheese or an equal amount of sour cream. The texture will be slightly different, but it will still be moist and delicious. If you’re avoiding dairy, use a dairy-free cream cheese alternative.
Pin This Recipe!
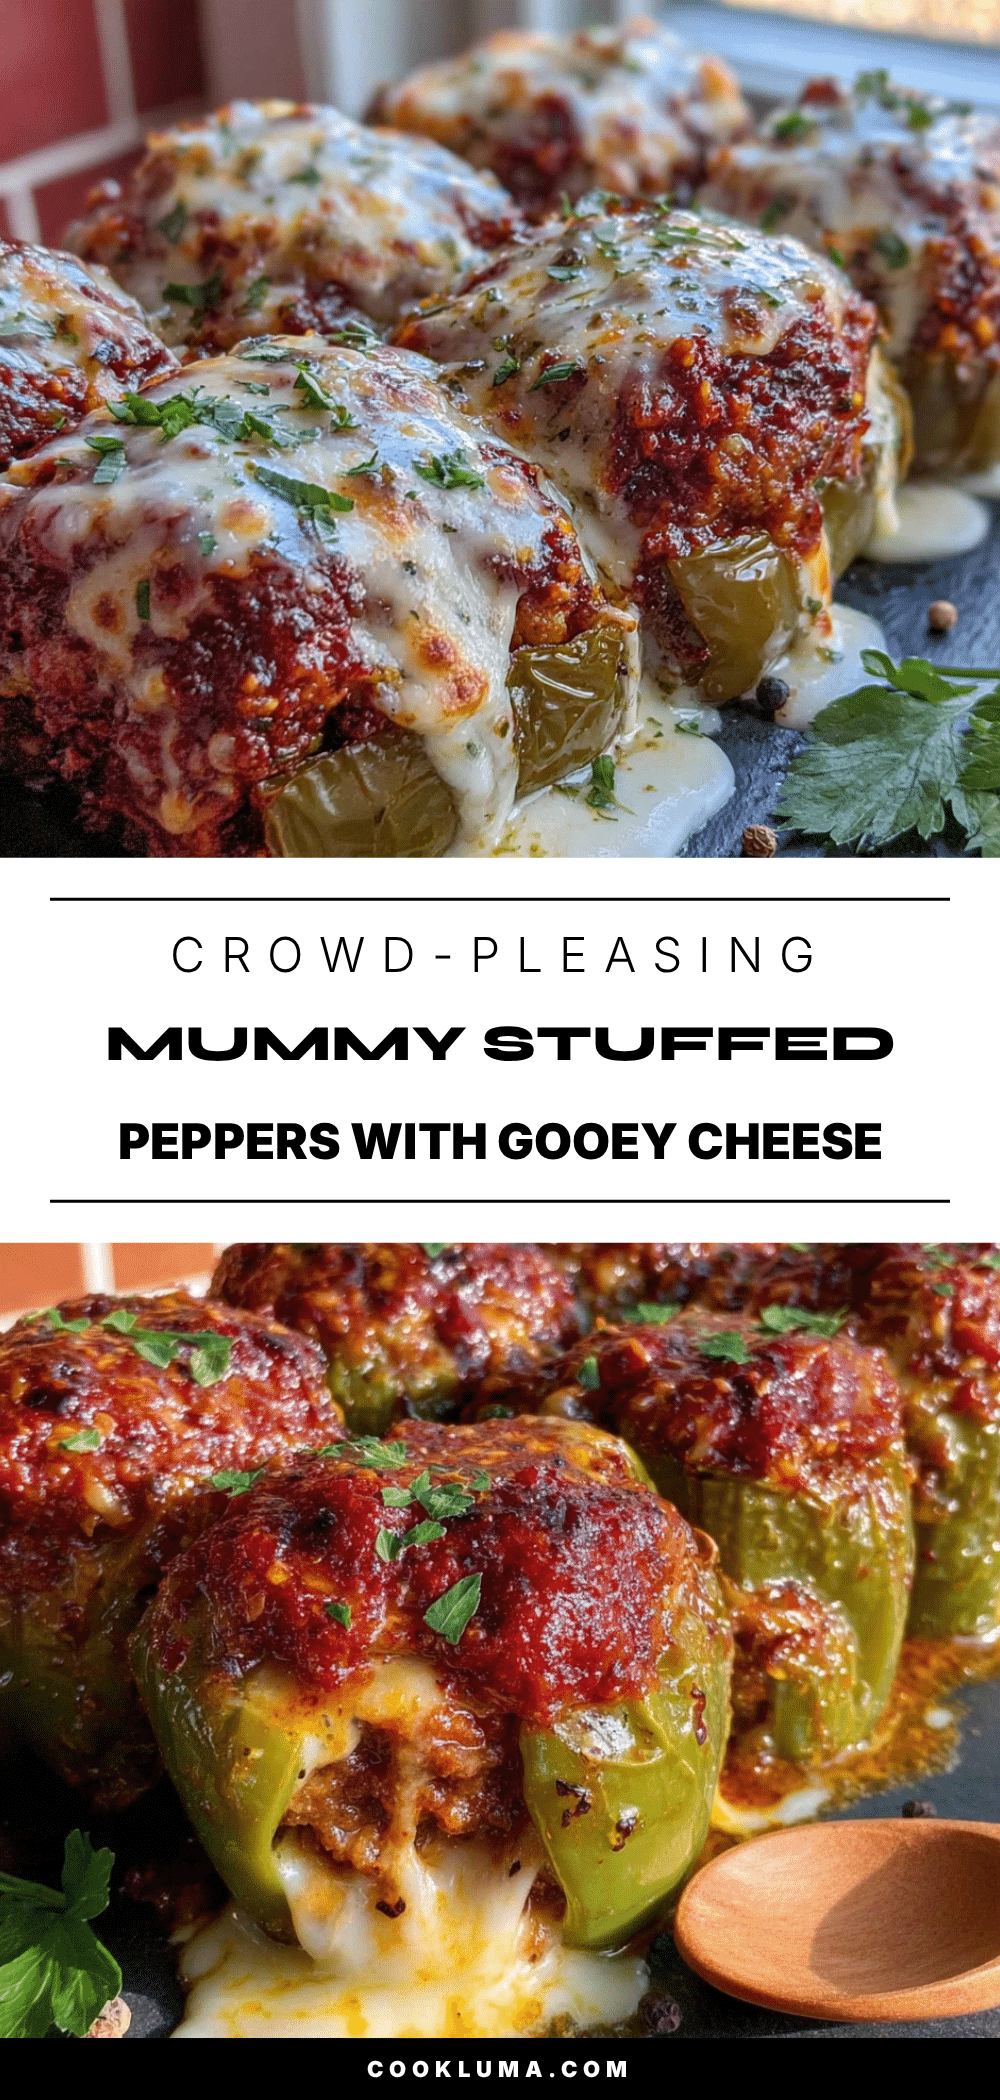
Crowd-Pleasing Mummy Stuffed Peppers: Easy Gooey Cheese Recipe
These mummy stuffed peppers are a fun, festive, and delicious dinner party showstopper. With a savory turkey and sausage filling, gooey mozzarella and provolone, and a playful crescent roll wrapping, they come together in under an hour and are sure to impress.
- Prep Time: 15 minutes
- Cook Time: 25 minutes
- Total Time: 40 minutes
- Yield: 6 servings 1x
- Category: Main Course
- Cuisine: American
Ingredients
- 1 lb ground turkey
- 1/2 lb Italian sausage, casings removed
- 1 cup cottage cheese, small curd
- 1 cup shredded mozzarella cheese
- 1/2 cup shredded provolone cheese
- 1/2 cup cooked rice (white or brown)
- 1 small onion, finely diced
- 3 cloves garlic, minced
- 1 teaspoon dried oregano
- 1/2 teaspoon red pepper flakes (optional)
- Salt and black pepper, to taste
- 6 large bell peppers (any color)
- 1 can (8 oz) refrigerated crescent roll dough
- 1 egg, beaten (for egg wash)
- Optional: black olive slices or small dots of black food coloring (for eyes)
- 1/2 cup marinara sauce (for serving)
- Fresh parsley, chopped (for garnish)
Instructions
- Preheat your oven to 375°F (190°C). Bring a large pot of water to a boil.
- Prepare the bell peppers: Cut the tops off and remove seeds and membranes. Trim a thin slice off the bottom so they sit flat, being careful not to cut a hole.
- Blanch the peppers: Place them in boiling water for 3 minutes. Remove with tongs and drain upside down on paper towels.
- Cook the meat mixture: In a large skillet over medium heat, cook the ground turkey and Italian sausage, breaking it up, until browned and cooked through (6-8 minutes). Add the diced onion and minced garlic and cook for another 2 minutes. Drain excess fat.
- Combine the filling: In a large mixing bowl, combine the cooked meat mixture, cottage cheese, shredded mozzarella, shredded provolone, cooked rice, dried oregano, red pepper flakes (if using), and salt and pepper to taste. Mix well.
- Stuff the peppers: Spoon the filling into each pepper, packing gently but firmly, level with the top.
- Wrap the mummies: Unroll the crescent roll dough and press the seams together. Cut into 1/2-inch wide strips. Starting at the top, wrap the strips around the pepper, overlapping slightly, leaving a small gap near the top for eyes.
- Add the eyes: Press two small olive slices into the gap, or use a toothpick dipped in black food coloring to make dots.
- Apply the egg wash: Brush the dough strips with the beaten egg.
- Bake: Place the wrapped peppers in a baking dish. Bake for 20-25 minutes, until the dough is golden brown and the filling is heated through. If the dough browns too quickly, tent loosely with aluminum foil for the last 5-10 minutes.
- Rest and serve: Let the peppers rest for 5 minutes. Serve with warm marinara sauce and a sprinkle of fresh parsley.
Notes
Don’t skip blanching the peppers—it ensures they cook through. Use a mix of cheeses for best flavor and stretch. Handle the dough gently; it’s forgiving if it tears. The filling can be made up to 2 days ahead. For a vegetarian version, substitute meat with black beans, corn, and quinoa.
Nutrition
- Serving Size: 1 stuffed pepper
- Calories: 420
- Sugar: 8
- Sodium: 780
- Fat: 22
- Saturated Fat: 10
- Carbohydrates: 28
- Fiber: 4
- Protein: 32
Keywords: mummy stuffed peppers, Halloween recipe, stuffed peppers, gooey cheese, turkey sausage, crescent roll, easy dinner, party food


