I was elbow-deep in a pile of vintage linens at a dusty estate sale last October when the woman running the cash box—a retired home economics teacher named Betty with a no-nonsense silver bob—started talking about Christmas cookies. I hadn’t asked. Honestly, I was just trying to negotiate a fair price for a set of Pyrex bowls that had seen better days. But Betty was already describing her “diabetic-friendly but nobody-knows-it” sugar cookie recipe, and she was using words like “almond flour” and “butter extract” and “don’t you dare overbake them.” I froze, holding a chipped mixing bowl, because this was exactly the kind of recipe I’d been hunting for months.
You see, the holidays in my house are a battlefield. I want the warm, buttery, sprinkle-covered cookies of my childhood. My body, however, decided a few years ago that it prefers a more balanced approach to sugar and refined flour. The result was usually two batches of cookies—one for me that tasted like cardboard, and one for everyone else. It was a sad, inefficient system. Betty’s recipe, scrawled on a notepad next to the cash register, promised to change that. She told me she’d been making these almond flour Christmas sugar cookies for her bridge club for over a decade, and not one person had ever guessed they weren’t the real deal. I bought the bowls, of course, but I practically ran home with that scrap of paper.
The first batch I made, I messed up. I used fine almond flour when Betty had specified a super-fine blanched variety, and the cookies spread into sad, greasy puddles. I almost gave up. But something about her confidence—that knowing look she gave me as she handed over the recipe—kept me going. The second batch was better. The third? That was the one. The one where the dough felt right in my hands, where the cookies puffed up with those perfect little crinkled edges, and where my husband asked, “Wait, these are actually healthy?” without a hint of suspicion. That’s the recipe I’m sharing with you today. It’s the one that finally ended the two-batch war in my kitchen.
Why You’ll Love This Recipe
Let me tell you why this particular recipe has earned a permanent spot in my holiday rotation. It’s not just another healthified cookie that leaves you feeling cheated. These almond flour Christmas sugar cookies deliver on every level, and I’ve got the experience—and the dozen-plus test batches—to prove it.
- Quick & Easy: From start to finish, these cookies come together in about 30 minutes. The dough needs a quick 15-minute chill (not an overnight ordeal), and the bake time is just 10-12 minutes. Perfect for those December evenings when you suddenly remember you need cookies for tomorrow’s school party.
- Simple Ingredients: You probably have most of this in your pantry right now. Almond flour, butter, a touch of maple syrup, vanilla, and a few other basics. No weird thickeners or specialty gums. I tested this with both name-brand and store-brand almond flour, and it works beautifully with either.
- Perfect for Holiday Gatherings: These cookies are the great equalizer at any party. They look and taste exactly like traditional sugar cookies, so nobody feels left out. I’ve brought them to cookie swaps, office parties, and family dinners, and they vanish just as fast as the gluten-filled versions.
- Crowd-Pleaser: My picky-eater nephew devoured four of these before asking what was in them. When I said “almond flour,” he shrugged and reached for a fifth. Kids and adults alike love the tender, buttery texture and the subtle sweetness.
- Unbelievably Delicious: This is the part that still surprises me every time. The texture is soft and almost shortbread-like, with a delicate crumb that melts in your mouth. The almond flour adds a natural richness that makes you wonder why you ever used white flour for sugar cookies in the first place.
What makes this recipe different from the dozens of other “healthy” sugar cookie recipes out there? It’s the technique. Most almond flour cookies turn out either too greasy or too crumbly. I spent weeks perfecting the ratio of wet to dry ingredients, and I landed on a method that uses a bit of coconut flour to absorb excess moisture. The result is a cookie that holds its shape, handles beautifully for decorating, and tastes genuinely indulgent. This isn’t a compromise cookie. It’s the cookie you’ll actually want to make year after year.
What Ingredients You Will Need
This recipe relies on a handful of wholesome ingredients that work together to create a cookie that’s both tender and sturdy enough for decorating. Here’s what you’ll need, along with a few notes from my testing kitchen.
- 2 ½ cups (280g) super-fine blanched almond flour: This is non-negotiable. Super-fine blanched almond flour (I prefer Bob’s Red Mill or Blue Diamond) creates a smooth, even texture. The blanched version (skins removed) gives you that pale, classic sugar cookie color. Avoid almond meal, which is coarser and will make your cookies grainy.
- ¼ cup (30g) coconut flour: This is my secret weapon. Coconut flour is incredibly absorbent, and it helps balance the moisture from the almond flour and butter. Without it, your cookies will spread too much. I’ve tested this with oat flour as a substitute, and it works, but the texture is slightly less tender.
- ½ teaspoon baking powder: Make sure it’s fresh. I learned this the hard way after a batch of flat, dense cookies. A quick test: drop a pinch of baking powder into hot water. If it fizzes, you’re good to go.
- ¼ teaspoon salt: Fine sea salt works best. It enhances the sweetness and balances the richness of the almond flour.
- 6 tablespoons (85g) unsalted butter, softened: I use unsalted to control the salt level. If you only have salted butter, reduce the added salt to ⅛ teaspoon. Let the butter come to room temperature naturally—about 30 minutes on the counter. Microwaving it can make it too soft, which leads to spreading.
- ⅓ cup (80ml) pure maple syrup: This is my preferred sweetener for its rich flavor and moisture. Honey works in a pinch, but it has a stronger flavor that can compete with the almond. For a lower-carb option, you can use a monk fruit maple syrup blend, but the texture will be slightly less tender.
- 1 large egg, room temperature: A cold egg can seize the butter and make the dough difficult to mix. Place your egg in a bowl of warm water for 5 minutes if you forgot to take it out ahead of time.
- 1 teaspoon vanilla extract: Pure vanilla extract makes a noticeable difference. I’ve used imitation vanilla in a pinch, and it works, but the flavor is less nuanced.
- ½ teaspoon almond extract (optional but recommended): This amplifies the natural almond flavor and gives the cookies that classic sugar cookie taste. I always include it, but if you’re baking for someone with a nut allergy, you can leave it out.
For the Icing (Optional but Recommended):
- 1 cup (120g) powdered sugar: Use a brand that uses tapioca starch instead of cornstarch if you’re avoiding corn.
- 1-2 tablespoons milk (dairy or non-dairy): Start with one tablespoon and add more until you reach your desired consistency.
- ½ teaspoon vanilla extract
- Natural food coloring (optional): I love using beet powder for pink and matcha for green.
I always recommend sourcing your almond flour from a brand you trust. I’ve noticed that cheaper brands can be grittier and less consistent. Also, store your almond flour in the refrigerator or freezer—it goes rancid faster than wheat flour due to its high fat content.
Equipment Needed
You don’t need a fancy bakery setup for these cookies, but a few key tools will make your life much easier.
- Mixing bowls: One large and one medium. I use glass or stainless steel because they don’t hold onto odors.
- Electric hand mixer or stand mixer: While you can cream the butter by hand with a wooden spoon, a mixer makes the process faster and ensures a smoother dough. I’ve done it both ways, and the mixer is worth the cleanup.
- Parchment paper or silicone baking mat: Essential for preventing sticking and ensuring even baking. I prefer parchment paper for easy cleanup.
- Baking sheets: Light-colored, heavy-duty sheets work best. Dark sheets can cause the bottoms of your cookies to brown too quickly.
- Rolling pin: A standard rolling pin works fine. If you want perfectly even thickness, use rolling pin rings or two ¼-inch thick guide sticks.
- Cookie cutters: Any shape you like! Stars, trees, and snowflakes are classic for Christmas. I have a set of vintage copper cutters that I found at a thrift store, and they work beautifully.
- Wire cooling rack: Crucial for letting your cookies cool evenly. If you let them cool on the baking sheet, they can continue to cook from the residual heat.
- Piping bags or small zip-top bags: For decorating with icing. Snip a tiny corner off a zip-top bag for a quick and easy piping tool.
If you don’t have a rolling pin, a clean wine bottle works in a pinch—just make sure it’s smooth and label-free. And if you don’t have cookie cutters, you can use a drinking glass to cut rounds, or simply roll the dough into balls and flatten them with a fork for a crinkle effect.
Preparation Method
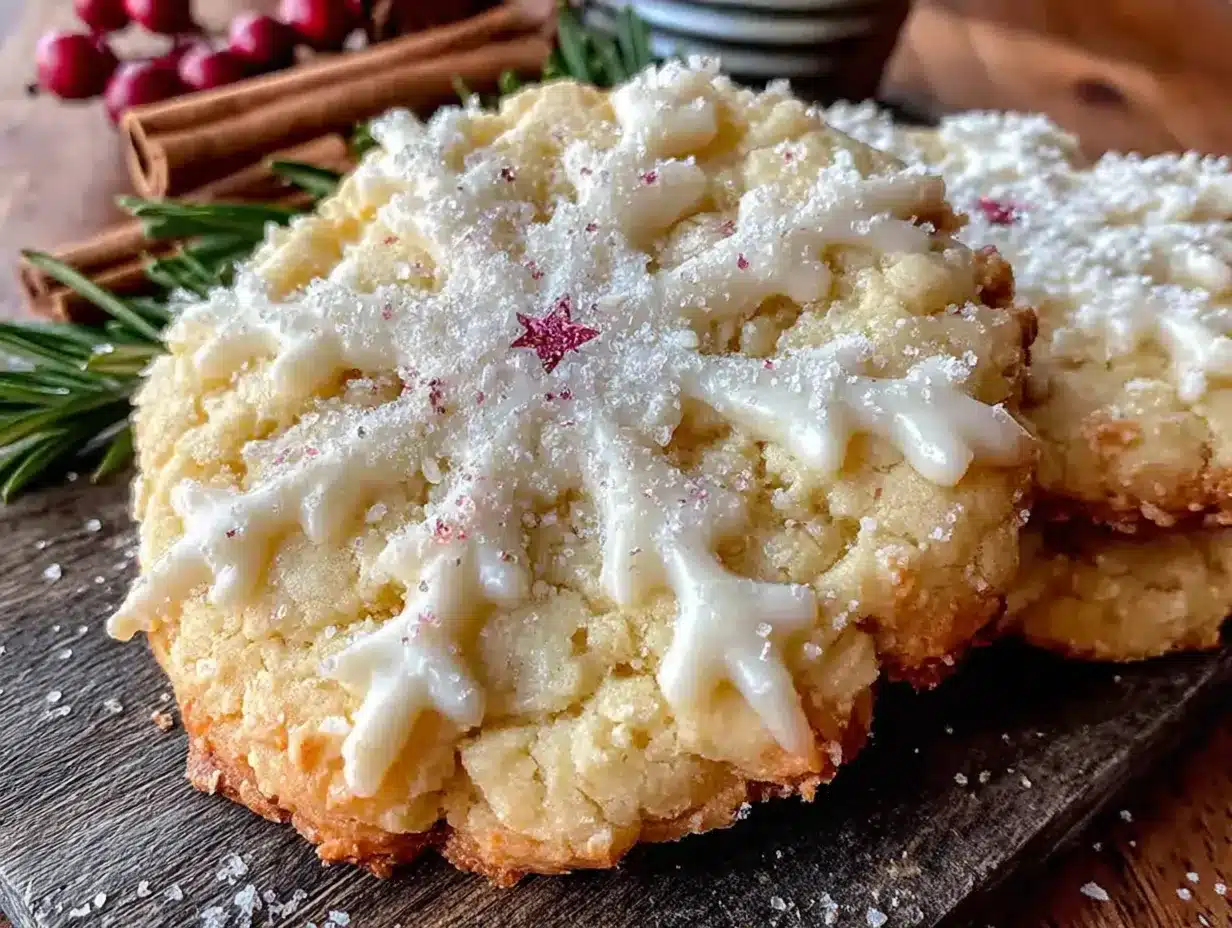
Let me walk you through this step by step. I’ve included all the little details I wish someone had told me when I first started making these.
- Preheat your oven to 350°F (175°C). Line two baking sheets with parchment paper or silicone mats. This is a good time to make sure your oven rack is in the center position.
- Whisk the dry ingredients together. In a medium bowl, combine the almond flour, coconut flour, baking powder, and salt. Whisk thoroughly to break up any clumps. The coconut flour in particular tends to clump, so take an extra 30 seconds here. Set aside.
- Cream the butter and maple syrup. In a large mixing bowl, beat the softened butter with an electric mixer on medium speed until creamy, about 1 minute. Add the maple syrup and continue beating for another 2 minutes until the mixture is light and fluffy. It should look like a pale, aerated paste. Scrape down the sides of the bowl with a spatula.
- Add the egg and extracts. Beat in the egg, vanilla extract, and almond extract (if using) until fully combined. The mixture might look slightly separated at this point—that’s okay. It will come together when you add the dry ingredients.
- Mix in the dry ingredients. Add the dry ingredient mixture to the wet ingredients in two additions, mixing on low speed after each addition until just combined. Do not overmix. The dough will be soft and slightly sticky, but it should hold together when pressed. If it feels too sticky to handle, refrigerate it for 10 minutes before rolling.
- Chill the dough. Divide the dough in half and shape each half into a flat disc. Wrap tightly in plastic wrap and refrigerate for at least 15 minutes. This step is crucial—it firms up the butter and allows the coconut flour to absorb moisture, making the dough much easier to roll. I once skipped this step in a hurry, and the cookies spread into amorphous blobs. Don’t be like me.
- Roll out the dough. Place one disc of dough between two sheets of parchment paper. Roll to ¼-inch (6mm) thickness. Using parchment paper prevents sticking without adding extra flour, which can dry out the dough. If the dough cracks at the edges, let it sit at room temperature for 2-3 minutes to soften slightly.
- Cut out your shapes. Dip your cookie cutters in a little almond flour to prevent sticking. Cut out shapes as close together as possible to minimize scraps. Transfer the cut cookies to your prepared baking sheets, spacing them about 1 inch apart. They won’t spread much, so you can fit quite a few on one sheet.
- Bake for 10-12 minutes. The cookies are done when the edges are just barely golden brown. The centers will look slightly puffed and pale. Do not overbake—they will continue to set as they cool. I recommend checking at the 10-minute mark. My oven runs hot, so I usually pull them out at exactly 10 minutes.
- Cool completely before decorating. Let the cookies cool on the baking sheet for 5 minutes, then transfer them to a wire cooling rack. Wait until they are completely cool (about 20 minutes) before applying any icing. Warm cookies will turn your icing into a runny mess.
For the Icing:
- In a small bowl, whisk together the powdered sugar, milk, and vanilla extract until smooth. The consistency should be thick but flowable—think toothpaste. If it’s too thick, add milk a few drops at a time. If it’s too thin, add more powdered sugar.
- Divide the icing into small bowls and tint with natural food coloring if desired.
- Transfer the icing to piping bags or small zip-top bags with a tiny corner snipped off. Pipe outlines and flood the centers, or simply drizzle for a rustic look. Add sprinkles before the icing sets.
Cooking Tips & Techniques
After making these cookies more times than I care to count, I’ve collected a few hard-won lessons that will save you from my early mistakes.
Don’t skip the chill time. I know it’s tempting to rush, but that 15-minute rest in the fridge is what separates beautiful cookies from flat puddles. The coconut flour needs time to hydrate, and the butter needs to firm up. If your kitchen is warm, extend the chill time to 30 minutes.
Watch your oven like a hawk. Almond flour cookies brown faster than wheat flour cookies because of the higher fat content. I once walked away to answer the phone and came back to cookies that looked like burnt toast. Set a timer, and check at the 10-minute mark. The perfect cookie has pale golden edges and a soft, pale center.
Use a light touch with the dough. Overworking almond flour dough can make it greasy. When you’re gathering and re-rolling scraps, handle the dough as little as possible. I usually get two good rolls from the scraps before the dough gets too warm and starts to crack. At that point, I just press the remaining dough into a small cookie shape with my hands.
Room temperature ingredients matter. I cannot stress this enough. Cold butter won’t cream properly, and a cold egg can cause the butter to seize. Set everything out 30 minutes before you start. Your future self will thank you.
Test a single cookie first. If you’re unsure about your oven temperature or dough consistency, bake one test cookie. It takes just 10 minutes and saves you from ruining an entire batch. I learned this after a particularly disastrous batch where I forgot the baking powder entirely.
Multitask strategically. While one batch of cookies is baking, roll out the next disc of dough. While the cookies cool, make the icing. This rhythm keeps the process moving without feeling overwhelming.
Variations & Adaptations
One of the best things about this recipe is how adaptable it is. Here are a few ways I’ve tweaked it over the years.
Vegan Version: Replace the butter with a high-quality vegan butter stick (I like Miyoko’s or Earth Balance) and use a flax egg (1 tablespoon ground flaxseed mixed with 3 tablespoons water, let sit for 5 minutes). The texture will be slightly less tender, but still delicious.
Chocolate Almond Snowflakes: Replace ¼ cup of the almond flour with ¼ cup of unsweetened cocoa powder. Add an extra tablespoon of maple syrup to balance the bitterness. These are my husband’s absolute favorite variation.
Citrus Spice Cookies: Add the zest of one orange and ½ teaspoon of ground cinnamon to the dry ingredients. The orange and almond flavors are a match made in heaven. I make these for my annual holiday brunch, and they always disappear first.
Nut-Free Option: Substitute the almond flour with an equal amount of sunflower seed flour (sometimes called sunflower seed meal). Note that the cookies will turn a slightly greenish-gray color due to a natural reaction between sunflower seeds and baking powder. This is harmless but visually unexpected. Add a tablespoon of lemon juice to minimize the color change.
Low-Carb Adaptation: Replace the maple syrup with a monk fruit maple syrup blend or use ⅓ cup of powdered allulose. The cookies will be slightly less moist, so you may need to add an extra tablespoon of butter.
Savory Twist: Reduce the maple syrup to 2 tablespoons, omit the vanilla and almond extracts, and add ½ teaspoon of garlic powder and ½ teaspoon of dried rosemary. Roll the dough thin and cut into small rounds. These are fantastic with cheese boards.
Serving & Storage Suggestions
These cookies are best served at room temperature, ideally within a day or two of baking. The texture is soft and tender, with just the right amount of crumble.
Serving Ideas:
- Arrange on a festive platter with fresh cranberries and rosemary sprigs for a stunning holiday presentation.
- Pair with a cup of hot cocoa, chai tea, or a warm spiced cider.
- For a dessert board, serve alongside dark chocolate squares, dried figs, and a small bowl of whipped cream or coconut cream.
- Package in cellophane bags tied with ribbon for homemade gifts. Include a tag with the ingredient list for friends with dietary restrictions.
Storage Instructions:
- Room Temperature: Store undecorated cookies in an airtight container at room temperature for up to 5 days. Place a sheet of parchment paper between layers to prevent sticking.
- Refrigerator: Decorated cookies can be stored in the refrigerator for up to a week. Let them come to room temperature for 10 minutes before serving for the best texture.
- Freezer: These cookies freeze beautifully. Freeze undecorated cookies in a single layer on a baking sheet, then transfer to a freezer-safe container or zip-top bag. They’ll keep for up to 3 months. Thaw at room temperature for about 30 minutes before decorating or serving.
Reheating: If you want that just-baked warmth, pop a cookie in a 300°F (150°C) oven for 3-4 minutes. Do not microwave—it will make them soggy.
One thing I love about these cookies is that the flavors actually improve after a day. The almond flour has time to fully hydrate, and the maple syrup’s sweetness mellows into something more complex. So don’t stress about making them the day before—they might be even better.
Nutritional Information & Benefits
Here’s the nutritional breakdown for one undecorated cookie (based on 20 cookies per batch):
| Nutrient | Amount per Cookie |
|---|---|
| Calories | 115 |
| Total Fat | 9g |
| Saturated Fat | 3g |
| Carbohydrates | 7g |
| Fiber | 2g |
| Sugar | 4g |
| Protein | 4g |
These cookies are naturally gluten-free, grain-free, and lower in sugar than traditional sugar cookies. The almond flour provides a good source of vitamin E, magnesium, and healthy monounsaturated fats. The coconut flour adds a bit of fiber, which helps slow down the absorption of sugar into your bloodstream.
From a wellness perspective, I love that I can enjoy these cookies without the blood sugar crash that usually follows a plate of traditional Christmas cookies. They satisfy that craving for something sweet and buttery without leaving me feeling sluggish. That’s a win in my book.
Please note that these cookies contain tree nuts (almonds) and dairy (butter). For a nut-free or dairy-free version, see the variations section above.
Conclusion
These almond flour Christmas sugar cookies have become a non-negotiable part of my holiday season. They’re the recipe that proved to me that eating well doesn’t mean sacrificing joy—especially during the holidays. Every time I pull a tray out of the oven and watch the golden edges catch the light, I think of Betty at that estate sale, insisting that I give her recipe a try.
I hope you’ll make these cookies your own. Maybe you’ll add a sprinkle of cinnamon, or swap the maple syrup for honey, or go wild with colorful natural icings. Whatever you do, I’d love to hear about it. Drop a comment below and tell me how your batch turned out—did you make a variation? Did your family guess the secret ingredient? Did you, like me, burn the first batch and try again? Share your story, because that’s what makes a recipe truly special.
Happy baking, friend. May your kitchen smell like almond and vanilla, and may your cookies be perfectly golden.
Frequently Asked Questions
Can I use regular all-purpose flour instead of almond flour?
No, this recipe is specifically designed for almond flour. All-purpose flour has different absorption properties and will not produce the same texture. If you need a wheat-based version, I recommend finding a separate recipe for traditional sugar cookies.
Why did my cookies spread too much?
This usually happens for one of three reasons: the dough wasn’t chilled long enough, the butter was too soft, or the coconut flour was omitted. Make sure to chill the dough for at least 15 minutes and measure your coconut flour accurately.
Can I make the dough ahead of time?
Absolutely! The dough can be refrigerated for up to 3 days or frozen for up to 3 months. If frozen, thaw overnight in the refrigerator before rolling. You may need to let it sit at room temperature for 5-10 minutes to become pliable enough to roll.
How do I get clean, sharp edges on my cookies?
Make sure your cookie cutters are sharp and dip them in a little almond flour before each cut. Also, roll the dough to an even ¼-inch thickness. If the edges look ragged after cutting, use your finger to gently smooth them before baking.
Are these cookies suitable for people with diabetes?
While these cookies are lower in sugar and higher in fiber and healthy fats than traditional sugar cookies, they are not sugar-free. Each cookie contains about 4g of sugar from the maple syrup. I recommend consulting with your healthcare provider about portion sizes. For a lower-sugar option, you can try the monk fruit variation mentioned in the variations section.
Pin This Recipe!
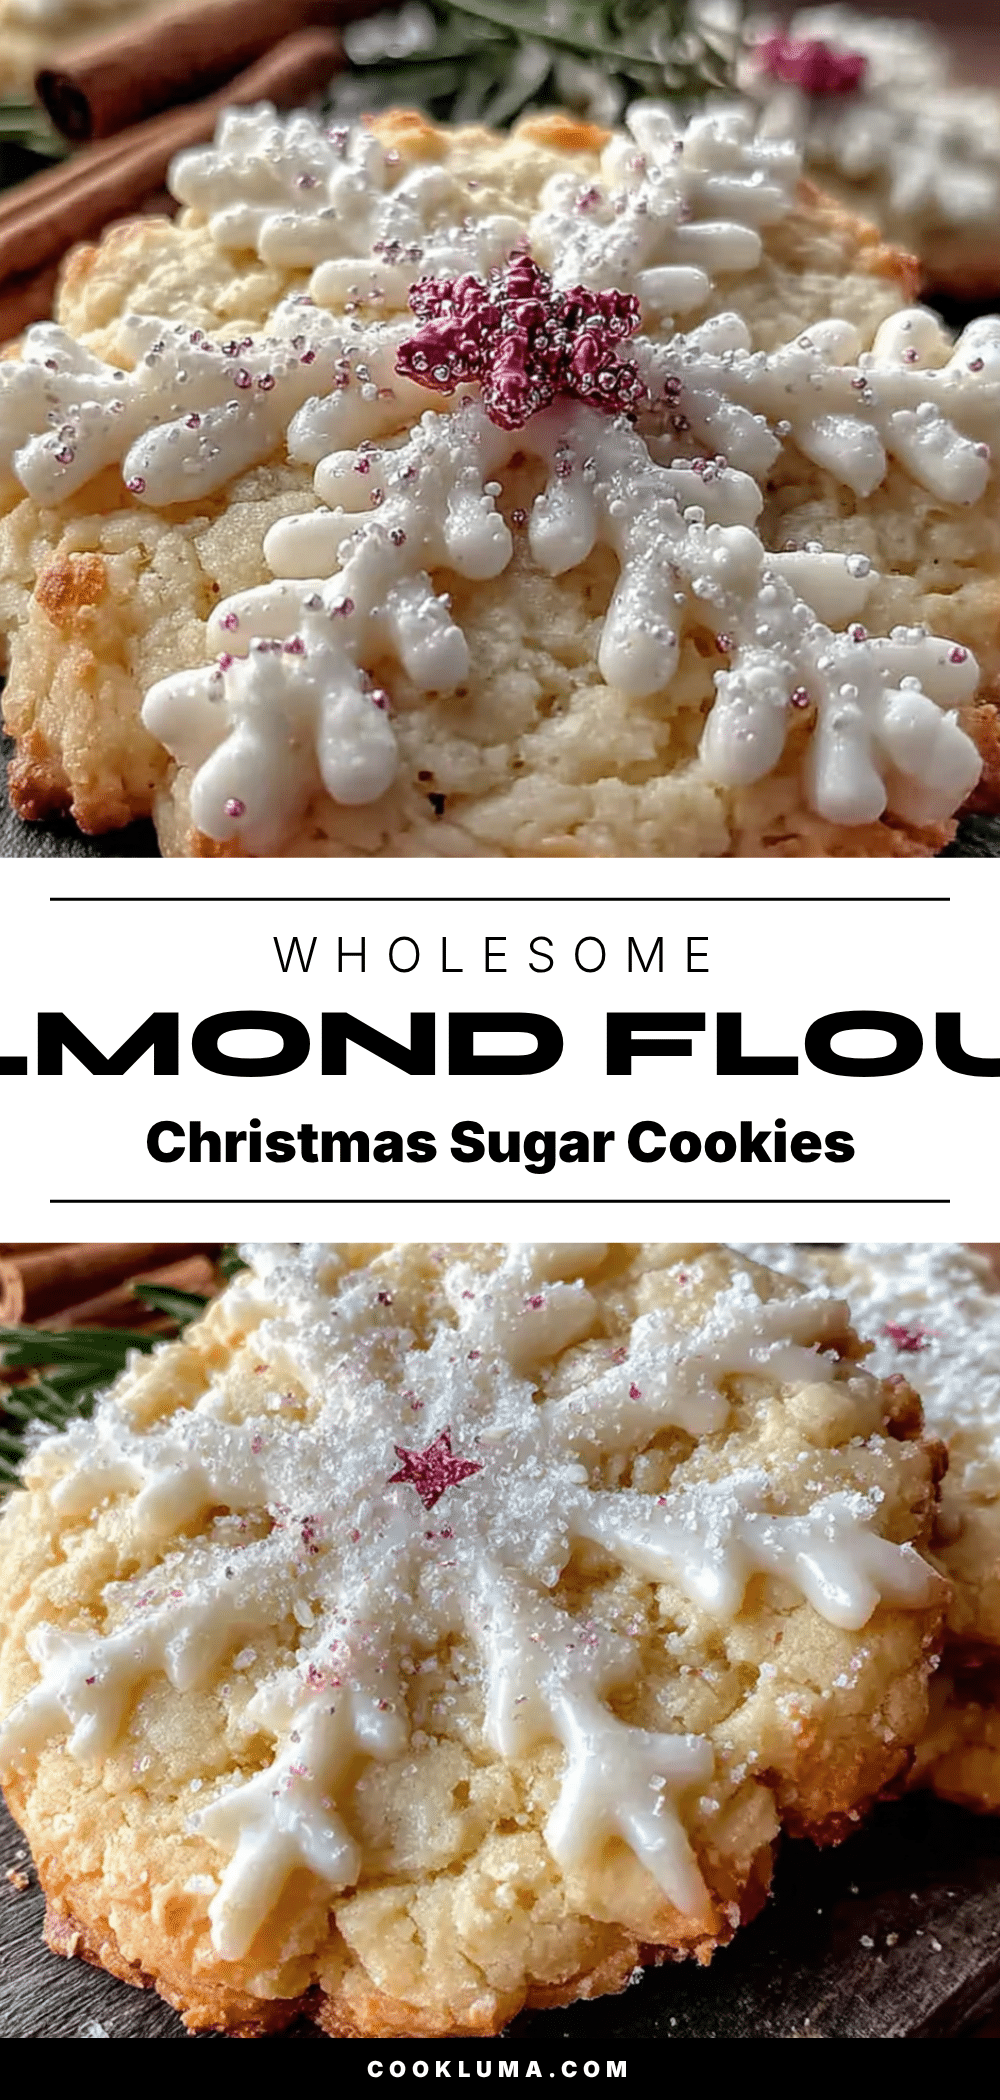
Best Almond Flour Christmas Sugar Cookies Recipe
These almond flour Christmas sugar cookies are tender, buttery, and naturally gluten-free. They come together in about 30 minutes and are perfect for holiday gatherings, with a texture that rivals traditional sugar cookies.
- Prep Time: 15 minutes
- Cook Time: 10-12 minutes
- Total Time: 30 minutes
- Yield: 20 cookies 1x
- Category: Dessert
- Cuisine: American
Ingredients
- 2 ½ cups (280g) super-fine blanched almond flour
- ¼ cup (30g) coconut flour
- ½ teaspoon baking powder
- ¼ teaspoon fine sea salt
- 6 tablespoons (85g) unsalted butter, softened
- ⅓ cup (80ml) pure maple syrup
- 1 large egg, room temperature
- 1 teaspoon vanilla extract
- ½ teaspoon almond extract (optional but recommended)
- For the Icing (Optional):
- 1 cup (120g) powdered sugar
- 1–2 tablespoons milk (dairy or non-dairy)
- ½ teaspoon vanilla extract
- Natural food coloring (optional)
Instructions
- Preheat your oven to 350°F (175°C). Line two baking sheets with parchment paper or silicone mats.
- In a medium bowl, whisk together the almond flour, coconut flour, baking powder, and salt until well combined and free of clumps.
- In a large mixing bowl, beat the softened butter with an electric mixer on medium speed until creamy, about 1 minute. Add the maple syrup and continue beating for another 2 minutes until light and fluffy.
- Beat in the egg, vanilla extract, and almond extract (if using) until fully combined.
- Add the dry ingredient mixture to the wet ingredients in two additions, mixing on low speed after each addition until just combined. Do not overmix. The dough will be soft and slightly sticky.
- Divide the dough in half and shape each half into a flat disc. Wrap tightly in plastic wrap and refrigerate for at least 15 minutes.
- Place one disc of dough between two sheets of parchment paper. Roll to ¼-inch (6mm) thickness.
- Dip cookie cutters in a little almond flour to prevent sticking. Cut out shapes as close together as possible to minimize scraps. Transfer cut cookies to prepared baking sheets, spacing them about 1 inch apart.
- Bake for 10-12 minutes, until the edges are just barely golden brown. The centers will look slightly puffed and pale. Do not overbake.
- Let the cookies cool on the baking sheet for 5 minutes, then transfer to a wire cooling rack. Cool completely before decorating.
- For the icing: In a small bowl, whisk together the powdered sugar, milk, and vanilla extract until smooth. The consistency should be thick but flowable. Divide into small bowls and tint with natural food coloring if desired.
- Transfer icing to piping bags or small zip-top bags with a tiny corner snipped off. Pipe outlines and flood the centers, or simply drizzle. Add sprinkles before the icing sets.
Notes
Don’t skip the chill time—it prevents spreading. Watch the oven closely as almond flour cookies brown faster than wheat flour cookies. Use a light touch when handling the dough to avoid making it greasy. Room temperature ingredients are crucial for proper creaming. Test a single cookie first if unsure about oven temperature or dough consistency.
Nutrition
- Serving Size: 1 cookie
- Calories: 115
- Sugar: 4
- Sodium: 75
- Fat: 9
- Saturated Fat: 3
- Carbohydrates: 7
- Fiber: 2
- Protein: 4
Keywords: almond flour sugar cookies, gluten-free Christmas cookies, healthy sugar cookies, low sugar cookies, grain-free cookies, diabetic-friendly cookies


