My roommate asked why I couldn’t just use a boxed cake mix for the Christmas party. I started to explain why that wouldn’t work — then stopped. Honestly, I had no good reason. I was being a snob about it, and we both knew it.
So I caved. I bought the box, baked it, crumbled it up, and rolled these little red velvet cake pops with cream cheese frosting. And let me tell you — they were the first thing to disappear at that party. I stood there with my fancy from-scratch brownies feeling totally humbled. The box mix made them lighter, almost fluffier, and the texture held up perfectly on the stick.
That was three winters ago, and now I make these cozy red velvet Christmas cake pops on a stick every single December. They’ve become my go-to for cookie swaps, tree-trimming nights, and those evenings when you just need something sweet without turning on the oven for an hour. Maybe you’ve been there — standing in the kitchen, wanting to make something special but running out of time and energy. These cake pops are that recipe.
They’re ridiculously easy, come together in under 30 minutes of active time, and they look like you spent all day on them. I mean, who doesn’t love a little cake on a stick? It’s portable, it’s cute, and it’s the kind of treat that makes people smile before they even take a bite.
Why You’ll Love This Recipe
Let’s be real — the holidays are chaotic. You’ve got gifts to wrap, cookies to bake, and about a million things on your to-do list. These red velvet Christmas cake pops are the answer to that chaos. They’re quick, they’re simple, and they deliver that cozy, festive feeling without the stress.
- Quick & Easy: Active time is about 30 minutes. The hardest part is waiting for the cake to cool, and even that goes fast if you pop it in the freezer for 15 minutes.
- Simple Ingredients: A box of red velvet cake mix, cream cheese frosting, and candy melts. That’s it. No fancy grocery runs needed.
- Perfect for Holiday Gatherings: These are ideal for cookie swaps, Christmas parties, or just a cozy night in with hot cocoa.
- Crowd-Pleaser: Kids love them, adults love them, and they disappear faster than almost anything else on the dessert table.
- Unbelievably Delicious: The combination of moist red velvet cake, creamy frosting, and that slight snap from the candy coating is pure comfort food magic.
What makes these different from other cake pop recipes? It’s the texture. Using a box mix actually gives you a lighter crumb that holds together beautifully when rolled. Plus, the cream cheese frosting adds that tangy richness that makes red velvet so special. This isn’t just another version — it’s the one you’ll come back to year after year.
These cake pops are the kind of treat that makes you close your eyes after the first bite. They’re cozy, they’re nostalgic, and they’re exactly what you need on a cold December evening.
What Ingredients You Will Need
This recipe keeps things simple. You only need a handful of ingredients to create these cozy red velvet Christmas cake pops on a stick, and most of them are pantry staples during the holiday season.
- 1 box red velvet cake mix (I prefer Duncan Hines or Betty Crocker — both give a nice, moist crumb)
- Ingredients listed on the cake mix box (usually eggs, oil, and water — follow the box instructions)
- 1 can (16 oz) cream cheese frosting (store-bought is fine, or use homemade if you’re feeling ambitious)
- 12 oz white or dark chocolate candy melts (I use Wilton brand — they melt smoothly and set nicely)
- 1 tablespoon coconut oil or vegetable shortening (helps thin the candy coating for easier dipping)
- Christmas sprinkles (red, green, and white — whatever festive mix you like)
- Lollipop sticks (about 20-24 sticks, depending on how big you roll your cake balls)
- Optional: red food coloring gel (if your cake mix looks more brown than red — some brands are lighter than others)
For the cake mix, I’ve found that the brand really does matter. Some cheaper mixes come out a bit dry, and dry cake makes crumbly cake pops. Stick with a trusted brand and your texture will be spot on.
If you want to make this gluten-free, use a gluten-free red velvet cake mix. Just check the box — some are better than others. King Arthur Flour makes a solid one that doesn’t taste like cardboard.
For a dairy-free version, use a dairy-free cake mix and a dairy-free cream cheese frosting. The candy melts are usually dairy-free, but check the label to be sure.
Pro tip: If you can’t find cream cheese frosting, vanilla frosting works too. It won’t have that tangy kick, but it’ll still taste great. Just add a splash of lemon juice to mimic the cream cheese flavor.
Equipment Needed
You don’t need much fancy equipment for these red velvet Christmas cake pops. Here’s what you’ll want to have on hand:
- 9×13 baking pan (or two 8-inch round pans — whatever you have)
- Large mixing bowl (for crumbling the cake)
- Fork or potato masher (for breaking up the cake into fine crumbs)
- Cookie scoop or tablespoon (for portioning the cake balls evenly)
- Baking sheet lined with parchment paper (for setting the cake pops)
- Small microwave-safe bowl (for melting the candy coating)
- Lollipop sticks (available at craft stores or online — about 20-24)
- Styrofoam block or cardboard box (for drying the cake pops upright — a flower frog works too)
If you don’t have lollipop sticks, you can use pretzel sticks for a salty-sweet twist. Just be careful — they’re more fragile and can break when you dip them.
I learned the hard way that a styrofoam block is worth the investment. The first time I made these, I tried drying them on a flat surface and ended up with flat-bottomed cake pops. Not the cutest look. A foam block lets them dry perfectly round.
Preparation Method
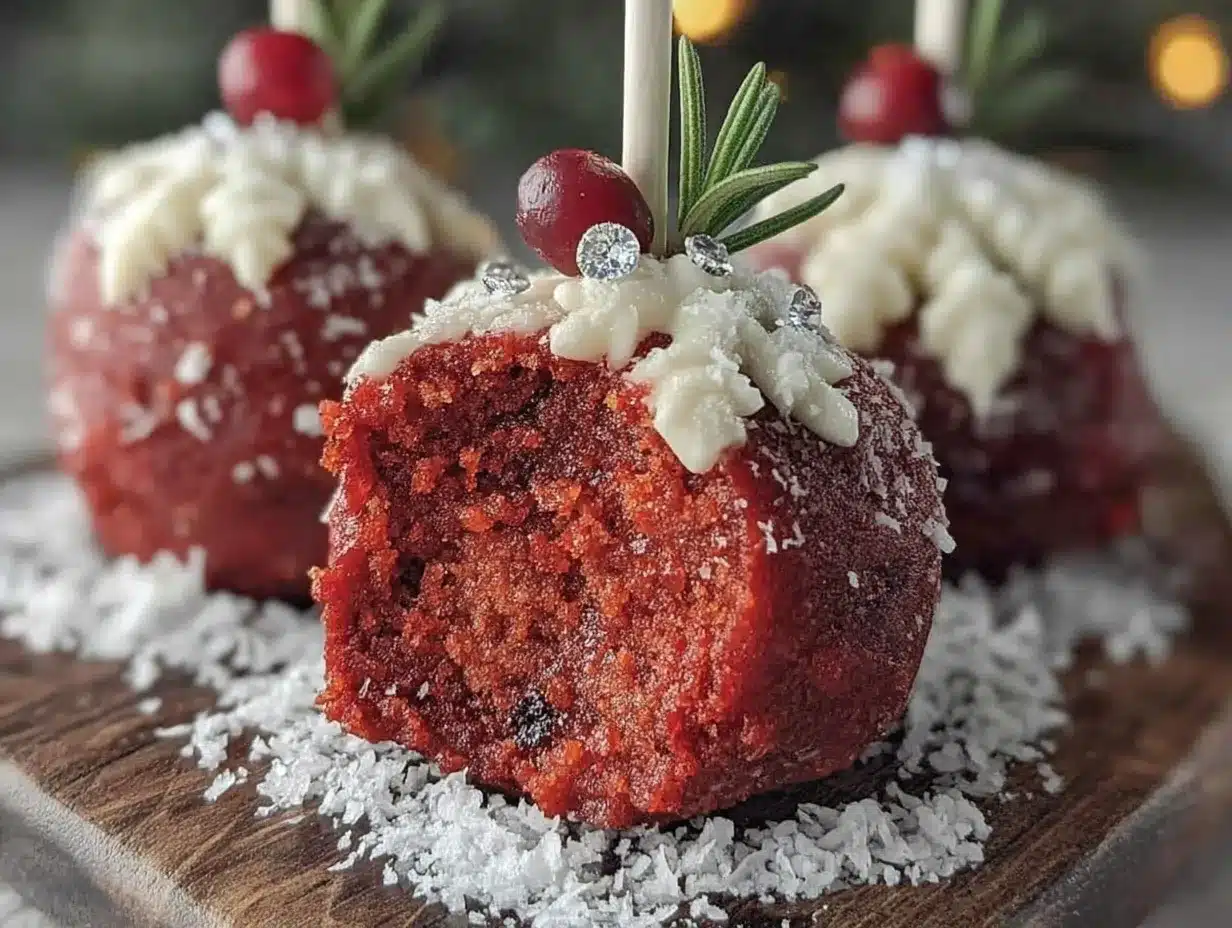
Ready to make these cozy red velvet Christmas cake pops on a stick? Let’s walk through it step by step.
- Bake the cake. Preheat your oven to 350°F (175°C). Prepare the red velvet cake mix according to the box directions. Pour the batter into a greased 9×13 pan and bake for the recommended time — usually about 25-30 minutes. Let the cake cool completely. If you’re in a hurry, pop it in the freezer for 15-20 minutes to speed things up.
- Crumble the cake. Once the cake is cool, break it into pieces and transfer them to a large mixing bowl. Use a fork or potato masher to crumble the cake into fine, even crumbs. You want it to look like wet sand — no big chunks left. This step is crucial for smooth cake pops.
- Add the frosting. Scoop about 3/4 of the cream cheese frosting into the bowl. Mix it into the cake crumbs with a fork or your hands (clean hands work best). The mixture should hold together when you squeeze it — like play dough. If it’s too dry, add more frosting a tablespoon at a time. If it’s too sticky, add a few more cake crumbs.
- Roll the cake balls. Scoop out about 1.5 tablespoons of the cake mixture and roll it into a smooth ball between your palms. Place each ball on the parchment-lined baking sheet. You should get about 20-24 balls, depending on size. Pop the tray in the fridge for 20 minutes to firm up.
- Melt the candy coating. Place the candy melts and coconut oil in a microwave-safe bowl. Microwave in 30-second intervals, stirring between each, until smooth. Don’t overheat — the coating should be thin enough to dip easily, but not runny. If it’s too thick, add a little more coconut oil.
- Dip the sticks. Remove the cake balls from the fridge. Dip the tip of a lollipop stick into the melted candy coating, then insert it about halfway into a cake ball. This acts like glue and helps the stick stay put. Repeat with all the cake balls, then return them to the fridge for 10 minutes.
- Dip the cake pops. Holding a cake pop by the stick, dip it into the melted candy coating until fully covered. Gently tap the stick on the edge of the bowl to let excess coating drip off. Immediately sprinkle with Christmas sprinkles before the coating sets.
- Let them dry. Stick the lollipop stick into your styrofoam block or cardboard box. Let the cake pops dry completely — about 15-20 minutes at room temperature. If you’re in a hurry, pop them in the fridge for 10 minutes.
- Repeat. Continue dipping and decorating until all the cake pops are done. If the candy coating starts to thicken, reheat it in the microwave for 10-15 seconds.
One thing I learned the hard way — don’t skip the fridge step before dipping. If the cake balls are too soft, they’ll fall off the stick into the coating. Nobody wants a swimming cake pop.
Cooking Tips & Techniques
After making these red velvet Christmas cake pops more times than I can count, I’ve picked up a few tricks that make the process smoother.
Don’t overmix the cake crumbs and frosting. I know it’s tempting to keep working the mixture, but overmixing can make the cake pops dense and greasy. Just mix until it holds together, then stop.
Chill the cake balls twice. The first chill after rolling helps them hold their shape. The second chill after inserting the sticks ensures they don’t slide off during dipping. Trust me on this one — I lost three cake pops to the coating before I figured it out.
Use a deep, narrow bowl for dipping. A tall glass or a small jar works better than a wide bowl. You want the coating to come up high enough to cover the cake ball completely without having to tilt it too much.
Tap, don’t swirl. When you pull the cake pop out of the coating, tap the stick gently on the bowl’s edge. Don’t swirl or spin it — that can crack the coating or make it uneven. Just tap and let gravity do the work.
Work in small batches. If you’re making a big batch, only take a few cake balls out of the fridge at a time. They warm up quickly, and warm cake balls are harder to dip.
My biggest failure? The first time I made these, I used too much frosting and the cake balls were sticky and impossible to roll. They ended up looking like lumpy red snowballs. Still tasted good, but not exactly Pinterest-worthy.
Variations & Adaptations
These cozy red velvet Christmas cake pops on a stick are incredibly versatile. Here are a few ways to switch things up:
Flavor Variations
- Peppermint Red Velvet: Add 1/2 teaspoon peppermint extract to the cake mixture and top with crushed candy canes instead of sprinkles. It’s like a red velvet candy cane — so festive.
- Chocolate Coating: Swap the white candy melts for dark or milk chocolate. The rich chocolate pairs beautifully with the tangy cream cheese frosting.
- Spiced Red Velvet: Add 1 teaspoon cinnamon and 1/4 teaspoon nutmeg to the cake crumbs before mixing in the frosting. It gives the cake pops a subtle warmth that’s perfect for winter.
Dietary Adaptations
- Gluten-Free: Use a gluten-free red velvet cake mix. King Arthur Flour and Pillsbury both make good options.
- Dairy-Free: Use a dairy-free cake mix and dairy-free cream cheese frosting. The candy melts are usually dairy-free, but double-check the label.
- Lower Sugar: Use a sugar-free cake mix and a sugar-free frosting. The texture might be slightly different, but it still works.
Shape Variations
- Christmas Trees: Instead of rolling the cake into balls, shape them into small cones and decorate with green coating and star sprinkles on top.
- Snowmen: Roll two different-sized balls and stack them on the stick. Decorate with mini chocolate chips for eyes and a tiny orange candy for the nose.
I tried the peppermint variation last year for a cookie swap, and they were gone in 20 minutes. The combination of red velvet and peppermint is just — chef’s kiss.
Serving & Storage Suggestions
These red velvet Christmas cake pops are best served at room temperature. The coating should be firm but not hard, and the cake center should be soft and moist.
For presentation, arrange them upright in a small vase or mason jar filled with decorative sand or sugar. You can also lay them on a platter — just make sure they’re not touching or they might stick together.
They pair beautifully with hot cocoa, eggnog, or a warm cup of coffee. Honestly, they’re perfect with anything warm and cozy.
Storage: Keep leftover cake pops in an airtight container in the refrigerator for up to 5 days. Let them sit at room temperature for 10-15 minutes before serving to soften the coating slightly.
Freezing: You can freeze undipped cake balls for up to 3 months. Just wrap them tightly in plastic wrap and place them in a freezer bag. When you’re ready to use them, thaw them in the fridge overnight, then dip and decorate as usual.
I’ve also frozen fully assembled cake pops. Place them in a single layer in an airtight container with parchment paper between layers. Thaw in the fridge overnight. The coating might get a little condensation, but they still taste great.
One thing I’ve noticed — the flavors actually get better after a day or two. The cream cheese frosting melds with the cake, and everything becomes more cohesive. So don’t be afraid to make them a day ahead.
Nutritional Information & Benefits
Let’s be honest — these cozy red velvet Christmas cake pops on a stick are a treat, not a health food. But here’s what you should know:
Estimated per cake pop (based on 24 pops):
- Calories: 180-220
- Fat: 9-12g
- Carbohydrates: 24-28g
- Protein: 2-3g
- Sugar: 16-20g
Red velvet cake is made with cocoa powder, which contains antioxidants called flavonoids. These can help reduce inflammation and support heart health — though the sugar and frosting kind of cancel that out. Still, it’s nice to know there’s a tiny bit of goodness in there.
The cream cheese frosting adds a small amount of calcium and vitamin A from the cream cheese. Again, we’re not talking about a health food here, but every little bit counts.
Dietary Considerations:
- Contains gluten, dairy, and eggs
- Can be made gluten-free and dairy-free with substitutions
- Not suitable for vegan diets without significant modifications
My personal take? These are holiday treats. They’re meant to be enjoyed in moderation, shared with loved ones, and savored. One or two of these with a cup of coffee on a cold winter evening is the kind of simple pleasure that makes the season special.
Frequently Asked Questions
Why did my cake pops fall off the stick?
This usually happens when the cake balls are too warm or too big. Make sure they’re thoroughly chilled before dipping, and don’t overload the stick. A 1.5-tablespoon scoop is the perfect size.
Can I use homemade cake instead of a box mix?
Absolutely! Just make sure your homemade red velvet cake is moist and tender. Dry cake makes crumbly cake pops that are hard to work with. If using homemade, add a little extra frosting to compensate.
How do I get smooth, crack-free coating?
The key is making sure the cake balls are cold and the coating is the right consistency. If the coating is too thick, it will crack. Thin it with a little coconut oil. Also, tap off excess coating gently — don’t swirl or spin.
Can I make these ahead of time?
Yes! You can make the cake balls up to 3 days ahead and keep them in the fridge. Dip and decorate the day you plan to serve them for the freshest look. Fully assembled cake pops can be stored for up to 5 days.
How do I store leftover cake pops?
Place them in an airtight container in the refrigerator. Layer them with parchment paper so they don’t stick together. Let them sit at room temperature for 10 minutes before serving.
Conclusion
These cozy red velvet Christmas cake pops on a stick have become a staple in my holiday baking rotation, and for good reason. They’re easy, they’re festive, and they bring a little bit of joy to every gathering. Whether you’re making them for a cookie swap, a tree-trimming party, or just a quiet night in, they never disappoint.
Don’t be afraid to make them your own. Add peppermint, switch up the sprinkles, or experiment with different coatings. The best recipes are the ones that adapt to your taste and your kitchen.
I’d love to hear how yours turn out! Leave a comment below with your favorite variation, or tag me in your photos on social media. There’s something so special about seeing these little red velvet beauties come to life in other people’s kitchens.
Happy baking, and here’s to a cozy, delicious holiday season. You’ve got this — and honestly, these cake pops are about to become your new favorite tradition.
Pin This Recipe!
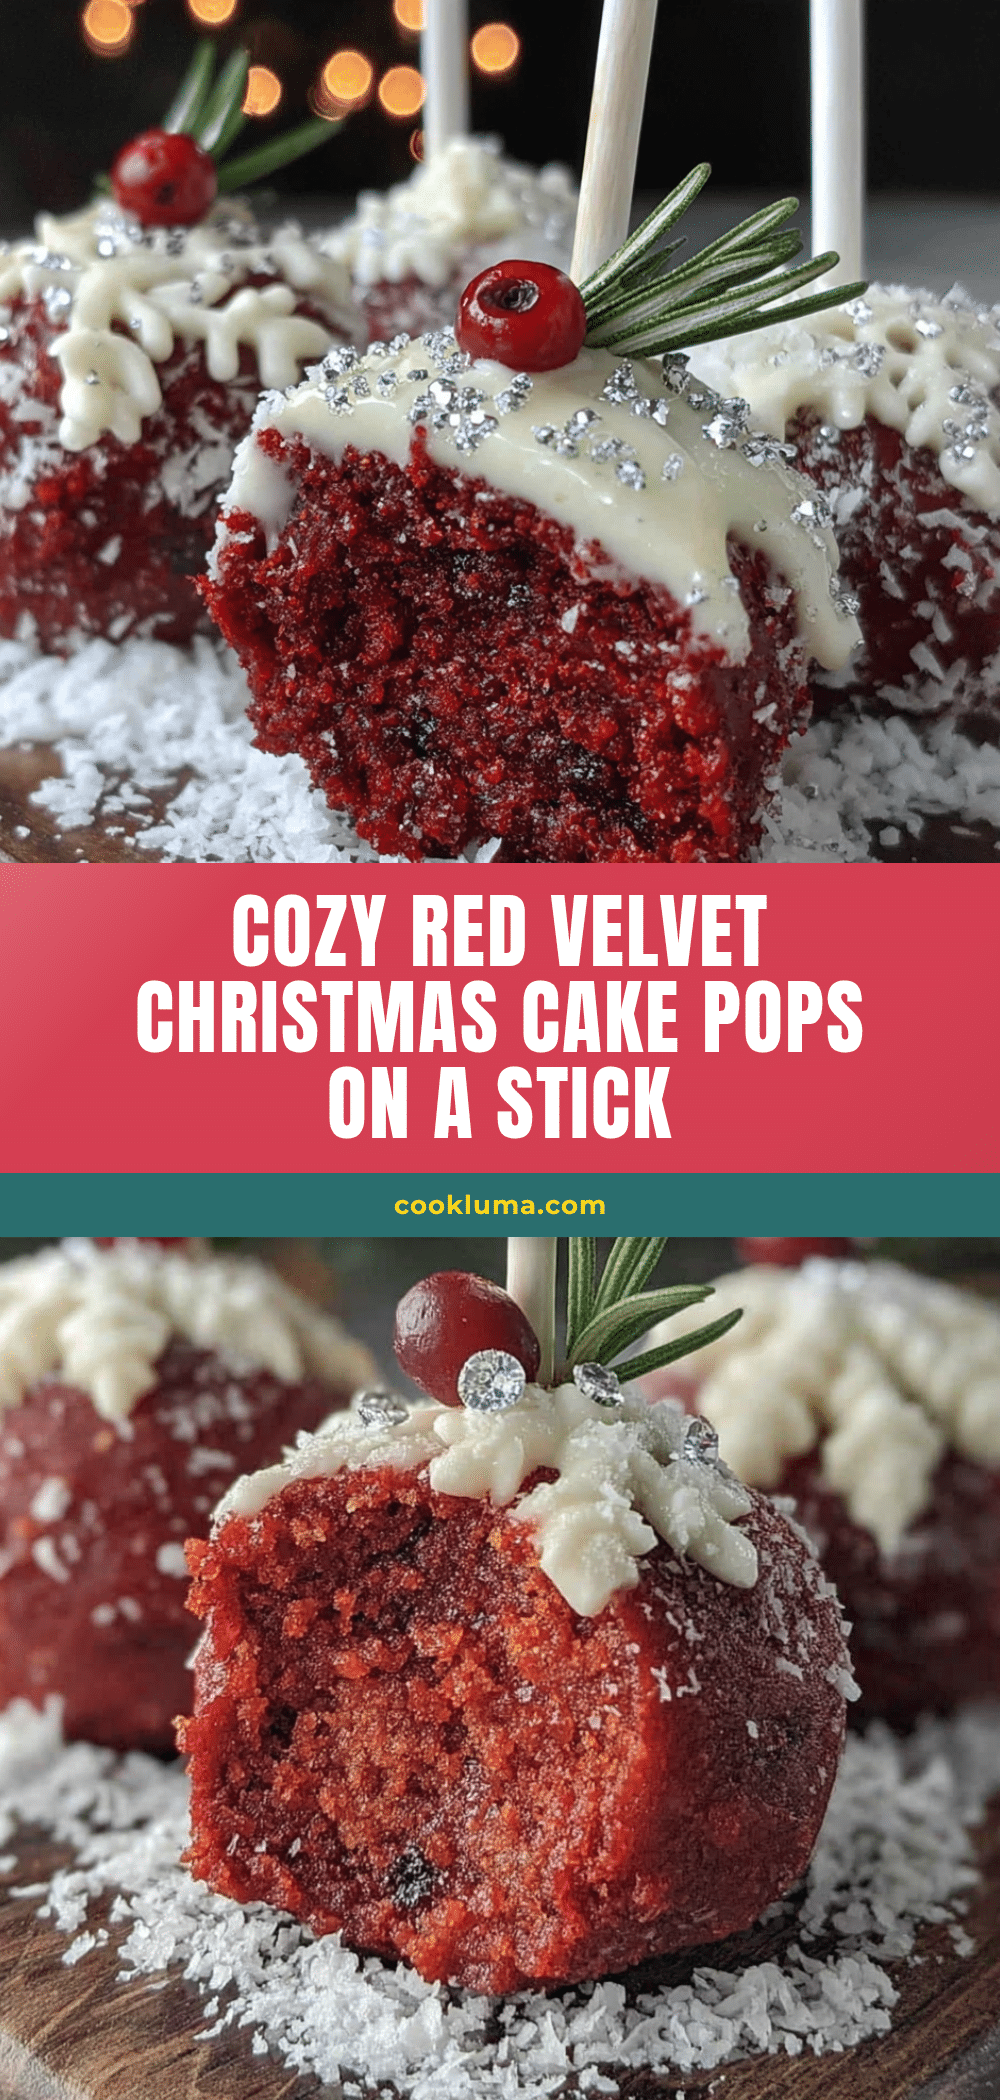
Cozy Red Velvet Christmas Cake Pops: Easy 30-Min Recipe
These easy red velvet Christmas cake pops on a stick come together in under 30 minutes of active time using a boxed cake mix and cream cheese frosting. They’re the perfect festive treat for holiday parties, cookie swaps, and cozy winter nights.
- Prep Time: 30 minutes
- Cook Time: 25-30 minutes
- Total Time: 55-60 minutes
- Yield: 20-24 cake pops 1x
- Category: Dessert
- Cuisine: American
Ingredients
- 1 box red velvet cake mix (Duncan Hines or Betty Crocker recommended)
- Ingredients listed on the cake mix box (eggs, oil, water)
- 1 can (16 oz) cream cheese frosting
- 12 oz white or dark chocolate candy melts (Wilton brand recommended)
- 1 tablespoon coconut oil or vegetable shortening
- Christmas sprinkles (red, green, and white)
- 20–24 lollipop sticks
- Optional: red food coloring gel
Instructions
- Preheat oven to 350°F (175°C). Prepare the red velvet cake mix according to box directions and bake in a greased 9×13 pan for 25-30 minutes. Let cool completely (or freeze for 15-20 minutes to speed up).
- Crumble the cooled cake into fine, even crumbs in a large bowl using a fork or potato masher until it resembles wet sand.
- Add about 3/4 of the cream cheese frosting to the cake crumbs and mix with your hands or a fork until the mixture holds together like play dough. Add more frosting if too dry, or more cake crumbs if too sticky.
- Scoop about 1.5 tablespoons of the mixture and roll into smooth balls. Place on a parchment-lined baking sheet. You should get 20-24 balls. Refrigerate for 20 minutes to firm up.
- Melt candy melts and coconut oil in a microwave-safe bowl in 30-second intervals, stirring between each, until smooth. The coating should be thin enough to dip easily.
- Dip the tip of a lollipop stick into the melted coating, then insert it about halfway into a cake ball. Repeat with all cake balls, then refrigerate for 10 minutes.
- Holding a cake pop by the stick, dip it into the melted coating until fully covered. Gently tap the stick on the bowl’s edge to remove excess coating. Immediately sprinkle with Christmas sprinkles.
- Insert the stick into a styrofoam block or cardboard box to dry. Let dry completely for 15-20 minutes at room temperature (or 10 minutes in the fridge).
- Repeat dipping and decorating until all cake pops are done. Reheat coating if it thickens.
Notes
Don’t skip the fridge steps—chilling the cake balls twice ensures they stay on the stick during dipping. Use a deep, narrow bowl for dipping to fully submerge the cake pops. Tap the stick gently to remove excess coating; don’t swirl or spin. Work in small batches to keep cake balls cold. For best results, use a trusted brand of cake mix for a moist crumb. The flavors improve after a day or two.
Nutrition
- Serving Size: 1 cake pop
- Calories: 200
- Sugar: 18
- Sodium: 180
- Fat: 10.5
- Saturated Fat: 4
- Carbohydrates: 26
- Fiber: 0.5
- Protein: 2.5
Keywords: red velvet cake pops, Christmas cake pops, holiday treats, easy cake pops, red velvet dessert, cake pops on a stick, Christmas baking


