I was at the community garden last December, helping bag up the last of the rosemary and sage before the first hard frost. A woman named Clara—who always wears a knitted hat with a pompom on top—noticed me staring at the peppermint patch she’d let run wild along the fence line. She didn’t say anything at first. She just snapped off a few sprigs, crushed them between her fingers, and held them out for me to smell. “That’s what Christmas should taste like,” she said, and then she started telling me about the peppermint bark she makes every year for her book club. I scribbled her method on the back of a seed packet, honestly, because I didn’t want to forget a single detail.
That conversation stayed with me longer than the rosemary. There was something about the way she described layering dark and white chocolate—like building a tiny, edible gift. She made it sound so simple, almost like an afterthought, but I could tell this was her signature move. I went home that afternoon, grabbed a block of dark chocolate from the pantry, and gave it a try. Let me tell you, the first batch was a mess. I melted the white chocolate too fast, it seized up, and I ended up with crumbly, streaky bark that looked more like abstract art than a holiday treat. But I kept going, tweaking the temperatures and the timing, and now this holiday peppermint bark has become my go-to for cookie swaps, hostess gifts, and those nights when you just need something sweet and crunchy.
Maybe you’ve been there—standing in the kitchen with a bag of candy canes, wondering how something so simple can feel so festive. This holiday peppermint bark with white and dark chocolate is that recipe. It’s the one you can make in under an hour, wrap up in cellophane bags, and hand to anyone who walks through your door. It’s the recipe that makes you look like you spent hours when you really just melted, spread, and sprinkled. And honestly, that’s my favorite kind of holiday magic.
Why You’ll Love This Recipe
I’ve tested this holiday peppermint bark more times than I can count, and I can tell you with confidence—it’s foolproof. Here’s why this version stands out from the dozens of recipes you’ll find online:
- Quick & Easy : From start to finish, this comes together in about 45 minutes, with only 15 minutes of active prep. Perfect for those December evenings when you’re already running behind.
- Simple Ingredients : You only need four ingredients—dark chocolate, white chocolate, peppermint extract, and crushed candy canes. No obscure baking supplies required.
- Perfect for the Holidays : Whether you’re making gift bags for neighbors, setting out a platter for a party, or just treating yourself after wrapping presents, this bark fits every occasion.
- Crowd-Pleaser : I’ve brought this to work parties, family gatherings, and cookie exchanges, and it always disappears first. Kids love the crunch, adults love the chocolate balance.
- Unbelievably Delicious : The contrast between the bittersweet dark chocolate and the creamy white chocolate, studded with crunchy, minty candy cane pieces—it’s next-level comfort food in bite-sized form.
What makes this recipe different from the rest? It’s the technique. I learned the hard way that tempering chocolate properly makes or breaks the final texture. Most recipes skip the details, but I’ll walk you through the exact method so your bark snaps cleanly and stays shiny. Plus, I use a double boiler instead of the microwave—trust me, it’s worth the extra step for that smooth, glossy finish.
This isn’t just another holiday dessert. It’s the kind that makes you close your eyes after the first bite. It’s comfort food reimagined—faster, simpler, but with the same soul-soothing satisfaction. Perfect for impressing guests without stress, or turning a quiet December afternoon into something memorable.
What Ingredients You Will Need
This recipe uses simple, wholesome ingredients to deliver bold flavor and satisfying texture without the fuss. Most of these are pantry staples during the holiday season, which makes this an easy last-minute project.
- 12 ounces dark chocolate , chopped (I recommend Ghirardelli 60% cacao for that perfect bittersweet balance)
- 12 ounces white chocolate , chopped (look for a brand with cocoa butter listed—Guittard or Callebaut work beautifully)
- 1 teaspoon peppermint extract , divided (use pure extract, not peppermint oil, which can be too strong)
- 1/2 cup crushed candy canes (about 6 regular-sized candy canes, crushed into small pieces)
- Optional: 1 tablespoon coconut oil (helps thin the white chocolate for smoother spreading)
Let me talk about the chocolate for a minute. I’ve tried this with chocolate chips, and honestly, they don’t melt as smoothly because they contain stabilizers. Chopping a good-quality chocolate bar gives you that clean snap and glossy finish. For the dark chocolate, I like something between 60% and 70% cacao—too high, and it gets bitter; too low, and it’s too sweet paired with the white chocolate.
For the white chocolate, quality matters. Some white chocolate products are actually “white confection” or “white morsels” that don’t contain cocoa butter. They melt into a weird, greasy mess. Check the label—real white chocolate should list cocoa butter as an ingredient. If you’re dairy-free, there are excellent plant-based white chocolate options from brands like Pascha or Enjoy Life.
The candy canes are non-negotiable for that authentic peppermint crunch. I prefer classic red-and-white striped ones, but you can use any flavor—just avoid the tiny, pre-crushed packages, which can be dusty. Crush your own in a sealed plastic bag with a rolling pin for the best texture. You want a mix of fine dust (for melting into the white chocolate) and small chunks (for sprinkling on top).
Equipment Needed
You don’t need a fancy kitchen to make this holiday peppermint bark. Here’s what I use every time:
- Baking sheet (standard 13×18-inch half-sheet pan works perfectly)
- Parchment paper (not wax paper—it will melt)
- Double boiler (or a heatproof bowl set over a saucepan of simmering water)
- Rubber spatula (for spreading the chocolate evenly)
- Chef’s knife (for chopping chocolate and candy canes)
- Cutting board
- Rolling pin (for crushing candy canes—a heavy skillet works too)
- Ziploc bag (for containing the candy cane mess)
- Offset spatula (optional, but makes spreading much easier)
If you don’t have a double boiler, no worries. I’ve used a stainless steel bowl set over a small saucepan for years. Just make sure the bowl doesn’t touch the water—steam alone does the melting. And please, don’t use the microwave unless you’re very experienced with chocolate. I’ve burned more batches that way than I care to admit.
Preparation Method
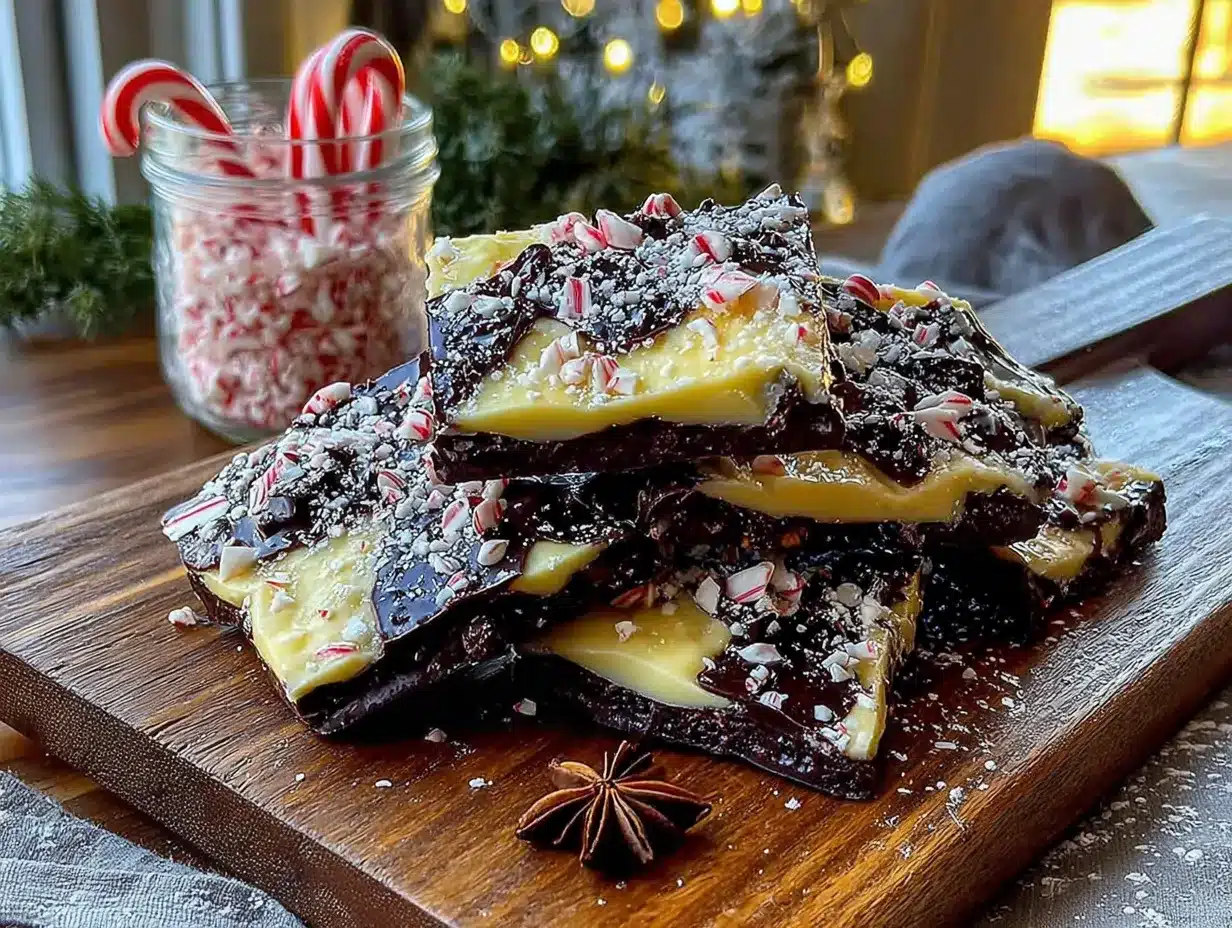
Let’s get to the fun part. I’ll walk you through this step by step, including all the little tricks I’ve picked up from my own mistakes.
Step 1: Prepare Your Workspace
Line your baking sheet with parchment paper, making sure the paper extends slightly over the edges—this gives you handles to lift the bark later. Crush your candy canes now. Place them in a Ziploc bag, seal it, and go at it with a rolling pin until you have a mix of fine powder and small chunks. Set aside 2 tablespoons of the crushed candy canes for the final sprinkle.
Step 2: Melt the Dark Chocolate
Fill your double boiler or saucepan with about 2 inches of water and bring it to a gentle simmer. Place the chopped dark chocolate in the top bowl. Stir occasionally with a rubber spatula until about two-thirds of the chocolate is melted. Remove from heat and continue stirring until completely smooth. The residual heat will finish the job—this prevents overheating. Stir in 1/2 teaspoon of peppermint extract.
Step 3: Spread the Dark Chocolate Layer
Pour the melted dark chocolate onto the prepared baking sheet. Use your spatula to spread it into an even rectangle, about 1/4-inch thick. Don’t worry if it’s not perfectly straight—bark is supposed to look rustic. Tap the pan gently on the counter to release any air bubbles. Place the pan in the refrigerator for 15 minutes, or until the chocolate is firm to the touch but not rock hard.
Step 4: Melt the White Chocolate
While the dark chocolate sets, rinse and dry your double boiler bowl thoroughly—any water will cause the white chocolate to seize. Repeat the same melting process with the white chocolate. If it seems too thick, stir in 1 tablespoon of coconut oil. Once smooth, stir in the remaining 1/2 teaspoon of peppermint extract and the fine candy cane dust (not the chunks).
Step 5: Assemble the Bark
Remove the pan from the refrigerator. Pour the melted white chocolate over the set dark chocolate layer. Gently spread it evenly, being careful not to mix the layers. While the white chocolate is still wet, sprinkle the reserved candy cane chunks evenly over the top. Lightly press them in with your fingers so they stick.
Step 6: Set and Break
Return the pan to the refrigerator for at least 30 minutes, or until the bark is completely firm. When ready, lift the parchment paper to remove the bark from the pan. Place it on a cutting board and use a sharp chef’s knife to break it into irregular pieces. You can also snap it by hand for a more organic look. Store in an airtight container.
Cooking Tips & Techniques
I’ve made this holiday peppermint bark at least thirty times, and I’ve learned a few things the hard way. Here are my best tips:
Don’t rush the chocolate melting. Low and slow is the golden rule. If you heat chocolate too quickly, it can seize into a grainy, clumpy mess. I once tried to speed things up by cranking the heat, and I ended up with a lumpy disaster that had to be thrown out. Patience pays off here.
Watch for water. Even a single drop of water in your melting chocolate can cause it to seize. Make sure your bowl and spatula are bone dry. If your chocolate does seize, you can sometimes rescue it by stirring in a tablespoon of vegetable oil, but prevention is better than cure.
Temperature matters. The ideal working temperature for dark chocolate is around 88-90°F, and for white chocolate, it’s slightly lower at 86-88°F. If you don’t have a thermometer, just remember: the chocolate should feel warm to the touch but not hot. If it’s uncomfortable on your wrist, it’s too hot.
Crush candy canes strategically. I keep a separate bag of finely crushed candy canes just for mixing into the white chocolate. The fine dust dissolves slightly and flavors the whole layer, while the chunks on top provide that satisfying crunch. It’s a two-texture approach that makes a big difference.
Multitask wisely. While the dark chocolate layer is chilling, wash your double boiler bowl and crush your candy canes. This keeps the process moving and prevents that frantic “oh no, the chocolate is setting and I’m not ready” panic.
Variations & Adaptations
One of the best things about this holiday peppermint bark is how easily it adapts. Here are a few variations I’ve tried and loved:
Dark Chocolate Mint Bark : Skip the white chocolate entirely and use two layers of dark chocolate, adding extra peppermint extract to the second layer. It’s less sweet and intensely minty—perfect for dark chocolate lovers.
Vegan Peppermint Bark : Use dairy-free dark chocolate and a high-quality vegan white chocolate (Pascha makes a great one). Swap the coconut oil for a neutral vegetable oil if needed. The rest of the recipe stays exactly the same.
Spiced Peppermint Bark : Add 1/4 teaspoon of cinnamon and a pinch of cayenne pepper to the dark chocolate layer. The warmth of the spices plays beautifully with the cool peppermint. I made this for a holiday party last year, and people couldn’t stop talking about it.
Gluten-Free Note : This recipe is naturally gluten-free, but always check your candy cane labels—some brands use wheat-based stabilizers. Most classic candy canes are safe, but it’s worth a quick look.
Cookie Cutter Shapes : If you want to get fancy, spread the bark slightly thicker (about 1/3 inch) and use small cookie cutters to stamp out stars, trees, or snowflakes before the chocolate fully sets. It’s a bit more work, but the results are stunning on a gift plate.
Serving & Storage Suggestions
This holiday peppermint bark is best served at cool room temperature—about 65-70°F. If it’s too warm, the chocolate can get soft and sticky. I like to arrange the pieces on a simple white platter or in a festive tin lined with parchment paper.
For gift giving, I stack the bark pieces in clear cellophane bags tied with red ribbon. It looks beautiful and keeps the bark fresh. Add a small tag with the ingredients list if you’re giving it to someone with allergies.
Storage: Keep the bark in an airtight container in a cool, dry place for up to 2 weeks. Do not refrigerate unless absolutely necessary—condensation can cause the chocolate to bloom (develop white streaks). If you must refrigerate, let the container come to room temperature before opening to prevent moisture buildup.
Freezing: Yes, you can freeze this bark! Layer pieces between sheets of parchment paper in a freezer-safe container. It will keep for up to 3 months. Thaw in the refrigerator overnight, then bring to room temperature before serving. I actually prefer the texture after freezing—it gets even snappier.
The flavors actually meld and deepen after a day or two. The peppermint infuses the chocolate layers more fully, and the candy cane crunch softens just slightly. It’s still delicious on day one, but day three is where it really shines.
Nutritional Information & Benefits
Let’s be real—this is a treat, not a health food. But here’s the approximate nutritional breakdown per serving (about 1 ounce, or a 2×2-inch piece):
- Calories: 160
- Fat: 10g
- Carbohydrates: 18g
- Sugar: 15g
- Protein: 2g
- Fiber: 1g
Dark chocolate (60% cacao or higher) does offer some benefits—it’s rich in antioxidants called flavonoids, which can support heart health. Peppermint has been shown to aid digestion and provide a natural energy boost without caffeine. And honestly, the act of making something beautiful and sharing it with people? That has its own kind of wellness value.
If you’re watching your sugar intake, you can use a sugar-free dark chocolate and a stevia-sweetened white chocolate alternative. The texture won’t be quite the same, but the flavor is still lovely. This recipe is naturally gluten-free and can be made dairy-free with the right chocolate choices.
Potential allergens: dairy (in the white chocolate), soy (often in chocolate as an emulsifier), and peppermint (rare, but possible). Always check labels if you’re serving someone with food sensitivities.
Conclusion
This holiday peppermint bark with white and dark chocolate is more than just a recipe—it’s a little moment of joy you can create in your own kitchen. It’s the kind of thing that makes you feel like a holiday hero, even if you’re just wearing sweatpants and listening to Christmas music. Clara from the garden would probably laugh to know her casual tip turned into my annual tradition, but that’s exactly what happened.
I hope you make this your own. Add extra candy canes if you’re feeling generous. Skip the white chocolate if you’re a dark chocolate purist. Use colored sprinkles instead of peppermint for a kid-friendly version. The beauty of bark is that there’s no wrong way to do it.
I’d love to hear how yours turns out. Drop a comment below and tell me about your candy cane crushing technique, or share a photo of your finished bark. And if you’ve got a holiday recipe that came from a conversation with a stranger, I want to hear that story too. Happy holidays, and happy snacking!
Frequently Asked Questions
Can I use chocolate chips instead of chopped chocolate?
You can, but the texture won’t be as smooth. Chocolate chips contain stabilizers that help them hold their shape, which means they don’t melt as fluidly. If you’re in a pinch, use high-quality chips and add a teaspoon of coconut oil to help them spread.
Why did my white chocolate seize and turn grainy?
White chocolate is notoriously sensitive to heat and moisture. It likely got too hot (over 110°F) or came into contact with water. Always melt it gently and keep everything bone dry. If it seizes, you can sometimes rescue it by stirring in a tablespoon of warm cream or coconut oil.
How do I crush candy canes without making a huge mess?
The Ziploc bag method is your friend. Place the candy canes in a sturdy bag, seal it, and cover with a kitchen towel before whacking with a rolling pin. The towel catches any rogue crumbs. For finer dust, use a food processor with short pulses.
Can I make this ahead for holiday gifting?
Absolutely. This bark keeps beautifully for up to 2 weeks at room temperature in an airtight container. It actually tastes better after a day or two when the flavors have melded. Just keep it away from heat and direct sunlight.
Is peppermint bark the same as chocolate bark?
Not exactly. Chocolate bark is a general term for any flat sheet of chocolate with toppings. Peppermint bark is a specific variation that uses peppermint extract and crushed candy canes. The combination of dark and white chocolate layers is what makes it a holiday classic.
Pin This Recipe!
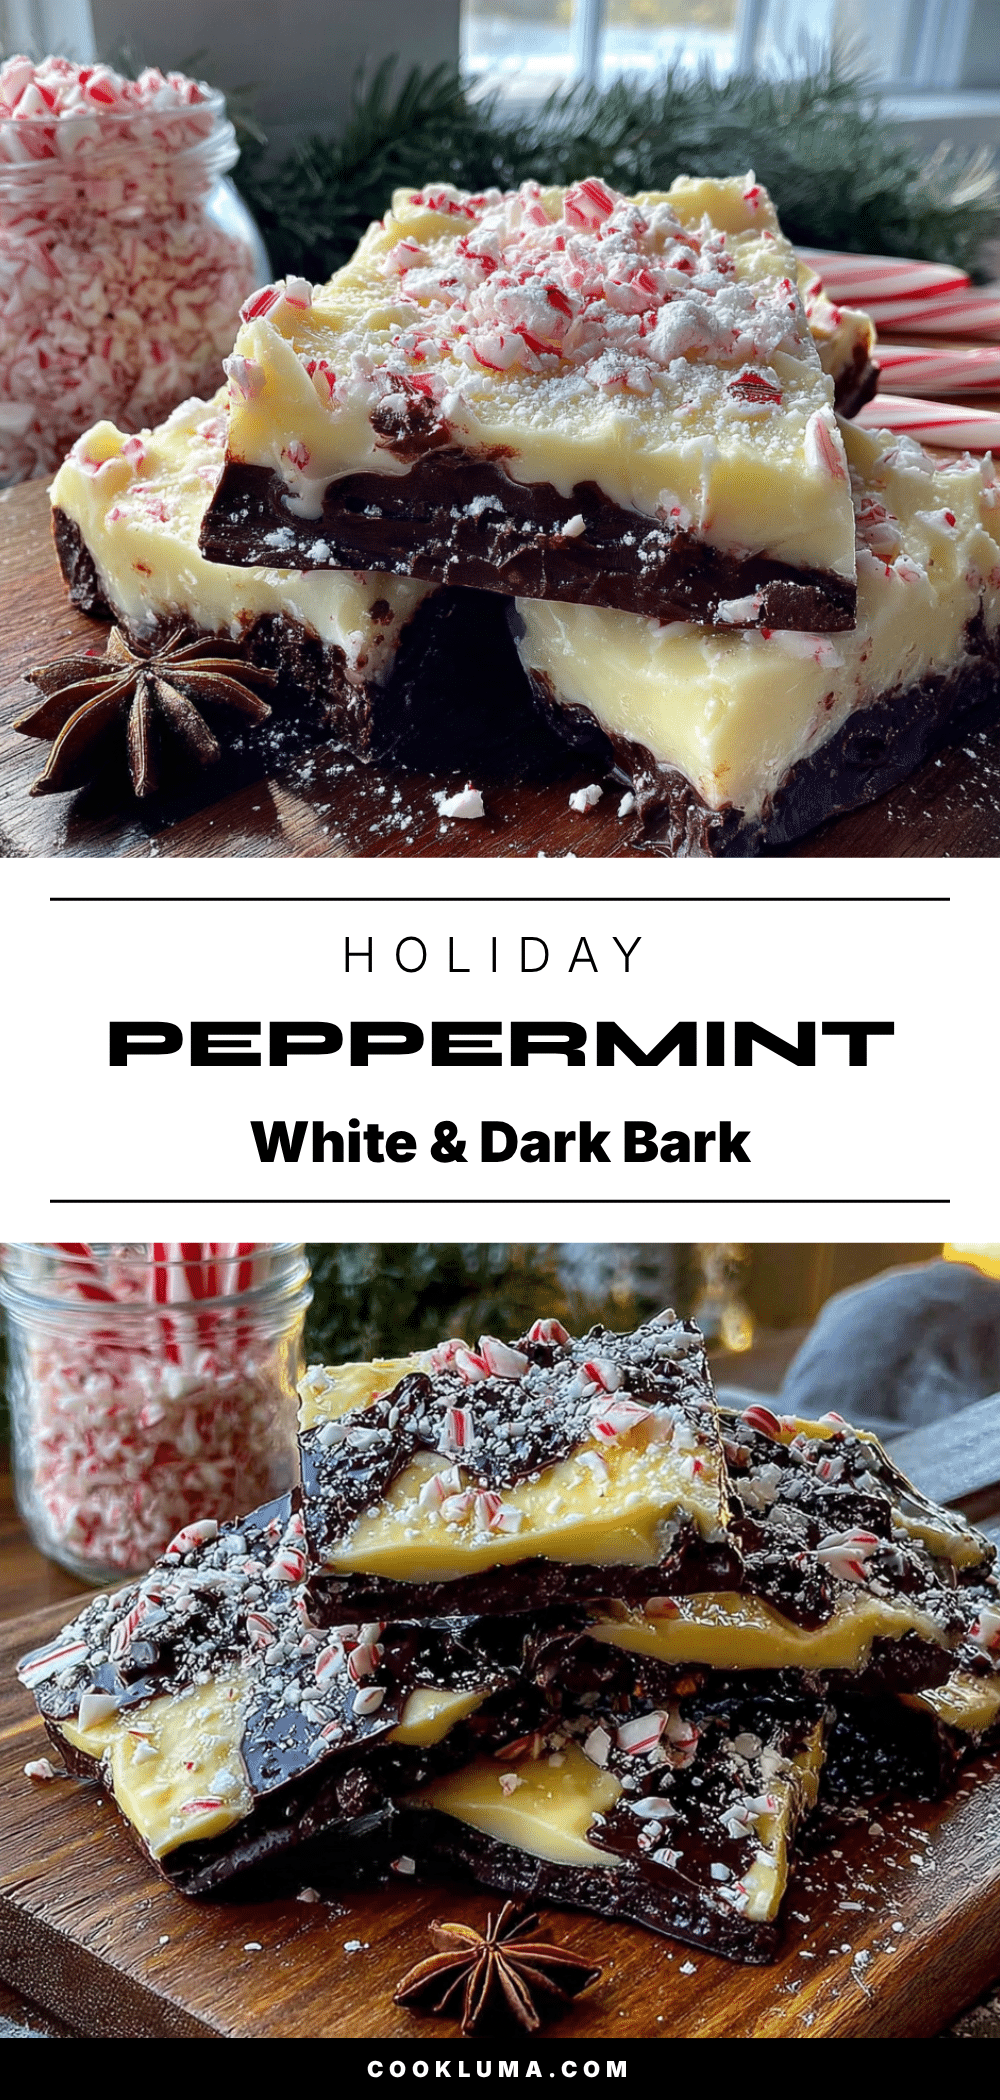
Holiday Peppermint Bark: Easy White & Dark Chocolate Treat

This easy holiday peppermint bark layers dark and white chocolate with crushed candy canes for a festive, crunchy treat. Perfect for gift-giving or holiday parties, it comes together in under an hour with just four simple ingredients.
- Prep Time: 15 minutes
- Cook Time: 30 minutes
- Total Time: 45 minutes
- Yield: 16 servings 1x
- Category: Dessert
- Cuisine: American
Ingredients
- 12 ounces dark chocolate, chopped (60% cacao recommended)
- 12 ounces white chocolate, chopped (with cocoa butter)
- 1 teaspoon peppermint extract, divided
- 1/2 cup crushed candy canes (about 6 regular-sized candy canes)
- 1 tablespoon coconut oil (optional, for smoother white chocolate)
Instructions
- Line a baking sheet with parchment paper, extending over edges for handles. Crush candy canes in a sealed Ziploc bag with a rolling pin until you have a mix of fine dust and small chunks. Set aside 2 tablespoons for the final sprinkle.
- Fill a double boiler or saucepan with 2 inches of water and bring to a gentle simmer. Place chopped dark chocolate in the top bowl. Stir occasionally until about two-thirds melted, then remove from heat and stir until completely smooth. Stir in 1/2 teaspoon peppermint extract.
- Pour melted dark chocolate onto prepared baking sheet. Spread into an even rectangle about 1/4-inch thick. Tap pan gently to release air bubbles. Refrigerate for 15 minutes until firm but not rock hard.
- Rinse and dry the double boiler bowl thoroughly. Repeat melting process with white chocolate. If too thick, stir in 1 tablespoon coconut oil. Once smooth, stir in remaining 1/2 teaspoon peppermint extract and the fine candy cane dust (not the chunks).
- Remove pan from refrigerator. Pour melted white chocolate over set dark chocolate layer. Gently spread evenly without mixing layers. While white chocolate is still wet, sprinkle reserved candy cane chunks evenly on top. Lightly press them in with fingers.
- Return pan to refrigerator for at least 30 minutes until completely firm. Lift parchment paper to remove bark from pan. Place on cutting board and break into irregular pieces with a sharp chef’s knife or by hand. Store in an airtight container.
Notes
For best results, use high-quality chocolate with cocoa butter. Avoid water contact when melting chocolate to prevent seizing. The bark keeps for up to 2 weeks in an airtight container at cool room temperature. Flavors deepen after a day or two.
Nutrition
- Serving Size: 1 ounce (about 2x2-i
- Calories: 160
- Sugar: 15
- Sodium: 20
- Fat: 10
- Saturated Fat: 6
- Carbohydrates: 18
- Fiber: 1
- Protein: 2
Keywords: peppermint bark, holiday dessert, chocolate bark, easy candy, Christmas treat, white chocolate, dark chocolate, candy cane


