I was standing in line at the post office, two days before Christmas, holding a package that had already been taped shut three times because the tape kept sticking to itself. The woman behind me—grey-haired, wearing a reindeer sweater that actually played music—leaned forward and said, “You look like you need a cookie that turns people green with envy.” I laughed, thinking she was just being festive. But then she pulled a crumpled recipe card from her coat pocket, the edges soft and stained, and told me about these Grinch Red Velvet White Chocolate Chip Cookies she’d been making for thirty years. She said her grandkids called them “heart-growing cookies” because they disappeared so fast. I mean, I wasn’t expecting baking advice from a stranger in a postal queue, but there I was, holding a piece of notebook paper with red ink smudges, listening to her explain exactly how to make these cookies. The power went out in our neighborhood that evening, and I made them by candlelight—honestly, it was the best baking decision I’ve ever made. The red velvet color against the white chips, the way the kitchen smelled like vanilla and cocoa… it just worked. Maybe you’ve been there, where a recipe finds you at exactly the right moment. These cookies have been my go-to holiday bake ever since, and let me tell you, they never last long.
Why You’ll Love This Recipe
These Grinch Red Velvet White Chocolate Chip Cookies are the kind of recipe that makes you look like a holiday hero without spending hours in the kitchen. I’ve tested this version more times than I care to admit, tweaking the ratios until the texture was absolutely perfect—soft centers, slightly crisp edges, and those pockets of melted white chocolate in every bite.
- Quick & Easy: From start to finish, these cookies are ready in under 30 minutes. No chilling required, which is a game-changer when you’re baking on a weeknight or need something fast for a party.
- Simple Ingredients: You probably have most of these in your pantry already. Red food coloring is the only “special” item, and you can find it at any grocery store.
- Perfect for Holiday Baking: These are made for cookie swaps, classroom parties, or just decorating the kitchen counter with something festive.
- Crowd-Pleaser: The combination of red velvet and white chocolate is universally loved. Kids go wild for the color, and adults appreciate that they’re not overly sweet.
- Unbelievably Delicious: The secret is using a bit of cocoa powder for that classic red velvet flavor, but not so much that it overpowers the white chocolate. The texture is soft, chewy, and absolutely addictive.
What makes these different from other red velvet cookie recipes? It’s the balance. I spent a whole afternoon baking batch after batch until I got the ratio of butter to sugar just right—enough structure to hold the shape, but tender enough to melt in your mouth. These aren’t cakey or dry; they’re dense and rich, like the best cookie you’ve ever had from a bakery, but made in your own kitchen.
This recipe isn’t just good—it’s the kind that makes you close your eyes after the first bite. It’s comfort food with a festive twist, perfect for impressing guests without the stress. And honestly, watching someone’s face light up when they see that bright red cookie studded with white chips? That’s the whole point of holiday baking.
What Ingredients You Will Need
This recipe uses simple, pantry-friendly ingredients to deliver bold flavor and satisfying texture without any fuss. Most of these are staples you likely already have, which makes these cookies perfect for last-minute baking emergencies.
- Unsalted butter, 1 cup (2 sticks), softened to room temperature—using unsalted lets you control the salt level
- Granulated sugar, 1 cup—adds sweetness and helps create those slightly crisp edges
- Large egg, 1, room temperature—binds everything together; if you’re in a hurry, place the egg in warm water for 5 minutes
- Vanilla extract, 2 teaspoons—pure vanilla makes a noticeable difference; I prefer Nielsen-Massey for the best flavor
- All-purpose flour, 2 cups—spoon and level it for accuracy; don’t scoop directly from the bag
- Unsweetened cocoa powder, 2 tablespoons—just enough for that subtle red velvet flavor without making the cookies taste like chocolate
- Baking soda, 1 teaspoon—helps the cookies spread just the right amount
- Salt, ½ teaspoon—balances the sweetness and enhances the vanilla
- Red food coloring, 1 tablespoon (or gel food coloring, 1 teaspoon)—gel coloring gives a more vibrant red without thinning the dough; I recommend Wilton brand
- White chocolate chips, 1½ cups—use good quality chips; Ghirardelli or Guittard melt better and taste creamier
Ingredient Selection Tips: For the red food coloring, gel-based colors are more concentrated, so you’ll need less and the dough won’t get runny. If you’re using liquid coloring, reduce the amount slightly to avoid affecting the texture. For the white chocolate chips, avoid “white morsels” that contain artificial flavors—real white chocolate has cocoa butter listed as an ingredient and melts beautifully.
Substitution Guidance: If you’re dairy-free, you can use plant-based butter sticks (like Country Crock Plant Butter) and dairy-free white chocolate chips. For a gluten-free version, swap the all-purpose flour with a 1:1 gluten-free baking blend that contains xanthan gum. The texture will be slightly different but still delicious.
Equipment Needed
You don’t need fancy equipment for these cookies, which is part of what makes them so weeknight-friendly. Here’s what you’ll need:
- Large mixing bowl—any bowl works, but a wide one makes mixing easier
- Electric hand mixer or stand mixer—you can do this by hand with a wooden spoon, but a mixer saves time and arm fatigue
- Baking sheets—two standard half-sheet pans work best; if you only have one, let it cool completely between batches
- Parchment paper or silicone baking mat—nonstick is essential for easy cleanup and even baking
- Cookie scoop or tablespoon—a 1.5-tablespoon scoop gives consistent sizes every time
- Cooling rack—lets air circulate so cookies don’t get soggy on the bottom
- Measuring cups and spoons—accuracy matters with baking
I’ve made these cookies with just a bowl and a spatula when my mixer was broken, and they turned out fine. The dough comes together quickly, so don’t let missing equipment stop you. If you don’t have a cookie scoop, just use two spoons to drop rounded tablespoons of dough onto the baking sheet. Budget-friendly tip: dollar stores often carry cookie scoops that work perfectly fine for occasional baking.
Preparation Method

Step 1: Preheat and Prep
Preheat your oven to 350°F (175°C). Line two baking sheets with parchment paper or silicone mats. This ensures the cookies won’t stick and makes cleanup a breeze.
Step 2: Cream Butter and Sugar
In a large mixing bowl, beat the softened butter and granulated sugar together until light and fluffy—about 2-3 minutes with an electric mixer on medium speed. The mixture should look pale and feel airy. This step is crucial because it incorporates air into the dough, giving the cookies a tender texture. Scrape down the sides of the bowl with a spatula halfway through.
Step 3: Add Egg and Vanilla
Add the egg and vanilla extract to the butter mixture. Beat on medium speed until fully combined, about 30 seconds. The batter should look smooth and glossy. If the egg is cold, it might make the butter clump—don’t worry, just keep mixing and it will come together.
Step 4: Mix Dry Ingredients
In a separate medium bowl, whisk together the flour, cocoa powder, baking soda, and salt. Whisking ensures the baking soda and salt are evenly distributed throughout the flour. This step prevents any bitter pockets of baking soda in the finished cookies.
Step 5: Combine Wet and Dry
Gradually add the dry ingredients to the wet mixture, mixing on low speed. Add the flour mixture in two additions, mixing just until the flour disappears. Overmixing at this stage develops too much gluten, which makes cookies tough. Stop as soon as you don’t see any white streaks.
Step 6: Add Red Food Coloring
Pour in the red food coloring and mix on low speed until the dough is evenly colored. If you’re using gel food coloring, you might need to mix a little longer to distribute it fully. The dough should be a vibrant red—if it looks more pink than red, add a few more drops of coloring. Scrape the bottom of the bowl to catch any uncolored spots.
Step 7: Fold in White Chocolate Chips
Gently fold in the white chocolate chips using a spatula. Don’t overmix—just fold until the chips are evenly distributed throughout the dough. The dough will be slightly stiff but scoopable. If it feels too soft, pop it in the fridge for 10 minutes.
Step 8: Scoop and Bake
Using a cookie scoop or tablespoon, drop rounded balls of dough onto the prepared baking sheets, spacing them about 2 inches apart. Each ball should be about 1.5 tablespoons of dough. Bake for 9-11 minutes, or until the edges are set and the tops look slightly cracked. The centers will look soft and slightly underdone—that’s exactly what you want. They will continue to set as they cool.
Step 9: Cool and Enjoy
Let the cookies cool on the baking sheet for 5 minutes before transferring them to a wire cooling rack. This resting time allows the cookies to firm up without becoming dry. Once completely cool, they’re ready to serve. Or, you know, eat three while they’re still warm—I won’t judge.
Cooking Tips & Techniques
Don’t Overbake: This is the most important tip I can give you. These cookies might look underdone when you pull them out of the oven, but trust the process. The residual heat from the baking sheet continues to cook the cookies as they cool. Overbaking leads to dry, crumbly cookies instead of soft, chewy ones.
Room Temperature Ingredients Matter: I learned this the hard way when I used cold butter straight from the fridge. The dough was lumpy, the cookies spread too much, and the texture was off. Let your butter and egg sit on the counter for 30 minutes before starting. If you’re in a rush, cut the butter into small cubes—they’ll soften in about 15 minutes.
How to Get Consistent Cookie Sizes: Use a cookie scoop. It’s one of those small kitchen tools that makes a huge difference. When every cookie is the same size, they bake evenly, and you don’t end up with some burnt and some raw. If you don’t have a scoop, use a measuring tablespoon and level it off.
Baking Sheet Rotation: Halfway through baking, rotate the baking sheets from front to back and swap the top and bottom racks. Most ovens have hot spots, and this simple step ensures all your cookies bake evenly. I forgot to do this once, and the cookies on the left side were noticeably darker.
Chill If Needed: If your dough feels too sticky or soft to handle, pop it in the refrigerator for 15-20 minutes. This is especially helpful if your kitchen is warm or if you’re using liquid food coloring. Chilled dough spreads less and gives you thicker cookies.
Variations & Adaptations
1. Peppermint Grinch Cookies: Add ½ cup of crushed peppermint candies to the dough along with the white chocolate chips. The crunch and cool mint flavor pair beautifully with the red velvet. This version always gets rave reviews at holiday parties.
2. Gluten-Free Version: Substitute the all-purpose flour with a 1:1 gluten-free baking blend that contains xanthan gum. I’ve tested this with Bob’s Red Mill 1-to-1 Baking Flour, and the cookies came out tender and delicious. Add an extra tablespoon of milk if the dough seems too dry.
3. Dairy-Free Adaptation: Use vegan butter sticks and dairy-free white chocolate chips. Miyoko’s Creamery makes an excellent plant-based butter that behaves almost exactly like the real thing. The cookies will spread slightly more, so chill the dough for 20 minutes before baking.
4. Extra Green Grinch Theme: For a more festive look, add a few drops of green food coloring to half the dough, then swirl it with the red dough before scooping. You’ll get marbled cookies that look like the Grinch himself. I tried this for a Grinch-themed movie night, and they were a hit.
5. Dark Chocolate Twist: Swap the white chocolate chips for dark chocolate chips if you prefer less sweetness. The bitterness of dark chocolate contrasts nicely with the sweet red velvet base. Use chips with 60% cocoa content for the best balance.
Serving & Storage Suggestions
These cookies are best served slightly warm, when the white chocolate chips are still soft and melty. Let them cool for about 5 minutes after baking, then serve them on a festive plate. They look gorgeous on a red or green platter, especially with a dusting of powdered sugar on top.
For a complete holiday dessert spread, pair these cookies with a glass of cold milk, a cup of hot cocoa, or a warm spiced chai latte. They also go beautifully with vanilla ice cream—just crumble a cookie over a scoop for an easy sundae. If you’re serving them at a cookie swap, arrange them in a tin lined with parchment paper for a beautiful presentation.
Storage Instructions: Store these cookies in an airtight container at room temperature for up to 5 days. Place a slice of bread in the container to keep them soft—the bread absorbs excess moisture and the cookies stay chewy. Replace the bread slice every two days if needed.
Freezing Instructions: These cookies freeze beautifully. You can freeze the baked cookies in a freezer-safe bag for up to 3 months. Thaw them at room temperature for about 30 minutes before serving. Alternatively, freeze the unbaked dough balls on a baking sheet, then transfer them to a freezer bag. Bake straight from frozen, adding 2-3 minutes to the baking time. This is my go-to trick for having fresh cookies on demand during the busy holiday season.
I’ve noticed that the flavors actually deepen after the first day. The cocoa and vanilla meld together, and the white chocolate chips set into creamy pockets throughout the cookie. Honestly, they might be even better on day two.
Nutritional Information & Benefits
Each cookie (based on a batch of 24) contains approximately:
- Calories: 185
- Total Fat: 10g
- Saturated Fat: 6g
- Cholesterol: 25mg
- Sodium: 125mg
- Total Carbohydrates: 24g
- Dietary Fiber: 0.5g
- Sugars: 16g
- Protein: 2g
While these are definitely a treat, there are a few silver linings. The cocoa powder in red velvet contains antioxidants called flavonoids, which can support heart health. White chocolate provides calcium from milk solids, and the butter offers vitamin A. Of course, the main benefit here is the joy they bring—sometimes, that’s the most important nutrient of all.
Dietary Considerations: These cookies contain gluten, dairy, and eggs. For allergen-friendly versions, see the variations section above. If you’re watching your sugar intake, you can reduce the granulated sugar to ¾ cup, though the texture will be slightly less tender.
Conclusion
These Grinch Red Velvet White Chocolate Chip Cookies are more than just a holiday recipe—they’re a little piece of joy that you can bake in under 30 minutes. From that unexpected encounter at the post office to the first batch made by candlelight, this recipe has become a staple in my kitchen because it’s reliable, forgiving, and absolutely delicious.
I encourage you to make these your own. Add a pinch of cinnamon for warmth, swap in dark chocolate for a grown-up twist, or go all out with the green-and-red marbled version. The best recipes are the ones that adapt to your kitchen and your tastes.
I’d love to hear how these turn out for you! Drop a comment below and let me know if you tried any variations, or tag me in your photos on social media. There’s something special about seeing these bright red cookies appear in kitchens around the world. Happy baking, and remember—sometimes the best recipes come from the most unexpected places.
Frequently Asked Questions
Can I make these cookies without red food coloring?
Absolutely. The red color is purely for the Grinch theme. If you prefer to skip artificial coloring, the cookies will turn out a dark brown color from the cocoa powder. They’ll still taste delicious, just without the festive red hue.
Why did my cookies spread too much?
This usually happens if the butter was too soft or melted, or if the dough wasn’t chilled before baking. Make sure your butter is softened but still cool to the touch, and if your kitchen is warm, chill the dough for 15-20 minutes before scooping.
Can I use natural cocoa powder instead of unsweetened?
Yes, natural cocoa powder works fine in this recipe. It will give the cookies a slightly more intense chocolate flavor and a darker color. Just don’t use Dutch-process cocoa, as it’s less acidic and might affect how the cookies rise.
How do I make these cookies more cake-like?
For a softer, cakier texture, add ¼ teaspoon of baking powder in addition to the baking soda. You can also reduce the butter by 2 tablespoons and add an extra egg yolk. The cookies will be puffier and more tender.
Can I double this recipe?
Yes, this recipe doubles beautifully. Just make sure your mixing bowl is large enough to accommodate the extra dough. You may need to bake in batches or use additional baking sheets. The baking time remains the same.
Pin This Recipe!
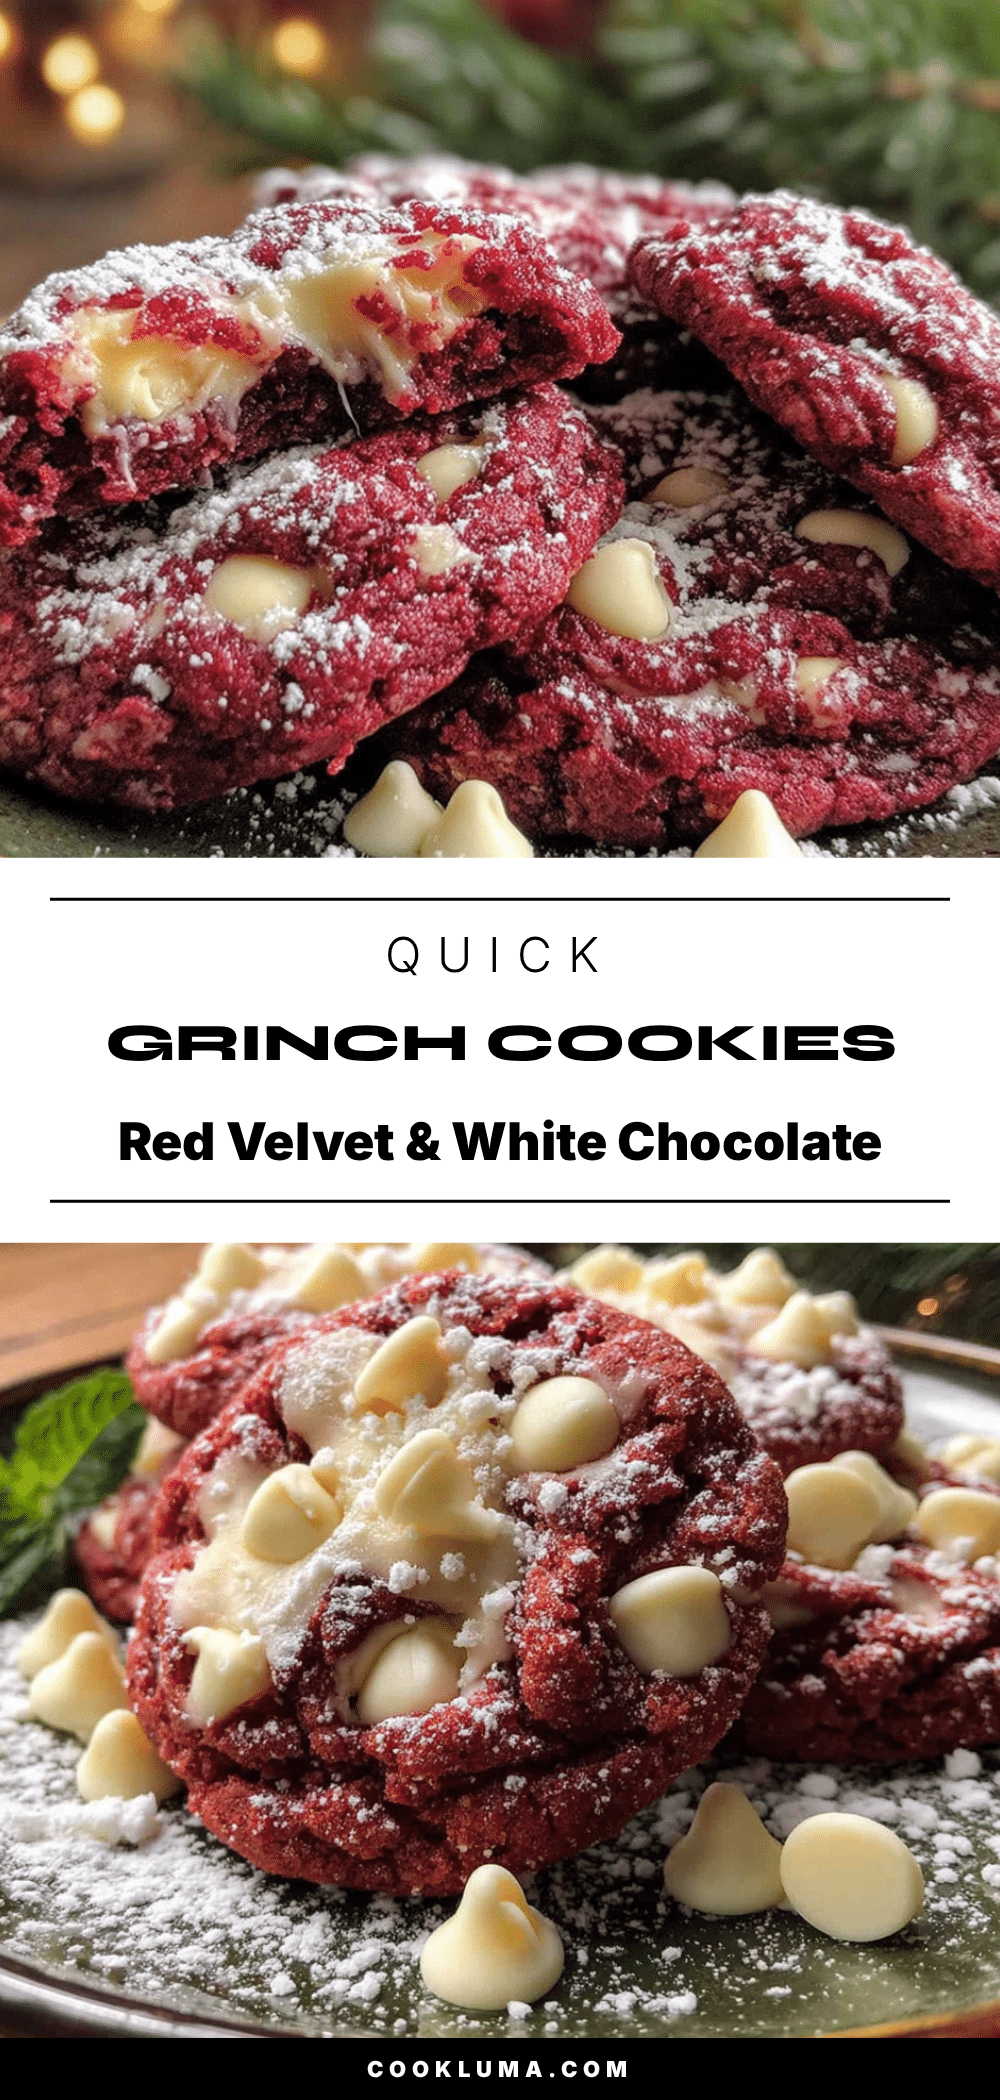
Easy Grinch Red Velvet White Chocolate Chip Cookies

These Grinch Red Velvet White Chocolate Chip Cookies are soft, chewy, and studded with creamy white chocolate chips. Ready in under 30 minutes with no chilling required, they’re the perfect festive treat for holiday baking, cookie swaps, or last-minute cravings.
- Prep Time: 15 minutes
- Cook Time: 10 minutes
- Total Time: 25 minutes
- Yield: 24 cookies 1x
- Category: Dessert
- Cuisine: American
Ingredients
- 1 cup (2 sticks) unsalted butter, softened
- 1 cup granulated sugar
- 1 large egg, room temperature
- 2 teaspoons vanilla extract
- 2 cups all-purpose flour
- 2 tablespoons unsweetened cocoa powder
- 1 teaspoon baking soda
- ½ teaspoon salt
- 1 tablespoon red food coloring (or 1 teaspoon gel food coloring)
- 1½ cups white chocolate chips
Instructions
- Preheat oven to 350°F (175°C). Line two baking sheets with parchment paper or silicone mats.
- In a large mixing bowl, beat softened butter and granulated sugar together until light and fluffy, about 2-3 minutes with an electric mixer on medium speed. Scrape down sides halfway through.
- Add egg and vanilla extract; beat on medium speed until fully combined, about 30 seconds.
- In a separate medium bowl, whisk together flour, cocoa powder, baking soda, and salt.
- Gradually add dry ingredients to wet mixture in two additions, mixing on low speed just until flour disappears. Do not overmix.
- Add red food coloring; mix on low speed until dough is evenly colored. Scrape bottom of bowl to incorporate any uncolored spots.
- Gently fold in white chocolate chips with a spatula until evenly distributed.
- Using a cookie scoop or tablespoon, drop rounded balls of dough (about 1.5 tablespoons each) onto prepared baking sheets, spacing 2 inches apart.
- Bake for 9-11 minutes, until edges are set and tops look slightly cracked. Centers will appear soft.
- Let cookies cool on baking sheet for 5 minutes, then transfer to a wire cooling rack to cool completely.
Notes
Don’t overbake—cookies should look slightly underdone when removed from oven; they will continue to set as they cool. For best results, use room temperature butter and egg. If dough is too sticky, chill for 15-20 minutes before scooping. Store in an airtight container at room temperature for up to 5 days; freeze baked cookies for up to 3 months.
Nutrition
- Serving Size: 1 cookie
- Calories: 185
- Sugar: 16
- Sodium: 125
- Fat: 10
- Saturated Fat: 6
- Carbohydrates: 24
- Fiber: 0.5
- Protein: 2
Keywords: Grinch cookies, red velvet cookies, white chocolate chip cookies, holiday cookies, Christmas cookies, easy cookie recipe, no chill cookies


