My brother-in-law Mark asked why I couldn’t just use crushed ginger snaps instead of making a graham cracker crust from scratch for the cheesecake. I started to explain why that wouldn’t work—then stopped. Honestly, I had no good reason. I just assumed a “real” cheesecake needed a from-scratch crust. But Mark was staring at me with this patient look, holding a box of store-bought ginger snaps he’d picked up “just in case.” So I caved. I crushed them up, mixed them with butter, and pressed them into the pan, fully expecting a crumbly, flavorless mess.
That cheesecake? It disappeared in twenty minutes. My sister called me the next day asking for the recipe, and I had to admit the secret was her husband’s last-minute grocery store suggestion. I mean, talk about a humbling moment. The ginger snap crust was spicy, crunchy, and held together perfectly—way better than my usual fussy version. It paired so well with the creamy, spiced eggnog filling that I felt a little silly for being so stubborn. The power went out halfway through baking that day, too, which forced me to open the oven door to check on it. I was sure I’d ruined it. But nope. It was perfect.
Maybe you’ve been there—someone suggests something simple, and you almost brush it off because it seems too easy. But this recipe taught me that the best dishes don’t need to be complicated. They just need the right combination of flavors and a little bit of trust. And let me tell you, when you serve this at your holiday gathering, nobody will care that the crust came from a box. They’ll be too busy asking for seconds. This eggnog cheesecake with gingerbread crust has become my go-to for Christmas dinner, and every time I make it, I think of Mark and his ginger snaps.
Why You’ll Love This Recipe
This isn’t just another cheesecake recipe—it’s the one that will make you the star of every holiday party. I’ve tested this version at least a dozen times, tweaking the spice levels and baking times until it was absolutely foolproof. Here’s why it works so well for hosts like you:
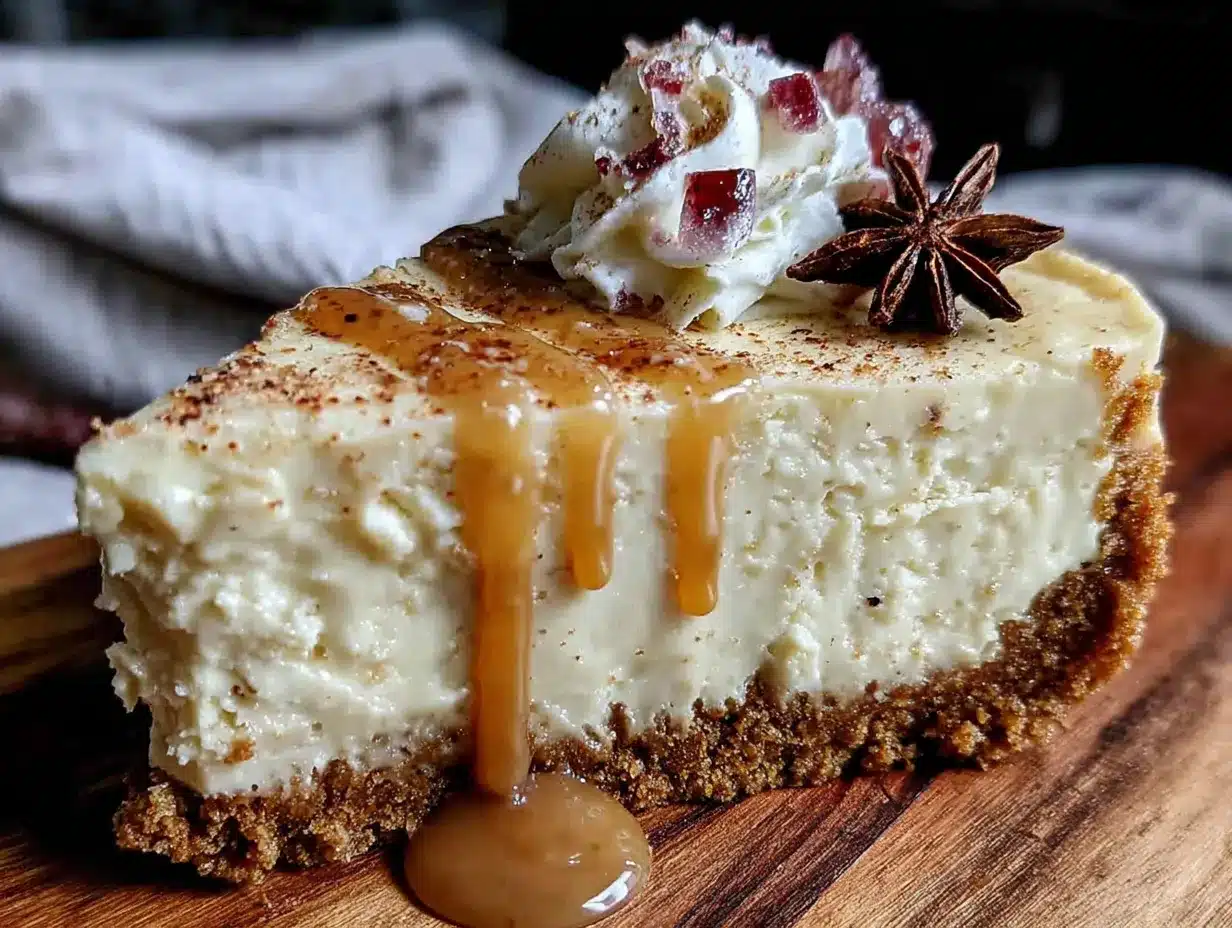
- Showstopper Presentation: That dark, spiced gingerbread crust against the pale, creamy filling is gorgeous. It looks like you spent hours on it, but the crust is embarrassingly easy.
- Perfect for Make-Ahead Hosting: Cheesecake actually tastes better after a day in the fridge. You can make this two days before your party, which frees you up to focus on appetizers and cocktails.
- Crowd-Pleasing Flavor: Eggnog is one of those divisive drinks—people either love it or hate it. But in cheesecake form? The spices mellow out, and the creamy texture wins everyone over. Even my eggnog-skeptic uncle asked for the recipe.
- Simple Ingredients, Big Impact: No fancy extracts or hard-to-find spices. You probably have most of these in your pantry right now. The ginger snaps do all the heavy lifting for the crust.
- Holds Its Shape Beautifully: This cheesecake slices cleanly, which is crucial when you’re serving a crowd. No sad, crumbly slices falling apart on the plate.
What makes this recipe different from every other eggnog cheesecake out there is the crust. Most recipes use a traditional graham cracker base, but the gingerbread flavor from crushed ginger snaps adds a warm, molasses-y depth that complements the eggnog perfectly. It’s not just a container for the filling—it’s an essential part of the experience. The filling itself is rich but not heavy, with just enough nutmeg and cinnamon to taste like the holidays without overwhelming your palate. This is the kind of dessert that makes people close their eyes after the first bite. Honestly, it’s comfort food at its finest—familiar, indulgent, and completely stress-free to pull off.
What Ingredients You Will Need
This recipe relies on simple, wholesome ingredients to create that luxurious holiday flavor without any fuss. Most of these are pantry staples during the holiday season, so you likely already have everything on hand.
For the Gingerbread Crust
- 2 cups (240g) crushed ginger snap cookies – I recommend Nabisco Ginger Snaps or a store-brand equivalent. You want a sturdy cookie that crushes evenly. Pulse them in a food processor or seal them in a bag and go to town with a rolling pin.
- 6 tablespoons (85g) unsalted butter, melted – This binds the crumbs together. Salted butter works in a pinch, but reduce the added salt in the filling slightly.
- 2 tablespoons (25g) brown sugar, packed – Adds a touch of molasses sweetness that deepens the gingerbread flavor. Light or dark brown sugar both work; dark gives a richer taste.
- ¼ teaspoon ground cinnamon – A warm spice that bridges the crust and filling flavors. Freshly ground is best, but pre-ground is fine.
For the Eggnog Cheesecake Filling
- 32 ounces (904g) cream cheese, softened – Full-fat is non-negotiable here. Low-fat cream cheese contains more water and will make your cheesecake crack. Let it sit on the counter for at least an hour before starting.
- 1 cup (200g) granulated sugar – Standard white sugar keeps the filling clean and creamy. Don’t substitute with brown sugar here—it will alter the texture.
- 3 large eggs, room temperature – Cold eggs can seize the batter and create lumps. Place them in a bowl of warm water for 5 minutes if you’re short on time.
- 1 ½ cups (360ml) eggnog – Use full-fat, high-quality eggnog. I prefer Hood or a local dairy brand. Avoid low-fat or “light” eggnog, as they contain stabilizers that can affect the set.
- ¼ cup (30g) all-purpose flour – This helps stabilize the filling and prevents cracking. You can substitute with cornstarch for a gluten-free option (use 2 tablespoons).
- 1 teaspoon vanilla extract – Pure vanilla extract adds warmth. Imitation vanilla works, but the flavor is noticeably less rich.
- ½ teaspoon ground nutmeg, freshly grated if possible – Fresh nutmeg is a game-changer. It’s more aromatic and less bitter than pre-ground. A microplane works perfectly.
- ½ teaspoon ground cinnamon – Balances the nutmeg and adds that classic holiday spice profile.
- ¼ teaspoon ground cloves – Just a hint for depth. Cloves are potent, so don’t overdo it.
- Pinch of salt – Enhances all the other flavors and cuts through the richness.
For the Optional Topping
- 1 cup (240ml) heavy cream – For whipped cream. Cold cream whips up faster and holds its shape longer.
- 2 tablespoons (15g) powdered sugar – Stabilizes the whipped cream and adds sweetness.
- ½ teaspoon vanilla extract – For flavor.
- Extra ground nutmeg or cinnamon for dusting – A pretty finishing touch.
Equipment Needed
You don’t need a professional kitchen to pull this off, but a few key tools will make your life much easier. Here’s what I use every time:
- 9-inch springform pan – This is essential for cheesecakes. The removable sides let you release the cake without damaging it. I use a Fat Daddio’s brand pan, and it has never let me down. If you don’t have one, you can use a deep-dish pie plate, but the slices won’t be as clean.
- Electric mixer (hand or stand) – A hand mixer works perfectly fine. I actually prefer it because it’s easier to control the speed and avoid overmixing. A stand mixer with the paddle attachment is great too, just don’t walk away.
- Food processor or rolling pin – For crushing the ginger snaps. A food processor gives you uniform crumbs in seconds, but a rolling pin and a zip-top bag will get the job done. Just make sure there are no large chunks.
- Large mixing bowls – You’ll need at least two: one for the crust and one for the filling.
- Rubber spatula – For scraping down the bowl and folding ingredients. A silicone one is best because it won’t scratch your pans.
- Measuring cups and spoons – Accurate measurements matter in cheesecake. Use dry measuring cups for the sugar and flour, and a liquid measuring cup for the eggnog.
- Roasting pan or large baking dish – For the water bath. You’ll place the springform pan inside this and fill it with hot water. It sounds fussy, but it’s the secret to a crack-free cheesecake.
- Aluminum foil – To wrap the bottom of the springform pan and prevent water from seeping in. Use heavy-duty foil if you have it.
If you’re on a budget, skip the food processor and crush the cookies by hand. The texture will be a little more rustic, but it still tastes amazing. Also, don’t stress about having a roasting pan—any oven-safe dish that’s larger than your springform pan will work.
Preparation Method
Let’s walk through this step by step. I’ve included all the little details I wish someone had told me when I first started making cheesecake. Trust me, they matter.
Step 1: Prep Your Pan and Preheat
Preheat your oven to 325°F (163°C). While it’s heating, wrap the outside of your 9-inch springform pan with two layers of heavy-duty aluminum foil. Make sure the foil goes up the sides at least 2 inches. This creates a waterproof barrier for the water bath. Lightly grease the inside of the pan with butter or non-stick spray.
Step 2: Make the Gingerbread Crust
In a medium bowl, combine the crushed ginger snap cookies, melted butter, brown sugar, and cinnamon. Stir with a fork until the mixture looks like wet sand and holds together when you squeeze it. Press this mixture firmly into the bottom of your prepared springform pan. I use the bottom of a flat measuring cup to really pack it down. Bake the crust for 10 minutes, then set it aside to cool while you make the filling. Leave the oven on—you’ll need it at the same temperature.
Step 3: Beat the Cream Cheese
In a large mixing bowl, beat the softened cream cheese with an electric mixer on medium speed until it’s completely smooth. This should take about 2 minutes. Scrape down the sides and bottom of the bowl with a rubber spatula. Any lumps here will show up in the final cheesecake, so be thorough. Add the granulated sugar and beat for another 2 minutes until the mixture is light and fluffy.
Step 4: Add the Eggs One at a Time
Crack one egg into the bowl and beat on low speed just until combined. Repeat with the remaining two eggs, beating briefly after each addition. Overmixing at this stage incorporates too much air, which can cause cracks. The batter should be smooth but not frothy.
Step 5: Incorporate the Wet and Dry Ingredients
In a separate small bowl, whisk together the eggnog, vanilla extract, flour, nutmeg, cinnamon, cloves, and salt. Pour this mixture into the cream cheese batter and beat on low speed until just combined. Scrape the bowl again to make sure everything is evenly mixed. The batter will be thin—that’s normal.
Step 6: Assemble and Bake
Pour the filling over the cooled crust. Gently tap the pan on the counter a few times to release any air bubbles. Place the foil-wrapped springform pan into your roasting pan. Carefully pour hot water into the roasting pan until it reaches about halfway up the sides of the springform pan. Bake at 325°F (163°C) for 55 to 65 minutes. The edges should be set and slightly puffed, but the center should still jiggle slightly when you gently shake the pan. It will continue to set as it cools.
Step 7: Cool Gradually
Turn off the oven and crack the door open. Let the cheesecake sit in the water bath for 1 hour. This gradual cooling prevents the dreaded crack. After an hour, remove the pan from the water bath and take off the foil. Let it cool on a wire rack for another hour at room temperature. Then, cover the pan with plastic wrap and refrigerate for at least 4 hours, but overnight is best. The cheesecake needs time to fully set and develop its flavor.
Step 8: Serve and Top
When you’re ready to serve, run a thin knife around the edge of the pan to loosen the cheesecake. Release the springform clasp and remove the sides. If you’re making the whipped cream topping, beat the heavy cream, powdered sugar, and vanilla extract in a cold bowl until soft peaks form. Dollop or pipe it onto the cheesecake, and dust with a little extra nutmeg or cinnamon. Slice with a sharp, wet knife for clean edges.
Cooking Tips & Techniques
Over the years, I’ve made every mistake you can imagine with cheesecake. I’ve had cracked tops, soggy crusts, and filling that tasted more like scrambled eggs than dessert. Here’s what I learned the hard way so you don’t have to.
Room temperature ingredients are non-negotiable. I know it’s tempting to rush, but cold cream cheese creates lumps that won’t smooth out. Eggs straight from the fridge can shock the batter and cause it to separate. Take everything out of the fridge at least an hour before you start. If you forget, cut the cream cheese into cubes and microwave it in 10-second bursts until it’s soft but not melted.
Don’t overmix the batter. Once you add the eggs and liquid, mix only until everything is combined. Overmixing incorporates too much air, which expands during baking and then collapses, leaving you with a cracked cheesecake. I speak from experience—my first few cheesecakes looked like the surface of the moon.
The water bath is your best friend. Yes, it’s a little fussy, but it creates a humid environment that prevents the cheesecake from drying out and cracking. Make sure your foil wrap is tight. I learned this the hard way when water seeped into my pan and turned my crust into a soggy mess. Use heavy-duty foil and double-wrap it.
Let it cool slowly. Thermal shock is the number one cause of cracks. The gradual cooling in the oven with the door cracked open, followed by room temperature cooling, and then refrigeration, gives the cheesecake time to adjust. Patience pays off here.
Timing for hosts: Make this cheesecake two days before your party. It needs at least 8 hours to set, but 24 to 48 hours is even better. The flavors meld and deepen, and you’ll have one less thing to worry about on the day of your gathering. While it’s baking, you can prep appetizers or set the table.
Variations & Adaptations
One of the best things about this recipe is how flexible it is. Here are some variations I’ve tried and loved:
- Gluten-Free Version: Use gluten-free ginger snap cookies for the crust. I’ve tested this with Kinnikinnick brand, and it works perfectly. Substitute the all-purpose flour in the filling with an equal amount of cornstarch or a gluten-free flour blend.
- Dairy-Free Adaptation: This one is trickier because cream cheese is the star. But you can use a high-quality dairy-free cream cheese alternative, like Miyoko’s or Violife. Use coconut cream instead of eggnog (thinned with a little almond milk and spiced with nutmeg and cinnamon). The texture will be slightly softer, so plan to freeze it for 30 minutes before slicing.
- Spiced Rum Kick: Add 2 tablespoons of dark spiced rum to the filling along with the eggnog. It adds a warm, boozy depth that’s perfect for an adults-only gathering. Just reduce the eggnog by 2 tablespoons to keep the liquid ratio balanced.
- Pumpkin Eggnog Fusion: Swap half the eggnog for canned pumpkin puree. Add an extra teaspoon of pumpkin pie spice. This creates a gorgeous orange color and a slightly denser texture that’s incredibly cozy.
- Mini Cheesecakes: Press the crust into a lined muffin tin and fill with the batter. Bake for 18 to 22 minutes at 325°F (163°C). These are perfect for parties where guests want to grab and go. No slicing required!
I once tried a chocolate swirl variation by melting 4 ounces of dark chocolate and drizzling it into the batter before baking. It looked beautiful, but the chocolate overpowered the delicate eggnog flavor. Stick with the spice-forward profile—it’s what makes this recipe special.
Serving & Storage Suggestions
This cheesecake is a showstopper at any holiday gathering, and how you serve it can make all the difference. Here’s my advice for hosting:
Serving Temperature: Pull the cheesecake out of the fridge about 20 minutes before you plan to serve it. This takes the chill off and allows the flavors to bloom. It should be cold but not icy. Slice with a sharp knife dipped in hot water and wiped clean between cuts. This gives you those picture-perfect slices.
Presentation Tips: Place the cheesecake on a beautiful cake stand or a wooden board. Add a sprig of fresh rosemary or a few cranberries around the base for a festive touch. If you’re serving a crowd, you can pre-slice the cheesecake and arrange the slices on a platter with dollops of whipped cream on each. This makes it easy for guests to grab a plate without hovering over the cake.
What to Serve Alongside: This cheesecake is rich, so keep the sides light. A cup of hot mulled wine or spiced apple cider pairs beautifully. For a non-alcoholic option, try a chai latte. If you’re building a dessert table, offer some fresh fruit—poached pears or a citrus salad cut through the richness nicely.
Storage: Leftover cheesecake keeps well in the refrigerator for up to 5 days. Cover it tightly with plastic wrap or store slices in an airtight container. The flavors actually continue to develop, so day-three cheesecake is often even better than day-one. You can also freeze it for up to 3 months. Wrap the entire cheesecake (or individual slices) in plastic wrap, then a layer of foil. Thaw overnight in the fridge before serving.
Reheating Note: Cheesecake is best served cold. If you prefer it slightly warm, microwave individual slices for 10 to 15 seconds. But honestly, I think it’s perfect straight from the fridge with a dollop of cold whipped cream.
Nutritional Information & Benefits
Let’s be real—this is an indulgent dessert. But that doesn’t mean it can’t have a few redeeming qualities. Here’s a rough nutritional estimate per slice (based on 12 servings):
- Calories: Approximately 420-450
- Fat: 28g
- Carbohydrates: 38g
- Protein: 8g
- Sugar: 28g
Health Highlights: Eggnog is a good source of calcium and vitamin D, thanks to the milk and eggs. The ginger in the crust has anti-inflammatory properties, and nutmeg has been used in traditional medicine to aid digestion. Of course, these benefits are modest at best given the sugar and fat content, but hey—it’s the holidays. Everything in moderation, right?
Dietary Considerations: This recipe contains dairy, gluten, and eggs. For a gluten-free option, see the variations section. For a dairy-free version, you’ll need to make several substitutions. I’ve included instructions above. This recipe is not suitable for vegans as written, but I’m working on a plant-based version for next year!
My Personal Take: I don’t believe in demonizing dessert. Food is about joy, connection, and celebration. This cheesecake brings people together, and that has its own kind of nutritional value. So go ahead, have a slice. You’ve earned it.
Conclusion
This eggnog cheesecake with gingerbread crust has become my signature holiday dessert, and I honestly think it will become yours too. It’s the perfect blend of creamy, spicy, and crunchy—every bite is a little celebration. Whether you’re hosting a formal dinner party or a casual family get-together, this cheesecake delivers on flavor, presentation, and that warm, fuzzy feeling that only homemade desserts can bring.
I love how forgiving this recipe is. Even when I made mistakes—like forgetting to add the flour or overbaking it by ten minutes—it still came out delicious. That’s the mark of a great recipe. It’s designed to succeed, even when you’re juggling a dozen other things as a host. And honestly, isn’t that what we all need during the holidays? A little less stress and a lot more joy.
I’d love to hear how yours turns out. Did you try one of the variations? Did your guests fight over the last slice? Drop a comment below and let me know. And if you snap a photo, tag me on Pinterest—I’m always looking for new inspiration. Happy baking, and here’s to a holiday season filled with good food and great company!
Frequently Asked Questions
Can I use store-bought eggnog for this recipe?
Absolutely. In fact, I recommend it. Homemade eggnog can vary in thickness and spice level, which might affect the final texture. Store-bought eggnog is consistent and perfectly spiced for this recipe. Just make sure it’s full-fat for the best results.
Why did my cheesecake crack on top?
Cracks usually happen because of overmixing, overbaking, or rapid temperature changes. Make sure you’re mixing on low speed once you add the eggs, and don’t overbake—the center should still jiggle slightly. The water bath and gradual cooling are also crucial. If it does crack, don’t worry! A layer of whipped cream covers it perfectly.
Can I make this cheesecake without a water bath?
You can, but I don’t recommend it. The water bath creates a gentle, humid heat that prevents cracks and ensures a creamy texture. Without it, the edges will overcook before the center sets. If you absolutely must skip it, place a pan of hot water on the rack below the cheesecake to add moisture to the oven.
How far in advance can I make this cheesecake?
You can make it up to 3 days in advance. In fact, it tastes better after a day or two because the flavors have time to meld. Just keep it tightly covered in the refrigerator. You can also freeze it for up to 3 months—just thaw overnight in the fridge before serving.
Can I use a different crust instead of gingerbread?
Sure! A traditional graham cracker crust works fine, but you’ll miss out on that warm, spicy gingerbread flavor. You could also try a shortbread cookie crust or even crushed vanilla wafers. If you go that route, add an extra teaspoon of cinnamon and a pinch of nutmeg to the crust to keep the holiday vibe.
Pin This Recipe!
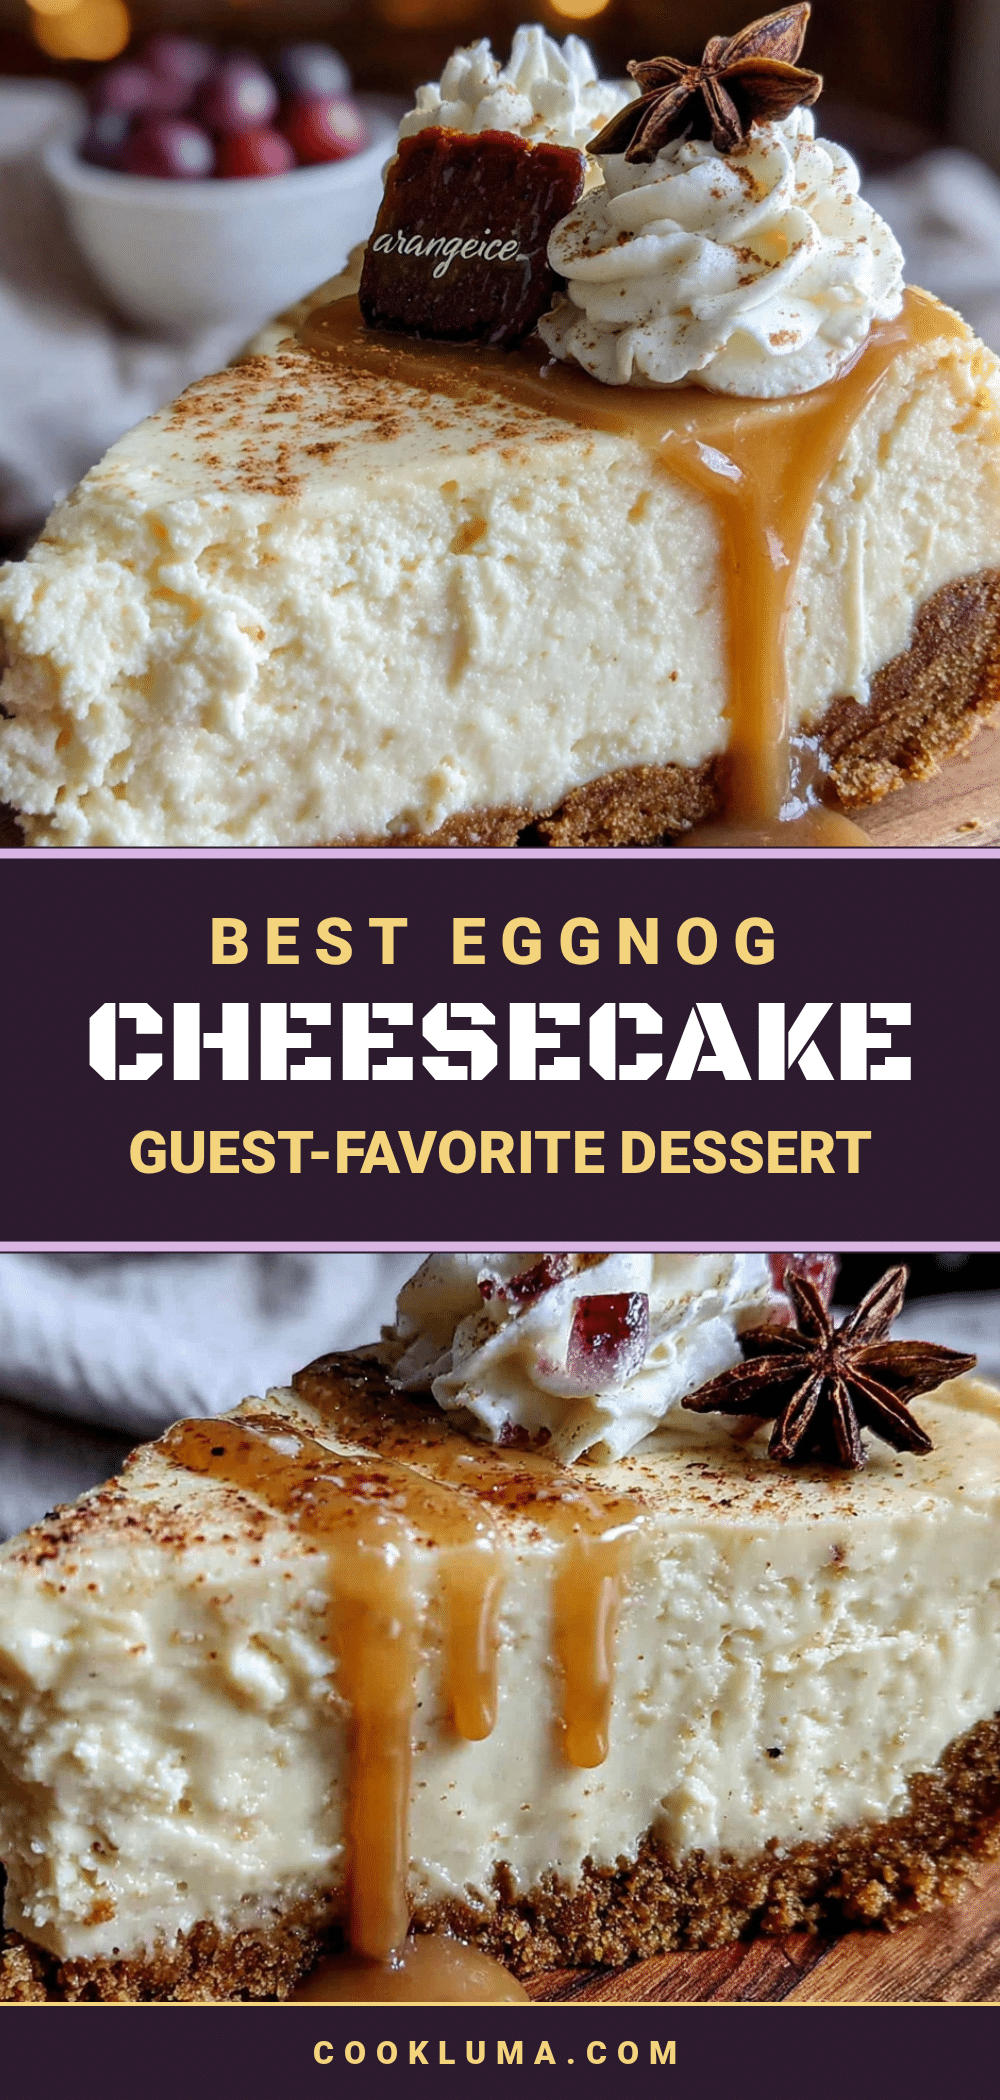
Best Eggnog Cheesecake with Gingerbread Crust
A creamy, spiced eggnog cheesecake with a crunchy ginger snap crust that’s perfect for holiday gatherings. This foolproof recipe delivers a showstopper dessert with simple ingredients and make-ahead convenience.
- Prep Time: 20 minutes
- Cook Time: 55-65 minutes
- Total Time: 8 hours (including cooling and chilling)
- Yield: 12 servings 1x
- Category: Dessert
- Cuisine: American
Ingredients
- 2 cups (240g) crushed ginger snap cookies
- 6 tablespoons (85g) unsalted butter, melted
- 2 tablespoons (25g) brown sugar, packed
- ¼ teaspoon ground cinnamon
- 32 ounces (904g) cream cheese, softened
- 1 cup (200g) granulated sugar
- 3 large eggs, room temperature
- 1 ½ cups (360ml) eggnog
- ¼ cup (30g) all-purpose flour
- 1 teaspoon vanilla extract
- ½ teaspoon ground nutmeg, freshly grated if possible
- ½ teaspoon ground cinnamon
- ¼ teaspoon ground cloves
- Pinch of salt
- 1 cup (240ml) heavy cream (for optional topping)
- 2 tablespoons (15g) powdered sugar (for optional topping)
- ½ teaspoon vanilla extract (for optional topping)
- Extra ground nutmeg or cinnamon for dusting (for optional topping)
Instructions
- Preheat oven to 325°F (163°C). Wrap the outside of a 9-inch springform pan with two layers of heavy-duty aluminum foil, going up the sides at least 2 inches. Lightly grease the inside of the pan.
- In a medium bowl, combine crushed ginger snap cookies, melted butter, brown sugar, and cinnamon. Stir until the mixture looks like wet sand and holds together when squeezed. Press firmly into the bottom of the prepared pan. Bake for 10 minutes, then set aside to cool. Leave the oven on.
- In a large mixing bowl, beat softened cream cheese with an electric mixer on medium speed until completely smooth, about 2 minutes. Scrape down the sides and bottom. Add granulated sugar and beat for another 2 minutes until light and fluffy.
- Add eggs one at a time, beating on low speed just until combined after each addition. Do not overmix.
- In a separate small bowl, whisk together eggnog, vanilla extract, flour, nutmeg, cinnamon, cloves, and salt. Pour into the cream cheese batter and beat on low speed until just combined. Scrape the bowl to ensure even mixing.
- Pour the filling over the cooled crust. Gently tap the pan on the counter to release air bubbles. Place the foil-wrapped pan into a roasting pan. Carefully pour hot water into the roasting pan until it reaches halfway up the sides of the springform pan.
- Bake at 325°F (163°C) for 55 to 65 minutes. The edges should be set and slightly puffed, but the center should still jiggle slightly.
- Turn off the oven and crack the door open. Let the cheesecake sit in the water bath for 1 hour. Remove from water bath, take off foil, and cool on a wire rack for another hour at room temperature. Cover with plastic wrap and refrigerate for at least 4 hours, preferably overnight.
- To serve, run a thin knife around the edge of the pan, release the springform clasp, and remove the sides. For the optional topping, beat heavy cream, powdered sugar, and vanilla extract until soft peaks form. Dollop or pipe onto the cheesecake and dust with extra nutmeg or cinnamon. Slice with a sharp, wet knife.
Notes
Room temperature ingredients are crucial for a smooth batter. Do not overmix once eggs and liquid are added. The water bath prevents cracking. For best flavor, make the cheesecake 1-2 days ahead. If the cheesecake cracks, cover with whipped cream.
Nutrition
- Serving Size: 1 slice
- Calories: 420450
- Sugar: 28
- Fat: 28
- Carbohydrates: 38
- Protein: 8
Keywords: eggnog cheesecake, gingerbread crust, holiday dessert, Christmas cheesecake, ginger snap crust, eggnog dessert


