I was elbow-deep in soapy water last Tuesday—the good kind of Tuesday, the one where you actually have a plan for dinner—when the smell of cinnamon and nutmeg hit me from nowhere. Not from my kitchen, mind you. I think it drifted in from the neighbor’s open window, or maybe it was just my brain playing tricks on me. But suddenly I was seven years old, sitting cross-legged on my Aunt Maggie’s linoleum floor, my fingers dusted with flour, pressing a cookie cutter shaped like a turkey into dough that was way too warm. She’d always let us get away with that, even though the cookies puffed up all wrong. She said it gave them “character.” I didn’t care about character. I cared about the little white icing smile I was about to pipe onto that turkey’s face.
That neighbor’s window closed, the smell faded, and I was back in my kitchen with a sink full of dishes. But the memory stuck. Aunt Maggie has been gone six years now, and I haven’t made those cookies since I was a kid. Honestly, I’d forgotten about them completely. But that little ghost of cinnamon got me thinking—could I make them with my own kids? Would they even care about turkeys and pumpkins when there’s a whole world of store-baked sugar cookies out there? Turns out, they do. Maybe you’ve been there, standing in the baking aisle, trying to decide if the effort is worth the mess. Let me tell you, it is. These Kid-Approved Iced Thanksgiving Cookie Cutouts aren’t just about the cookies. They’re about the flour on the floor and the lopsided icing smiles.
Why You’ll Love This Recipe
I’ve tested a lot of sugar cookie recipes over the years. Some stay rock-hard, some spread into blobs, and some just taste like sweet cardboard. This one? It’s the Goldilocks of cookie dough. It holds its shape beautifully—that turkey keeps its waddle, that pumpkin keeps its ridges—but it still melts in your mouth. I’ve tweaked the butter-to-flour ratio over maybe a dozen batches, and this is the version that finally made my husband say, “Wait, you made these?” (He meant it as a compliment, I swear.)
- Kid-Friendly from Start to Finish : The dough is forgiving enough for little hands to roll and cut without falling apart. No stress, just fun.
- Simple Pantry Ingredients : Butter, sugar, flour, eggs, vanilla—you probably have everything already. No trips to a specialty store for obscure extracts.
- Perfect for Thanksgiving Gatherings : These cookies are a hit at school parties, family dinners, or just a quiet afternoon of decorating with the kids.
- Holds Its Shape Perfectly : No spreading, no puffing into unrecognizable blobs. Your turkey will look like a turkey, I promise.
- The Icing is Foolproof : A simple powdered sugar glaze that hardens just enough to stack, but stays soft enough to bite into. No royal icing fuss.
What makes this recipe different from every other cutout cookie out there is the chilling step. I know, I know—waiting is the worst part. But that thirty minutes in the fridge is the secret to crisp edges and a tender center. I’ve skipped it before (because who has time?), and I ended up with cookies that looked like abstract art. Not the good kind. So trust me on this one. It’s the kind of recipe that makes you feel like a hero when the kids run into the kitchen and see a plate of turkeys and pumpkins waiting for them. It’s comfort, tradition, and a little bit of mess—all rolled into one perfect bite.
What Ingredients You Will Need
This recipe uses simple, wholesome ingredients to deliver a buttery, tender cookie that’s sturdy enough for little decorators. No fancy stuff here—just the basics, done right.
For the Cookie Dough
- 1 cup (226g) unsalted butter, softened to room temperature (I use Land O’Lakes—it’s consistent and reliable)
- 1 cup (200g) granulated sugar
- 1 large egg, room temperature (cold egg will make the dough stiff)
- 1 teaspoon vanilla extract (pure, not imitation, if you can swing it)
- 1/2 teaspoon almond extract (optional, but it adds a lovely little something)
- 2 1/2 cups (312g) all-purpose flour, spooned and leveled (don’t scoop straight from the bag—you’ll pack in too much)
- 1/2 teaspoon baking powder
- 1/4 teaspoon salt
For the Icing

- 2 cups (240g) powdered sugar, sifted (lumps are the enemy of smooth icing)
- 3-4 tablespoons milk (whole milk works best, but 2% is fine)
- 1/2 teaspoon vanilla extract
- Food coloring (gel is better than liquid—it doesn’t thin the icing out)
Ingredient Tips and Substitutions
If you’re dairy-free, you can swap the butter for a good-quality vegan butter stick (I’ve had success with Earth Balance). The texture will be slightly less tender, but it still works. For a gluten-free version, use a 1:1 gluten-free flour blend that contains xanthan gum—I like King Arthur’s. Just know the dough will be a little more fragile, so handle it gently.
When it comes to food coloring, I’ve learned the hard way that liquid colors can make your icing too runny. Gel colors give you vibrant shades without changing the consistency. For the turkeys, you’ll want brown, orange, red, and yellow. For the pumpkins, just orange and green. My kids always end up with a few purple turkeys, and honestly, those are my favorites.
Equipment Needed
You don’t need a fancy bakery setup for these cookies. Here’s what you’ll need:
- Turkey and pumpkin cookie cutters (I found a set of four on Amazon for under ten bucks—they’re metal and still sharp after three years)
- Rolling pin (a regular one is fine, but if you have adjustable rings, they’re a game-changer for even thickness)
- Baking sheets (two is ideal so you can rotate batches)
- Parchment paper (non-negotiable—keeps the bottoms from browning too fast)
- Electric mixer (hand or stand, both work)
- Mixing bowls
- Plastic wrap
- Cooling rack
- Piping bags or zip-top bags (for the icing)
- Small round piping tip (or just snip a tiny corner off the bag)
If you don’t have piping bags, don’t sweat it. A zip-top bag with a tiny corner snipped off works just as well. I’ve done it a hundred times. Just don’t snip too big a hole, or you’ll end up with icing blobs instead of tidy lines. Ask me how I know.
Preparation Method
Alright, let’s get to it. This recipe has a few steps, but I promise it’s straightforward. Here’s how to make these Kid-Approved Iced Thanksgiving Cookie Cutouts from start to finish.
Step 1: Make the Dough
In a large bowl, beat the softened butter and granulated sugar together until light and fluffy—about 3 minutes with a hand mixer, 2 minutes with a stand mixer. You want it to look pale and almost creamy. Scrape down the sides once. Add the egg, vanilla extract, and almond extract (if using), and beat until combined. It might look a little curdled at this point—that’s normal, don’t panic.
In a separate bowl, whisk together the flour, baking powder, and salt. Gradually add the dry ingredients to the wet mixture, mixing on low speed until just combined. The dough will be soft and slightly sticky. That’s perfect. If it feels too sticky to handle, add a tablespoon more flour, but no more than that.
Step 2: Chill the Dough
Divide the dough into two disks, wrap each tightly in plastic wrap, and refrigerate for at least 30 minutes. This is the step you cannot skip. I’ve tried. The dough needs to firm up so the cookies hold their shape. Thirty minutes is the minimum—an hour is better. You can even make the dough a day ahead and keep it in the fridge.
Step 3: Preheat and Prep
Preheat your oven to 350°F (175°C). Line two baking sheets with parchment paper. Take one disk of dough out of the fridge and let it sit on the counter for 5 minutes—just enough so it’s rollable but still cold.
Step 4: Roll and Cut
On a lightly floured surface, roll the dough to about 1/4-inch thickness. I use a rolling pin with adjustable rings set to 1/4 inch, but if you don’t have those, just eyeball it. Aim for even thickness so the cookies bake uniformly. Cut out your turkeys and pumpkins, re-rolling the scraps once. (After that, the dough gets tough, so I just bake the scraps as “taste testers.”)
Place the cutouts on the prepared baking sheets, spacing them about 2 inches apart. They don’t spread much, but they do need a little breathing room.
Step 5: Bake
Bake for 8-10 minutes, rotating the pans halfway through. The cookies should be set around the edges but still pale on top—they shouldn’t be brown. Let them cool on the baking sheet for 5 minutes, then transfer to a wire rack to cool completely. This is important: if you try to ice them while they’re even slightly warm, the icing will melt into a puddle. I learned that one the hard way.
Step 6: Make the Icing
In a medium bowl, whisk together the powdered sugar, 3 tablespoons of milk, and the vanilla extract. Start with 3 tablespoons—you want a consistency that’s thick enough to hold its shape but thin enough to pipe. Add the fourth tablespoon only if it’s too thick. Divide the icing into small bowls and tint with gel food coloring. For the turkeys, I do brown for the body, orange for the beak, and a little red for the wattle. For the pumpkins, orange with a green stem.
Step 7: Decorate
Spoon the icing into piping bags or zip-top bags. Snip a tiny corner off each bag. Let the kids go wild. I usually pipe the outlines and let them fill in the centers, but if your kids are older, they can do the whole thing. For the turkeys, I pipe a brown base, then add orange beaks and red wattles. For the pumpkins, I pipe orange ridges and a green stem. You can also add sprinkles or candy eyes if you’re feeling extra.
Let the icing set for at least 1 hour before stacking or serving. If you’re impatient (like me), pop them in the fridge for 20 minutes.
Cooking Tips & Techniques
I’ve made more batches of these cookies than I can count, and I’ve messed up plenty. Here are the things I wish someone had told me:
- Don’t overwork the dough. The more you handle it, the tougher the cookies get. Mix until just combined, and re-roll scraps only once.
- Chill between batches. If the dough gets too warm, it will stick to your counter and lose its shape. Pop it back in the fridge for 10 minutes if it feels soft.
- Use a light hand with flour. Too much flour on your rolling surface will dry out the dough. I use a light dusting and re-flour as needed.
- Rotate your pans. Ovens are liars. They heat unevenly. Rotating the pans halfway through ensures even browning.
- Cool completely before icing. I cannot stress this enough. Warm cookies + icing = disaster. Wait until they’re fully cool to the touch.
- Thin the icing gradually. Add milk one teaspoon at a time. You want the icing thick enough to pipe but thin enough to spread slightly. Think toothpaste, not water.
One time, I forgot to chill the dough and tried to cut out shapes anyway. The cookies spread into flat, sad ovals that looked nothing like turkeys. My kids called them “blobs.” They ate them anyway, but it was a good lesson. Patience pays off.
Variations & Adaptations
These cookies are endlessly customizable. Here are a few ways to switch things up:
- Gluten-Free Version : Swap the all-purpose flour for a 1:1 gluten-free blend. The dough will be a bit more crumbly, so chill it for an extra 15 minutes before rolling.
- Vegan Version : Use vegan butter and a flax egg (1 tablespoon ground flaxseed + 3 tablespoons water, let sit for 5 minutes). The cookies will be slightly less tender, but still delicious.
- Spiced Sugar Cookies : Add 1 teaspoon cinnamon, 1/2 teaspoon nutmeg, and 1/4 teaspoon cloves to the flour mixture. It gives the cookies a warm, cozy fall flavor.
- Chocolate-Dipped : Skip the icing and dip half of each cooled cookie in melted dark chocolate. Sprinkle with sea salt for a grown-up twist.
- Royal Icing : If you want a harder, glossier finish, use royal icing instead of the glaze. It’s more work, but it gives you that bakery-style look.
- Mini Cutouts : Use smaller cookie cutters to make bite-sized cookies. Reduce baking time to 6-7 minutes.
My personal favorite variation is the spiced version. I made it for a Friendsgiving party last year, and they disappeared before the turkey even hit the table. The cinnamon and nutmeg just feel like fall in a cookie.
Serving & Storage Suggestions
These cookies are best served at room temperature, after the icing has fully set. I like to arrange them on a big platter with a few fall leaves scattered around—it makes for a pretty centerpiece. They pair beautifully with a warm cup of apple cider or a glass of cold milk.
For storage, place the cookies in an airtight container at room temperature. They’ll stay fresh for up to 5 days. If you stack them, put a sheet of parchment paper between layers to keep the icing from sticking. Do not refrigerate them—the fridge will dry them out and make the icing crack.
You can also freeze the baked, un-iced cookies for up to 3 months. Wrap them tightly in plastic wrap, then foil. When you’re ready to decorate, thaw them at room temperature and ice as directed. The flavor actually gets a little better after freezing—something about the butter settling in.
If you have leftover icing, you can store it in the fridge for up to a week. Just bring it to room temperature and whisk before using. It might need a drop of milk to loosen it up.
Nutritional Information & Benefits
Let’s be real—these are cookies, not health food. But here’s the approximate nutritional breakdown per cookie (based on 24 cookies):
- Calories: 185
- Fat: 9g
- Carbohydrates: 25g
- Protein: 2g
- Sugar: 14g
The butter provides a small amount of vitamin A, and the eggs add a bit of protein. But honestly, the real benefit here is the joy of making something together as a family. These cookies are about connection, not nutrition. That said, you can reduce the sugar by 1/4 cup without affecting the texture too much—just expect a slightly less sweet cookie.
If you’re watching your sugar intake, serve these as a special treat rather than an everyday snack. They’re perfect for Thanksgiving dessert tables or classroom parties where a little indulgence is the whole point.
Conclusion
These Kid-Approved Iced Thanksgiving Cookie Cutouts are more than just a recipe—they’re a memory in the making. The smell of butter and vanilla filling your kitchen, the laughter when a turkey loses its head to a wonky cutter, the pride on a little face holding up a perfectly iced pumpkin. That’s what this is about. The cookies are delicious, sure, but the real magic is in the mess.
I hope you make these with your family this Thanksgiving. Don’t worry about making them perfect. Let the kids pipe lopsided smiles and purple turkeys. Those are the ones you’ll remember. And when you bite into one, still slightly warm from the oven, I think you’ll understand why I had to recreate that memory from my aunt’s kitchen.
If you try this recipe, I’d love to hear about it. Leave a comment below and tell me about your favorite Thanksgiving baking tradition. Or share a photo of your cookies—I promise I won’t judge the purple turkeys. Happy baking, friends!
Frequently Asked Questions
Can I make the dough ahead of time?
Absolutely. You can make the dough up to 3 days in advance and keep it wrapped tightly in the fridge. Let it sit at room temperature for 10 minutes before rolling so it’s pliable enough to work with.
Why did my cookies spread?
Most likely, the dough wasn’t chilled enough. Make sure you refrigerate it for at least 30 minutes before rolling and cutting. Also, check that your butter wasn’t too soft when you started—it should be softened, not melted.
Can I freeze the decorated cookies?
I don’t recommend freezing them after they’re iced. The icing can get sticky or crack when thawed. Freeze the un-iced cookies instead, then decorate after they’ve thawed.
What if I don’t have turkey and pumpkin cookie cutters?
You can use any fall-themed cutters—leaves, acorns, apples. Or just cut the dough into circles with a glass and decorate them like mini pumpkins. No one will know the difference.
How do I get the icing to harden faster?
Pop the iced cookies in the fridge for 15-20 minutes. The cold helps the icing set quickly. Just make sure they’re on a flat surface so the icing doesn’t run.
Pin This Recipe!
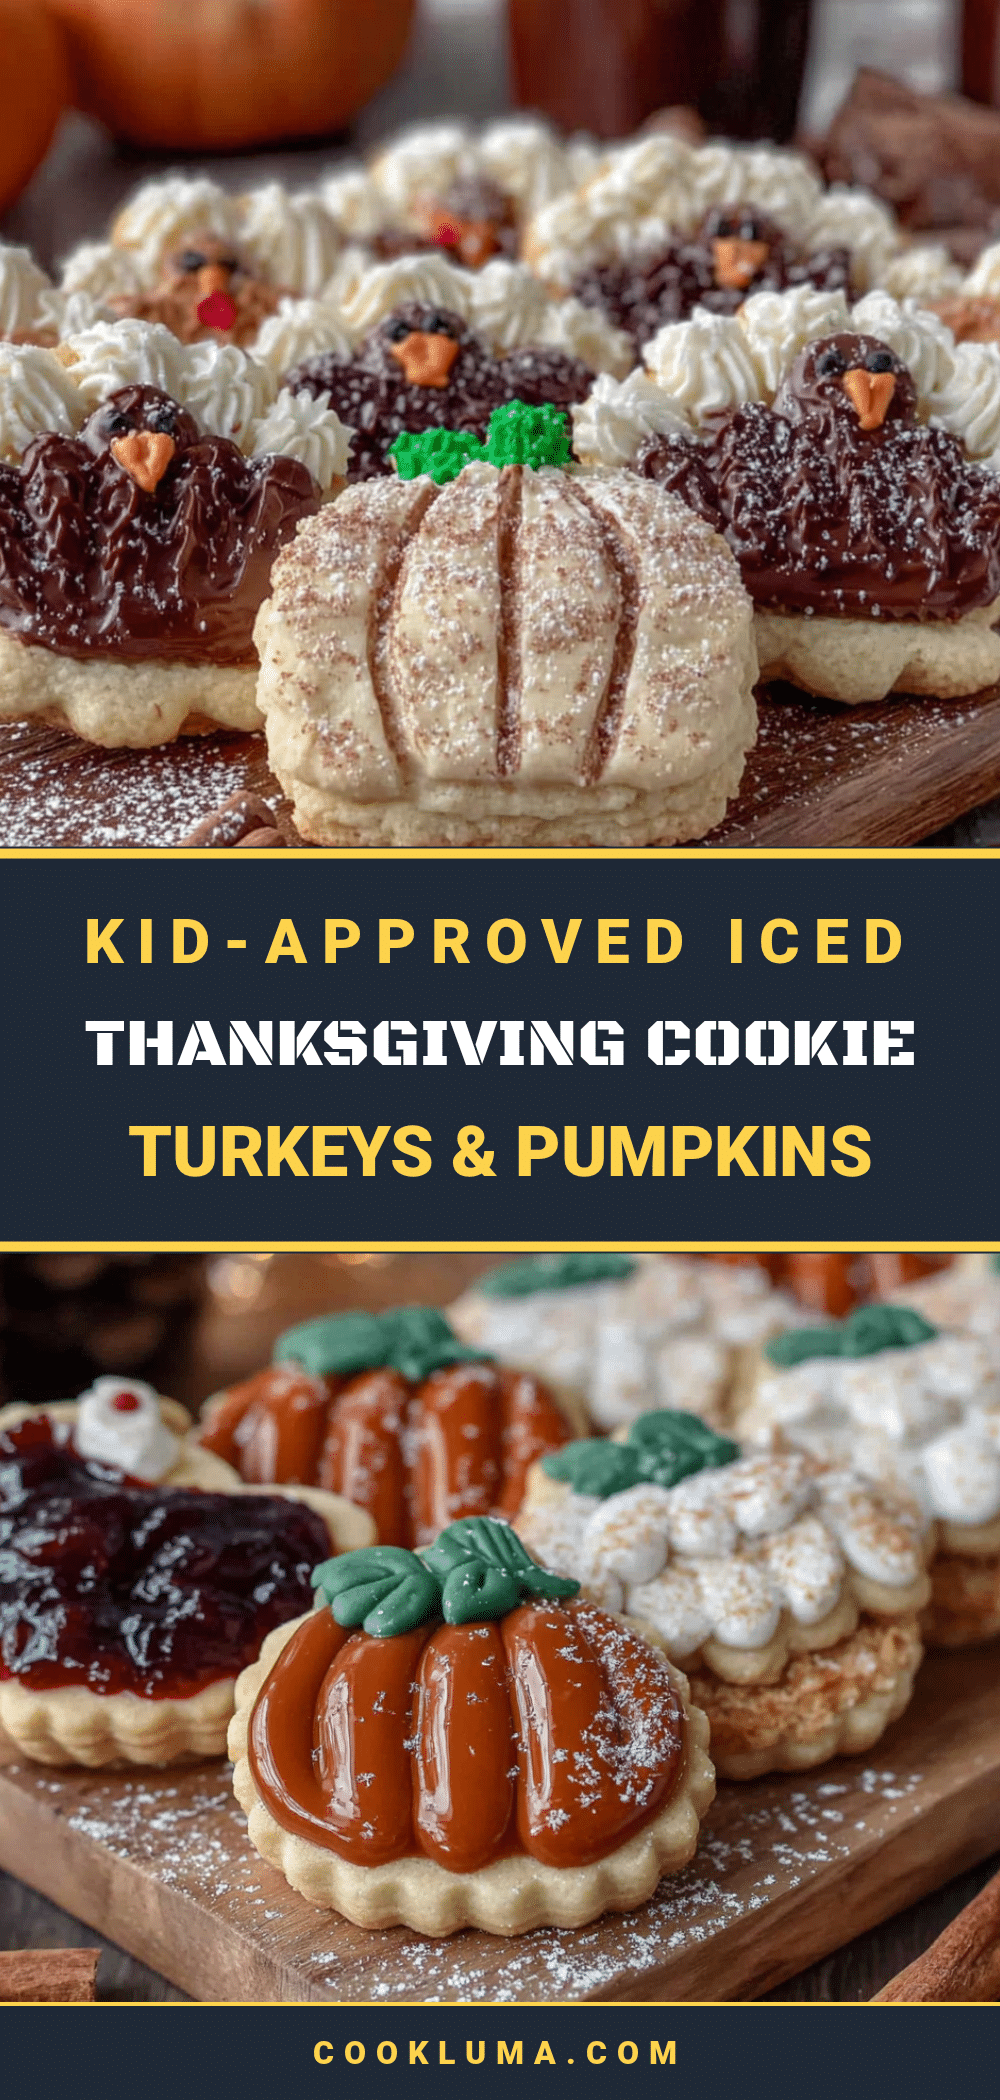
Best Kid-Approved Iced Thanksgiving Cookie Cutouts

These buttery, tender sugar cookies hold their shape perfectly and are topped with a simple, foolproof icing. Perfect for making with kids, they capture the joy of Thanksgiving baking with every lopsided smile and purple turkey.
- Prep Time: 30 minutes
- Cook Time: 10 minutes
- Total Time: 1 hour 40 minutes (includes chilling and setting)
- Yield: 24 cookies 1x
- Category: Dessert
- Cuisine: American
Ingredients
- 1 cup (226g) unsalted butter, softened to room temperature
- 1 cup (200g) granulated sugar
- 1 large egg, room temperature
- 1 teaspoon vanilla extract (pure preferred)
- 1/2 teaspoon almond extract (optional)
- 2 1/2 cups (312g) all-purpose flour, spooned and leveled
- 1/2 teaspoon baking powder
- 1/4 teaspoon salt
- 2 cups (240g) powdered sugar, sifted
- 3–4 tablespoons milk (whole milk preferred)
- 1/2 teaspoon vanilla extract
- Food coloring (gel preferred)
Instructions
- In a large bowl, beat the softened butter and granulated sugar together until light and fluffy, about 3 minutes with a hand mixer or 2 minutes with a stand mixer. Scrape down the sides once.
- Add the egg, vanilla extract, and almond extract (if using), and beat until combined. The mixture may look slightly curdled.
- In a separate bowl, whisk together the flour, baking powder, and salt. Gradually add the dry ingredients to the wet mixture, mixing on low speed until just combined. The dough will be soft and slightly sticky.
- Divide the dough into two disks, wrap each tightly in plastic wrap, and refrigerate for at least 30 minutes (1 hour is better).
- Preheat oven to 350°F (175°C). Line two baking sheets with parchment paper.
- On a lightly floured surface, roll one disk of dough to about 1/4-inch thickness. Cut out shapes using turkey and pumpkin cookie cutters, re-rolling scraps once.
- Place cutouts on prepared baking sheets, spacing them about 2 inches apart.
- Bake for 8-10 minutes, rotating the pans halfway through. Cookies should be set around the edges but still pale on top.
- Let cookies cool on the baking sheet for 5 minutes, then transfer to a wire rack to cool completely.
- In a medium bowl, whisk together the powdered sugar, 3 tablespoons of milk, and the vanilla extract. Add the fourth tablespoon only if too thick. Divide icing into small bowls and tint with gel food coloring.
- Spoon icing into piping bags or zip-top bags. Snip a tiny corner off each bag. Decorate cookies as desired.
- Let icing set for at least 1 hour before stacking or serving (or refrigerate for 20 minutes).
Notes
Chilling the dough is essential to prevent spreading. Do not overwork the dough. Cool cookies completely before icing. For dairy-free, use vegan butter; for gluten-free, use a 1:1 gluten-free flour blend with xanthan gum. Icing can be stored in the fridge for up to a week.
Nutrition
- Serving Size: 1 cookie
- Calories: 185
- Sugar: 14
- Sodium: 75
- Fat: 9
- Saturated Fat: 5
- Carbohydrates: 25
- Protein: 2
Keywords: Thanksgiving cookies, sugar cookies, cutout cookies, kid-friendly, iced cookies, turkey cookies, pumpkin cookies, fall baking


