My neighbor, Dave, wasn’t trying to impress anyone. I’d stopped by to drop off a package that got delivered to my house by mistake, and this smell hit me before I even knocked on the door. You know that smell—the one that makes your brain stop processing anything else until you figure out what it is? It was nutty and sweet and a little bit like toasted hazelnuts, but with something deeper underneath. I stood there on his porch like a weirdo, just breathing it in.
Dave opened the door holding a baking sheet in one hand and a spatula in the other. “Oh hey,” he said, like it was totally normal to be answering the door mid-cooking. “Package? Thanks.” He was about to close the door, and honestly, I almost let him. But the smell was still there, and I blurted out, “What are you making?” He looked down at the baking sheet like he’d forgotten he was holding it. “Oh, this? Just squash. My wife bought some weird little squash at the store.”
He let me peek at the pan, and let me tell you—these tiny orange squashes were sitting in this glossy, amber-colored sauce with crispy sage leaves scattered around them. They looked like something from a fancy restaurant menu, not something you throw together on a random Tuesday night. Dave shrugged and said, “It’s just butter and squash. Nothing special.” But I knew better. I asked for the details, and he rattled off the steps while I scribbled them on the back of the misdelivered envelope. That was three years ago, and I’ve been making this quick roasted honeynut squash with brown butter ever since. It’s the recipe I bring to every potluck, the one that makes people close their eyes when they take the first bite, and the one that proves you don’t need a ton of time or fancy skills to make something unforgettable on a weeknight.
Why You’ll Love This Recipe
Look, I get it. Weeknights are chaos. You’re tired, you’re hungry, and the last thing you want is a recipe with twenty ingredients and a two-hour cook time. This quick roasted honeynut squash with brown butter is the opposite of all that. It’s the kind of dish that makes you look like you tried way harder than you actually did.
- Ready in under 30 minutes: From the moment you pull the squash out of the fridge to the moment you’re taking that first buttery bite, we’re talking about 25 minutes max. That’s faster than ordering takeout in some neighborhoods.
- Five ingredients, max: Honeynut squash, butter, fresh sage, salt, and maybe a pinch of cinnamon if you’re feeling fancy. That’s it. No trips to three different grocery stores.
- One pan, minimal cleanup: Everything happens on a single baking sheet. You can literally line it with parchment paper and throw it away when you’re done. Your future self will thank you.
- Impressive enough for company, easy enough for a Tuesday: I’ve served this at Thanksgiving alongside the turkey, and I’ve eaten it straight off the pan while standing over the kitchen counter on a random Wednesday. It works for both.
- That brown butter magic: This is the part that makes people think you’re a culinary genius. Browning butter takes maybe three extra minutes, but it transforms the whole dish into something nutty and complex and deeply satisfying.
What makes this recipe different from all the other roasted squash recipes out there? It’s the ratio. Most recipes drown squash in oil or butter, making it soggy instead of caramelized. This one uses just enough brown butter to coat each piece, letting the natural sugars in the honeynut squash concentrate and caramelize in the oven. The result is tender on the inside, golden and slightly crisp on the edges, with a flavor that tastes like autumn in a single bite. Honestly, it’s the kind of recipe that makes you wonder why you ever bothered with complicated side dishes.
What Ingredients You Will Need
This recipe uses simple, everyday ingredients to create something that tastes way more complex than it has any right to be. The key is using good-quality butter and fresh sage—those two ingredients do all the heavy lifting here.
- Honeynut squash (4-6, about 2 pounds total): These little guys are smaller and sweeter than butternut squash, with a thinner skin that you don’t even need to peel. Look for ones that feel heavy for their size and have a deep orange color. If you can’t find honeynut squash, you can substitute butternut squash—just peel it first and cut it into 1-inch cubes. I’ve also used delicata squash with great results since the skin is edible too.
- Unsalted butter (4 tablespoons, or 1/2 stick): Please use unsalted butter here. Salted butter can foam unpredictably when you’re browning it, and you want to control the salt level yourself. I prefer Kerrygold or Plugrà for the best flavor, but any good-quality unsalted butter will work. For a dairy-free version, use a high-quality vegan butter or coconut oil—the flavor will be different but still delicious.
- Fresh sage leaves (10-12 leaves): Fresh sage is non-negotiable here. Dried sage just doesn’t have the same aromatic quality, and it burns too easily. The leaves will crisp up in the brown butter, turning into these little crunchy flavor bombs. If you don’t have sage, you can use fresh thyme or rosemary—both work beautifully.
- Kosher salt (1/2 teaspoon, plus more to taste): I use Diamond Crystal kosher salt because it’s less salty by volume than Morton’s, which gives me more control. If you’re using table salt, reduce the amount by about half.
- Black pepper (1/4 teaspoon, freshly ground): Freshly ground pepper makes a difference here. The pre-ground stuff just doesn’t have the same pop.
- Optional: Maple syrup (1 tablespoon): This is totally optional, but if your squash isn’t as sweet as you’d like, a tiny drizzle of maple syrup before roasting can bump up the caramelization. I only add this in early spring when the squash has been sitting in storage for a while.
- Optional: Cinnamon or cayenne (pinch): A pinch of cinnamon adds warmth, while a pinch of cayenne adds a subtle heat that plays beautifully with the brown butter. I usually go with cinnamon in the fall and cayenne in the winter when I want something cozier.
Equipment Needed
You don’t need a lot of fancy equipment for this recipe, which is exactly how I like it on a busy weeknight. Here’s what you’ll need:
- Baking sheet (half-sheet pan, 18×13 inches): A rimmed baking sheet is important here because the brown butter can pool a bit, and you don’t want it dripping onto the bottom of your oven. I use Nordic Ware aluminum baking sheets—they’re affordable, heat evenly, and last forever. If you don’t have one, any rimmed baking sheet will work.
- Parchment paper or aluminum foil: Line your baking sheet for easy cleanup. I prefer parchment paper because nothing sticks to it, but foil works in a pinch.
- Small skillet or saucepan: You’ll need this for browning the butter. A light-colored pan is actually better here because you can see the butter solids turning brown—dark pans make it harder to judge the color.
- Chef’s knife and cutting board: Honeynut squash are small enough that you can cut them with a decent chef’s knife. No need to break out the cleaver.
- Large spoon or bench scraper: For scooping out the seeds. A regular spoon works fine, but a bench scraper makes quick work of it.
- Measuring spoons: For the salt and pepper. I’ve been using the same set of OXO measuring spoons for a decade, and they still work perfectly.
That’s it. No food processor, no stand mixer, no special gadgets. Just basic kitchen tools that you probably already own.
Preparation Method
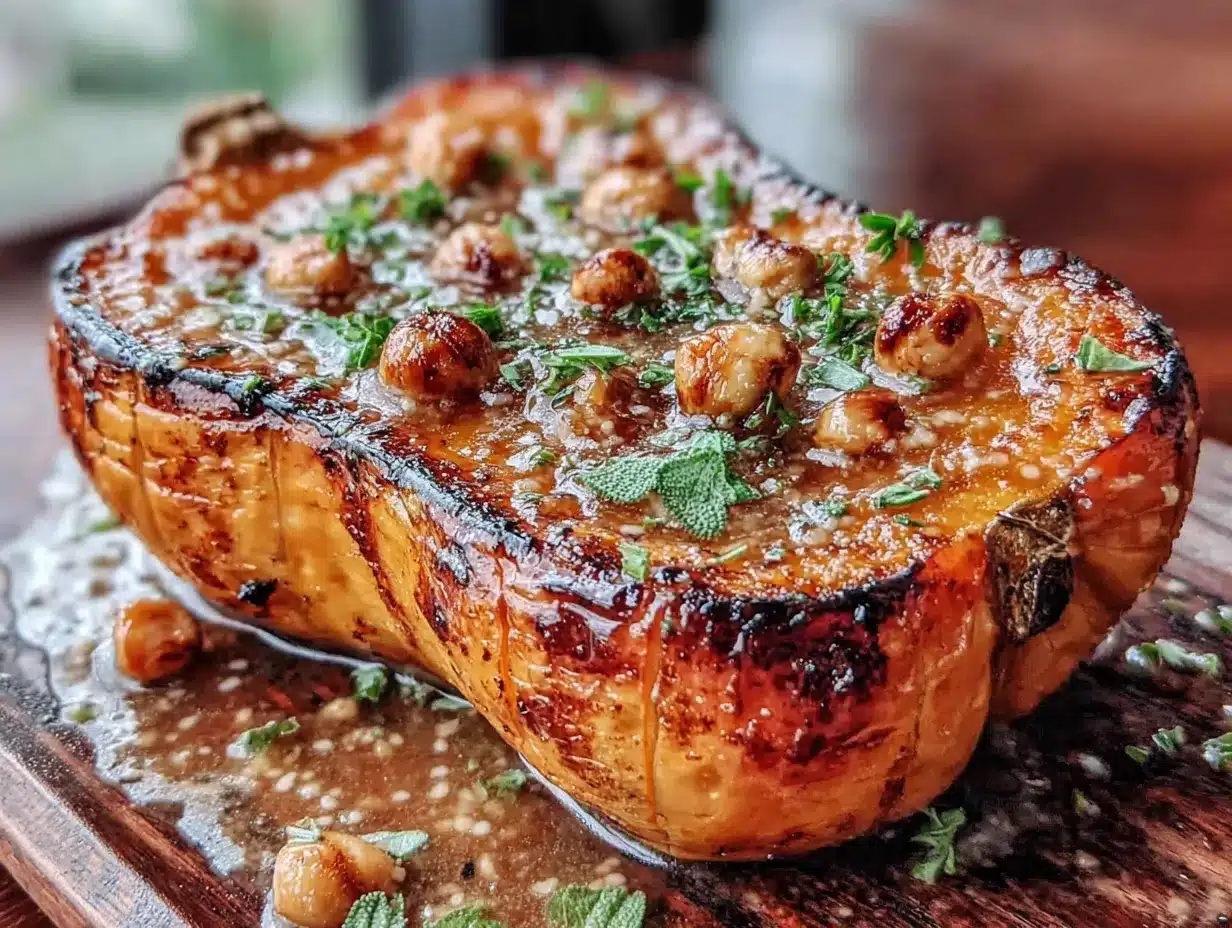
Let me walk you through this step by step. I’ve made this quick roasted honeynut squash with brown butter probably fifty times by now, so I’ve figured out all the little tricks that make it come out perfectly every time.
- Preheat your oven to 425°F (220°C). This is important—you want the oven screaming hot so the squash caramelizes instead of steaming. While the oven heats up, line your baking sheet with parchment paper. Don’t skip this step unless you enjoy scrubbing burned-on butter off your pans.
- Prepare the squash. Cut each honeynut squash in half lengthwise, from the stem end to the pointy end. Be careful—these little guys are dense, and your knife can slip. I like to cut off a tiny slice from the bottom of each squash first so it sits flat on the cutting board. Use a spoon to scoop out the seeds and stringy bits. Don’t worry about getting every last strand—a few leftover seeds add a nice texture if they roast up.
- Season the squash. Place the squash halves cut-side up on the prepared baking sheet. Sprinkle them with salt and pepper. Don’t be shy with the salt—squash needs it to bring out the sweetness. At this point, if you’re using cinnamon or cayenne, sprinkle that on too.
- Make the brown butter. This is the step that makes everything magical. Put the butter in a small skillet or saucepan over medium heat. Let it melt completely, then swirl the pan occasionally. After about 2-3 minutes, the butter will start to foam. Keep swirling. You’ll see little specks forming at the bottom of the pan—those are the milk solids toasting. When the butter turns a golden-amber color and smells nutty (like hazelnuts or toasted almonds), it’s done. This usually takes 4-5 minutes total. Remove it from the heat immediately—it can go from perfect to burnt in about 15 seconds.
- Add the sage. Drop the sage leaves into the hot brown butter. They’ll sizzle and crisp up almost immediately. Swirl them around for about 10 seconds, then pour the whole thing—butter and sage leaves—over the squash halves. Use a pastry brush or spoon to make sure each half gets some of that brown butter goodness.
- Roast the squash. Put the baking sheet in the oven and roast for 18-22 minutes. The exact time depends on the size of your squash. You’ll know they’re done when the edges are golden and caramelized, and you can easily pierce the flesh with a fork. The skin should be slightly wrinkled and tender.
- Finish and serve. Remove the baking sheet from the oven. Let the squash cool for 2-3 minutes on the pan—they’ll continue to caramelize slightly as they cool. Transfer to a serving platter, making sure to pour any remaining brown butter from the pan over the top. Arrange the crispy sage leaves on top for garnish.
A few things I’ve learned the hard way: Don’t crowd the pan. If the squash halves are touching each other, they’ll steam instead of roast. Leave at least an inch of space between them. Also, if your squash are different sizes, check the smaller ones a few minutes early—they’ll cook faster than the bigger ones. And whatever you do, don’t skip the resting time at the end. Those few minutes let the brown butter soak into the squash, making every bite more flavorful.
Cooking Tips & Techniques
I’ve messed up this recipe more times than I’d like to admit, so let me save you the trouble. Here are the things I wish someone had told me the first time I made this quick roasted honeynut squash with brown butter.
Watch the butter like a hawk. I cannot stress this enough. Brown butter goes from perfect to burnt faster than you’d believe. The first time I made this, I got distracted by my phone and ended up with butter that looked more like used motor oil. It tasted bitter and awful, and I had to start over. Stay at the stove, keep swirling, and trust your nose—when it smells nutty and toasty, it’s ready.
Cut the squash evenly. If some halves are thicker than others, they’ll cook at different rates. I’ve started cutting the stem end off completely on the bigger squash so they’re more uniform in size. It’s a small thing, but it makes a big difference in how evenly everything roasts.
Don’t peel the squash. I know it’s tempting, especially if you’re used to peeling butternut squash. But the skin on honeynut squash is thin and tender, and it gets even more tender as it roasts. Plus, the skin holds the squash together, so you get these nice little boats that are easy to pick up and eat. If you really can’t stand the idea of eating the skin, it peels off easily after roasting.
Use the broiler for extra caramelization. If you want those deep, dark caramelized edges that look like they came from a restaurant kitchen, switch your oven to broil for the last 2 minutes of cooking. Watch it closely—things can burn fast under the broiler. I only do this when I’m serving the squash to guests, because honestly, it’s delicious either way.
Make extra brown butter. I always make a little more brown butter than I need and save the extra in a jar in the fridge. It’s amazing on roasted vegetables, pasta, popcorn, or even drizzled over ice cream. Once you start making brown butter, you’ll find excuses to use it everywhere.
Variations & Adaptations
One of the things I love about this quick roasted honeynut squash with brown butter is how adaptable it is. Here are some variations I’ve tried over the years:
Maple-Balsamic Version: Before roasting, drizzle the squash halves with 1 tablespoon of balsamic vinegar and 1 tablespoon of maple syrup, along with the brown butter. The vinegar adds a tangy sweetness that cuts through the richness of the butter. This version is my go-to for holiday dinners—it’s fancy enough for Thanksgiving but easy enough for a random Thursday.
Spicy Version: Add 1/4 teaspoon of red pepper flakes to the brown butter along with the sage. The heat builds slowly and catches you by surprise in the best way. I make this version in the dead of winter when I need something to warm me up from the inside out. A drizzle of honey at the end balances the heat perfectly.
Cheesy Version: After roasting, sprinkle the squash with 1/4 cup of crumbled goat cheese or feta cheese and return to the oven for 2 minutes. The cheese gets slightly melted and tangy, which pairs beautifully with the sweet squash and nutty brown butter. This is my favorite version for brunch—it feels indulgent but comes together in minutes.
Grain Bowl Addition: Cube the roasted squash (skin and all) and toss it into a bowl with cooked farro, arugula, toasted walnuts, and a simple lemon vinaigrette. The brown butter from the squash coats everything and acts as the dressing. This is my go-to lunch the next day, if there’s any left over.
Vegan Version: Substitute the butter with a high-quality vegan butter or coconut oil. The flavor won’t be exactly the same, but the caramelization will still be beautiful. I’ve also used olive oil in a pinch, and while it’s not as rich, it still tastes great.
Serving & Storage Suggestions
This quick roasted honeynut squash with brown butter is best served warm, straight from the oven. The brown butter is still glossy and the sage leaves are still crispy—that’s the sweet spot. I like to arrange the squash halves on a platter with the crispy sage leaves scattered on top and a little extra flaky salt (like Maldon) sprinkled over everything just before serving.
As for what to serve alongside it, the possibilities are endless. It’s fantastic with roasted chicken or pork chops for a complete weeknight dinner. I’ve also served it alongside a simple green salad with lemon vinaigrette for a lighter meal. During the holidays, it holds its own next to turkey, stuffing, and all the other traditional sides. And honestly? Sometimes I just eat two or three halves as a main course with a piece of crusty bread to soak up the brown butter.
If you have leftovers (which is rare in my house), store them in an airtight container in the refrigerator for up to 4 days. The squash will soften a bit, but the flavor actually gets better as it sits. To reheat, pop the squash in a 350°F oven for 5-7 minutes, or microwave for 30-60 seconds. The sage leaves will lose their crunch, so I usually add fresh ones on top after reheating. You can also freeze the roasted squash for up to 3 months—just let it cool completely, then transfer to a freezer-safe bag or container. Thaw in the refrigerator overnight and reheat in the oven.
Nutritional Information & Benefits
Honeynut squash is a nutritional powerhouse disguised as a cute little vegetable. It’s packed with vitamin A (one serving provides over 100% of your daily needs), vitamin C, potassium, and fiber. The deep orange color comes from beta-carotene, which your body converts into vitamin A and uses for eye health, immune function, and skin health. Plus, the fiber content helps keep you full and supports healthy digestion.
Here’s the estimated nutritional breakdown per serving (2 squash halves, based on 4 servings total):
- Calories: 185
- Total Fat: 12g (from the butter)
- Saturated Fat: 7g
- Carbohydrates: 20g
- Fiber: 4g
- Sugar: 8g (natural, from the squash)
- Protein: 2g
- Vitamin A: 180% of Daily Value
- Vitamin C: 25% of Daily Value
- Potassium: 450mg
This recipe is naturally gluten-free, vegetarian, and can be made vegan with a simple swap. If you’re watching your sodium, reduce the salt to 1/4 teaspoon. And if you’re looking to cut calories, you can reduce the butter to 2 tablespoons—it won’t be as rich, but it’ll still be delicious.
Conclusion
I still think about that night on Dave’s porch sometimes. The way that smell stopped me mid-step, the way he shrugged off something so beautiful, the way I stood there scribbling notes on a crumpled envelope. That’s the kind of recipe this is—the kind that sneaks up on you, the kind that makes you believe you can create something extraordinary with almost no effort at all.
This quick roasted honeynut squash with brown butter has become my secret weapon for busy weeknights, lazy Sundays, and everything in between. It’s proof that you don’t need a dozen ingredients or hours in the kitchen to make something that tastes like love. So go ahead—pick up some honeynut squash next time you’re at the store, brown that butter until it smells like toasted hazelnuts, and let yourself be amazed at what happens when simple ingredients meet a little bit of heat and attention.
I’d love to hear how yours turns out! Drop a comment below and let me know if you tried any of the variations, or if you came up with your own twist. And if you’re looking for more quick and easy weeknight sides, you might also enjoy this roasted broccoli with garlic and lemon or this maple glazed carrots with thyme. Happy cooking!
Frequently Asked Questions
Can I use butternut squash instead of honeynut squash?
Absolutely. Butternut squash is the closest substitute, but you’ll need to peel it first since the skin is too tough to eat. Cut it into 1-inch cubes and roast for the same amount of time. The flavor will be slightly less sweet, but the brown butter makes up for it.
How do I know when the brown butter is done?
Watch for three signs: the color turns from yellow to golden-amber, the foam subsides, and the smell becomes nutty and toasty. If you see dark brown specks forming at the bottom of the pan, you’re there. Remove it from the heat immediately—it goes from perfect to burnt in seconds.
Can I make this recipe ahead of time?
Yes! You can roast the squash up to 2 days ahead and reheat it in a 350°F oven for 5-7 minutes. The sage leaves won’t stay crispy, so I recommend adding fresh sage leaves after reheating. The brown butter flavor actually deepens as it sits, so leftovers taste amazing.
Do I have to use sage, or can I use other herbs?
Fresh sage is traditional, but you can absolutely use other herbs. Fresh thyme, rosemary, or even a few sprigs of oregano work beautifully. Each herb brings its own personality—thyme is earthy, rosemary is piney, oregano is slightly peppery. Feel free to experiment!
Is this recipe suitable for meal prep?
Definitely. Roast a big batch on Sunday and use it throughout the week. Add it to salads, grain bowls, pasta, or eat it as a side dish. Store it in an airtight container in the fridge for up to 4 days. It’s one of those recipes that gets better as the flavors meld together.
Pin This Recipe!
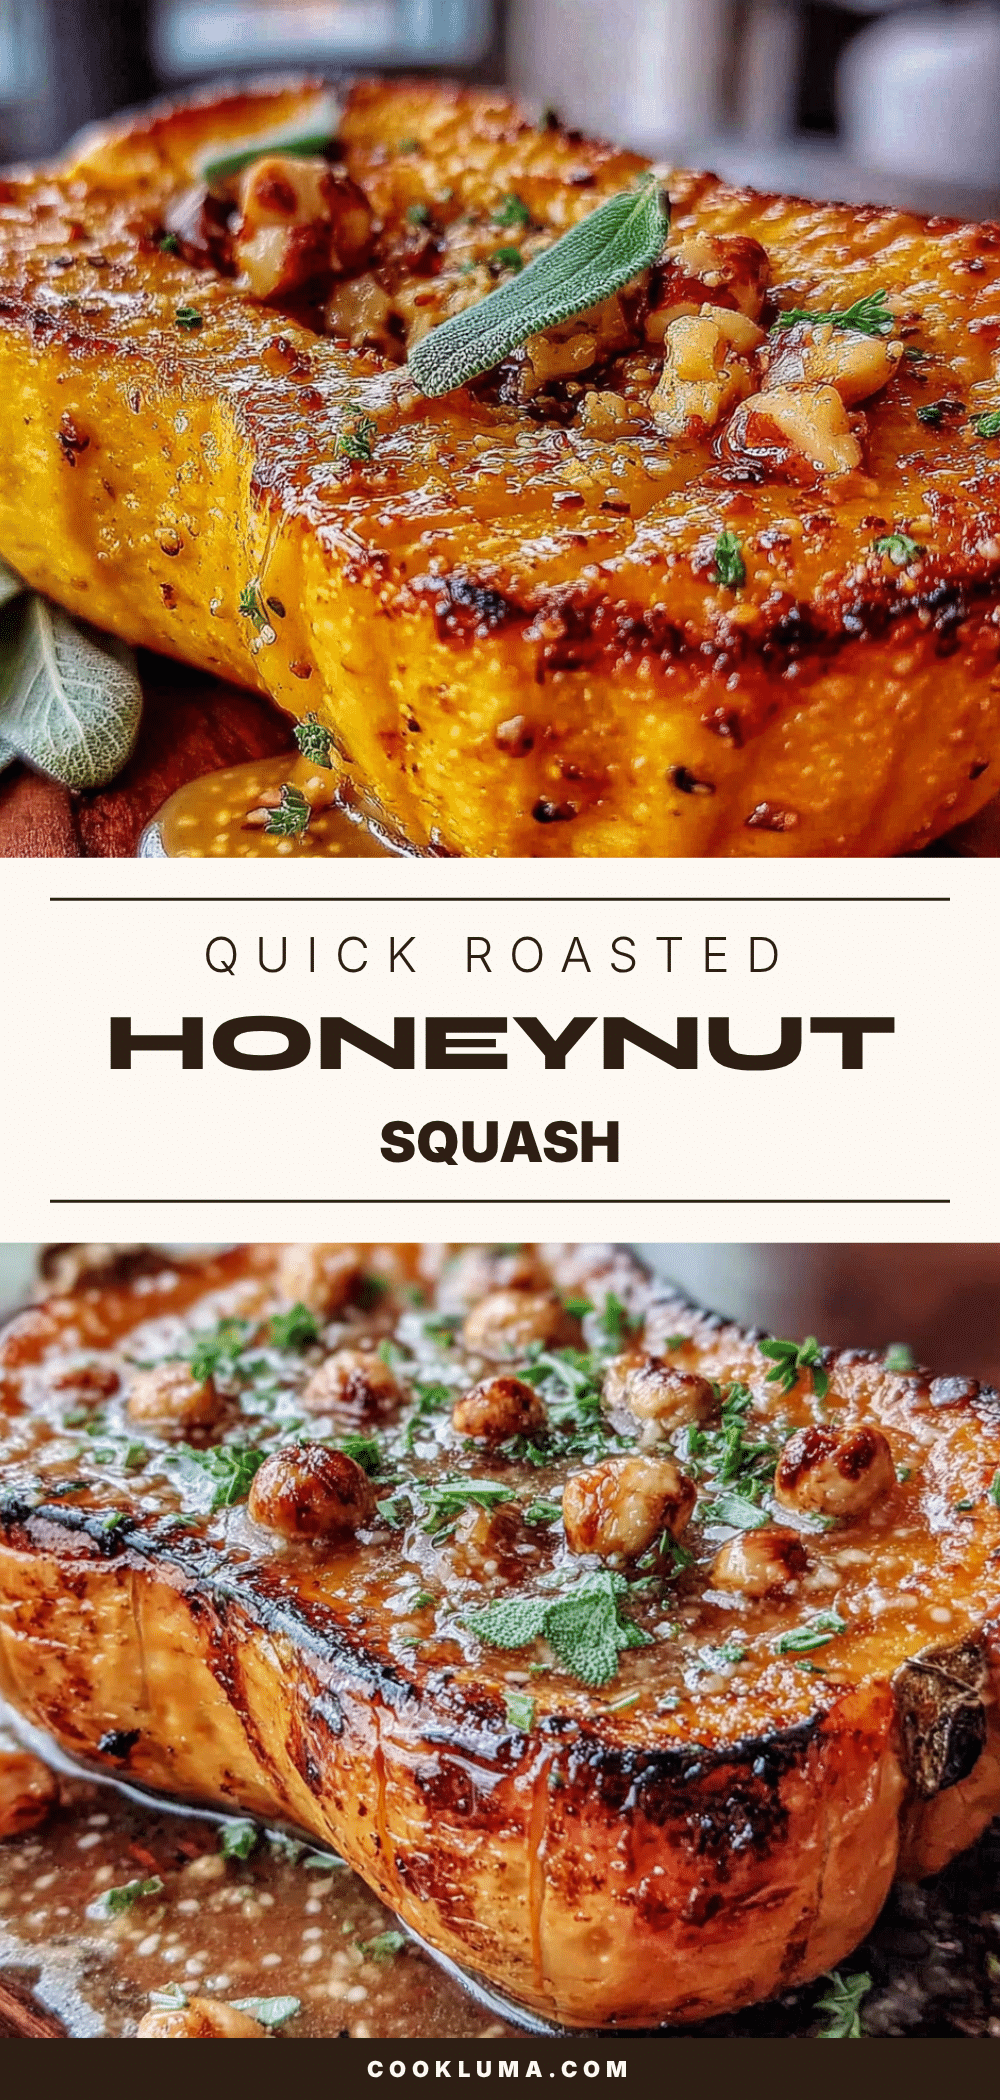
Quick Roasted Honeynut Squash with Brown Butter

This quick roasted honeynut squash with brown butter is a simple yet impressive side dish ready in under 30 minutes. With just five ingredients and one pan, it’s perfect for busy weeknights or holiday dinners.
- Prep Time: 5 minutes
- Cook Time: 22 minutes
- Total Time: 27 minutes
- Yield: 4 servings 1x
- Category: Side Dish
- Cuisine: American
Ingredients
- 4–6 honeynut squash (about 2 pounds total)
- 4 tablespoons unsalted butter (1/2 stick)
- 10–12 fresh sage leaves
- 1/2 teaspoon kosher salt, plus more to taste
- 1/4 teaspoon freshly ground black pepper
- 1 tablespoon maple syrup (optional)
- Pinch of cinnamon or cayenne (optional)
Instructions
- Preheat your oven to 425°F (220°C). Line a baking sheet with parchment paper.
- Cut each honeynut squash in half lengthwise. Scoop out the seeds and stringy bits.
- Place the squash halves cut-side up on the prepared baking sheet. Sprinkle with salt and pepper. If using cinnamon or cayenne, sprinkle that on too.
- Make the brown butter: Melt the butter in a small skillet or saucepan over medium heat. Swirl occasionally. After 2-3 minutes, the butter will foam. Continue swirling until the butter turns golden-amber and smells nutty, about 4-5 minutes total. Remove from heat immediately.
- Drop the sage leaves into the hot brown butter. Swirl for about 10 seconds, then pour the butter and sage leaves over the squash halves. Use a pastry brush or spoon to coat each half.
- Roast for 18-22 minutes, until the edges are golden and caramelized and the squash is easily pierced with a fork.
- Let the squash cool on the pan for 2-3 minutes. Transfer to a serving platter, pouring any remaining brown butter from the pan over the top. Garnish with the crispy sage leaves.
Notes
Watch the brown butter carefully—it can go from perfect to burnt in seconds. Don’t crowd the pan; leave at least an inch of space between squash halves. For extra caramelization, broil for the last 2 minutes. Leftovers can be stored in an airtight container in the refrigerator for up to 4 days or frozen for up to 3 months.
Nutrition
- Serving Size: 2 squash halves
- Calories: 185
- Sugar: 8
- Sodium: 300
- Fat: 12
- Saturated Fat: 7
- Carbohydrates: 20
- Fiber: 4
- Protein: 2
Keywords: honeynut squash, roasted squash, brown butter, sage, quick side dish, fall recipe, weeknight dinner, gluten-free, vegetarian


