My neighbor, a woman named Rosa who grew up on a farm in upstate New York, watched me hauling grocery bags into my apartment one chilly November afternoon. She didn’t say anything at first. Then she just smiled and handed me a small jar of her homemade apple butter through the gap in the fence. “You’re planning a party,” she said. It wasn’t a question. I admitted I was trying to pull together a Friendsgiving, but I was overthinking it, buying too much stuff I didn’t need. She laughed and told me about the boards she used to make for harvest gatherings back home—nothing fussy, just good things from the season arranged on a slab of wood. “Let the fruit do the work,” she said. “It’s fall. Everything already tastes good together.”
That conversation changed how I approach entertaining, honestly. I had been stressing over individual dishes, worrying about timing, and completely missing the point of a Friendsgiving—which is supposed to be low-pressure and full of laughter, not a kitchen meltdown. Rosa’s philosophy stuck with me. So I took her advice, swapped my anxiety for a cutting board, and built this Cozy Friendsgiving Charcuterie Board with Fall Fruit. It’s become my go-to for the holiday, and let me tell you, it never fails to make people stop and stare before they start grabbing.
Maybe you’ve been there, standing in the grocery aisle wondering if you need three kinds of crackers or if anyone will notice you forgot the dip. I get it. This board is my answer to that chaos. It’s forgiving, flexible, and it tastes like the season in the best way possible. The apples are crisp, the cheese is creamy, and the whole thing comes together in about twenty minutes flat. Rosa moved away last year, but I think about her every time I set this out. It’s more than a recipe—it’s a reminder that good food doesn’t need to be complicated. It just needs to be shared.
Why You’ll Love This Recipe
I’ve tested this board at three different Friendsgiving gatherings now, and each time, it disappeared faster than anything else on the table. There’s something about the combination of sweet fall fruit, salty cured meats, and creamy cheese that hits exactly right when the weather turns cold. Here’s why this particular board stands out from the crowd:
- Quick & Easy: You can assemble this entire board in under 20 minutes. No cooking, no complicated steps, just arranging and snacking. Perfect for when you’re hosting and need one less thing to stress about.
- Simple Ingredients: Every ingredient is available at your regular grocery store. No specialty shops or online orders needed. You probably already have half of these things in your fridge.
- Perfect for Friendsgiving: This board sets the tone for a relaxed, graze-as-you-go meal. It’s the ultimate icebreaker—everyone gathers around it, and conversation just flows naturally.
- Crowd-Pleaser: I’ve served this to groups with varying dietary preferences, and there’s always something for everyone. Gluten-free? Skip the crackers and load up on fruit and cheese. Vegetarian? Loads of options without the meat.
- Unbelievably Delicious: The trick is in the contrast. The sharpness of aged cheddar against sweet Honeycrisp apples, the saltiness of prosciutto mellowed by fig jam—it’s a flavor party that keeps you coming back for more.
What makes this different from other charcuterie boards you’ve seen? It’s the intentional use of fall fruit as the star, not just an afterthought. Most boards treat fruit like a garnish. Here, it’s the anchor. The apples and pears provide texture, sweetness, and acidity that balances the richness of the cheese and meat. Plus, the honey drizzle? That’s the secret weapon. It ties everything together in a way that feels both rustic and elegant. This isn’t just another grazing board—it’s a seasonal experience that makes your Friendsgiving feel special without any extra effort.
What Ingredients You Will Need
This recipe uses simple, seasonal ingredients that work together to create a board that’s both beautiful and delicious. The key is choosing items that complement each other in flavor and texture. Here’s what you’ll need:
For the Fruit
- 2 large Honeycrisp apples, sliced thin (they hold their color and crunch the longest)
- 2 ripe Bosc pears, sliced (their firm texture works well for dipping and spreading)
- 1 cup seedless red grapes, washed and left in small clusters (adds pops of sweetness)
- 1/2 cup dried figs, halved (I prefer the ones from Trader Joe’s—they’re consistently soft)
- 1/2 cup dried apricots (adds a chewy, tangy contrast)
For the Cheese
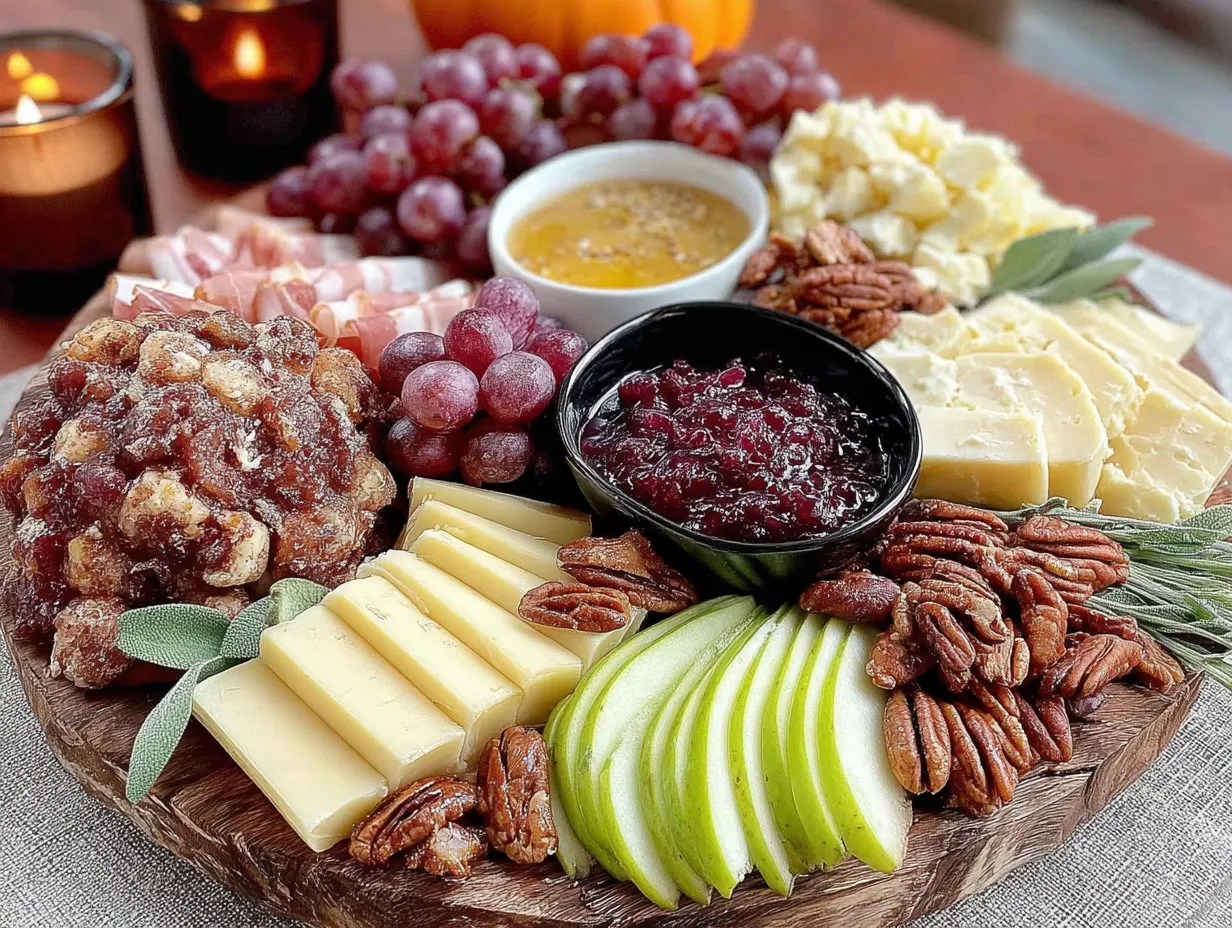
- 8 ounces aged sharp cheddar, sliced into thin wedges (Cabot is my go-to for consistent quality)
- 6 ounces creamy brie, left whole or halved (let it come to room temperature for best texture)
- 4 ounces goat cheese log, sliced into rounds (a little tang cuts through the richness)
- 1/4 cup honey, for drizzling (local honey adds a nice floral note if you can find it)
For the Meats
- 4 ounces prosciutto, thinly sliced (look for De Medici or Boar’s Head for quality)
- 4 ounces soppressata, sliced into thin rounds (the peppery flavor pairs beautifully with the fruit)
- 3 ounces capicola, rolled into small rosettes (adds a spicy kick)
For the Extras
- 1 cup mixed olives (I use Castelvetrano and Kalamata for variety)
- 1/2 cup Marcona almonds (they’re softer than regular almonds and slightly sweet)
- 1/4 cup fig jam or apple butter (Rosa’s apple butter is ideal, but store-bought fig jam works great)
- 1 small baguette, sliced into thin rounds and lightly toasted (or use gluten-free crackers if needed)
- Fresh rosemary sprigs, for garnish (optional but pretty)
For substitutions, you have plenty of wiggle room here. If you can’t find Bosc pears, Anjou works fine. No prosciutto? Try serrano ham. Need a dairy-free option? Omit the cheese and double up on the fruit and nuts. The beauty of this board is its flexibility—use what looks good at the market and don’t stress about perfection. I once made this with only cheddar and apples because that’s all I had, and it was still a hit. Trust your instincts.
Equipment Needed
You don’t need much to pull this together, which is part of the appeal. Here’s what I use:
- Large wooden cutting board or serving platter (at least 18 inches long—I use a reclaimed acacia board from World Market that cost $25)
- Sharp chef’s knife (a good 8-inch knife makes slicing apples and pears effortless)
- Small bowls or ramekins (for the jam, honey, and olives—I use these little ceramic ones from Crate & Barrel)
- Cheese knife or spreader (optional but nice for the brie)
- Small tongs (helps guests serve themselves without touching everything)
If you don’t have a large board, no worries. Use a baking sheet lined with parchment paper—it works just as well and looks rustic in its own way. I’ve also used a large marble pastry board when my wooden one was in use, and the cold surface actually helped keep the cheese firm. For budget-friendly options, check thrift stores for wooden cutting boards; I found my backup one for $6 and it’s perfect for parties.
Pro tip: Wash your board with mild soap and water, then dry it immediately to prevent warping. If you use it often, rub it with mineral oil once a month to keep the wood from drying out.
Preparation Method
This is where the magic happens. Follow these steps, and you’ll have a board that looks like it took hours—when it really took less than 20 minutes.
- Start with the bowls. Place your small bowls or ramekins on the board first. This anchors the layout and creates natural sections. Put the fig jam in one, the honey in another, and the olives in a third. Space them out evenly—one near each end of the board works well. I usually put the honey in the center because it gets drizzled over everything at the end.
- Add the cheese. Arrange the cheese around the bowls. Place the brie whole or halved near one corner, the cheddar wedges in a fan pattern opposite it, and the goat cheese rounds scattered in between. Make sure the cheeses aren’t touching each other—they need their own space. Let the brie come to room temperature for about 30 minutes before serving; it makes a huge difference in creaminess.
- Layer the meats. Fold the prosciutto slices into loose ribbons or rosettes and tuck them near the cheddar. Arrange the soppressata rounds in a small overlapping pile next to the brie. Roll the capicola into small cylinders and place them near the goat cheese. The meats should look effortless, not perfectly arranged—Rosa would say “they’re supposed to look like you just threw them on there.”
- Add the fruit. Fan the apple slices in a curve along one edge of the board. Do the same with the pear slices on the opposite side. Scatter the grape clusters in the empty spaces—they fill gaps beautifully. Tuck the dried figs and apricots here and there, nestling them against the cheese or meat. The fruit should look abundant, not sparse, so don’t be shy with it.
- Fill the gaps. Sprinkle the Marcona almonds in the remaining empty spots. They’re small, so they settle into the crevices and make the board look full. Arrange the baguette slices in a neat stack or fan near one end of the board. If you’re using crackers, place them in a small pile nearby—don’t scatter them, or they’ll get soggy from the fruit.
- Drizzle and garnish. Just before serving, drizzle the honey over the brie and goat cheese. It doesn’t need to be perfect—a little messy looks intentional and rustic. Tuck fresh rosemary sprigs here and there for color. I like to put one sprig near each cheese for a pop of green. Step back and look at your board. If there are any bare spots, add a few more almonds or grapes until it looks full.
A note on timing: You can prep the fruit and cheese up to two hours ahead. Just cover everything with plastic wrap and keep it in the fridge. Take the board out 20 minutes before guests arrive to let the cheese come to room temperature. The honey and jam should be added right before serving to keep things looking fresh.
One thing I learned the hard way: don’t overcrowd the board. It’s tempting to pile everything on, but guests need room to grab things without knocking over the cheese. Leave about 10% of the board empty—it looks more intentional and makes the board easier to navigate.
Cooking Tips & Techniques
Over the years, I’ve made plenty of mistakes with charcuterie boards. Here’s what I’ve learned so you don’t have to repeat my errors:
Slice apples right before serving. I once sliced apples an hour ahead, and they turned brown and sad-looking. Honeycrisp apples hold up better than most, but even they oxidize. Slice them as close to serving time as possible, and if you must prep ahead, toss them in a little lemon juice to slow browning. A tablespoon of lemon juice mixed with a teaspoon of water is enough for two apples.
Let the cheese breathe. Cold cheese is flavorless cheese. Take everything out of the fridge at least 30 minutes before serving. Brie needs even longer—an hour if you can manage it. The texture becomes creamy and the flavor opens up dramatically. I’ve had guests say they don’t like brie, only to watch them devour it when it’s at room temperature.
Balance salt and sweet. The magic of this board is in the contrast. If you have a very salty meat like capicola, pair it with a sweet element like dried apricots or honey. If you have a sharp cheese like aged cheddar, balance it with something mild like pear slices. Think of it as a flavor seesaw—you want to keep things in motion, not let one note dominate.
Don’t overthink the arrangement. I used to stress about making everything look perfect, but honestly, the best boards look a little chaotic. Rosa told me to “put things where they want to go,” and that advice has served me well. Place items, step back, adjust. Trust your eye. If something looks off, move it. The board is forgiving.
Multitask strategically. While the cheese is coming to room temperature, slice the fruit and arrange the bowls. By the time the cheese is ready, everything else is done. This cuts your active time to about 10 minutes. I usually set the board up while my main dish is in the oven, and it’s ready by the time the turkey comes out.
Variations & Adaptations
This board is endlessly customizable. Here are some variations I’ve tried and loved:
Vegetarian Version: Skip the meats entirely and double up on cheese and fruit. Add roasted vegetables like butternut squash cubes or caramelized Brussels sprouts for a savory element. I did this for a vegetarian Friendsgiving last year, and no one missed the meat. The roasted squash added a sweetness that paired beautifully with the goat cheese.
Gluten-Free Version: Replace the baguette with gluten-free crackers or rice cakes. Add extra nuts and dried fruit for crunch. I’ve used these almond flour crackers from Simple Mills, and they hold up well under cheese. Just make sure to check labels on any pre-made items like fig jam, as some contain wheat-based thickeners.
Vegan Version: Use vegan cheese alternatives (Miyoko’s makes a great cashew-based brie) and skip the honey—use agave or maple syrup instead. Load up on extra fruit and nuts. I tried this for a friend with dairy allergies, and the roasted chickpeas I added became the unexpected star of the board.
Seasonal Swaps: In early fall, use fresh figs instead of dried ones. In late fall, swap the grapes for pomegranate seeds or persimmon slices. In winter, add clementines and dried cranberries. The board adapts to whatever the market has, which is part of its charm.
Spicy Kick: Add a small bowl of hot honey or red pepper flakes for guests who like heat. The spicy-sweet combination with the creamy brie is addictive. I tried this after a friend brought hot honey to a party, and now I always include it.
My personal favorite variation? I add a small bowl of dark chocolate chunks in December. It feels indulgent and festive, and it pairs surprisingly well with the sharp cheddar. Don’t knock it till you try it.
Serving & Storage Suggestions
This board is best served at room temperature, so take it out of the fridge about 20 minutes before guests arrive. Arrange it on a large wooden board or platter, and place it in the center of the table where everyone can reach it. I like to put it on a slightly elevated surface, like a cake stand or a small riser, so it becomes a visual focal point.
For presentation, I add a few small serving spoons or tongs near the olives and jam. A cheese knife next to the brie is essential—otherwise, guests will use their hands, and things get messy fast. I also put out small plates and napkins nearby so people can build their own little plates without hovering over the board.
What to serve with it: This board pairs beautifully with a crisp white wine like Sauvignon Blanc or a light red like Pinot Noir. For non-alcoholic options, sparkling apple cider or a spiced chai tea latte works wonderfully. If you’re serving it as part of a larger Friendsgiving meal, it’s perfect as an appetizer while the main dishes finish cooking.
Storage: If you have leftovers (which is rare in my house), store the components separately. Wrap the cheese in wax paper and place it in an airtight container in the fridge. Store the fruit in a separate container to prevent it from getting soggy. The meats can be wrapped in parchment paper and kept in the fridge for up to three days. The honey and jam don’t need refrigeration—just pop the lids back on and store them in the pantry.
Reheating: There’s no real reheating needed, but if you want to refresh the baguette slices, pop them in a 350°F oven for 3-4 minutes. The cheese should be brought back to room temperature before serving again. The fruit will soften slightly overnight, so it’s best to slice fresh apples and pears if you’re serving the board a second time.
One thing I’ve noticed: the flavors actually meld together a bit after a few hours. The honey soaks into the cheese, the fruit releases its juices, and everything becomes more cohesive. If you’re serving this at a party that lasts several hours, it actually gets better as the night goes on.
Nutritional Information & Benefits
While this board is indulgent, it also offers some surprising nutritional benefits. Here’s an approximate breakdown per serving (about 1/8 of the board):
- Calories: 380-420
- Protein: 18-22g
- Fat: 24-28g (mostly from cheese and nuts)
- Carbohydrates: 28-32g
- Fiber: 6-8g
- Sugar: 18-22g (naturally occurring from fruit)
The apples and pears provide a good dose of fiber and vitamin C, while the almonds offer healthy monounsaturated fats and vitamin E. Cheese is a great source of calcium and protein, though it’s higher in saturated fat, so moderation is key. The prosciutto and other cured meats add protein but also sodium, so balance your intake with plenty of fruit and vegetables throughout the day.
For those with dietary concerns, this board is naturally gluten-free if you skip the baguette and use gluten-free crackers. It’s also easy to make dairy-free by omitting the cheese and adding more nuts and vegetables. The honey can be swapped for agave for a vegan option. Just be mindful of the sodium content if you’re watching your salt intake—the cured meats and olives are the main contributors.
I personally love that this board lets you graze mindfully. Because there’s so much variety, you naturally eat slower and appreciate each bite. It’s not the kind of food you scarf down—it’s meant to be savored, which makes it a healthier choice for social gatherings.
Conclusion
This Cozy Friendsgiving Charcuterie Board with Fall Fruit has become my signature dish for the holiday season, and I hope it becomes yours too. It’s everything I want in a Friendsgiving recipe—effortless, beautiful, and deeply satisfying. The combination of crisp apples, creamy brie, salty prosciutto, and sweet honey captures the spirit of fall in a way that feels both comforting and celebratory.
What I love most about this board is how it brings people together. There’s something about sharing food from a communal board that breaks down barriers and sparks conversation. It’s the kind of dish that makes your guests feel welcomed and cared for, without you having to spend hours in the kitchen. And honestly, isn’t that what Friendsgiving is all about?
I’d love to hear how your board turns out. Did you add any unique ingredients? Did your guests have a favorite combination? Drop a comment below and share your creation—I read every single one, and I’m always inspired by how you make recipes your own. Don’t forget to pin this for later and share it with your Friendsgiving group chat. Here’s to good food, great company, and a season full of warmth and gratitude. Happy grazing!
Frequently Asked Questions
Can I make this board ahead of time?
Yes! You can prep everything up to two hours ahead. Slice the fruit, arrange the cheese and meats, and cover the board with plastic wrap. Keep it in the fridge, then take it out 20 minutes before serving to let the cheese come to room temperature. Add the honey and jam just before serving for the best presentation.
How do I keep the apples from turning brown?
Slice the apples as close to serving time as possible. If you need to prep ahead, toss the slices in a mixture of 1 tablespoon lemon juice and 1 teaspoon water. This slows oxidation without adding too much tartness. Honeycrisp apples naturally brown slower than other varieties, so they’re a good choice for this board.
What if I don’t have a large board?
No problem! Use a baking sheet lined with parchment paper, a large marble slab, or even a clean wooden cutting board. You can also use multiple smaller boards placed together. The key is having enough surface area to spread everything out so guests can easily reach each component.
Can I use different cheeses?
Absolutely. The recipe is flexible. Swap the brie for camembert, the cheddar for gouda, or the goat cheese for blue cheese. Just keep the balance in mind—include at least one soft cheese, one hard cheese, and one crumbly or spreadable option for variety. I’ve used manchego, fontina, and even a truffle-infused cheese with great results.
How much should I make per person?
For a main course appetizer at a Friendsgiving, plan for about 3-4 ounces of cheese per person, 2-3 ounces of meat, and a generous handful of fruit and nuts. If the board is the main event, increase those amounts by about 50%. It’s always better to have too much than too little—leftovers are delicious the next day.
Pin This Recipe!
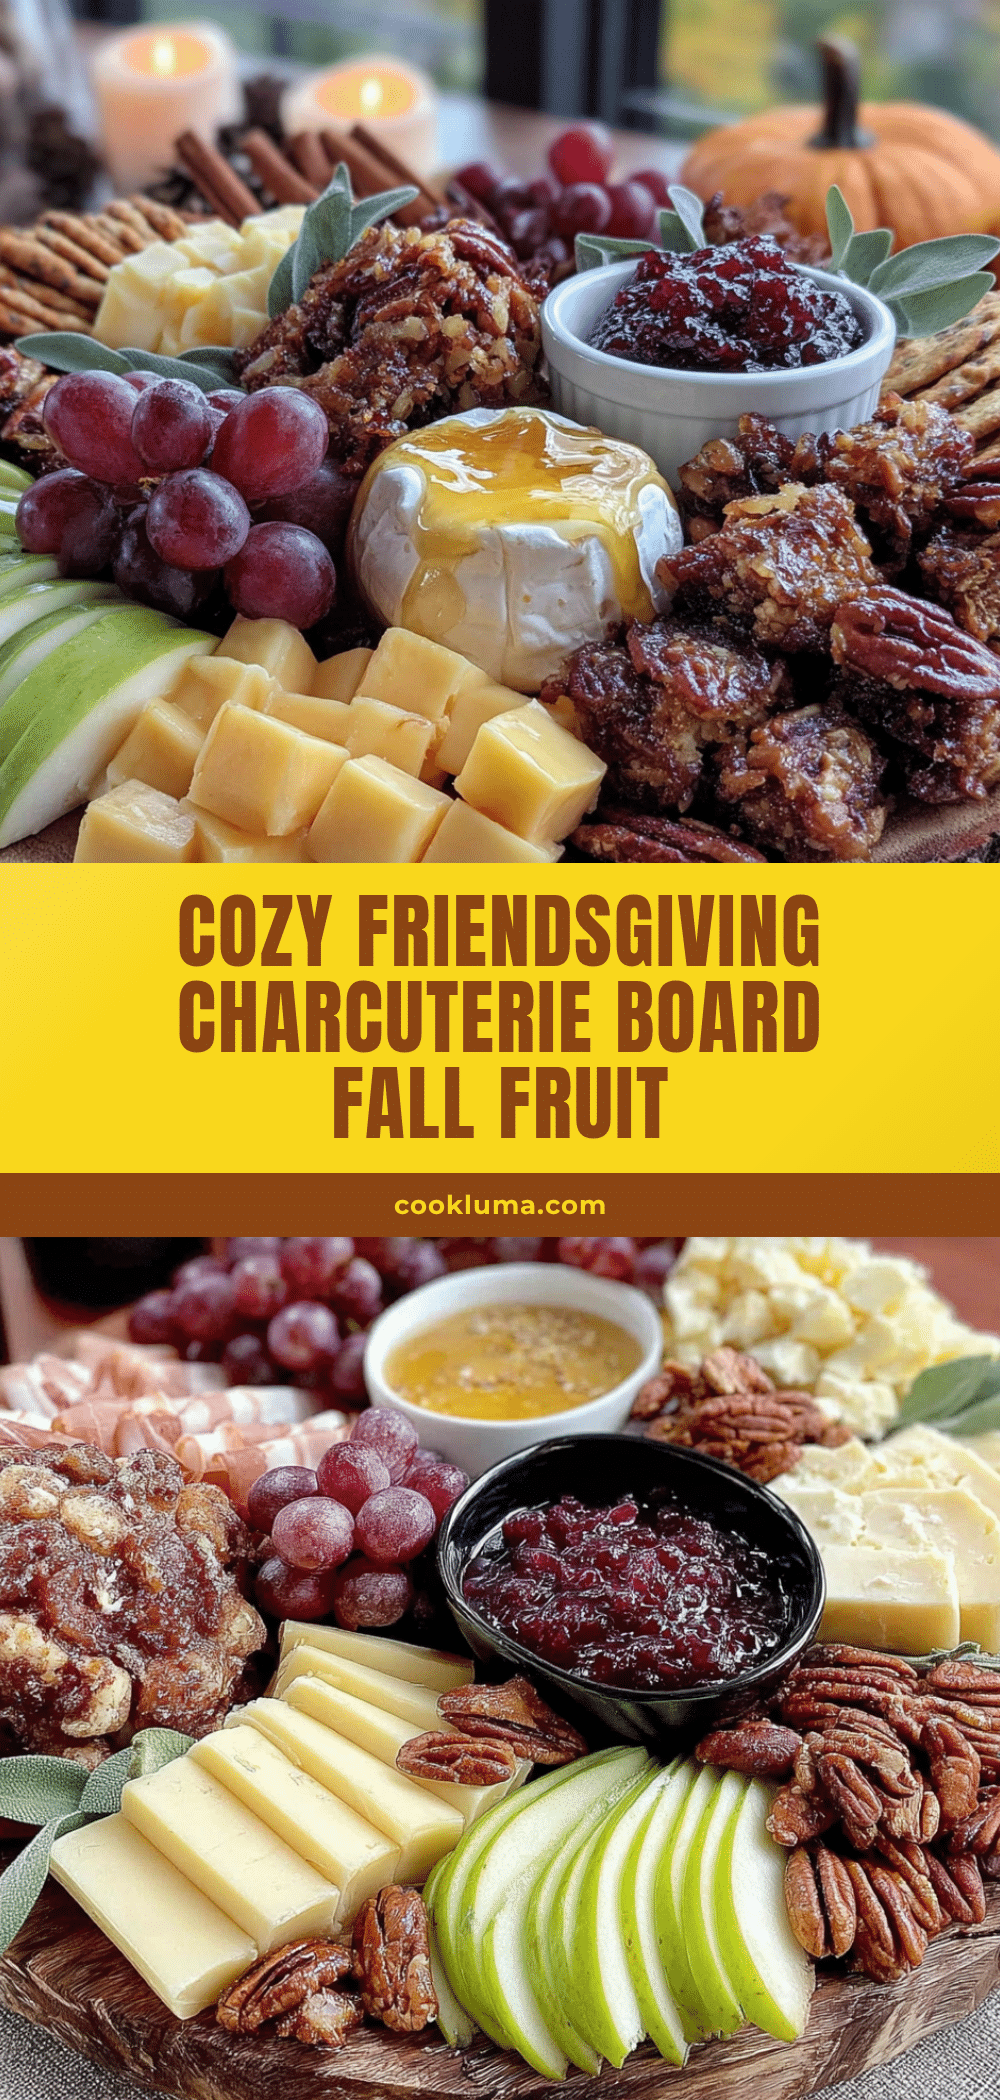
Cozy Friendsgiving Charcuterie Board with Fall Fruit
A low-pressure, beautiful charcuterie board featuring crisp fall fruit, creamy cheeses, and savory cured meats. Perfect for Friendsgiving gatherings, it comes together in under 20 minutes and lets the season’s flavors shine.
- Prep Time: 20 minutes
- Cook Time: 0 minutes
- Total Time: 20 minutes
- Yield: 8 servings 1x
- Category: Appetizer
- Cuisine: American
Ingredients
- 2 large Honeycrisp apples, sliced thin
- 2 ripe Bosc pears, sliced
- 1 cup seedless red grapes, washed and left in small clusters
- 1/2 cup dried figs, halved
- 1/2 cup dried apricots
- 8 ounces aged sharp cheddar, sliced into thin wedges
- 6 ounces creamy brie, left whole or halved
- 4 ounces goat cheese log, sliced into rounds
- 1/4 cup honey
- 4 ounces prosciutto, thinly sliced
- 4 ounces soppressata, sliced into thin rounds
- 3 ounces capicola, rolled into small rosettes
- 1 cup mixed olives (Castelvetrano and Kalamata)
- 1/2 cup Marcona almonds
- 1/4 cup fig jam or apple butter
- 1 small baguette, sliced into thin rounds and lightly toasted
- Fresh rosemary sprigs for garnish (optional)
Instructions
- Place small bowls or ramekins on the board first: fig jam in one, honey in another, olives in a third. Space them out evenly.
- Arrange the cheese around the bowls: brie whole or halved near one corner, cheddar wedges in a fan pattern opposite, goat cheese rounds scattered in between. Ensure cheeses are not touching each other.
- Fold prosciutto into loose ribbons or rosettes and tuck near the cheddar. Arrange soppressata rounds in a small overlapping pile next to the brie. Roll capicola into small cylinders and place near the goat cheese.
- Fan apple slices in a curve along one edge of the board. Do the same with pear slices on the opposite side. Scatter grape clusters in empty spaces. Tuck dried figs and apricots here and there.
- Sprinkle Marcona almonds in remaining empty spots. Arrange baguette slices in a neat stack or fan near one end of the board.
- Just before serving, drizzle honey over the brie and goat cheese. Tuck fresh rosemary sprigs here and there for color. Step back and adjust any bare spots with more almonds or grapes.
Notes
Let brie come to room temperature for about 30 minutes before serving for best creaminess. Slice apples as close to serving time as possible to prevent browning; if prepping ahead, toss with a little lemon juice. Don’t overcrowd the board—leave about 10% empty for easy navigation. The board can be prepped up to 2 hours ahead; cover with plastic wrap and refrigerate, then add honey and jam just before serving.
Nutrition
- Serving Size: 1/8 of the board
- Calories: 400
- Sugar: 20
- Sodium: 800
- Fat: 26
- Saturated Fat: 12
- Carbohydrates: 30
- Fiber: 7
- Protein: 20
Keywords: Friendsgiving, charcuterie board, fall fruit, appetizer, grazing board, holiday entertaining


