I was at the hardware store on a random Tuesday afternoon, trying to find a specific size of washer for a leaky faucet, when the woman behind the counter—a no-nonsense type with reading glasses on a chain—started talking about pie crust. Not the weather, not my plumbing problem, but pie crust. “Store-bought is fine,” she said, not even looking up from her inventory sheet, “but if you’re in a hurry and want something that actually tastes good, use gingersnaps. Crush ’em up, add some butter, and you’re done in ten minutes. No rolling, no mess.” I blinked. Was I really getting baking advice at the hardware store? I was, and honestly, it was the best tip I’d gotten in months. I scribbled “gingersnaps + butter” on the back of my receipt right there between the plumbing aisle and the paint samples. That chance conversation led me to create this Quick Gingersnap Pumpkin Pie from Scratch, and let me tell you, it’s been a game-changer for my weeknight dessert game ever since. You know that feeling when you want something homemade but you’re just too tired to deal with a fussy crust? Maybe you’ve been there, standing in your kitchen at 7 PM, staring at a can of pumpkin puree and wondering if it’s worth the effort. This recipe is the answer. It’s fast, it’s forgiving, and that spicy, crunchy gingersnap crust pairs with the silky pumpkin filling in a way that feels like you planned it all along. I almost walked out of that store without asking her name, but I’m so glad I didn’t—because this pie has become my go-to for fall weeknights, Thanksgiving potlucks, and honestly, any Tuesday that needs a little sweetness.
Why You’ll Love This Recipe
Let me be real with you—I’ve tested this pie at least a dozen times to make sure it works when you’re tired, busy, and just want dessert on the table without a production. Here’s why this one’s different:
- Quick & Easy: From start to table in under an hour. No blind baking, no chilling the dough, no rolling pins involved. The crust comes together in about 10 minutes flat.
- Simple Ingredients: You probably have most of these in your pantry right now. No trips to specialty stores or hunting down obscure spices.
- Perfect for Weeknights: This is the kind of dessert you can make after a long day at work, while you’re also trying to get dinner on the table and help with homework. It doesn’t demand your full attention.
- Crowd-Pleaser: I brought this to a Friendsgiving last year and three people asked for the recipe before I’d even finished my first slice. It disappears fast.
- Unbelievably Delicious: That crunchy, spicy crust against the smooth, creamy pumpkin filling? It’s the texture combo you didn’t know you needed.
What makes this different from every other pumpkin pie recipe out there is the crust. Most recipes either use a traditional pastry crust (which takes forever and can be finicky) or a graham cracker crust (which is fine, but a little boring). The gingersnap crust adds a deep, molasses-y warmth that complements the pumpkin perfectly. It’s not just another version—it’s the version you’ll actually want to make on a Tuesday night when you’re tired but still craving something homemade. Plus, the filling uses a simple blend of pantry spices and canned pumpkin, so there’s no fussing with fresh pumpkins or complicated techniques.
What Ingredients You Will Need
This recipe uses simple, everyday ingredients to create something that tastes way more complicated than it actually is. The beauty of this pie is that most of these items are probably already in your kitchen, especially if you do any amount of fall baking.
For the Gingersnap Crust
- 2 cups (about 200g) gingersnap cookies, crushed into fine crumbs – I use Nabisco brand, but any crispy gingersnap works. Avoid the soft, chewy kind—they won’t give you that crunchy texture you want.
- 6 tablespoons (85g) unsalted butter, melted – Salted butter works in a pinch, just skip the added salt in the recipe. Let it cool slightly after melting so it doesn’t make the crumbs greasy.
- 2 tablespoons (25g) granulated sugar – This adds a touch of sweetness and helps the crust hold together better. You can reduce it to 1 tablespoon if your gingersnaps are already very sweet.
- Pinch of salt – Only if you’re using unsalted butter. It balances the sweetness and enhances the spice flavors.
For the Pumpkin Filling
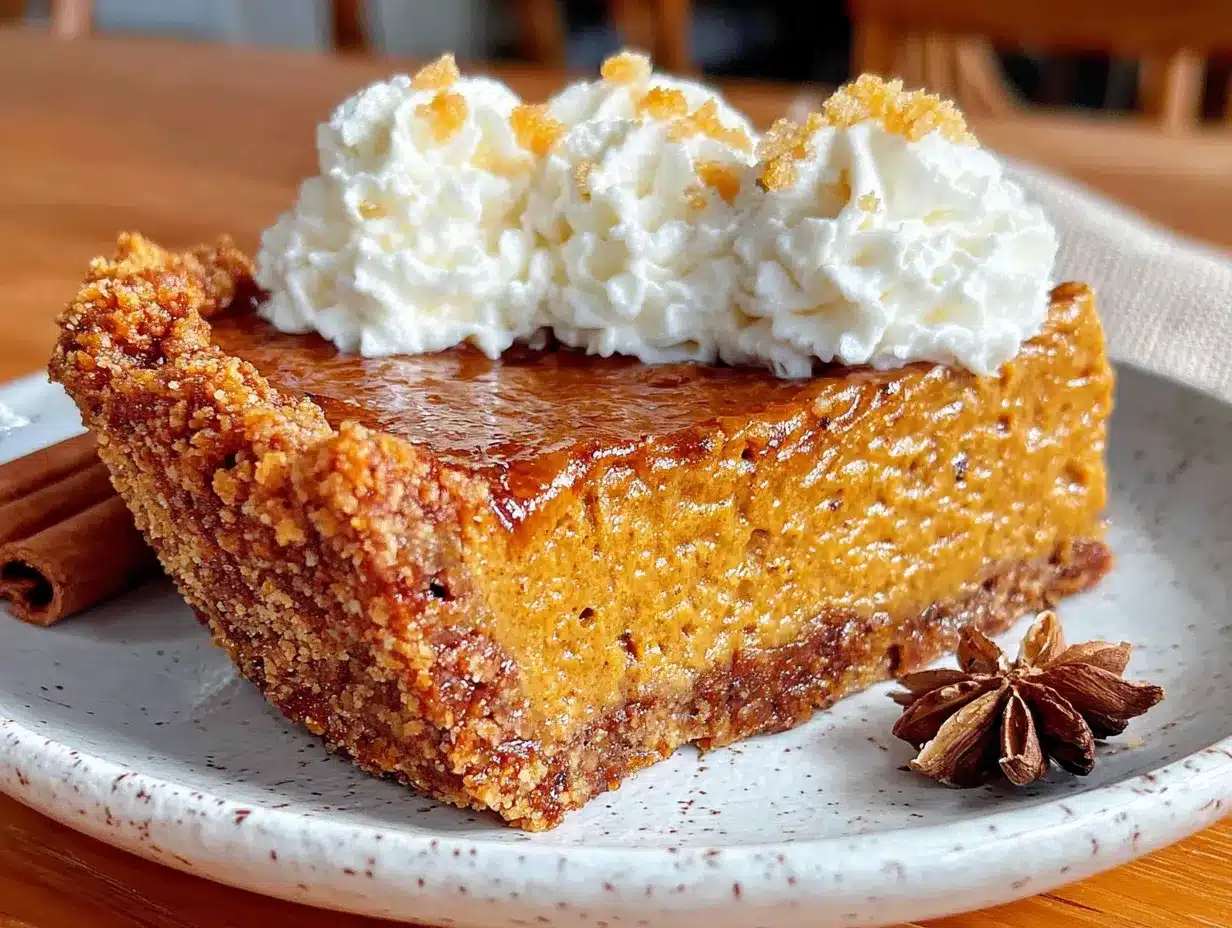
- 1 can (15 oz or 425g) pumpkin puree – Not pumpkin pie filling! Make sure you grab plain pumpkin puree. Libby’s is my go-to brand for consistent texture and flavor.
- 1 can (14 oz or 396g) sweetened condensed milk – This is what gives the filling its silky, rich texture without needing to whip cream or cook a custard from scratch. Eagle Brand works great.
- 2 large eggs, at room temperature – Cold eggs can make the filling lumpy. If you forgot to take them out ahead of time, place them in a bowl of warm water for 5 minutes.
- 1 teaspoon vanilla extract – Pure vanilla is best, but imitation works fine in a pinch. It rounds out the flavors nicely.
- 1 ½ teaspoons pumpkin pie spice – If you don’t have this, mix ¾ teaspoon cinnamon, ½ teaspoon ginger, ¼ teaspoon nutmeg, and a pinch of cloves.
- ½ teaspoon ground cinnamon – I like adding extra cinnamon because it pairs so beautifully with the gingersnap crust.
- ¼ teaspoon salt – Don’t skip this! Salt makes all the flavors pop.
Optional Toppings
- Whipped cream or Cool Whip – For serving. Homemade whipped cream is easy: just whip 1 cup heavy cream with 2 tablespoons powdered sugar and ½ teaspoon vanilla until soft peaks form.
- Extra crushed gingersnaps – Sprinkle on top for crunch.
- Caramel sauce – A drizzle adds a lovely sweetness that complements the spices.
Equipment Needed
Nothing fancy here—this is a weeknight recipe, after all. Here’s what you’ll need:
- 9-inch pie dish – Glass or ceramic works best. Metal can work too, but glass lets you see when the crust is golden brown.
- Food processor or zip-top bag and rolling pin – For crushing the gingersnaps. The food processor is faster, but the bag-and-rolling-pin method works great and gives you a little arm workout.
- Medium mixing bowl – For the crust ingredients.
- Large mixing bowl – For the filling. A glass or stainless steel bowl works fine.
- Whisk – For mixing the filling smooth. A fork works in a pinch, but a whisk gives you a silkier texture.
- Measuring cups and spoons – For accuracy. I’ve learned the hard way that eyeballing the pumpkin puree leads to a soggy pie.
- Spatula – For scraping every last bit of filling into the crust. Waste not, want not.
- Baking sheet – Place the pie dish on a baking sheet to catch any drips and make it easier to get in and out of the oven.
I’ve made this pie with a cheap glass pie dish from the grocery store and it turned out perfectly. Don’t overthink the equipment—if you’ve got a bowl and something to crush cookies with, you’re good to go.
Preparation Method
Alright, let’s get cooking. This whole process takes about 50 minutes from start to finish, and most of that is hands-off baking time.
- Preheat your oven to 350°F (175°C). Place a baking sheet on the middle rack. This helps the pie cook evenly and catches any potential spills.
- Make the crust. Add your gingersnap cookies to a food processor and pulse until you have fine crumbs. No food processor? No problem. Put the cookies in a zip-top bag, seal it, and crush them with a rolling pin or even the bottom of a heavy skillet. You want about 2 cups of crumbs. Transfer the crumbs to a medium bowl, add the melted butter, sugar, and salt, and stir with a fork until everything is evenly moistened. It should look like wet sand and hold together when you squeeze a handful.
- Press the crust into the pan. Dump the crumb mixture into your 9-inch pie dish. Use the bottom of a measuring cup or a flat-bottomed glass to press it firmly and evenly into the bottom and up the sides. Don’t skip this pressing step—a loose crust will fall apart when you cut the pie. Make sure the sides are about ¼-inch thick. Place the crust in the refrigerator while you make the filling, about 10 minutes. This helps it set up and prevents it from sliding down the sides during baking.
- Make the filling. In a large bowl, whisk together the pumpkin puree and sweetened condensed milk until smooth. Add the eggs, one at a time, whisking well after each addition. Stir in the vanilla, pumpkin pie spice, cinnamon, and salt. Whisk until everything is completely combined and the mixture is silky smooth. Don’t overmix—just until there are no streaks. A few small lumps are fine; they’ll bake out.
- Assemble the pie. Take the crust out of the fridge. Pour the filling into the crust, spreading it evenly with a spatula. The filling should come almost to the top of the crust. Tap the pie dish gently on the counter a few times to release any air bubbles.
- Bake the pie. Place the pie dish on the preheated baking sheet in the oven. Bake for 45 to 50 minutes, or until the edges are set and the center is just slightly jiggly—like Jell-O, not like liquid. A knife inserted about an inch from the edge should come out clean. The center will continue to set as it cools. If the crust edges are browning too quickly, tent them loosely with aluminum foil about halfway through baking.
- Cool completely. Transfer the pie to a wire rack and let it cool at room temperature for at least 2 hours. This is crucial—cutting into it while it’s warm will result in a runny mess. The filling needs time to fully set. Once it’s completely cool, you can serve it immediately or refrigerate it for later.
Pro tip from my kitchen: I once tried to rush the cooling process by putting the pie in the fridge after only 30 minutes. The center was still warm and it slid everywhere when I tried to cut it. Learn from my mistake—patience here pays off.
Cooking Tips & Techniques
After making this pie more times than I can count, I’ve picked up a few tricks that make the process smoother and the results more consistent.
Don’t overbake the filling. This is the number one mistake I see people make. Pumpkin pie filling continues to cook and set after it comes out of the oven. If you wait until the center is completely firm, it’ll be overcooked and crack on top. Pull it out when the center wobbles like firm Jell-O—about a 2-inch circle in the very middle should still jiggle slightly. It’ll set perfectly as it cools.
Blind baking is not necessary here. Unlike traditional pastry crusts, the gingersnap crust doesn’t need to be pre-baked. The butter and sugar in the crust help it firm up during the baking process. Just refrigerating it while you make the filling is enough to keep it from getting soggy.
Room temperature ingredients matter. I know, I know—it’s an extra step. But cold eggs and cold pumpkin puree can make the filling lumpy and take longer to bake evenly. Set your eggs and pumpkin out on the counter about 30 minutes before you start. If you forgot, place the eggs in a bowl of warm water for 5 minutes and microwave the pumpkin puree for 15 seconds to take the chill off.
Use a baking sheet. I learned this one the hard way after a pie bubbled over and burned on the bottom of my oven, filling my kitchen with smoke. A baking sheet catches drips, makes the pie easier to handle, and helps it bake more evenly.
Let it cool completely. I cannot stress this enough. The hardest part of making this pie is waiting for it to cool. But if you cut into it too soon, you’ll have a soupy mess. Plan ahead—make it in the morning or the day before you need it. The flavor actually gets better after it sits overnight in the fridge.
Variations & Adaptations
One of the things I love about this recipe is how flexible it is. Here are some variations I’ve tried that worked beautifully:
Gluten-Free Version
Use gluten-free gingersnap cookies for the crust. Many brands are naturally gluten-free, but check the label to be sure. The rest of the ingredients are naturally gluten-free, so this is an easy swap. I’ve used Kinnikinnick brand with great results.
Dairy-Free Version
Replace the butter in the crust with coconut oil (use refined for a neutral flavor) or a plant-based butter like Miyoko’s. For the filling, use sweetened condensed coconut milk instead of regular. I’ve tried this with Nature’s Charm brand and it turned out creamy and delicious.
Spiced-Up Version
Add ½ teaspoon of ground cardamom or a pinch of cayenne pepper to the filling for a warm, unexpected kick. The cardamom pairs beautifully with the ginger in the crust. I made this version for a holiday party and it was the first pie to disappear.
Mini Pie Version
Press the crust into a muffin tin (about 2 tablespoons per cup) and fill with about 3 tablespoons of filling. Bake for 18-22 minutes. Perfect for portion control or serving a crowd. These little guys are great for Thanksgiving when everyone wants a taste of everything.
No-Bake Version
For a truly no-fuss option, use a pre-made graham cracker crust and a no-bake pumpkin filling (mix pumpkin puree with instant vanilla pudding mix, cool whip, and spices). It’s not quite the same, but it works in a pinch when you’re really short on time.
Serving & Storage Suggestions
Serving: This pie is best served chilled or at room temperature. I prefer it cold straight from the fridge—the filling is firmer and the crust stays crunchier. Top each slice with a generous dollop of whipped cream and a sprinkle of extra crushed gingersnaps for texture. A drizzle of caramel sauce takes it over the top, but it’s fantastic on its own too.
What to serve with it: A cup of hot coffee or chai tea is the perfect companion. For a full dessert spread, pair it with vanilla ice cream or a slice of apple crisp. It also holds its own next to a traditional pecan pie on a Thanksgiving dessert table.
Storage: Cover the pie loosely with plastic wrap or aluminum foil and store it in the refrigerator for up to 5 days. The crust will soften slightly over time, but the flavor actually deepens and gets better after a day or two. I actually prefer the pie on day two—the spices meld together and taste more complex.
Freezing: You can freeze the fully baked and cooled pie for up to 3 months. Wrap it tightly in plastic wrap, then a layer of foil. To serve, thaw it overnight in the refrigerator. Don’t freeze the pie with whipped cream on top—add that fresh after thawing.
Reheating: If you prefer warm pie, place individual slices in a 300°F (150°C) oven for 10 minutes, or microwave for 20-30 seconds. The crust won’t be as crunchy, but the warm filling is comforting on a cold evening.
Nutritional Information & Benefits
Here’s the approximate nutritional breakdown for one slice (based on 8 servings):
| Nutrient | Amount per Slice |
|---|---|
| Calories | 380 |
| Total Fat | 16g |
| Saturated Fat | 9g |
| Cholesterol | 85mg |
| Sodium | 320mg |
| Total Carbohydrates | 54g |
| Dietary Fiber | 3g |
| Sugars | 38g |
| Protein | 6g |
| Vitamin A | 290% DV |
| Calcium | 15% DV |
| Iron | 10% DV |
Pumpkin is packed with vitamin A (great for eye health and immune function) and fiber, which helps keep you full. The gingersnaps contain ginger, which has anti-inflammatory properties and can aid digestion. While this isn’t a health food by any stretch, it’s a dessert that offers more nutritional value than most. It’s also lower in sugar than many traditional pumpkin pie recipes since the sweetened condensed milk provides sweetness without needing extra sugar.
Dietary considerations: This recipe contains dairy (butter, sweetened condensed milk) and gluten (gingersnap cookies). It can be made gluten-free and dairy-free with the substitutions listed above. It’s nut-free as written.
Conclusion
Look, I know there are a million pumpkin pie recipes out there. But this one? It’s the one I keep coming back to, week after week, year after year. It started with a random conversation in a hardware store, and now it’s the pie I bring to every fall gathering, the one my family requests for Thanksgiving, the one I make on random Tuesday nights when I just need something sweet and comforting. The gingersnap crust adds a warmth and crunch that makes it feel special without any extra effort. The filling is creamy, spiced just right, and sets up perfectly every single time. It’s forgiving enough for a beginner, fast enough for a weeknight, and impressive enough for company.
I’d love to hear how it turns out for you. Did you add your own twist? Did your family love it as much as mine does? Drop a comment below and let me know—I read every single one and I’m always looking for new ideas to try. And if you’re looking for another quick dessert to round out your fall baking, you might want to try my easy apple crisp or these pumpkin chocolate chip cookies. Happy baking, friends—you’ve got this.
Frequently Asked Questions
Can I use fresh pumpkin instead of canned?
Yes, but it requires extra work. Roast a small sugar pumpkin at 400°F until tender, scoop out the flesh, and puree it in a food processor. You’ll need to drain the puree in a cheesecloth-lined strainer for at least an hour to remove excess moisture, or the filling will be too watery. Canned pumpkin is more consistent and saves time, which is why I recommend it for this quick recipe.
Why did my crust fall apart when I cut the pie?
This usually happens when the crust wasn’t pressed firmly enough into the pan or wasn’t chilled long enough before baking. Make sure you pack the crumbs down really tight using the bottom of a measuring cup. Also, let the pie cool completely before slicing—a warm crust is more fragile. If it’s still falling apart, try adding an extra tablespoon of melted butter next time.
Can I make this pie ahead of time?
Absolutely! This pie actually tastes better the next day. Bake it, let it cool completely, cover it, and refrigerate for up to 2 days before serving. The flavors meld together and the texture firms up beautifully. Just add the whipped cream right before serving.
My pie cracked on top. What went wrong?
Cracks happen when the pie is overbaked or when it cools too quickly. The filling expands as it bakes and contracts as it cools—if the contraction happens too fast, cracks form. To prevent this, pull the pie out when the center is still slightly jiggly, and let it cool gradually on the counter before refrigerating. If it does crack, just cover it with whipped cream—nobody will ever know.
Can I use a different type of cookie for the crust?
Yes, but the flavor will change. Graham crackers work well and give a milder, sweeter crust. Shortbread cookies create a buttery, neutral crust. Chocolate wafer cookies make a rich, chocolatey base that’s surprisingly good with pumpkin. Just keep the ratio the same: 2 cups crumbs to 6 tablespoons melted butter. Avoid soft or cream-filled cookies—they won’t hold together properly.
Pin This Recipe!
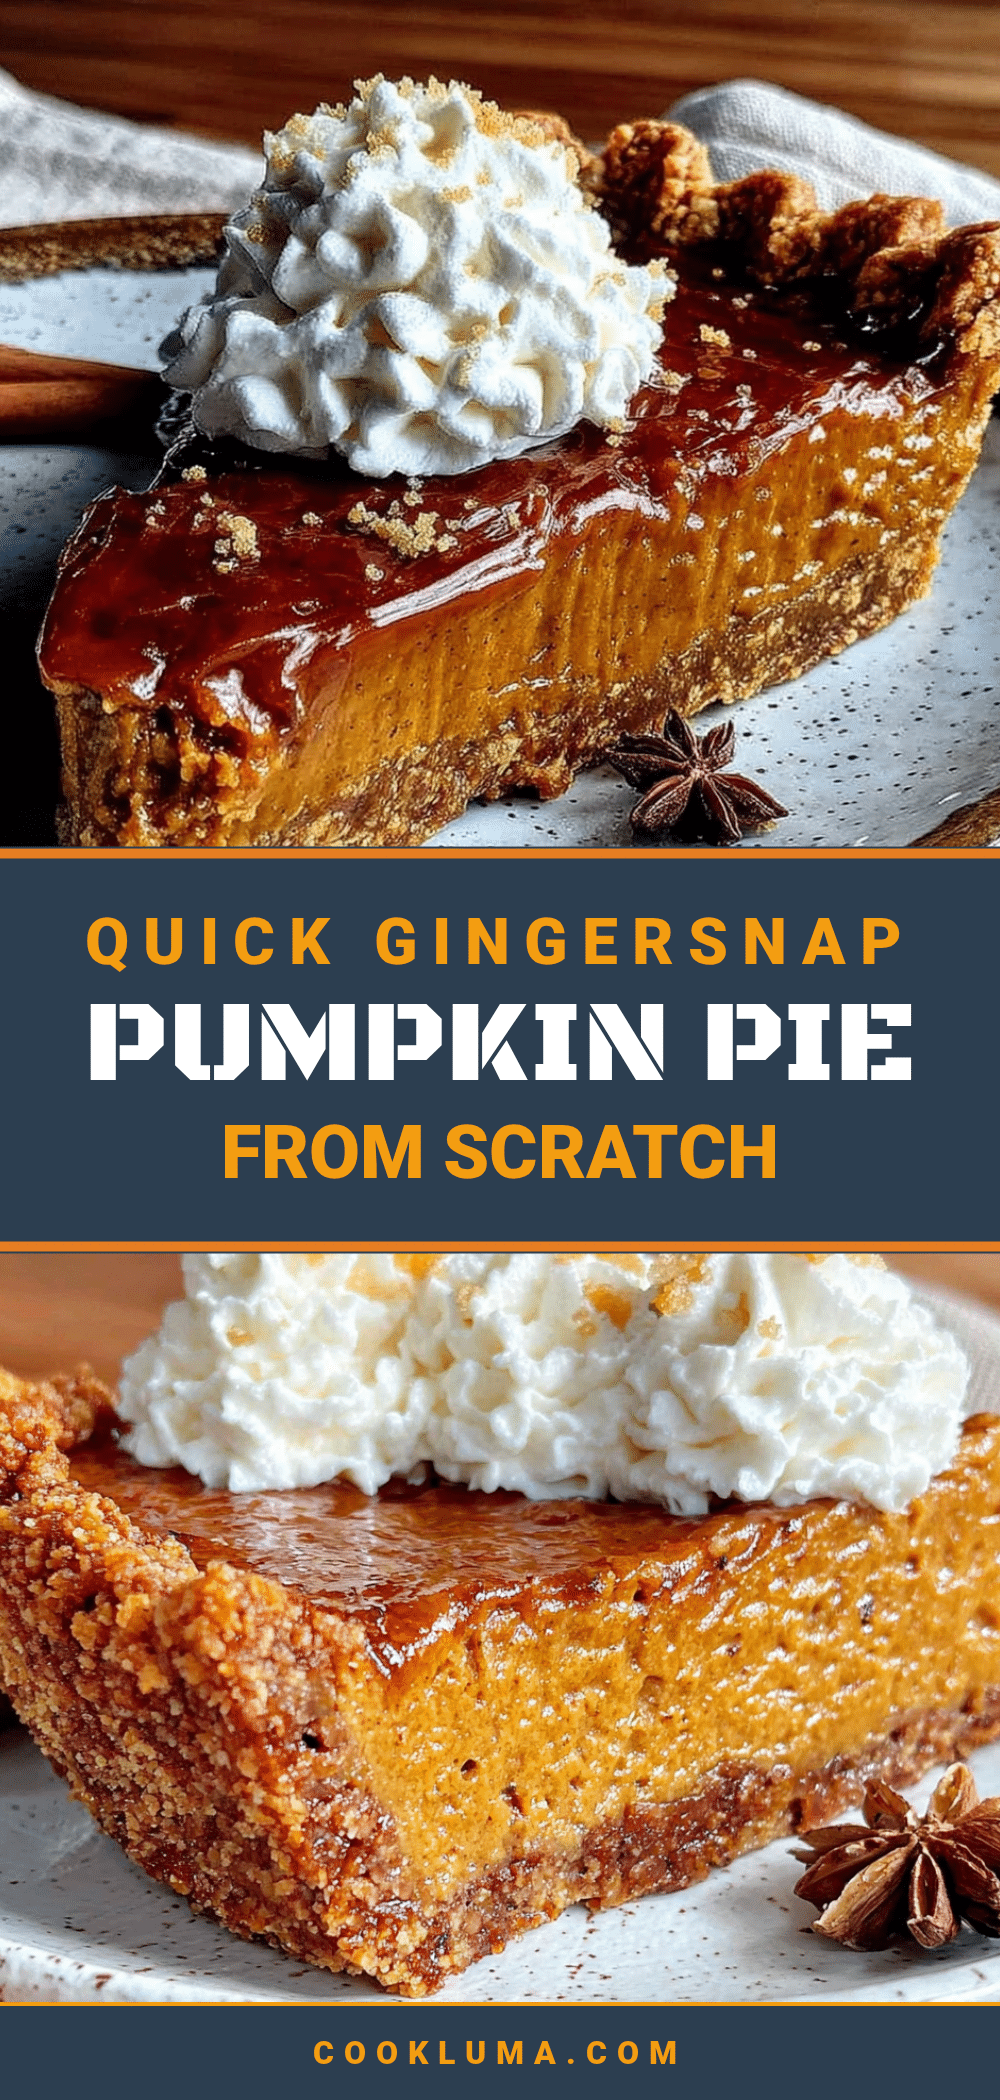
Best Easy Homemade Gingersnap Pumpkin Pie
A quick and easy pumpkin pie with a crunchy, spicy gingersnap crust that comes together in under an hour. Perfect for weeknights, this forgiving recipe uses simple pantry ingredients and delivers a crowd-pleasing dessert that tastes like you planned it all along.
- Prep Time: 15 minutes
- Cook Time: 45 minutes
- Total Time: 1 hour
- Yield: 8 servings 1x
- Category: Dessert
- Cuisine: American
Ingredients
- 2 cups (about 200g) gingersnap cookies, crushed into fine crumbs
- 6 tablespoons (85g) unsalted butter, melted
- 2 tablespoons (25g) granulated sugar
- Pinch of salt (if using unsalted butter)
- 1 can (15 oz or 425g) pumpkin puree
- 1 can (14 oz or 396g) sweetened condensed milk
- 2 large eggs, at room temperature
- 1 teaspoon vanilla extract
- 1 ½ teaspoons pumpkin pie spice
- ½ teaspoon ground cinnamon
- ¼ teaspoon salt
- Whipped cream or Cool Whip (optional, for serving)
- Extra crushed gingersnaps (optional, for topping)
- Caramel sauce (optional, for drizzling)
Instructions
- Preheat your oven to 350°F (175°C). Place a baking sheet on the middle rack.
- Make the crust: Add gingersnap cookies to a food processor and pulse until fine crumbs. Alternatively, crush cookies in a zip-top bag with a rolling pin. Transfer crumbs to a medium bowl, add melted butter, sugar, and salt, and stir until evenly moistened (like wet sand).
- Press the crust into a 9-inch pie dish firmly and evenly on the bottom and up the sides using the bottom of a measuring cup. Refrigerate while making the filling, about 10 minutes.
- Make the filling: In a large bowl, whisk together pumpkin puree and sweetened condensed milk until smooth. Add eggs one at a time, whisking well after each. Stir in vanilla, pumpkin pie spice, cinnamon, and salt until silky smooth.
- Assemble the pie: Remove crust from fridge. Pour filling into crust and spread evenly. Tap the dish gently on the counter to release air bubbles.
- Bake: Place pie dish on the preheated baking sheet. Bake for 45 to 50 minutes, until edges are set and center is slightly jiggly (like Jell-O). Tent crust edges with foil if browning too quickly.
- Cool completely on a wire rack for at least 2 hours before serving. Refrigerate for firmer texture.
Notes
Don’t overbake—pull when center is slightly jiggly. Let cool completely before slicing to avoid a runny mess. The pie tastes even better the next day. For a gluten-free version, use gluten-free gingersnaps. For dairy-free, use coconut oil and sweetened condensed coconut milk.
Nutrition
- Serving Size: 1 slice
- Calories: 380
- Sugar: 38
- Sodium: 320
- Fat: 16
- Saturated Fat: 9
- Carbohydrates: 54
- Fiber: 3
- Protein: 6
Keywords: pumpkin pie, gingersnap crust, easy pumpkin pie, quick dessert, fall dessert, Thanksgiving pie, weeknight dessert


