There used to be a little wine bar tucked behind a bookstore in my old neighborhood, a place called The Gilded Grape, that made the most incredible fall charcuterie board I had ever seen. It wasn’t just cheese and crackers—it was a work of art, piled high with roasted figs, honeycomb dripping over aged gouda, and these tiny, candied pecans that I still dream about. When they closed their doors three years ago, I honestly felt a little pang of loss. I mean, where was I supposed to go for that perfect, shareable autumn spread? After about six tries—some were just sad plates of deli meat, others were way too expensive to justify—I finally cracked the code. This budget-friendly Friendsgiving charcuterie board is my love letter to that memory, and let me tell you, it’s even better than the original.
I remember the Wednesday before Thanksgiving last year, staring at my grocery list with a knot in my stomach. I wanted to host a little Friendsgiving, but my wallet was screaming “no.” The idea of a charcuterie board seemed impossible—all those fancy cheeses and cured meats add up fast. But I was determined. I grabbed a bag of apples, a bunch of grapes, and some sharp cheddar, thinking, “This is going to be a sad little snack plate.” Then I got creative. I roasted some cheap apples with cinnamon, grabbed a block of store-brand brie, and threw in some budget-friendly salami. When my friends showed up, they gasped. “Where did you get this?” they asked, grabbing handfuls of the roasted fruit and creamy cheese. I just smiled. It felt so good to share something that looked like a million bucks without actually spending it. Maybe you’ve been there—wanting to host a big, beautiful gathering but feeling the pinch. This board is your secret weapon.
Why You’ll Love This Budget-Friendly Friendsgiving Charcuterie Board
This isn’t just a pretty plate of food; it’s a strategic, crowd-pleasing centerpiece that lets you host like a rockstar without the stress. I’ve tested every combination here, and I can tell you with confidence: this works. It’s the kind of board that makes people linger, chat, and feel truly welcome.
- Easy on the Wallet: By focusing on affordable fall fruit like apples and grapes, and using budget-friendly cheese blocks instead of pre-sliced fancy wedges, you save a ton. We’re talking under $30 for a board that feeds 6-8 people.
- Simple to Assemble: No complicated cooking required. You just roast a little fruit, slice some cheese, and arrange everything beautifully. It comes together in under 30 minutes of active prep time.
- Perfect for Friendsgiving: This board is the ultimate social food. Everyone can grab what they like, and it encourages conversation and sharing. It’s the star of the pre-dinner spread or the main event for a casual gathering.
- Always a Crowd-Pleaser: The combination of sweet roasted fruit, salty meats, creamy cheese, and crunchy nuts is a guaranteed hit. Even picky eaters find something to love.
- Unbelievably Delicious: The magic is in the contrast. The warm, caramelized apples against the cold, creamy brie? It’s a flavor explosion that feels way more expensive than it is.
What makes this recipe different from the rest is the “budget-first” approach. I’m not using expensive prosciutto or aged manchego. I’m showing you how to make a $5 block of brie look like a million bucks by pairing it with a simple, homemade roasted fruit compote. It’s comfort food for the host—delicious, beautiful, and totally stress-free.
What Ingredients You Will Need
This recipe uses simple, everyday ingredients that you can find at any grocery store. The key is to focus on seasonal produce and affordable staples to keep the cost down without sacrificing flavor.
- For the Roasted Fall Fruit:
- 2 medium apples (like Honeycrisp or Gala), cored and sliced into wedges (they get sweet and tender when roasted)
- 1 medium pear (like Bartlett), cored and sliced into wedges (adds a soft, buttery texture)
- 1 cup seedless red or black grapes, stems removed (they burst and release sweet juice)
- 1 tablespoon olive oil (helps the fruit caramelize)
- 1 tablespoon maple syrup (adds a warm, fall sweetness)
- 1/2 teaspoon ground cinnamon (the classic autumn spice)
- Pinch of salt (balances the sweetness)
- For the Charcuterie Board:
- 8 ounces block of brie cheese (go for the store brand, it’s just as creamy and way cheaper than the fancy stuff)
- 8 ounces sharp cheddar cheese, sliced (a classic, budget-friendly block cheese that everyone loves)
- 6 ounces salami, thinly sliced (I recommend the hard salami from the deli counter, it’s usually the most affordable option)
- 4 ounces pepperoni, thinly sliced (adds a little spice and is almost always on sale)
- 1 cup mixed nuts (like almonds and walnuts, buy them in the bulk section for the best price)
- 1/2 cup dried cranberries or cherries (adds a chewy, tart pop of flavor)
- 1/2 cup crackers or crostini (look for a plain, sturdy cracker like a water cracker or a baguette sliced and toasted)
- Fresh rosemary or thyme sprigs for garnish (optional, but makes it look restaurant-quality)
For the cheese, I’ve found that letting it sit out at room temperature for about 30 minutes before serving really helps the flavor shine. If you’re watching your budget, skip the pre-sliced cheese and buy blocks. You’ll get more for your money. For a gluten-free option, swap the crackers for sliced cucumber or bell pepper rounds.
Equipment Needed
- Large baking sheet (for roasting the fruit)
- Parchment paper (makes cleanup a breeze)
- Large wooden board or serving platter (a cutting board works perfectly)
- Cheese knife or a sharp chef’s knife
- Small bowls (for the nuts and dried fruit)
- Small spatula or tongs (for arranging)
If you don’t have a fancy wooden board, don’t worry. A large ceramic platter or even a clean cutting board works just as well. I’ve used my old, scratched-up cutting board for years, and it just adds to the rustic charm! For the cheese knife, I honestly just use my sharpest paring knife—it does the job.
Preparation Method
- Preheat and Prep: Preheat your oven to 400°F (200°C). Line a large baking sheet with parchment paper. This step is non-negotiable for easy cleanup—trust me, you don’t want to be scrubbing caramelized sugar off a pan.
- Roast the Fall Fruit: In a medium bowl, toss the apple wedges, pear wedges, and grapes with the olive oil, maple syrup, cinnamon, and a pinch of salt. Spread them in a single layer on the prepared baking sheet. Roast for 15-20 minutes, or until the fruit is tender and the edges are just starting to caramelize. You’ll know it’s done when the kitchen smells like a fall bakery. Let it cool on the pan for about 5 minutes.
- Prepare the Cheeses: While the fruit is roasting, take your brie and cheddar out of the fridge. Slice the cheddar into thin, even squares. For the brie, you can leave it whole and let people cut it themselves, or you can slice it into wedges. I prefer leaving it whole—it looks more impressive on the board.
- Arrange the Meats: Fold the salami and pepperoni slices into loose ribbons or simply pile them in a few clusters around the board. A little bit of folding goes a long way in making it look intentional and fancy.
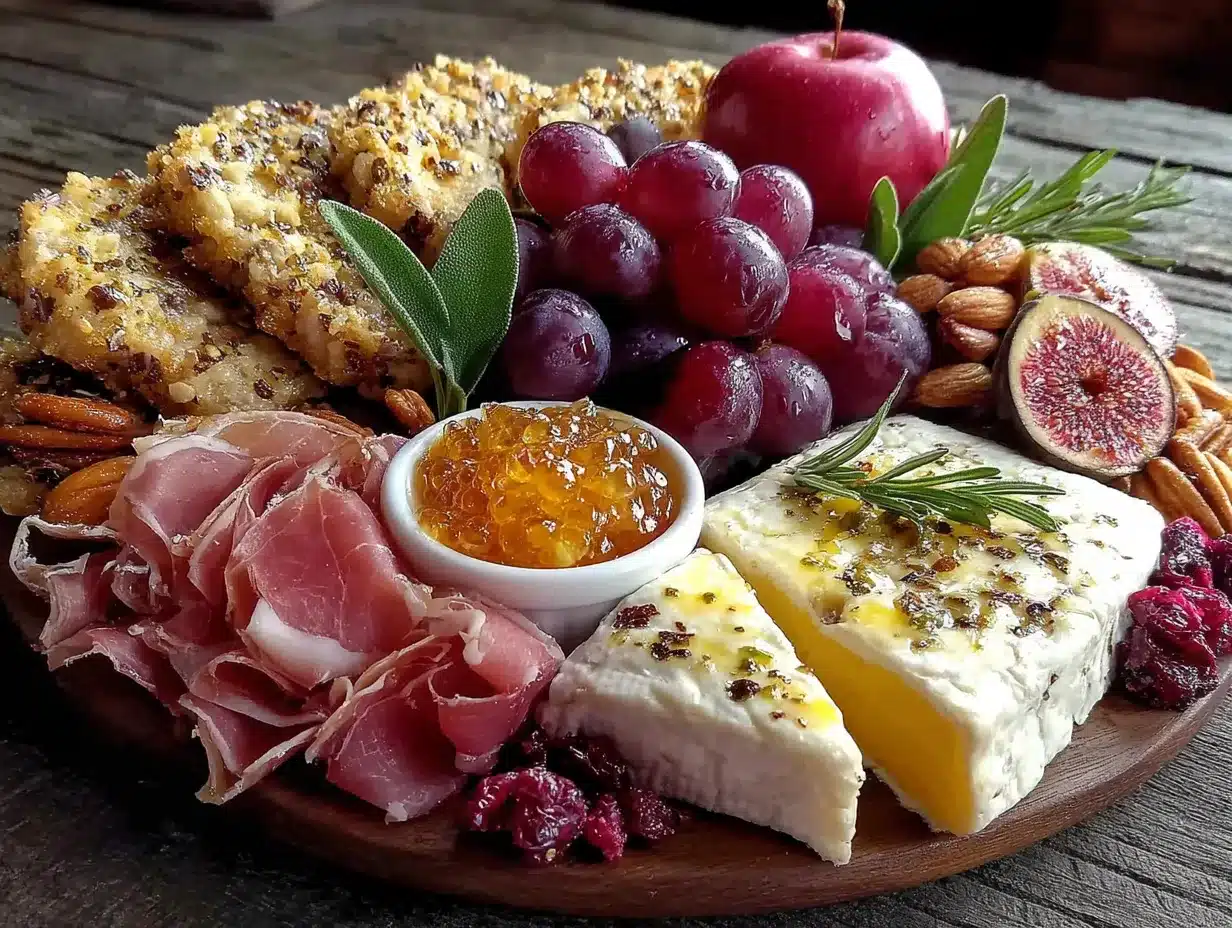
- Assemble the Board: This is the fun part. Start by placing the small bowls of nuts and dried cranberries on the board. Then, arrange the cheese wedges in different spots. Next, add the meat clusters. Now, spoon the warm roasted fruit into any empty spaces. Finally, fill in the gaps with the crackers and garnish with fresh rosemary or thyme sprigs. Don’t be afraid to overlap things—a full, abundant look is the goal.
- Serve Immediately: This board is best served while the fruit is still warm and the cheese is at room temperature. It’s a beautiful contrast of temperatures and textures.
A little trick I learned from my third failed attempt: don’t put all the crackers in one spot. Scatter them around the board so everyone has easy access. And if you’re short on space, you can always put the crackers in a separate basket next to the board.
Cooking Tips & Techniques
- Don’t Overcrowd the Pan: When roasting the fruit, make sure it’s in a single layer. If you pile it up, it will steam instead of caramelize, and you’ll miss out on that sweet, sticky goodness. I learned this the hard way when I ended up with mushy apples.
- Room Temperature Cheese is Key: Cold cheese is flavorless cheese. Take your cheese out of the fridge at least 30 minutes before you plan to serve. It makes a world of difference in the creamy texture and taste.
- Timing is Everything: Roast the fruit first, then while it’s cooling, prep your meats and cheeses. This way, the fruit is still warm when you assemble the board. The warm fruit slightly softens the brie, creating a heavenly, spreadable texture.
- Go Easy on the Garnish: A little rosemary goes a long way. Too much can make the board look messy and overwhelm the flavors. A few sprigs strategically placed is all you need.
- Multitask Like a Pro: While the fruit is in the oven, use that time to slice your cheese and arrange the meats. This keeps your active prep time super low, so you can actually enjoy your own Friendsgiving party.
Variations & Adaptations
- Vegan Friendsgiving Board: Swap the brie and cheddar for your favorite vegan cheese alternatives. Use a vegan salami or marinated mushrooms for the “meat” component. The roasted fruit is already vegan, so you’re halfway there!
- Spicy Autumn Twist: Add a drizzle of hot honey over the brie before serving. The combination of sweet, spicy, and creamy is absolutely addictive. I tried this at a friend’s house last fall, and I’ve been hooked ever since.
- Add a Protein Punch: If you want to make this a more filling meal, add some hard-boiled eggs or a small bowl of hummus. It’s a great way to round out the board for hungry guests.
- Seasonal Fruit Swap: In the summer, swap the apples and pears for peaches and plums. The same roasting method works beautifully. In the winter, try roasted persimmons or pomegranate seeds for a fresh pop of color.
Serving & Storage Suggestions
This board is best served at room temperature, with the fruit still slightly warm. I like to arrange it on a large wooden board in the center of the table so everyone can gather around. It pairs beautifully with a crisp white wine like Sauvignon Blanc or a light, fruity red like Pinot Noir. For a non-alcoholic option, a sparkling apple cider is a perfect match.
If you have leftovers (which is rare!), store the components separately. The roasted fruit can be kept in an airtight container in the fridge for up to 3 days. The cheese and meats should also be wrapped tightly and refrigerated. The crackers will get soft if left out, so store them in a ziplock bag at room temperature. To reheat the fruit, just pop it in a 350°F (175°C) oven for 5-7 minutes. Honestly, the flavors actually get even better after a day in the fridge—the fruit gets a little more jammy and delicious.
Nutritional Information & Benefits
This charcuterie board is a balanced mix of healthy fats, protein, and fiber. The apples and grapes are packed with antioxidants and vitamins, while the nuts provide heart-healthy fats and a good dose of protein. The cheese offers calcium and protein, making this a satisfying and nourishing snack. A typical serving (about 1/6 of the board) contains approximately 350-400 calories, 20g of fat, 25g of carbohydrates, and 15g of protein.
Please note: This recipe contains dairy and gluten. For those with nut allergies, simply omit the mixed nuts and add extra seeds like pumpkin seeds or sunflower seeds. It’s a flexible, feel-good dish that you can tweak to your needs.
Conclusion
This budget-friendly Friendsgiving charcuterie board is proof that you don’t need a fat wallet to host a memorable gathering. It’s all about smart choices—using affordable, seasonal fruit and simple, quality ingredients—to create something that feels truly special. I love this recipe because it brings people together without the stress or the cost. It’s the kind of food that makes you slow down, take a bite, and just enjoy the moment.
I’d love to see your boards! Share your creations in the comments below, or tag me on Pinterest with your own Friendsgiving spread. Don’t be afraid to swap in your favorite fruits or cheeses—this recipe is yours to play with. Happy hosting, friends!
Frequently Asked Questions
Can I make this charcuterie board ahead of time?
Absolutely! You can roast the fruit up to 2 days in advance and store it in the fridge. You can also slice the cheese and arrange the meats a few hours before your guests arrive. Just assemble everything about 30 minutes before serving so the cheese can come to room temperature.
What if I don’t have a wooden board?
No problem at all! A large ceramic platter, a clean cutting board, or even a sheet of parchment paper placed directly on the table works perfectly. The key is to have a large, flat surface to arrange everything on.
How can I make this even more budget-friendly?
Skip the pepperoni and just use one type of salami. Buy your nuts and dried fruit from the bulk bins—you can get exactly what you need without paying for packaging. Also, check your fridge for any leftover cheese or meats you might already have on hand.
What are the best fruits to roast for this board?
Apples and pears are the stars of fall, but you can also roast figs, plums, or even pineapple for a tropical twist. The key is to choose fruits that are firm enough to hold their shape when roasted. Avoid overly soft fruits like very ripe bananas.
Can I add a dip to this board?
Yes! A small bowl of honey or a fig jam would be a lovely addition. A simple honey-mustard dip or a balsamic glaze also pairs beautifully with the cheese and fruit. Just make sure to place it in a small bowl so it doesn’t spill onto the other items.
PrintBudget-Friendly Friendsgiving Charcuterie Board with Fall Fruit
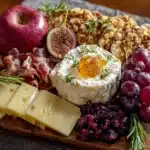
A stunning and affordable charcuterie board featuring roasted fall fruit, creamy cheeses, and savory meats, perfect for a Friendsgiving gathering. This budget-friendly centerpiece comes together in under 30 minutes and feeds 6-8 people.
- Prep Time: 15 minutes
- Cook Time: 20 minutes
- Total Time: 35 minutes
- Yield: 6-8 servings 1x
- Category: Appetizer
- Cuisine: American
Ingredients
- 2 medium apples (like Honeycrisp or Gala), cored and sliced into wedges
- 1 medium pear (like Bartlett), cored and sliced into wedges
- 1 cup seedless red or black grapes, stems removed
- 1 tablespoon olive oil
- 1 tablespoon maple syrup
- 1/2 teaspoon ground cinnamon
- Pinch of salt
- 8 ounces block of brie cheese
- 8 ounces sharp cheddar cheese, sliced
- 6 ounces salami, thinly sliced
- 4 ounces pepperoni, thinly sliced
- 1 cup mixed nuts (like almonds and walnuts)
- 1/2 cup dried cranberries or cherries
- 1/2 cup crackers or crostini
- Fresh rosemary or thyme sprigs for garnish (optional)
Instructions
- Preheat your oven to 400°F (200°C). Line a large baking sheet with parchment paper.
- In a medium bowl, toss the apple wedges, pear wedges, and grapes with the olive oil, maple syrup, cinnamon, and a pinch of salt. Spread them in a single layer on the prepared baking sheet.
- Roast for 15-20 minutes, or until the fruit is tender and the edges are just starting to caramelize. Let it cool on the pan for about 5 minutes.
- While the fruit is roasting, take your brie and cheddar out of the fridge. Slice the cheddar into thin, even squares. For the brie, you can leave it whole or slice it into wedges.
- Fold the salami and pepperoni slices into loose ribbons or simply pile them in a few clusters around the board.
- Start assembling the board by placing small bowls of nuts and dried cranberries on the board. Then, arrange the cheese wedges in different spots. Next, add the meat clusters. Spoon the warm roasted fruit into any empty spaces. Finally, fill in the gaps with the crackers and garnish with fresh rosemary or thyme sprigs.
- Serve immediately while the fruit is still warm and the cheese is at room temperature.
Notes
For best flavor, let cheese sit at room temperature for 30 minutes before serving. To make gluten-free, swap crackers for sliced cucumber or bell pepper rounds. Leftover roasted fruit can be stored in an airtight container in the fridge for up to 3 days.
Nutrition
- Serving Size: 1/6 of the board
- Calories: 375
- Sugar: 15
- Sodium: 600
- Fat: 20
- Saturated Fat: 8
- Carbohydrates: 25
- Fiber: 3
- Protein: 15
Keywords: Friendsgiving, charcuterie board, fall fruit, budget-friendly, appetizer, party food, roasted fruit, cheese board


