I’m not supposed to play favorites with recipes, but these ghost sugar cookies have a permanent spot on my counter every October.
Last fall, my daughter came home from school buzzing about the Halloween party her class was planning. She wanted to bring something “spooky but not scary,” and honestly, I was stuck. Everything I found online either required fondant (no thanks) or those creepy candy eyeballs that always end up on the floor.
Then my neighbor, Mrs. Chen, saw me wrestling with a bag of Wilton tips on my front porch. She didn’t say anything at first — just watched me struggle for a solid minute. Then she disappeared inside her house and came back with a plastic container full of the cutest little ghost cookies I’d ever seen. They were simple. White. Two tiny chocolate chip eyes. That’s it. She said, “My kids made these when they were small. You don’t need fancy tools. Just cookies and love.”
Something about that moment stuck with me. Not the recipe itself — though it’s perfect — but the way she shared it. Like it was nothing. Like of course you should have this. That’s how the best recipes travel, isn’t it? Not through formal teaching moments, but through kitchen windows and porch conversations.
I tweaked her method over the last year — added a little almond extract for warmth, figured out the best way to get those chocolate chip eyes to stay put — and this version is what my kids now request for every single holiday, not just Halloween. Maybe you’ve been there, where a simple recipe becomes the one your family measures every other cookie against.
These ghost sugar cookies are that recipe for us. And I think they’re about to become that for you too.
Why You’ll Love This Recipe
Let me tell you why these ghost sugar cookies are about to become your new favorite Halloween tradition. I’ve tested this recipe about seven times (my family was very patient, bless them) and each batch taught me something new about getting that perfect balance of soft, chewy, and adorable.
- Quick & Easy: From start to finish, these come together in under an hour. The dough chills for just 15 minutes, so you’re not waiting around all afternoon while your kids ask “are they ready yet?” every four seconds.
- Simple Ingredients: You probably have everything in your pantry right now. Butter, sugar, flour, eggs, vanilla, almond extract, chocolate chips. No specialty stores. No mysterious ingredients you’ll never use again.
- Perfect for Halloween: These are the star of any classroom party, neighborhood gathering, or cozy family movie night. They’re spooky enough to be fun but cute enough that even the littlest kids don’t get scared.
- Crowd-Pleaser: My picky nephew who “doesn’t like cookies” (I know, I don’t understand it either) ate four of these in one sitting. They’re that good.
- Unbelievably Delicious: The secret is the almond extract. It adds this warm, almost marzipan-like flavor that makes these taste bakery-quality without any of the effort.
What makes these different from every other sugar cookie recipe out there? It’s the texture. Most ghost cookies end up hard or brittle — great for decorating, not great for eating. This recipe uses a higher ratio of butter to sugar and a quick chill time that keeps them soft-centered with just the slightest crisp on the edges. Plus, the chocolate chip eyes melt slightly into the dough as they bake, creating the cutest little sleepy ghost faces you’ve ever seen.
This is comfort food reimagined for the Halloween season — faster, simpler, but with the same soul-soothing satisfaction as the cookies your grandma used to make. Perfect for impressing your kid’s classmates without stressing yourself out.
What Ingredients You Will Need
This recipe uses straightforward, pantry-friendly ingredients to create ghost sugar cookies that taste as good as they look. Nothing fancy, nothing fussy — just honest baking ingredients that work together beautifully.
- Unsalted butter, softened — 1 cup (2 sticks, 226g). I use Land O’Lakes for baking because it has a consistent fat content. Make sure it’s truly softened — leave it on the counter for about an hour, not microwaved. Microwaved butter changes the texture.
- Granulated sugar — 1 cup (200g). Regular white sugar works best here. Don’t substitute brown sugar — it changes the color and makes the cookies spread too much.
- Large egg — 1, room temperature. Crack it into a small bowl first in case you get shell bits. Nobody wants crunchy ghost cookies.
- Vanilla extract — 1 teaspoon. Pure vanilla if you have it, but imitation works fine for this recipe.
- Almond extract — ½ teaspoon. This is the secret ingredient. Don’t skip it. It adds a subtle nutty warmth that makes these ghost sugar cookies unforgettable.
- All-purpose flour — 2 cups (250g). Spoon and level your flour — don’t scoop directly from the bag or you’ll pack in too much and end up with dry cookies.
- Baking powder — 1 teaspoon. Make sure it’s fresh. If it’s been sitting in your cabinet for three years, it’s time for a new can.
- Salt — ½ teaspoon. Fine sea salt or table salt. It balances the sweetness and enhances the almond flavor.
- Mini chocolate chips — ¼ cup (45g) for the eyes. I prefer Ghirardelli mini chips because they’re small enough to look like cute ghost eyes without overwhelming the cookie. Regular chocolate chips are too big — use minis.
- Powdered sugar — Optional, for dusting. A light sprinkle right before serving makes them look extra ghostly and magical.
For the chocolate chip eyes, you want to press them in gently before baking. If you press too hard, they sink into the dough and disappear. Too light, and they fall off after baking. I’ll show you the sweet spot in the method section.
Equipment Needed
You don’t need much to make these ghost sugar cookies. That’s part of their charm.
- Large mixing bowl — Any bowl works. I use a ceramic one because it doesn’t slide around on the counter.
- Electric hand mixer or stand mixer — A hand mixer is fine. You can cream the butter and sugar by hand with a wooden spoon, but your arm will be tired and the texture won’t be as light.
- Measuring cups and spoons — Dry measuring cups for flour and sugar, liquid measuring cup for nothing here (see, simple).
- Baking sheets — Two standard half-sheet pans. Line them with parchment paper or silicone baking mats. Parchment is cheaper and gives slightly crispier bottoms.
- Cookie scoop or tablespoon — A 1.5-tablespoon scoop makes perfectly uniform ghost shapes. If you don’t have one, use a regular tablespoon and level it.
- Cooling rack — Wire rack for cooling. If you don’t have one, a clean cutting board works in a pinch.
- Small bowl — For holding your mini chocolate chips while you place the eyes.
- Spatula — For transferring cookies to the cooling rack.
I bought my cookie scoop at a kitchen supply store for about eight dollars, and it’s one of the best investments I’ve made for consistent baking. But honestly, a regular spoon works perfectly fine — your ghosts might just be slightly different sizes, which I think adds character.
Preparation Method
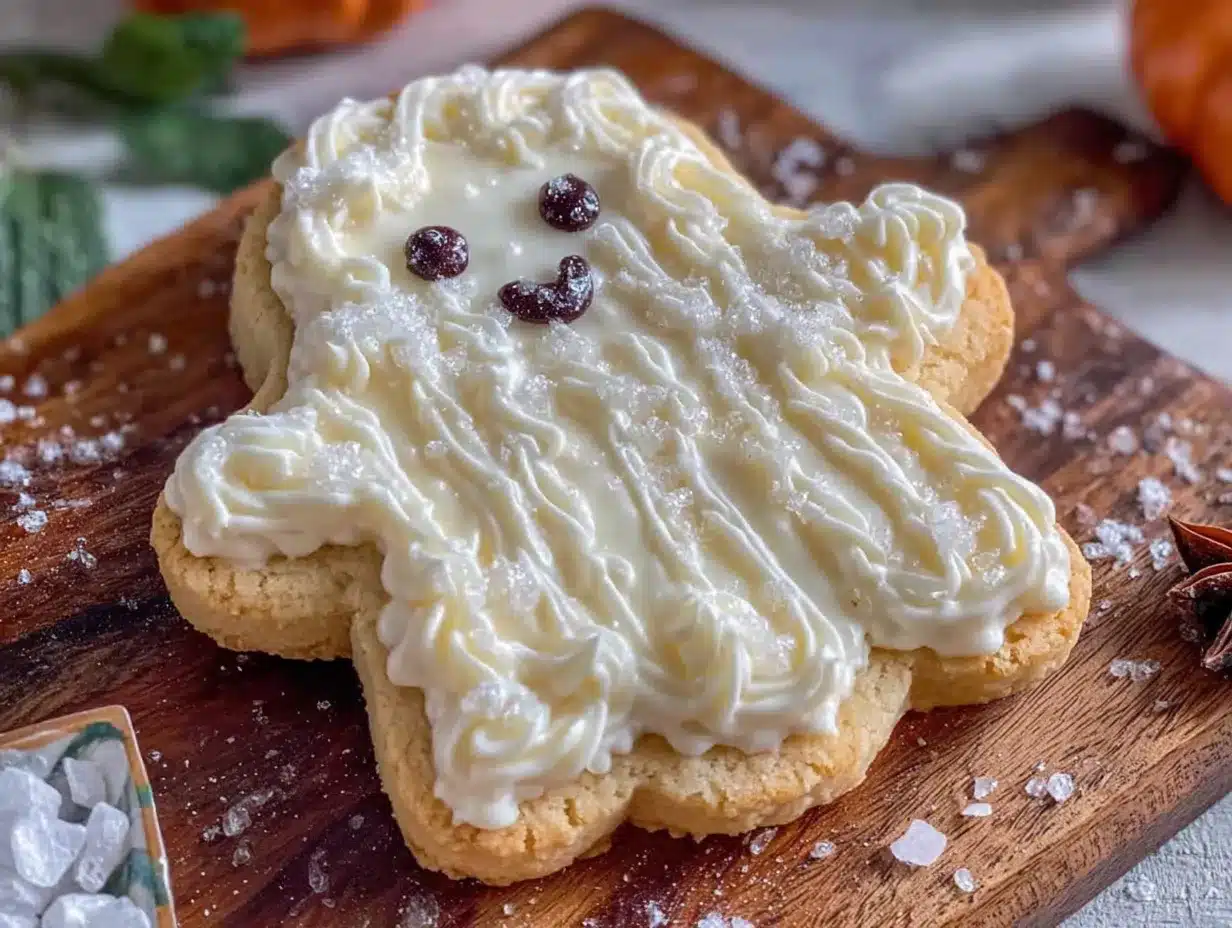
Let’s make some ghost sugar cookies. I’ve broken this down into clear steps with all the little details I wish someone had told me the first time I tried this.
-
Cream the butter and sugar. In your large mixing bowl, beat the softened butter and granulated sugar together on medium speed for about 3 minutes. You want it light and fluffy — almost pale yellow. Scrape down the sides of the bowl halfway through. If you see any butter chunks, keep beating. This step is crucial for soft cookies.
-
Add the wet ingredients. Crack in your room-temperature egg, then add the vanilla extract and almond extract. Beat on low speed until just combined — about 30 seconds. Don’t overmix here. Overmixing develops gluten and makes tough cookies. We want tender ghosts.
-
Mix the dry ingredients separately. In a separate medium bowl, whisk together the flour, baking powder, and salt. Whisking aerates the flour and distributes the leavening evenly. I learned this the hard way after biting into a cookie that tasted like a salt lick.
-
Combine wet and dry. Add the flour mixture to the butter mixture in two additions, mixing on low speed after each until just incorporated. The dough will be soft and slightly sticky — that’s perfect. If it’s too sticky to handle, refrigerate it for 10 minutes before the next step.
-
Chill the dough. Cover the bowl with plastic wrap and refrigerate for 15 minutes. This is non-negotiable. Chilling prevents the cookies from spreading too much in the oven and losing their ghost shape. I once skipped this step because I was in a hurry, and my ghosts looked more like ghost pancakes.
-
Preheat and prepare. While the dough chills, preheat your oven to 350°F (175°C). Line your baking sheets with parchment paper.
-
Shape the ghosts. Scoop rounded tablespoons of dough (about 1.5 tablespoons each) and roll them into balls. Place them on the prepared baking sheets about 2 inches apart. Here’s the trick: gently flatten each ball slightly with your palm, then pinch one side to form a small tail. This creates the classic ghost teardrop shape. Don’t worry if they look weird — they puff up and smooth out in the oven.
-
Add the eyes. Take two mini chocolate chips and press them gently into the top portion of each ghost cookie. Press just until they’re flush with the dough — not deeper. If you press too hard, they’ll sink and disappear. I promise you’ll get the feel after the first few. For expression variation, place some eyes closer together for a surprised ghost, or slightly angled for a sleepy ghost.
-
Bake. Bake for 8-10 minutes, rotating the pan halfway through. The edges should be just barely golden — the centers will look slightly underdone. That’s exactly what you want. They continue baking on the hot pan after you pull them out.
-
Cool properly. Let the cookies rest on the baking sheet for 5 minutes. This is important — they’re too fragile to move immediately. After 5 minutes, transfer them to a wire cooling rack to cool completely. The chocolate chip eyes will have melted slightly into the surface, creating the cutest little ghost faces.
If you want to add a powdered sugar dusting, wait until the cookies are completely cool. Use a fine-mesh strainer and tap gently — you want a light snowfall effect, not a blizzard.
Cooking Tips & Techniques
After making these ghost sugar cookies more times than I care to admit, here’s what I’ve learned the hard way so you don’t have to.
The almond extract is not optional. I know I said this already, but it bears repeating. Vanilla alone makes a perfectly fine sugar cookie, but almond extract is what gives these ghosts their hauntingly good flavor. Start with ½ teaspoon — a little goes a long way. Too much and your cookies will taste like perfume.
Room temperature ingredients matter. Cold eggs seize the butter and create a lumpy dough. Cold butter doesn’t cream properly. I’ve made this mistake on a rushed Tuesday afternoon, and the cookies were dense and flat. Leave your butter and egg on the counter for at least an hour before starting.
Don’t overbake. This is the number one mistake I see in cookie baking. These ghost sugar cookies are done when the edges are set but the centers still look slightly soft and puffy. They will continue baking on the hot pan. If you wait until the centers look fully baked, they’ll be dry and crumbly by the time they cool.
Chill between batches. If you’re baking multiple trays, keep the unused dough in the refrigerator. Warm dough spreads more, and you’ll end up with ghost blobs instead of ghost shapes. I learned this when my third batch came out looking like melted marshmallows.
Consistency tip for perfect ghost shapes: Use a cookie scoop for uniform size, then shape each one individually. The pinching technique takes practice — aim for a gentle pinch on one side to create a slight tail. The cookies will spread and round out in the oven, so the tail doesn’t need to be dramatic.
Variations & Adaptations
These ghost sugar cookies are wonderfully adaptable. Here are some variations I’ve tried and loved.
Gluten-Free Version: Substitute the all-purpose flour with a 1:1 gluten-free baking flour blend. I’ve used Bob’s Red Mill with great results. Add an extra tablespoon of flour — gluten-free dough tends to be slightly wetter. The texture is a bit more tender, but the ghosts still hold their shape beautifully.
Vegan Adaptation: Use vegan butter sticks (not margarine from a tub) and a flax egg (1 tablespoon ground flaxseed mixed with 3 tablespoons water, let sit for 5 minutes). The cookies will be slightly less tender but still delicious. Use dairy-free chocolate chips for the eyes.
Flavor Twists: Add ½ teaspoon of lemon zest to the dough for a bright, citrusy ghost. Or swap the almond extract for peppermint extract and use dark chocolate chips for a mint-chocolate version. My personal favorite variation adds ¼ teaspoon of cinnamon and a pinch of nutmeg — it gives the ghosts a cozy fall warmth that’s perfect for October afternoons.
Decorating Beyond Eyes: Once the cookies are completely cool, you can pipe on little ghost mouths with black frosting or melted dark chocolate. My kids love making different expressions — happy ghosts, surprised ghosts, even one with a tiny tongue sticking out. You can also dust them with edible glitter for extra sparkle.
Cookie Size Variations: For mini ghosts (perfect for classroom parties), use a teaspoon scoop and bake for 6-7 minutes. For giant ghosts, use 3 tablespoons of dough and bake for 12-14 minutes. Adjust your eye placement accordingly.
Serving & Storage Suggestions
These ghost sugar cookies are best served at room temperature, which means they’re ready to go whenever you are. Arrange them on a platter with a dusting of powdered sugar for maximum ghostly effect. They look especially spooky on a dark plate or black serving tray.
For Halloween parties, I like to pair them with warm apple cider or a cold glass of milk. The sweet, buttery cookies balance perfectly with the tartness of cider or the creaminess of milk. If you’re serving adults, they’re lovely with a cup of chai tea or even a hot latte.
Storage: Store these cookies in an airtight container at room temperature for up to 5 days. Layer them between sheets of parchment paper to prevent the chocolate chip eyes from sticking to each other. Do not refrigerate — the refrigerator dries out baked goods and makes them stale faster.
Freezing: These freeze beautifully. Place the baked and completely cooled cookies in a single layer in a freezer-safe container, with parchment between layers. Freeze for up to 3 months. Thaw at room temperature for about 30 minutes before serving. You can also freeze the unbaked dough — shape the ghosts, place them on a parchment-lined baking sheet, freeze until solid, then transfer to a freezer bag. Bake directly from frozen, adding 2-3 minutes to the baking time.
One thing I love about these ghost sugar cookies is that the flavors actually develop over time. They’re good on day one, but day two is when the almond extract really settles in and the texture becomes perfectly soft. If you can resist eating them all immediately, they’re even better the next day.
Nutritional Information & Benefits
Let’s be real — these are cookies, not health food. But here’s the approximate nutritional breakdown per cookie (based on 24 cookies):
| Nutrient | Amount per cookie |
|---|---|
| Calories | 145 |
| Total Fat | 7g |
| Saturated Fat | 4g |
| Carbohydrates | 19g |
| Sugar | 11g |
| Protein | 2g |
| Sodium | 55mg |
That said, there are some small bright spots. Butter contains vitamin A and healthy fats when consumed in moderation. Eggs provide protein and choline, which is important for brain health. And let’s be honest — the joy these ghost sugar cookies bring to a Halloween celebration has its own kind of nutritional value.
If you’re watching your sugar intake, you can reduce the granulated sugar to ¾ cup without significantly affecting the texture. The cookies will be slightly less sweet, but the almond extract still shines through.
These cookies are vegetarian but not vegan (due to butter and eggs). They contain gluten, dairy, and eggs, so they’re not suitable for those with allergies to those ingredients. The almond extract is typically safe for nut allergies since it’s made from apricot pits, but check your brand to be sure.
Conclusion
These ghost sugar cookies are more than just a Halloween treat — they’re a little piece of kitchen magic that brings people together. Mrs. Chen shared them with me on a random Tuesday afternoon, and now I’m sharing them with you. That’s how good recipes work, isn’t it? They travel from kitchen to kitchen, collecting little tweaks and stories along the way.
I love these cookies because they’re forgiving. You don’t need perfect piping skills or expensive tools. You just need butter, sugar, flour, and a little bit of patience. The ghosts don’t have to be identical — in fact, the slightly imperfect ones are my favorites. They have personality.
I’d love to hear how yours turn out. Did your kids help shape the ghosts? Did someone make a ghost with three eyes? Did you add a special twist? Drop a comment below and tell me about it. And if you share these on social media, tag me — I want to see your ghost cookie creations.
Happy Halloween, friends. May your kitchen be warm, your cookies be soft, and your ghosts be the cutest ones on the block.
Frequently Asked Questions
Can I make these ghost sugar cookies without almond extract?
Yes, you can substitute with additional vanilla extract (use 1½ teaspoons total) or leave it out entirely. The cookies will still taste good, but they’ll lose that special something that makes these ghost sugar cookies unique. Try adding a pinch of cinnamon as a substitute flavor booster.
Why did my ghosts spread into flat blobs?
This usually happens for one of three reasons: your butter was too soft (almost melted), you skipped the chilling step, or your baking powder is too old. Make sure your butter is softened but still cool to the touch, chill the dough for the full 15 minutes, and check that your baking powder is less than 6 months old.
Can I use regular chocolate chips instead of mini chips?
You can, but the ghosts won’t look as cute. Regular chocolate chips are too large for ghost eyes — they look more like googly eyes than cute little ghost faces. If mini chips aren’t available, cut regular chips in half with a sharp knife, or use miniature M&Ms for colorful eyes.
How do I get the chocolate chip eyes to stay in place?
Press them in gently until they’re flush with the dough surface. If you press too hard, they sink and disappear. If they’re too loose, they’ll fall off after baking. The sweet spot is pressing until the top of the chip is level with the dough. Also, make sure your dough isn’t too cold — if it’s straight from the fridge, let it sit for 5 minutes so it’s pliable enough to hold the chips.
Can I double this recipe for a large party?
Absolutely. This recipe doubles beautifully. Just make sure your mixing bowl is large enough to accommodate the extra dough. You may need to chill the dough in two batches if your refrigerator space is limited. The baking time stays the same, but you’ll need extra baking sheets or bake in batches. These ghost sugar cookies freeze well, so you can make them ahead of time.
PrintEasy Ghost Sugar Cookies Recipe – Kid-Approved & Cute
These ghost sugar cookies are soft, chewy, and adorable, made with simple ingredients and a secret touch of almond extract. Perfect for Halloween parties, classroom treats, or cozy family movie nights.
- Prep Time: 15 minutes
- Cook Time: 10 minutes
- Total Time: 40 minutes
- Yield: 24 cookies 1x
- Category: Dessert
- Cuisine: American
Ingredients
- 1 cup (2 sticks, 226g) unsalted butter, softened
- 1 cup (200g) granulated sugar
- 1 large egg, room temperature
- 1 teaspoon vanilla extract
- ½ teaspoon almond extract
- 2 cups (250g) all-purpose flour
- 1 teaspoon baking powder
- ½ teaspoon fine sea salt or table salt
- ¼ cup (45g) mini chocolate chips
- Powdered sugar, for dusting (optional)
Instructions
- Cream the butter and sugar: In a large mixing bowl, beat the softened butter and granulated sugar together on medium speed for about 3 minutes until light and fluffy. Scrape down the sides halfway through.
- Add the wet ingredients: Add the room-temperature egg, vanilla extract, and almond extract. Beat on low speed until just combined, about 30 seconds. Do not overmix.
- Mix the dry ingredients separately: In a separate medium bowl, whisk together the flour, baking powder, and salt.
- Combine wet and dry: Add the flour mixture to the butter mixture in two additions, mixing on low speed after each until just incorporated. The dough will be soft and slightly sticky.
- Chill the dough: Cover the bowl with plastic wrap and refrigerate for 15 minutes.
- Preheat and prepare: Preheat oven to 350°F (175°C). Line baking sheets with parchment paper.
- Shape the ghosts: Scoop rounded tablespoons of dough (about 1.5 tablespoons each) and roll into balls. Place on prepared baking sheets about 2 inches apart. Gently flatten each ball slightly with your palm, then pinch one side to form a small tail (teardrop shape).
- Add the eyes: Press two mini chocolate chips gently into the top portion of each ghost cookie, just until flush with the dough. Do not press too deep.
- Bake: Bake for 8-10 minutes, rotating the pan halfway through. Edges should be just barely golden; centers will look slightly underdone.
- Cool properly: Let cookies rest on the baking sheet for 5 minutes, then transfer to a wire cooling rack to cool completely. Dust with powdered sugar if desired.
Notes
The almond extract is the secret ingredient—do not skip it. Room temperature ingredients are crucial for proper texture. Do not overbake; cookies continue baking on the hot pan. Chill dough between batches to prevent spreading. For gluten-free, use a 1:1 gluten-free flour blend. For vegan, use vegan butter and a flax egg. Store in an airtight container at room temperature for up to 5 days. Freeze baked cookies for up to 3 months.
Nutrition
- Serving Size: 1 cookie
- Calories: 145
- Sugar: 11
- Sodium: 55
- Fat: 7
- Saturated Fat: 4
- Carbohydrates: 19
- Protein: 2
Keywords: ghost sugar cookies, Halloween cookies, easy sugar cookies, kid-friendly Halloween treats, soft sugar cookies, almond extract cookies


